
Complete Guide to the 45 Degree Lat Pulldown: Technique, Equipment, and Programming
Understanding the 45 Degree Lat Pulldown
The 45 degree lat pulldown is a variation of the traditional lat pulldown where the machine’s seat and torso pad are positioned so the line of pull is angled approximately 45 degrees relative to a vertical line. This angle changes the movement mechanics, shifting loading patterns and the range of motion, and offering an alternative stimulus for the latissimus dorsi and surrounding back musculature. Understanding the specific mechanics is critical to choosing this variation purposefully within a training plan.
Unlike a strict vertical pulldown where the bar travels directly down toward the chest, the 45 degree setup aligns the bar to a slightly forward and downward path. This subtle shift increases the role of scapular depression and retraction while reducing the direct shear on the shoulder joint when compared with some vertical variations. For lifters who feel shoulder impingement or discomfort in strict vertical pulldowns, the 45 degree option can be an ergonomic improvement when performed correctly.
Key benefits of the 45 degree lat pulldown include enhanced mid-back engagement, improved scapular control, and the ability to load the lats through a slightly different arc that can complement other horizontal and vertical pulling exercises. It is particularly useful for physique athletes aiming to emphasize the width and lower lat sweep while preserving shoulder comfort. Because the angle modifies leverage, lifters often perceive a stronger contraction at the bottom of the movement, which can be helpful for hypertrophy-focused work.
What the 45 Degree Lat Pulldown Is and How It Differs
The 45 degree lat pulldown positions the torso so the chest pad and seat tilt the lifter into a forward-leaning position. This orientation places the humerus in a slightly different plane, modifying the moment arm around the glenohumeral joint. Practically, the bar path traces a diagonal plane, and the lifter must coordinate scapular retraction with elbow flexion through that line. Because of this diagonal pull, the lift recruits the lower lattissimus fibers and the teres major more consistently than some vertical variants.
In comparison to a straight vertical pulldown, the 45 degree variation can reduce extreme shoulder extension at the bottom of the movement and limit excessive forward head or thoracic flexion. It can be a safer option for those with labral sensitivity or anterior shoulder discomfort because the line of pull keeps the humerus in a more neutral plane. However, anyone switching between these variations must adapt load and technique because perceived difficulty and range of motion changes.
For trainers: cue clients to feel the difference in scapular movement and emphasize controlled eccentric motion. For trainees: think of pulling slightly down-and-back rather than strictly straight down. This mental image helps keep tension on the lats and prevents compensatory biceps dominance or shrugging of the shoulders.
Muscles Targeted and Physiological Effects
The primary target of the 45 degree lat pulldown is the latissimus dorsi, particularly the lower fibers that contribute to the coveted “lat sweep.” Secondary muscles include the teres major, posterior deltoid, rhomboids, and the middle and lower trapezius, which assist with scapular retraction and depression. The biceps brachii and brachialis act as strong elbow flexors and are involved as synergists during the concentric phase.
Physiologically, the angled line of pull increases time under tension for the posterior scapular stabilizers and creates a longer eccentric length for the lats. This can enhance hypertrophic signaling when performed with controlled tempos and moderate volume. Because the movement demands coordinated scapular motion, it also improves scapulothoracic control and can translate into better stability in compound lifts like rows and pull-ups.
For programming considerations, the 45 degree lat pulldown is effective across goals: heavier sets with lower reps for strength, moderate loads with controlled eccentrics for hypertrophy, and lighter sets for muscular endurance or technique work. Pay attention to neuromuscular coordination—novices benefit from lower loads to master the scapular mechanics before increasing intensity.
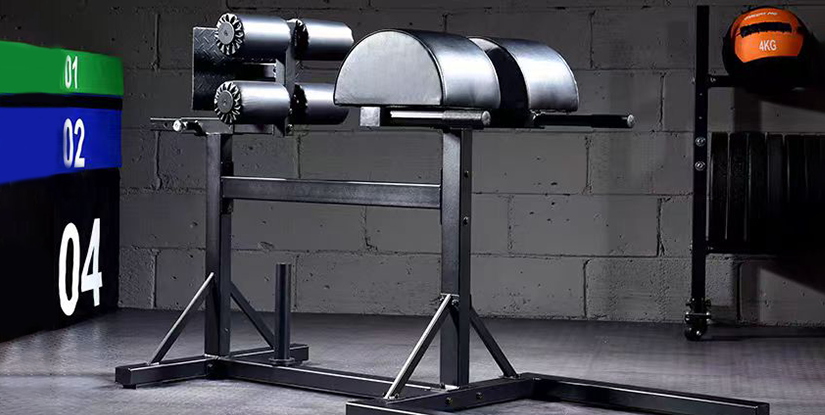
Equipment and Setup
Selecting the correct machine and adjusting it for your body are foundational to safe, effective 45 degree lat pulldowns. Machines vary: selectorized angled pulldown machines, adjustable cable stations with incline benches, and multi-angle plate-loaded rigs can all reproduce the 45 degree line. Choosing equipment that provides stable chest or torso support and a smooth cable path is essential to maintain consistent tension and reduce compensatory movement.
Attachments matter. Wide bars, Y-shaped handles, neutral close-grip handles, and single-handle D-grips each change hand position and muscle emphasis. A wider grip will emphasize lateral expansion, while a neutral or close grip increases involvement of the biceps and mid-back. For progressive loading and comfort, textured rubber grips or lightly padded handles reduce slip and improve force transfer.
Setup involves adjusting seat height, chest pad angle, and foot placement to lock your torso against the pad without creating excessive spinal flexion. The chest pad should support the sternum so the lifter can maintain a neutral spine while pulling. Foot placement should be stable; feet flat on the platform or floor help generate a rigid base that prevents the torso from moving forward during heavy pulls.
Machine Types, Attachments & Alternatives
There are several machine categories that facilitate a 45 degree lat pulldown. Fixed inclined lat machines have built-in angled seats and chest pads—these provide the most consistent line of pull with minimal setup. Cable towers with incline benches or adjustable pulleys can recreate the angle by setting the bench to 45 degrees and attaching a lat bar or handles to the high pulley. Plate-loaded rigs allow more weight increments but require a compatible angle bench or support system.
Attachments to consider: wide lat bars (for width emphasis), cambered bars (for more natural wrist alignment), neutral grips (for shoulder-friendly pulls), V-bars or close grips (for lower lat targeting), and single handles (for unilateral work). Alternatives if you lack a machine include incline bench single-arm cable pulldowns, resistance band pulldowns anchored overhead with a forward-leaning torso, or assisted incline pull-ups using a bench for body-angle adjustments.
Example: Use a cable tower with the bench at 45 degrees and a wide bar—start with a lighter weight to dial in the angle, then progressively increase weight as the movement pattern becomes stable. For home gyms, anchor a heavy resistance band overhead and perform the movement from a seated or supported incline position to approximate the mechanics.
Setup, Adjustments & Safety Checks
Proper setup reduces injury risk and maximizes effectiveness. Steps include: adjust the chest pad so it sits against your sternum without causing extension; lower or raise the seat until your arms reach the bar with a slight shoulder flexion—avoid full lockout at the top; set foot position for a solid base; select a grip width that allows a comfortable elbow path (usually slightly wider than shoulder width for wide grips).
Safety checks: confirm cable routing is smooth and the pin is fully engaged; test one light rep to ensure the chest pad holds you; watch for shoulder elevation—if your shoulders shrug up toward your ears, lower the weight and focus on scapular depression before elbow flexion. Never use momentum by rocking; the pad should limit torso motion. If you feel sharp pain in the anterior shoulder or deep joint line, stop and reassess path and seat height.
Tip: Log your seat and pad settings so you recreate consistent biomechanics each session. Small changes to angles can produce very different stimulus and leverage, so consistency supports progressive overload and injury prevention.
Technique and Form
Mastering technique on the 45 degree lat pulldown is about sequencing: scapular depression and retraction first, then elbow flexion and finishing with a controlled eccentric return. The goal is to maintain tension on the lats across the entire range and avoid bicep-dominant pulls or upper trap shrugging. Proper form increases muscular engagement and minimizes stress on the shoulder joint.
Start each rep with a full shoulder protraction (scapulae slightly forward) as you reach for the bar. Initiate the concentric phase by pulling the scapulae down and back, thinking of sliding your shoulder blades into your back pockets. Only after the scapular movement begins should you flex the elbows to complete the pull. This sequencing emphasizes the scapulothoracic muscles and ensures the lats do the primary work instead of allowing the arms to take over.
Control the eccentric: lower the bar slowly on a 2-4 second count, resisting gravity and maintaining tension. Do not let the shoulders collapse forward at the top—keep a stable torso and controlled shoulder protraction to prepare for the next rep. Breathing: exhale during the concentric pull, inhale on the eccentric return. Using these breathing cues helps maintain intra-abdominal pressure and spinal stability.
Step-by-Step Execution
1) Setup: Sit with your chest against the pad, feet planted, and hands placed on the chosen attachment. Take a light scapular protraction to set the starting position. 2) Initiation: Begin by depressing and retracting the scapulae—imagine pulling your shoulder blades down and toward each other. This primes the lats before the elbows bend. 3) Pull: Follow the scapular movement with elbow flexion, driving the bar down along the 45 degree path until your hands reach or pass the upper chest, depending on mobility. 4) Peak contraction: Pause briefly (0.5–1 second) at the bottom to maximize the lat contraction. Avoid leaning back excessively; keep the torso steady against the pad. 5) Eccentric: Slowly extend the elbows and allow the scapulae to protract, returning to the start in a controlled 2–4 second tempo.
In practice, choose a tempo that matches your goal: 2/0/2 for strength, 3/1/3 for hypertrophy (eccentric focus), and 2/0/2 for endurance with lighter loads. Adjust grip width and attachments to shift emphasis—wider for the lats, closer for the lower lats and biceps. Always prioritize the scapular-first cue to maintain correct muscle sequencing.
Common Mistakes and Corrective Cues
Several common errors reduce effectiveness and increase injury risk. The most frequent are: shrugging the shoulders (upper traps take over), using momentum by rocking the torso, allowing the elbows to flare excessively, and pulling the bar behind the neck. Each error has a simple corrective cue.
- Shoulder shrugging: Cue 'down and back'—focus on pulling the scapulae down before elbow bend.
- Torso rocking: Use a slightly heavier chest pad or reduce weight; consciously brace your core and remind yourself to keep the chest on the pad.
- Excessive elbow flare: Imagine pulling the elbows toward the hips; keep elbows tracking in a path that maintains tension on the lats.
- Behind-the-neck pulls: Replace with front chest pulldowns; behind-the-neck increases impingement risk and is not necessary for lat development.
Corrective exercises can help: scapular retraction/depression drills, band pull-aparts for posterior shoulder health, and single-arm lat pulls to reinforce unilateral control. Video yourself from the side to confirm bar path and torso stability, and perform technique work with lighter loads until movement quality improves.
Programming and Progressions
Programming the 45 degree lat pulldown depends on your specific training objective: strength, hypertrophy, endurance, or rehabilitation. The movement is pliable: it can be loaded heavy for strength (with lower reps), performed with moderate loads and higher volume for hypertrophy, or executed for higher repetitions with short rest for endurance. The key is to manipulate sets, reps, load, tempo, and frequency to match adaptation goals.
Volume and intensity interplay is central. For strength, use 3–6 sets of 3–6 reps with longer rest (2–4 minutes) and focus on solid scapular mechanics at near-max loads. For hypertrophy, target 3–5 sets of 6–12 reps with 60–90 seconds rest, emphasizing controlled eccentrics and full range. For endurance or conditioning, 2–4 sets of 15–25 reps with shorter rest periods can be effective, especially when using lighter loads or tempo variations.
Integration into weekly plans: place the 45 degree lat pulldown as a primary horizontal/angled pull on upper-body days, or as an accessory on back-focused sessions. It pairs well with heavy rows and pull-ups: use it after compound multi-joint work for hypertrophy or before as an activation/technique set when focusing on scapular control.
Programming by Goal: Strength, Hypertrophy, Endurance
Strength program: 3–5 sets of 3–6 reps at 80–90% of your rep-max for the given movement. Focus on full contraction and maintain clean tempo. Monitor progress via incremental load increases of 2.5–5% when form is preserved.
Hypertrophy program: 3–5 sets of 6–12 reps at 65–80% intensity, 2–3 second eccentrics, 0–1 second pause at peak contraction. Prioritize progressive overload through added reps, increased time under tension, or slightly higher frequency (2 sessions per week on the back split).
Endurance program: 2–4 sets of 15–25 reps at 40–60% intensity with 30–60 seconds rest. Use controlled tempo but emphasize continuous tension and metabolic stress. This format is useful for conditioning phases or when trying to increase muscular stamina for higher-rep pulling like climbing or certain sports.
Variations, Load Progression and Integration
Variations include unilateral single-arm pulldowns, neutral-grip pulldowns, underhand/close-grip angled pulldowns, and slow-tempo eccentric focus sets. Each variation shifts activation: unilateral work corrects imbalances, neutral grip tends to be shoulder-friendly, and underhand increases biceps involvement. Periodically rotating variations prevents plateau and targets the lat from different vectors.
Progression examples: use linear progression for novices—add 2.5–5 lbs per session when you can complete target reps with good form. Intermediate lifters might use wave loading or block periodization—three-week hypertrophy blocks followed by a two-week strength block. Advanced lifters can employ autoregulation (RPE/RIR) or daily undulating periodization to manage fatigue while accumulating volume.
Practical integration: On a pull day with heavy deadlifts or rows, perform 2–3 technical sets of 8–10 reps on the 45 degree lat pulldown to emphasize hypertrophy without overwhelming recovery. On a day focused on upper body width, make pulldowns a primary exercise followed by rows and rear delt work.
Troubleshooting and Injury Prevention
Pain or poor movement quality on the 45 degree lat pulldown usually stems from setup errors, mobility limits, or overuse without adequate recovery. Addressing these systematically prevents setbacks and enhances long-term progression. Start with diagnostic questions: Where is the pain located? Does pain occur sharply during a specific portion of the range? Is there weakness or numbness? These answers guide immediate modification and referral decisions.
Common issues include anterior shoulder discomfort, elbow tendon irritation, and excessive upper-trap activation. Solutions range from grip adjustments and seat repositioning to mobility work and load management. When in doubt, reduce load and emphasize technique. If sharp joint pain persists, consult a healthcare professional before continuing heavy loading.
Prehab and warm-up are critical. Include thoracic mobility, scapular control drills, and rotator cuff activation to prepare the shoulder complex. Small, consistent investments in mobility and postural strength often produce larger returns than adding more volume without addressing quality.
Addressing Elbow and Shoulder Pain
If you experience lateral elbow pain (common in high-volume pulling), reduce grip width and decrease load while focusing on elbow alignment. Incorporate eccentric loading for elbow-tendon strength as tolerated and strengthen forearm musculature with wrist curls and reverse curls. Ensure sufficient recovery and consider a temporary reduction in frequency to allow tissue adaptation.
For anterior shoulder pain, avoid behind-the-neck pulldowns and limit extreme lat stretch at the top of the movement. Opt for neutral grips and slightly narrower hand positions to reduce shoulder abduction torque. Strengthen external rotators and posterior shoulder musculature with face pulls, banded external rotations, and prone Y/T/W exercises to balance the shoulder girdle.
When pain is neurological (numbness/tingling), reassess spinal posture and consult a clinician. Sometimes cervical or thoracic issues refer symptoms into the arm and require targeted therapy, not only exercise modification.
Mobility, Warm-Up, and Rehab-Friendly Modifications
A practical warm-up sequence: 5–10 minutes of general cardiovascular activity (to increase blood flow), followed by dynamic thoracic rotations, band pull-aparts (2–3 sets of 12–15), and light single-arm cable rows focusing on scapular motion (2 sets of 10). Finish with one or two light working sets of the 45 degree lat pulldown to dial in technique at submaximal loads.
Rehab-friendly modifications include using a neutral grip, performing single-arm pulldowns to reduce bilateral compensation, lowering range of motion to a pain-free window, and extending the eccentric only (where concentric is pain-provoking). Progressive loading should focus on pain-free ROM first, then gradually restore full movement and load.
Tip: Track subjective readiness using a simple scale (0–10) for pain and stiffness before sessions. Adjust volume and intensity accordingly to manage long-term tendon and joint health while continuing progress.
FAQs
Below are 12 professional-style frequently asked questions and concise answers about the 45 degree lat pulldown. These address technique, programming, safety, and practical application for lifters and coaches.
- Q1: Is the 45 degree lat pulldown better than the vertical pulldown?
A: Neither is universally better; the 45 degree variation offers a slightly different line of pull that can reduce shoulder strain and emphasize lower lat fibers. Choose based on comfort, training goals, and how the movement complements other exercises in your program. - Q2: How should I set the chest pad and seat?
A: Adjust the chest pad to support the sternum while allowing a neutral spine. Seat height should permit a slight shoulder flexion at the top without locking the elbows. Ensure feet are planted for a stable base. - Q3: What grip width is optimal?
A: A grip slightly wider than shoulder width is a common starting point for lat emphasis. Wider grips increase lateral stretch while closer grips shift emphasis to lower lats and biceps. Use multiple grips across training cycles. - Q4: How many times per week should I train this movement?
A: For most lifters, 1–2 sessions per week is effective. Frequency depends on recovery, total weekly volume, and integration with other pulling work like rows and pull-ups. - Q5: Can beginners perform the 45 degree lat pulldown?
A: Yes, but start with light loads to learn scapular sequencing. Practice scapular depression/retraction drills and perform higher-rep technical sets before adding heavy loads. - Q6: Should I pause at the bottom of each rep?
A: A brief 0.5–1 second pause at peak contraction helps reinforce lat engagement. Avoid long pauses that convert the movement into an isometric rather than a dynamic hypertrophy stimulus unless intentionally programmed. - Q7: Is a neutral grip safer for shoulders?
A: Often yes—neutral grips tend to place the shoulder in a more comfortable position and reduce impingement risk, making them a good choice for those with anterior shoulder discomfort. - Q8: How do I progress load on this exercise?
A: Progress by small weight increments (2.5–5 lb), adding reps, improving tempo control, or increasing weekly frequency. Prioritize form and scapular control when increasing load. - Q9: Can I do unilateral 45 degree pulldowns?
A: Yes—single-arm variations correct asymmetries, enhance stability, and allow slightly higher time under tension per side. Use handles or single D-grips for unilateral work. - Q10: What warm-up is recommended?
A: General aerobic warm-up followed by thoracic mobility, band pull-aparts, and light single-arm scapular pulls. Finish with one or two light working sets of the pulldown to refine technique. - Q11: How do I avoid biceps dominance?
A: Use scapular-first cues—depress and retract before elbow flexion—and select grips that reduce elbow torque. Lower the load if the biceps feel like they are taking over. - Q12: When should I consult a professional?
A: Seek a licensed physiotherapist or sports medicine professional if you experience persistent joint pain, numbness, or sharp discomfort that does not improve with load reduction and technique adjustments. Professional assessment ensures safe return to training.