
Adjustable Lat Pulldown Bar: Comprehensive Guide to Selection, Installation, and Training
Overview of the Adjustable Lat Pulldown Bar
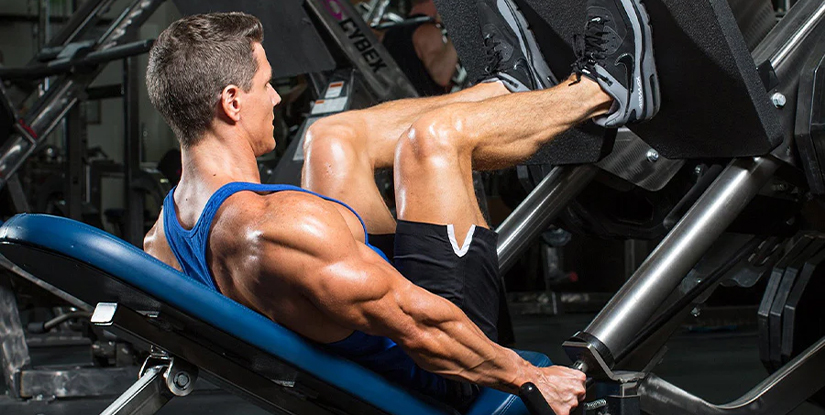
An adjustable lat pulldown bar is a versatile attachment for cable machines and home gyms that targets the latissimus dorsi, upper back, and biceps while offering varied grip positions and angles. Unlike fixed bars, an adjustable model allows users to change grip width, angle, or handle position to match biomechanics, accommodate mobility limitations, and focus on specific muscle groups. This adaptability makes it an important tool for both beginners and advanced lifters aiming to improve back development, shoulder stability, and pulling strength.
Beyond pure muscle targeting, the adjustable lat pulldown bar addresses practical concerns such as equipment compatibility and space constraints. Many modern attachments are designed to work with standard cable machine carabiners or multi-attachment stations and fold or detach quickly for storage. For personal trainers and gym owners, an adjustable pulldown bar simplifies programming because it replaces multiple fixed bars. For home users, it reduces the need to purchase several separate attachments while delivering near-commercial functionality.
Functionally, the adjustable lat pulldown bar alters movement patterns in three primary ways: grip width, grip orientation (pronated, supinated, neutral), and plane of pull. Each variation shifts recruitment among the lats, teres major, rhomboids, trapezius, biceps, and forearms. Using a close, neutral grip tends to increase biceps involvement and emphasize the lower lats, while a wide, pronated grip emphasizes the upper lats and rear delts. The adjustability permits progressive overload through incremental changes in leverage and muscle emphasis, not just added weight, supporting continual strength and hypertrophy gains.
Key Features and Types of Adjustable Lat Pulldown Bars
Choosing the right adjustable lat pulldown bar starts with understanding the available types and their design features. Bars vary by handle configuration, adjustment mechanism, materials, and additional ergonomics like knurling or rubberized grips. Knowing how these differences affect feel, durability, and muscle engagement helps match the tool to your training goals and equipment.
Straight, Bent, and Multi-Grip Bar Differences
There are three common types of adjustable pulldown bars: straight bars, bent or cambered bars, and multi-grip bars. Straight bars are the most basic—they provide a consistent grip width and simple, direct pulling line. Their simplicity makes them reliable for heavy loads and straightforward technique coaching, but they offer less variety in hand placement.
Bent or cambered bars introduce an angled or curved profile that changes wrist and elbow position during the movement. This can reduce shoulder strain for lifters with mobility issues and often feels more natural to the joints. Cambered bars shift the center of mass slightly and can alter leverage; some lifters find they can engage the lats more effectively with moderate loads.
Multi-grip bars are the most versatile. They include multiple handle positions—wide, neutral, close, and often an angled set—allowing rapid transitions between exercises and grips without swapping attachments. These bars are particularly useful in commercial settings, group training, or for individuals who prioritize variety. The adjustable mechanisms on multi-grip bars can be mechanical (holes and pins, carabiners) or friction-based (locking collars, threaded adjustments).
Materials, Grip Options, and Build Quality
Material quality determines longevity, safety, and comfort. Common materials include solid steel with powder-coated finishes, stainless steel, and chrome. Solid steel bars with a durable powder coat resist chipping and rust better in high-use settings, while chrome offers a smoother finish that some users prefer for reduced friction. Stainless options add corrosion resistance for humid environments.
Grip options range from bare metal with knurling to rubberized sleeves or interchangeable handle grips. Knurling improves friction for heavy sets but can be uncomfortable for high-volume reps. Rubber or urethane grips provide cushioning and reduce hand fatigue, beneficial in circuit training or rehabilitation contexts. Evaluate seams, welds, and the attachment point (carabiner ring, swivel, or integrated hook) for smooth operation: a high-quality swivel reduces cable twist and protects bearings in the cable machine.
Build quality also includes weight capacity and tolerance. Professional-grade bars often support higher working loads and have more robust pivot points, while economy bars are lighter and suited to home use. When comparing models, examine published weight limits and read usage recommendations—overloading an attachment can damage the cable system or create unsafe conditions.
How to Choose the Right Adjustable Lat Pulldown Bar and Compatibility Considerations
Selecting the optimal adjustable lat pulldown bar requires balancing user goals, equipment compatibility, and ergonomics. Compatibility hinges on the attachment mechanism and the cable system’s hardware. Ergonomics consider grip comfort, reach, and required shoulder mobility. Prioritizing these factors will help you avoid purchases that underperform or don’t fit your machine.
Begin by measuring the cable machine’s carabiner or hook size and comparing it with the bar’s attachment ring or swivel diameter. Most aftermarket bars use a standard carabiner connection, but some machines use proprietary clips or thicker mounting points. Check the pulley height range: if the top pulley sits unusually high or low, a specific bar length and handle geometry will be more comfortable. For tall users, a longer bar and higher anchor point maintain a full range of motion; shorter users may prefer compact bars to avoid overextension.
Compatibility with Machines, Racks, and Home Gyms
Compatibility testing should include both physical fit and functional fit. Physical fit focuses on whether the ring, swivel, or hook seats properly on the machine’s carabiner without rubbing or binding. Functional fit evaluates whether the bar allows natural torso and shoulder positions during exercise. Considerations include the distance from the bench or seat to the pulley and whether a lat pad or thigh hold-down will interfere with bar movement.
Adapters can expand compatibility: universal carabiners, D-rings, and short chains provide extra length or adjust anchor angles. However, every added link introduces potential failure points and should be rated for the working load. For home gyms using power racks with pulley attachments, verify that the rack’s upright spacing allows the bar to move freely without striking uprights or crossmembers at different angles.
Ergonomics, Weight Capacity, and Budget Trade-Offs
Ergonomics matter as much as material quality. When testing a bar in-person or evaluating specs online, review handle spacing, grip diameter, and bar curvature. Thicker grips increase forearm engagement and grip strength demands but may fatigue beginners faster. Ergonomic contours and textured rubber sleeves may reduce joint stress and improve control for higher-rep sessions.
Weight capacity should exceed your working sets by a comfortable margin (at least 20-30%). This margin accounts for dynamic forces, such as momentum during explosive reps or cable angles that create leverage peaks. Budget models will lower upfront cost but may compromise on swivel bearings, thicker welds, or ergonomic polish. Decide whether durability and comfort justify a higher initial investment—commercial-grade bars can last many years under heavy use, often making them more cost-effective long-term.
Installation, Adjustment, Maintenance, Safety, and Training Tips
Proper installation and maintenance preserve function and safety. Installation typically involves attaching the bar’s ring or swivel to the cable machine’s carabiner, checking clearance, and testing rotation. Adjustment refers both to changing handle positions during a workout and to tuning cable tension and swivel lubrication. Attention to detail prevents wear, reduces noise, and maximizes exercise effectiveness.
Regular maintenance includes inspecting welds, checking for loose bolts, and ensuring any rubber grips remain intact. Lubricate swivel bearings as recommended by the manufacturer and replace frayed attachment straps or chains immediately. For gym owners, keep a maintenance log and schedule monthly checks to extend service life and reduce liability risks.
Step-by-Step Installation and Adjustment Guidance
Installation is straightforward but should be done carefully: first, ensure the machine is powered off if it has electronic controls and clear the area of other attachments. Attach the bar’s ring to the machine carabiner and ensure the swivel rotates freely without binding. Lower the seat and position the thigh pad for a test pull; do a slow empty-set pull to observe cable alignment. If the bar hits the machine frame or seat, adjust the anchor point using a short chain or reposition the carabiner if possible.
Adjustments during training include changing grip width, selecting different handle positions, or altering torso angle to shift emphasis. When you change grip or attachment angle, perform a controlled warm-up set to confirm comfort and full range of motion. If you experience shoulder pinching, adjust hand position to a more neutral grip or switch to an angled cambered bar to reduce impingement risk.
Maintenance, Safety Checks, and Longevity Tips
Routine maintenance extends lifespan and prevents accidents. Wipe down bars after use to remove sweat and corrosive salts. Inspect for corrosion, bent components, loose rivets, and worn grips. Lubricate swivels with light machine oil as recommended—avoid over-lubrication that attracts dust. Replace rubber grips if they split or degrade; damaged grips increase the risk of slippage and hand injury.
Safety checks should include load testing after major impacts: incrementally load a bar with low weight and visually inspect for bending or unusual movement. For commercial facilities, require staff to tag and remove faulty attachments immediately. For home users, avoid using the bar for unsupported movements like heavy one-arm jerks that introduce twisting forces beyond its design.
Training Tips, Exercises, and Program Integration
Integrate the adjustable lat pulldown bar into programs by varying grip, tempo, and angle to target different back fibers. Sample exercise variations include wide pronated pulldowns for upper-lat emphasis, close neutral-grip pulldowns to increase lower-lat and biceps involvement, and behind-the-neck pulldowns only if you have excellent shoulder mobility and no pain. Use controlled tempos (e.g., 2-1-2) to increase time under tension and emphasize eccentric control for hypertrophy.
Progress intelligently: start with manageable loads and prioritize full range of motion. For strength phases, focus on lower reps (4-6) with heavier loads using stable grips. For hypertrophy, target 8-15 reps with moderate load and varying grips across sessions. For rehabilitation or mobility work, use lighter loads and neutral grips to reinforce scapular control. Track grip position, set volume, and perceived exertion to ensure progressive overload without compensatory elbow or torso lean that reduces lat activation.
FAQs
1. What makes an adjustable lat pulldown bar better than a fixed bar?
An adjustable lat pulldown bar offers versatility in grip positions and angles, enabling targeted muscle activation and improved ergonomics. While a fixed bar can be durable and simple, it limits hand placement and often forces one movement pattern. Adjustable bars enable multiple exercises—wide pulldowns, close-grip rows, neutral-grip pulls—without swapping hardware. This flexibility benefits users with mobility limitations, trainers programming variety, and gyms aiming to maximize utility per attachment. Additionally, adjustability can reduce joint strain by allowing neutral or angled grips that align more naturally with a user’s wrist and shoulder mobility.
From a performance perspective, adjustable bars support progressive overload through leverage changes as well as weight increases, permitting nuanced emphasis on specific lat regions. In practice, an adjustable option often replaces several fixed bars while offering a smoother transition between exercises during superset circuits and busy gym periods.
2. How do I know if a bar is compatible with my cable machine?
Check the attachment interface first: measure the carabiner or hook diameter on your cable machine and compare it to the bar’s ring or swivel. Most aftermarket bars work with standard carabiners, but some machines have non-standard hooks. Confirm the pulley height and cable travel to ensure the bar clears frames and pads throughout its arc. If unsure, consult the machine or bar manufacturer’s specifications or use a universal carabiner adapter rated for the intended load. Remember that adding adapters increases points of wear—use only rated hardware.
Also consider the machine’s working weight and the bar’s weight capacity. If your training routinely exceeds the bar’s published limit, upgrade to a commercial-grade attachment. When possible, test the bar in-person before purchase to check clearance and feel.
3. Are adjustable lat pulldown bars safe for people with shoulder issues?
Adjustable bars can be safer for individuals with shoulder problems because they allow neutral or angled grips that reduce impingement. Cambered designs and multi-grip options enable hand positions that maintain a more natural shoulder plane during pulling. However, safety depends on proper selection and technique: avoid behind-the-neck pulldowns unless you have excellent mobility and no pain, and prioritize neutral grips to reduce rotator cuff strain.
Always consult a healthcare professional if you have a diagnosed shoulder condition. Use light weights initially and monitor symptoms—any sharp pain or persistent discomfort warrants immediate cessation and professional assessment. Proper scapular control and slow tempo help reinforce safe mechanics during rehabilitation.
4. How often should I maintain or lubricate the swivel on the bar?
Maintenance frequency depends on usage and environment. For home use, inspect and lubricate the swivel every 3-6 months. In commercial or high-frequency settings, perform monthly inspections and lubricate as needed. Use a light machine oil on swivel bearings and avoid heavy greases that attract dust. Regular cleaning—wiping down after use—reduces corrosive buildup from sweat and extends time between deeper maintenance tasks.
Replace any worn or noisy swivel bearings promptly. Excessive play or grinding sounds are indicators that the swivel may be failing and should be serviced or replaced to avoid cable misalignment or sudden attachment failure.
5. Can I use an adjustable lat pulldown bar for rows and other exercises?
Yes—adjustable pulldown bars are excellent for rows, upright rows, triceps pushdowns (with certain handle configurations), and straight-arm pulldowns. Multi-grip bars facilitate close-grip seated rows and neutral-grip variations that target different back fibers. Ensure the bar and cable angle suit the exercise: for rows, a lower pulley and a shorter bar or handle keeps resistance in the right plane. Always confirm the bar’s weight rating for the intended exercises, particularly for dynamic or high-load rows.
Use proper form—controlled scapular retraction for rows and a stable torso—to maximize muscle targeting and avoid compensatory movement patterns that can stress the lower back or shoulders.
6. What grip widths and hand positions should beginners try first?
Beginners should start with a neutral or medium-width grip to find a comfortable baseline. Neutral grips (palms facing each other) reduce wrist strain and allow a natural shoulder path. Medium-width pronated grips (palms away) are useful for general lat development without the extreme leverage changes of very wide grips. Avoid very wide or behind-the-neck grips until you have established shoulder mobility and learned proper scapular control.
Focus on full range of motion and a controlled tempo: initiate each rep with scapular depression and end with a full but not forced contraction of the lats. If grip strength is limiting, use straps temporarily while you develop forearm strength alongside back work.
7. How should I program the adjustable lat pulldown into my workouts?
Programming depends on goals. For strength: use lower reps (4-6) with heavier loads and sturdy grips, including close-grip and pronated variants for progressive overload. For hypertrophy: perform 8-15 reps with varied grips across sets and sessions, adjusting tempo to emphasize eccentric control. For endurance or conditioning: incorporate higher reps (15-25) and circuit formats using multi-grip transitions to sustain volume while managing fatigue.
Periodize by alternating focus every 4-8 weeks—start with hypertrophy phases, transition to strength, then a deload or technique-focused phase. Track grip positions and rep schemes so you can systematically increase volume or load without accidental overuse of one joint angle.
8. What are common mistakes to avoid when using an adjustable lat pulldown bar?
Common mistakes include using excessive body lean to cheat the movement, pulling with the arms rather than initiating with scapular depression, and choosing grips that create shoulder impingement (such as behind-the-neck pulldowns for those without mobility). Other errors are neglecting maintenance—allowing worn swivels to operate—and mismatching the bar to the machine, causing binding or uneven cable wear.
To avoid these issues, prioritize form: keep the torso stable, lead the pull with the scapula, and select a grip that keeps the shoulder in a safe plane. Maintain equipment regularly and verify compatibility before heavy use. If unsure, consult a qualified coach for technique feedback and equipment advice.