
Comprehensive Guide to the Arm Pull Down Machine: Selection, Technique, Programming, and Maintenance
Introduction to the Arm Pull Down Machine
The arm pull down machine, commonly known as the lat pulldown or arm pull-down, is a staple in modern gyms for developing the posterior chain of the upper body, particularly the latissimus dorsi, biceps, rhomboids, and middle trapezius. Unlike free-weight vertical pulling movements such as pull-ups, this machine offers a guided, adjustable resistance pathway that allows users to isolate the back and arm muscles with controlled range of motion. For beginners, those rehabbing from injury, or athletes seeking targeted hypertrophy, the arm pull down machine provides a safer and more scalable option than bodyweight-only variations.
Understanding how this machine fits into a balanced strength program requires more than recognizing its primary targets. It is an adaptable piece of equipment suitable for warm-up sets with lighter resistance, high-volume hypertrophy cycles with moderate loads, and even strength-focused work when performing heavier, controlled repetitions. Its biomechanics involve shoulder adduction, elbow flexion, and scapular depression—patterns that reinforce posture and upper-body pulling capacity when executed correctly. This introduction sets the stage for selecting the right unit, learning precise technique, designing effective programs, and maintaining the equipment to maximize longevity and performance.
Several variations of the arm pull down machine exist, including wide-grip bars, V-bar attachments, single-arm handles, and cable-based stations that mimic the same movement with slight mechanical differences. Choosing among these options depends on user goals: wider grips emphasize the outer lats and upper back width, while narrow grips and single-arm handles can increase biceps and lower-lat activation and correct unilateral imbalances. In the following sections, we break down how to evaluate machines, how to set up and perform each variation safely, and how to plan progressive training with practical examples.
What the Arm Pull Down Machine Is and Muscles Targeted
The arm pull down machine is a resistance device designed to simulate the downward-pulling motion that targets the latissimus dorsi—the broad, flat muscle spanning the mid to lower back. When you grasp the bar and pull down toward the chest or behind the neck (the latter is less recommended), the movement primarily adducts the humerus and extends the shoulder joint. Secondary muscles engaged include the biceps brachii, brachialis, posterior deltoids, and the rhomboids which assist in scapular retraction.
Scapular stabilization is a crucial but often overlooked component: the serratus anterior and lower trapezius help position the shoulder blade throughout the movement. Proper activation of these muscles reduces compensatory motion from the upper trapezius and cervical region, lowering injury risk and improving force transfer. Understanding these roles allows practitioners to choose grips, angle of pull, and tempos that emphasize specific muscle groups—for instance, a slow eccentric with a neutral grip will stimulate different fibers than explosive concentric repetitions with a wide grip.
Assessing electromyographic (EMG) evidence and practical coaching cues can further refine target activation. Coaches often cue athletes to depress and retract the scapula prior to initiating the concentric pull—this ensures the lats, not the arms alone, drive the motion. For rehabilitation contexts, focusing on slow, controlled eccentric lowering helps rebuild tendon resilience and strength without excessive joint stress.
Benefits Compared to Other Pulling Exercises
The arm pull down machine offers several advantages over alternative pulling movements. Firstly, it provides adjustable resistance that can be precisely incremented, which is beneficial for progressive overload and safe strength development. This is especially valuable for novice trainees who may not yet be able to perform multiple unassisted pull-ups. Secondly, the guided path of the machine reduces stabilization demands, which can isolate the latissimus more effectively for hypertrophy-focused training cycles.
Another important benefit is the machine’s suitability for rehabilitation and controlled tempo work. Physical therapists use pulldown variations to reintroduce controlled scapular motion and improve concentric-eccentric coordination while monitoring pain responses. It also allows for unilateral options (single-arm handles) that address strength asymmetries without requiring complex free-weight setups. For athletes, the machine can be used to replicate sport-specific pulling actions with reduced spinal loading compared to heavy bent-over rows.
There are limitations: the machine reduces the demand on stabilizing muscles compared to free-weight pulls, potentially limiting carryover to movements requiring full-body coordination. It’s best used alongside compound free-weight exercises in a balanced program. When combined correctly, the arm pull down machine is an effective tool for building pulling strength, improving posture, and enhancing upper-back aesthetics.
Choosing the Right Arm Pull Down Machine
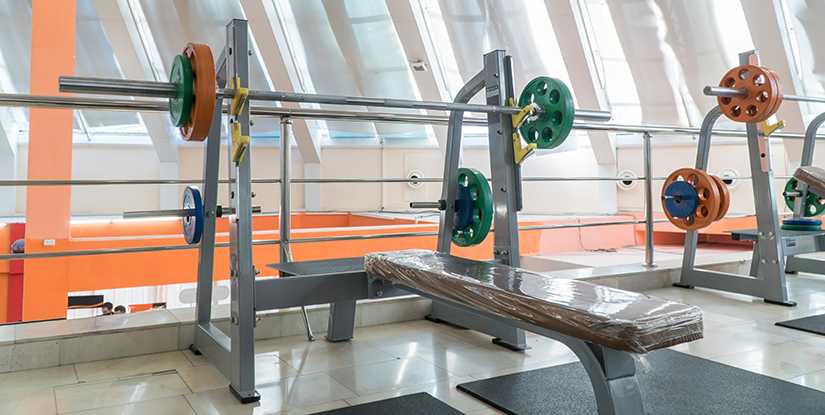
Selecting the appropriate arm pull down machine for a gym, home setup, or rehabilitation clinic involves evaluating mechanical design, construction quality, adjustability, and accessory compatibility. Not all pulldown stations are created equal: cable-based stations, selectorized stack machines, plate-loaded lat towers, and multi-function rigs each have unique characteristics that affect user experience. Key parameters to assess include range of motion, pulley quality and alignment, seat and thigh pad adjustability, available grip attachments, and the machine’s footprint relative to the space available.
For commercial gyms, durability and ease of maintenance are paramount—look for welded steel frames, high-capacity weight stacks, and sealed bearings or high-quality pulleys. For home users, modular systems that combine a lat pulldown with a low row or cable crossover can offer better value. Space considerations influence the decision: plate-loaded versions may require less ceiling height, while cable towers need adequate vertical space for full extension and effective movement mechanics. Accessibility features, such as comfortable seat padding and quick-adjust thigh restraints, improve the user experience and reduce setup time between clients or users.
When evaluating machines, consider the maximum and minimum load increments, the feel of the resistance curve (some machines provide smoother loading due to cam design), and how attachments are stored or interchanged. Practical testing—trying different grips, seating positions, and weights—reveals mechanical idiosyncrasies not obvious from specifications alone. Read manufacturer manuals for maintenance requirements and warranty coverage, since long-term downtime due to neglected components can increase total cost of ownership.
Types and Features to Look For
Categorize machines by their resistance systems: selectorized weight stacks, plate-loaded mechanisms, and cable-pulley towers. Selectorized weight stacks are user-friendly for gyms, enabling quick weight changes and typically include safety features. Plate-loaded machines offer a direct feel and are easy to upgrade with additional plates, but require storage for plates and may be bulkier. Cable-pulley towers provide versatility and multiple angles but depend heavily on cable and pulley quality for smooth operation.
Look for several must-have features when choosing a model. Adjustable thigh pads should lock down firmly to prevent the user from being lifted during heavy sets. Seat height should allow full arm extension without hitting the frame or bottoming out. Pulley alignment affects the force curve—side-anchored pulleys or offset cams change resistance through the range of motion and can be used to emphasize concentric or eccentric phases. A variety of attachments—wide bars, V-grips, single handles, and ropes—expand exercise options into neutral-grip pulldowns, single-arm rows, and face-pulls.
Additional desirable features include smooth, low-friction cables, corrosion-resistant coatings for high-traffic environments, and compact design if space is limited. For rehab settings, fine incremental load adjustments and softer cushioning can improve tolerance for sensitive shoulders or post-operative clients. Warranty terms and availability of replacement parts can also be deciding factors, especially for commercial installations.
Buying New vs Used and Budget Considerations
Budget dictates much of the decision process. New commercial-grade machines offer reliability, consistent resistance feel, and warranties, but they come at a premium. For commercial operators, the predictable maintenance plans and customer expectations justify the higher upfront cost. Home users may prefer mid-range or even used models to balance functionality and affordability. When buying used equipment, thoroughly inspect the frame for cracks or rust, test pulleys and cables for fraying, check that weight stacks engage securely, and verify seat and pad integrity.
Cost-saving tips include prioritizing structural soundness over cosmetic appearance, as repainting or reupholstering is relatively inexpensive compared to repairing bent frames or replacing snapped pulleys. Also compare the availability of compatible attachments and spare parts; some older or proprietary systems are difficult to service. Factor in shipping or delivery costs—heavy commercial pulldown stations can be costly to move and install. Consider purchasing from reputable dealers who provide refurbishment and limited warranties for used gear.
Finally, estimate lifetime value: a durable commercial machine used daily may justify a higher price than a cheaper unit that fails quickly. For home setups, modular cable towers that offer multiple functions might provide better value than a single-purpose lat pulldown, depending on your training priorities and available space.
Proper Technique and Programming with the Arm Pull Down Machine
Technique mastery and thoughtful programming are what turn equipment into results. Correct setup and execution reduce injury risk and maximize muscle recruitment. Start every session by adjusting the seat so your thighs are snug under the thigh pads, allowing full arm extension without scapular collapse. Grip selection matters: wide pronated grips emphasize upper lat width, neutral or supinated grips increase biceps involvement and lower-lat activation. Avoid behind-the-neck pulls due to increased cervical and shoulder stress; front pulldowns to the upper chest or clavicular region are safer and more effective for most athletes.
Execution cues are critical. Retract and depress the scapula before initiating the concentric phase to ensure that the lats, not the arms or traps, primarily drive the motion. Lead the bar toward the sternum while keeping the torso slightly leaned back at about 10–15 degrees—this angle allows better shoulder mechanics without turning the movement into a row. Control the eccentric lowering phase; a 2–3 second descent increases time under tension and supports tendon adaptation. Avoid excessive swinging, jerking, or using momentum to move heavier loads—it reduces muscle stimulus and increases injury risk.
Programming wise, integrate pulldowns across training phases. For hypertrophy aim for 6–12 reps with moderate loads across 3–4 sets and emphasize slow eccentrics. For strength, use heavier loads for 4–6 sets of 3–6 reps with longer rests. Include variations—wide-grip for width, close-grip or V-bar for thickness and biceps stimulus, and single-arm handles to correct unilateral imbalances. Progress by increasing load, reps, improving tempo control, or adding advanced techniques like drop sets or slow eccentrics depending on recovery and goals. The sample workouts below provide practical templates for different objectives.
Step-by-Step Setup and Execution
Begin by selecting a comfortable seat height where the arms can fully extend overhead without the shoulders shrugging forward. Lock the thigh pad snugly against your thighs to prevent upward movement during heavy pulls. Choose a grip that aligns with your training objective: wide pronated for outer-lat emphasis, neutral or supinated for greater biceps engagement and lower-lat recruitment. Grip width should allow a straight-down pull to chest level without twisting the wrists.
Before initiating the concentric, cue a scapular set—pull the shoulder blades down and slightly together. This primes the lats and reduces upper-trapezius domination. Execute the concentric by pulling the bar smoothly toward the upper chest, keeping the elbows pointed down and back. Maintain a small, controlled torso lean but avoid turning the movement into a row by not leading with the elbows excessively. Pause briefly at peak contraction to enhance motor control, then lower the bar under tension with a controlled 2–3 second eccentric phase. Breathe exhale on the pull and inhale on the return. For beginners, perform 2–3 sets of 8–12 controlled reps focusing on technique before increasing load.
Common technical faults include shrugging the shoulders, allowing the chest to cave forward, or using excessive momentum. If these occur, reduce the weight, refine the scapular cues, and slow the tempo. For trainees with shoulder discomfort, try neutral-grip pulldowns or reduce the range of motion until pain resolves, and consult a healthcare professional if symptoms persist.
Sample Workouts and Progression Strategies
To build a practical plan, align pulldown variations with specific objectives. For hypertrophy: perform 3–4 sets of 8–12 reps using moderate weight, 60–90 seconds rest, and controlled 2–3 second eccentrics. Incorporate one wide-grip set, one close-grip or V-bar set, and conclude with a lighter unilateral or high-rep set to failure for muscular fatigue. Example session: warm-up set of 15 reps with light load, then 3 sets of 8–10 reps wide-grip, 2 sets of 10–12 reps close-grip, and a final drop set of 15–20 reps.
For strength development: use heavier loads for lower reps—4–6 sets of 3–6 reps with 2–3 minutes rest. Prioritize perfect form and longer eccentric control, and avoid training to absolute failure to preserve neural recovery. Combine heavy pulldowns with compound horizontal pulls like bent-over rows on alternate days to develop full-back strength.
Progress by systematically increasing load (2.5–5% increments), adding reps, improving tempo quality, or manipulating volume across weeks. Use periodization: a 4–6 week hypertrophy block followed by a 3–4 week strength block offers balanced development. Track performance metrics like bar position, rep quality, and perceived exertion rather than relying solely on weight numbers, since technique changes can influence effective load.
Maintenance, Safety, and Troubleshooting
Proper maintenance extends the life of any arm pull down machine and enhances user safety. Establish routine inspections to identify wear before it becomes a hazard. Daily or weekly checks should include cables for fraying, pulley bearings for noise or resistance, seat and pad securement, and weight stack pin integrity. Lubricate moving parts according to manufacturer specifications and replace worn cables or pulleys promptly—these components are inexpensive relative to injury risk from failure during use.
Safety protocols include ensuring appropriate signage for proper usage, staff training for spotting and machine adjustments, and clear space around the machine to prevent collisions. For home users, ensure the machine is anchored or weighted adequately to prevent tipping when performing heavy sets or unilateral movements. If the machine makes abnormal noises, binds, or has excessive play in the pulleys, cease use until the issue is resolved. Regular calibration of selectorized stacks and inspection of welds and fasteners solves many common failures.
If troubleshooting is needed, a methodical approach saves time. Isolate the symptom—noisy pulleys often indicate worn bearings or misalignment; jerky motion may be due to cable fraying or contaminated pulleys; inconsistent weight engagement often traces back to damaged weight selector pins or misaligned stacks. Keeping a maintenance log helps track repeated problems and informs decisions on repair versus replacement. For commercial installations, contract servicing agreements reduce downtime and maintain a consistent user experience.
Routine Maintenance Checklist
Create a monthly and yearly maintenance checklist to keep the machine in top condition. Monthly tasks include cleaning sweat and grime from upholstery and metal surfaces, inspecting cables for frays, and checking that bolts and fasteners are tight. Verify that the seat and thigh pads are secure and free of tears that could expose foam to moisture. For selectorized machines, ensure the weight stack moves smoothly and that the selector pin is straight and functioning.
Quarterly or biannual tasks include lubricating pivot points, checking pulley alignment, and replacing worn bushings or bearings. For commercial units in intense-use environments, annual professional inspection by a certified technician is recommended to identify stress fractures, worn components, or hidden corrosion. Maintain spare parts inventory—extra pulley wheels, cable lengths, and pins—to minimize downtime when repairs are required. Document all maintenance tasks in a logbook to track part replacements and service intervals; this record also supports warranty claims if needed.
For home users, a simple checklist accompanied by photos of critical components (cable ends, pulleys, welds) helps monitor gradual wear. Replace cables at the first sign of fraying—do not run them to failure. Use only manufacturer-approved replacement parts when available to preserve safety ratings and mechanical compatibility.
Common Issues and How to Fix Them
Several recurring issues arise with arm pull down machines: frayed cables, noisy or sticking pulleys, misaligned weight stacks, and torn upholstery. Frayed cables are an immediate safety hazard—remove the machine from service and replace the cable before resuming use. Avoid splicing or temporary fixes; cables subject to high load must be replaced with the correct spec stainless steel or nylon-coated replacements to maintain rated capacity.
Noisy pulleys often indicate worn bearings or dirt accumulation. Clean debris from pulleys and lubricate per the manual; if noise persists, replace the bearing or the pulley assembly. If the weight stack binds or skips teeth, check for foreign objects lodged in the guide channels, straighten any bent selector pins, and ensure the stack plates are vertical and not warped. Minor upholstery damage can be patched, but extensive foam or structural damage to seats or pads should prompt replacement to maintain user comfort and hygiene standards.
Always follow manufacturer guidance for torque settings on fasteners and use recommended tools for adjustments. For complex repairs involving welds, frame damage, or electrical components (for motorized units), engage a certified technician to ensure structural integrity and compliance with safety codes. Proactive maintenance prevents most of these common issues and reduces long-term repair costs.
Frequently Asked Questions (12 - 专业 style)
The following FAQs address practical, evidence-based concerns about the arm pull down machine. Each answer provides concise, actionable guidance grounded in strength-training principles and equipment safety.
- Q: What is the safest grip width for beginners on the arm pull down machine? A: For beginners, a shoulder-width to slightly wider-than-shoulder-width pronated grip is safest. This grip balances lat activation and shoulder joint stress, reducing the risk associated with extreme wide grips that can impinge the shoulder. Start with a weight that allows you to maintain scapular retraction and avoid shrugging.
- Q: Can the arm pull down machine replace pull-ups entirely? A: It can serve as an effective substitute for building pulling strength, particularly for those not yet able to perform unassisted pull-ups. However, pull-ups develop specific isometric stabilization and full-body coordination that the machine does not fully replicate. Include both methods in a long-term program for maximal transferability.
- Q: Is behind-the-neck pulldown ever recommended? A: Behind-the-neck pulldowns are generally not recommended due to increased cervical and shoulder stress and higher risk of impingement. Front pulldowns to the upper chest provide a safer and equally effective stimulus for lat development for most individuals.
- Q: How often should cables be replaced? A: Inspect cables regularly; replace them immediately at the first sign of fraying or broken strands. For high-use commercial settings, a scheduled replacement every 2–5 years depending on usage and visual condition is prudent. Never attempt to tape or temporarily repair frayed cables.
- Q: What tempo should I use for hypertrophy on pulldowns? A: A common hypertrophy tempo is 2 seconds concentric, 1 second pause at peak, and 2–3 seconds eccentric. This increases time under tension and supports both muscle fiber recruitment and tendon adaptation while maintaining mechanical control.
- Q: How do I fix a pulldown machine that skips weight plates? A: Skipping indicates alignment or selector-pin issues. Inspect the selector pin for straightness, ensure the pin fully engages plates, and check that the guide rods and plate holes are not deformed. Clean guide rods and verify stack plates move freely; replace damaged components as needed.
- Q: Can pulldown variations help correct muscle imbalances? A: Yes. Single-arm pulldowns and unilateral handles allow targeted work to address asymmetries. Use single-arm sets with controlled tempo and equalized volume on both sides to progressively reduce imbalances while monitoring technique.
- Q: What are good accessory exercises to pair with pulldowns? A: Pair pulldowns with horizontal pulls like seated cable rows or bent-over rows for thickness, face-pulls for rear deltoid and rotator cuff health, and biceps work such as hammer curls for balanced arm development. This combination supports both size and joint health.
- Q: How do I program pulldowns during a deload week? A: During deload weeks, reduce volume by 40–60% and intensity by 10–20%, focus on technique, slow controlled reps, and avoid training to failure. Maintain frequency but reduce set counts and weights to facilitate recovery while preserving movement patterns.
- Q: Are neutral grips better for shoulder health? A: Neutral grips can reduce external rotation demands on the shoulder and are often better tolerated by individuals with shoulder pain. They shift activation slightly toward the lower lats and biceps and are a useful alternative when pronated grips cause discomfort.
- Q: What is the correct breathing pattern during pulldowns? A: Exhale during the concentric pull and inhale during the eccentric return. This breathing rhythm helps maintain intra-abdominal pressure and supports trunk stability without compromising technique.
- Q: How should I maintain a commercial pulldown machine? A: Implement a maintenance schedule that includes daily visual checks, weekly cleaning of contact surfaces, monthly inspection of cables and pulleys, quarterly lubrication of moving parts, and annual professional servicing. Keep a maintenance log and replace worn parts promptly to minimize downtime and safety risks.