
Complete Guide to Fitness Equipment: Mastering the Lying Pull Down
Overview of Fitness Equipment: Types, Uses, and Practical Applications
Fitness equipment spans a broad range of machines, free weights, functional tools, and accessories designed to support specific training goals such as strength, hypertrophy, endurance, mobility, and rehabilitation. Understanding the categories and intended uses of equipment helps you make informed purchases, structure effective workouts, and prevent injury. In commercial gyms you'll see specialized machines for isolation work, multi-station rigs for compound lifts, and a variety of cardio solutions. For home gyms, the focus tends to be on versatility, space efficiency, and cost-effectiveness.
Different equipment types serve different physiological demands. Free weights like barbells and dumbbells require greater stability and recruit stabilizer muscles, enhancing functional strength. Machines and cable systems reduce stabilization requirements and can isolate specific muscles, which is useful for bodybuilding or rehabilitation. Functional trainers and suspension systems encourage multiplanar movements and core engagement, bridging the gap between machine precision and free-weight adaptability. Recognizing the strengths and limitations of each type allows athletes, coaches, and recreational lifters to select tools that align with their programming needs.
From an application perspective, equipment selection should be driven by the training objective. If the goal is maximal strength, prioritize barbells and a rack. For hypertrophy, free weights plus machines and cables offer controlled progressive overload. Cardio machines—treadmills, rowers, bikes—provide measurable metrics for aerobic conditioning. For rehabilitation or beginners, low-impact machines and adjustable resistance bands offer progressive progression with reduced injury risk. Assessing user experience, available space, budget, and safety requirements ensures you choose appropriate equipment for the intended training environment.
Strength Training Machines vs Free Weights
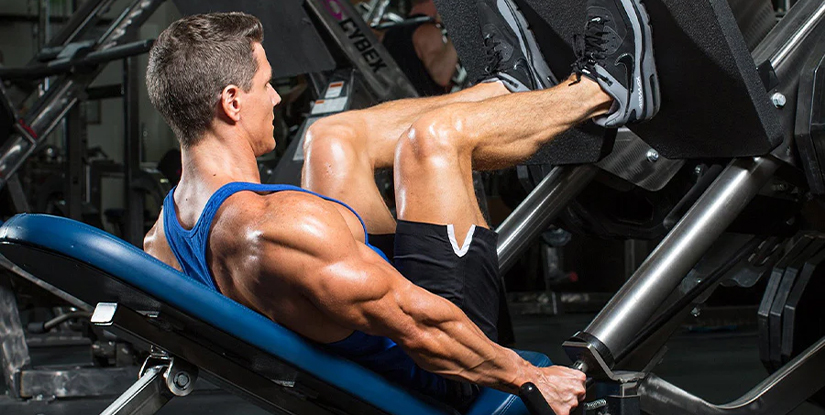
Strength training equipment falls broadly into two camps: machines and free weights. Machines include selectorized weight stacks, plate-loaded machines, and plate-based plate carriers. They constrain motion to a guided path, reduce the need for balance, and often include built-in safety measures. Machines are exceptionally useful for isolating muscles, assisting in technique learning, and providing safer heavy sets without a spotter. However, machines can limit functional range of motion and may not replicate sport-specific movement patterns.
Free weights—barbells, kettlebells, dumbbells, and plates—impose higher stabilization demands and promote intermuscular coordination. They tend to elicit greater core activation and mimic real-world movements, making them excellent for athletic development. Free-weight training requires more skill and attention to technique and generally a safer setup (power racks, spotters) when lifting heavy. For many trainees, an optimal program blends both modalities: compound free-weight lifts for strength and functional capacity, supplemented by machines for control and targeted muscle development.
When deciding between the two, consider the user profile. Novices can benefit from machine-led initial phases to build confidence and basic strength. Intermediate and advanced lifters will often rely on free weights for progressive overload and transfer to performance tasks. Gyms and home setups that incorporate both types yield the most versatile training environments.
Cardio Equipment and Hybrid Machines
Cardio equipment traditionally includes treadmills, stationary bikes, elliptical trainers, and rowing machines. Each modality emphasizes different muscle groups and energy systems. Treadmills are ideal for running-specific training, offering precise pace and incline control. Rowers provide a full-body, low-impact stimulus beneficial for both aerobic conditioning and calorie expenditure. Bikes—indoor trainers and spin bikes—target lower-body endurance with lower impact stress on joints, making them a staple for rehabilitation and high-volume conditioning.
Hybrid machines and functional trainers blend resistance and cardiovascular elements. Examples include air bikes, SkiErgs, and certain cable-based circuits that permit high-intensity interval training (HIIT) and metabolic conditioning. These hybrids are valuable in time-efficient programs because they combine strength and conditioning benefits. For gyms or home setups prioritizing versatility, selecting equipment with cross-modality uses expands training options without requiring excessive floor space.
When integrating cardio and hybrid equipment, consider metrics and connectivity. Many modern machines provide power outputs, heart rate compatibility, and programmable workouts, enabling objective progression tracking. For users focused on performance, these metrics help quantify workload and recovery needs; for general fitness, they improve adherence through structured sessions and measurable goals.
The Lying Pull Down: Technique, Muscular Benefits, and Use Cases
The lying pull down is a variant of the lat pulldown that places the athlete in a supine position—often on a bench or specialized bench attachment—while pulling a bar or handle toward the chest or torso. This modification shifts biomechanical demands: the lifter's torso is stabilized against the bench, reducing lower-back involvement and altering the angle of pull to better isolate the latissimus dorsi, teres major, rhomboids, and posterior deltoids. The lying pull down is particularly useful for lifters who have difficulty maintaining an upright torso or who experience lumbar strain during seated pull-downs.
Biomechanically, the lying position changes scapular mechanics: retraction and depression occur more readily when the chest is supported, which can enhance motor control of scapular stabilizers. For trainees recovering from lower-back injuries, the lying pull down allows the execution of a vertical-pull movement pattern with reduced spinal loading. Athletes seeking greater strictness in lat engagement can use this variation to limit momentum and minimize lower-body drive often used during standing variations.
Use cases for the lying pull down include rehabilitation protocols, prehab and accessory work for athletes focusing on shoulder girdle stability, and bodybuilding routines that prioritize lat isolation. It is also a valuable option for older adults or those with limited core stability who need a supported pulling exercise. When integrating the lying pull down into programming, consider it as an accessory to heavy compound pulling movements like pull-ups, rows, and deadlifts, rather than a primary maximal strength lift.
Correct Form and Common Mistakes
Performing the lying pull down correctly starts with setup. Lie flat on a bench positioned beneath the pulldown cable or bar. Your head should be near the anchor point so the bar travels in a natural arc. Grip the bar slightly wider than shoulder-width with a pronated or neutral grip, depending on targeted muscles. Engage the lats by initiating a scapular depression and retraction before bending the elbows—think pull the shoulder blades down and back. Pull the bar to the upper chest or sternum with controlled tempo, exhaling on the concentric phase and inhaling on the return.
Common mistakes include using excessive momentum, arching the lumbar spine, letting the elbows flare excessively, and initiating the movement with the forearms rather than the scapulae. Momentum compromises lat activation and increases injury risk. Arching the lower back defeats the supported intent of the variation. To correct these issues, reduce load, focus on a two-second eccentric and one-second concentric cadence, and pause briefly at peak contraction to reinforce mind-muscle connection. Practicing scapular pull-downs and band-assisted lat activation drills can help lifters cue proper mechanics.
Other technique notes: ensure full range of motion without shrugging the shoulders toward the ears, maintain neutral neck alignment, and avoid locking the elbows at the bottom of the eccentric phase. If grip strength limits performance, use straps or switch to neutral handles. For beginners, start with light resistance and higher volume to ingrain movement patterns before progressing intensity.
Variations and Progressions
The lying pull down admits several useful variations to target different muscular emphases and accommodate equipment constraints. Variations include wide-grip lying pull downs to emphasize the outer lats, close-grip or V-bar pulls to target the lower lats and biceps, and single-arm lying pull downs using a single cable handle to address unilateral imbalances. Reverse-grip lying pull downs shift emphasis to the biceps and lower lat fibers. Changing grip width and hand orientation adjusts leverage and muscle recruitment patterns.
Progressions can be structured around load, volume, tempo, and instability. Once form is established, increase resistance in small increments while maintaining controlled tempo. Implement paused reps at peak contraction to enhance tension time, or use slow eccentrics (3-4 seconds) to promote muscle damage and hypertrophy. For advanced trainees, cluster sets or rest-pause techniques allow higher intensity with preserved technique. Incorporating lying pull downs into superset protocols with rowing movements can enhance metabolic stress and posterior chain development.
Alternative progressions include transitioning to supported seated pulldowns or incorporating eccentric-overload by using a partner to help concentric movement and slowly resisting the eccentric. For home gym users without a cable tower, lying pull downs can be simulated with resistance bands anchored overhead, though tension curves and stability differ from cable systems. Always prioritize movement quality when increasing difficulty to prevent compensatory patterns.
Choosing the Right Equipment: Matching the Lying Pull Down and Related Tools to Your Needs
Selecting equipment for exercises like the lying pull down requires considering versatility, footprint, build quality, and the specific accessories needed to perform the movement safely. In commercial settings, integrated cable towers with adjustable pulleys and a flat bench or adjustable decline bench create an ideal setup. For home gyms, modular functional trainers that include a low pulley and a bench, or a dedicated lat pulldown station with bench attachment, provide the most straightforward solution. When space or budget is limited, resistance bands and a sturdy anchor point can approximate the movement, although they change resistance profiles and feel.
Material and construction matter: look for commercial-grade steel frames, sealed bearings in pulley systems, and durable nylon-coated cables for longevity. Bench quality is equally important—choose pads with sufficient density to prevent bottoming out and frames with stable bases to avoid movement during heavy sets. For users who need to load plates, ensure the machine accepts standard or Olympic-width plates as required. Adjustable components, such as height-variable pulleys and multi-grip bars, increase exercise variety and long-term value.
Accessory selection influences usability. Wide-grip bars, neutral handles, V-bars, and single-hand D-handles each provide distinct muscle emphases. If wrist or shoulder issues are present, neutral handles reduce strain. For those aiming to lift heavy without a spotter, look for machines with safety catches and pin-lock adjustments. Also examine warranty specifics for cables, pulleys, and frames—longer warranties generally indicate manufacturer confidence in durability.
Key Features to Look For
When evaluating pulley systems and pulldown stations for the lying pull down, prioritize smooth, low-friction pulleys to maintain consistent resistance across the range of motion. Ball-bearing pulleys provide smoother cable travel compared to bushing systems. Look for a cable rated well above expected loads—this improves safety and reduces stretch over time. Adjustable pulley heights and multiple handgrip options increase exercise versatility, letting you perform wide, narrow, neutral, and unilateral variations effectively.
Bench considerations are equally important. A stable bench with non-slip footing and adequately dense padding ensures body support without instability. If purchasing a decline or adjustable bench, confirm the degree of decline suits your setup and that adjustment mechanisms are easy to operate and lock securely. For home setups, foldable benches that lock firmly can save space without compromising safety.
Other practical features include integrated weight storage, plate compatibility, and built-in cable guides to reduce wear. For users who value data and progression tracking, look for machines compatible with digital resistance systems or with metric readouts that record load, reps, and time. These elements enhance training precision and user engagement.
Budgeting, Space, and Safety Considerations
Budget and space constraints often dictate equipment choices. For limited budgets, prioritize multi-functional pieces—a functional trainer with a bench supports lying pulldowns, rows, presses, and leg work. Mid-range shoppers may opt for a dedicated lat pulldown/low row stack with bench attachment, which balances specialization and cost. High-end users can invest in commercial-grade cable towers with integrated benches and multiple attachments for the broadest exercise selection.
Space planning is critical: measure ceiling height for overhead pulleys and ensure adequate clearance around the bench for full range of motion. Account for the cable arc and bar travel, as well as user entry/exit zones. If floor area is tight, consider compact towers or strap-based systems that anchor overhead with minimal footprint. When installing heavy equipment, secure it to a stable, level surface to prevent rocking or tipping.
Safety considerations include regular inspection of cables and pulleys, confirming that bench pads show no severe wear, and ensuring that pins and adjustment mechanisms function smoothly. For home setups where lifters train alone, choose machines with built-in safety catches and avoid free-weight alternatives for maximal singles unless you have a spotter or power rack with safety arms. Investing in professional assembly and regular maintenance reduces long-term risk and preserves equipment performance.
Maintenance, Safety Protocols, and Programming the Lying Pull Down Effectively
Maintaining cable machines and benches is essential for safe, consistent performance. Scheduled maintenance should include visual inspection of cables for fraying, checking pulley alignment, lubricating moving parts as recommended by the manufacturer, and tightening bolts and fasteners. Replace worn ropes or straps promptly. For cable towers, verify weight stack alignment and inspect guide rods for smooth pin operation. Regularly clean bench pads to preserve material integrity and reduce slip risk.
Safety protocols include educating users on proper setup and hand placement, ensuring weight increments are appropriate for the user's strength level, and using collars or locking mechanisms where plates are part of the system. Clear signage that outlines machine usage and cautions for extremes of motion can reduce misuse. For commercial settings, schedule periodic professional inspections to adhere to liability and warranty requirements. For home users, follow manufacturer maintenance guides and keep a log of any repairs.
Programming the lying pull down requires aligning the exercise with broader training goals. For hypertrophy: use 8–15 rep ranges, multiple sets, and controlled tempo emphasizing time under tension. For strength-endurance: higher reps with shorter rest. For rehabilitation and motor control focus: low load, higher volume, and emphasis on perfect scapular mechanics. Integrate the lying pull down as an accessory after primary compound lifts or as part of a pull-focused day, complementing rows and deadlifts to ensure balanced posterior chain development.
Maintenance and Setup Tips
Start maintenance with a manufacturer-provided checklist. Weekly tasks might include wiping down pads, checking cables visually, and ensuring pulleys spin freely. Monthly checks should tighten bolts, inspect for unusual noises during operation, and verify pin integrity on selectorized stacks. Annual servicing, ideally by a certified technician, should include cable replacement if any fraying is detected and a comprehensive lubrication of moving parts. Keep spare parts like extra cables, pins, and small pulley components accessible for quick repairs.
Correct setup for the lying pull down includes positioning the bench directly beneath the pulley so the bar follows a straight arc to the chest. Verify the bench alignment visually and perform a test rep with minimal weight to ensure the bar path doesn't contact the bench frame or ceiling fixtures. Use rubberized or textured bench covers to prevent slipping, and maintain a clear floor area to avoid tripping hazards. If multiple users share equipment, provide adjustable markers for common setups to speed transitions and reduce setup errors.
When switching grips and attachments, inspect carabiners and attachment points for wear. Replace any metal hardware showing deformation. If using bands as an alternative, check for micro-tears and replace bands periodically according to manufacturer recommendations, as bands degrade faster than steel cables.
Integrating Lying Pull Down into Training Programs
Designing a program around the lying pull down depends on training phase and objectives. For a beginner program, include lying pull downs twice weekly as part of a full-body routine, using 3 sets of 8–12 reps to build baseline lat strength and improve scapular control. For intermediate lifters, place the lying pull down as a secondary movement after compound pulls, performing 3–5 sets of 6–12 reps focusing on contraction and tempo control to increase hypertrophy and muscular endurance.
Advanced lifters can use the lying pull down for targeted accessory work—addressing weak points such as scapular depression or lat width. Strategies include pre-exhausting the lats with higher-rep lying pull downs before rows or using heavy single-arm variants to correct unilateral imbalances. Periodize intensity through blocks: hypertrophy phases emphasize higher volume and moderate loads, while strength blocks reduce reps and increase load while preserving technique through lowered amplitude or tempo modifications.
Track progress using objective metrics: weekly tonnage (sets x reps x load), peak contraction hold times, and subjective ratings of perceived exertion to adjust recovery. Incorporate deloads and mobility-focused sessions to maintain shoulder health, and complement pulling days with posterior chain work—face pulls, band pull-aparts, and prone Y/T/Ws—to support scapular mechanics and balance anterior shoulder demands.
FAQs
Q: What is the primary benefit of the lying pull down compared to seated pulldowns? A: The lying pull down provides enhanced torso support, reduces lumbar involvement, and improves scapular control, making it suitable for isolation of the lats and users with lower-back concerns.
Q: How should I set up the bench for a lying pull down? A: Position a flat or slight decline bench directly beneath the pulley so the bar path connects to the upper chest; perform a light test rep to confirm alignment and ensure head placement allows natural bar travel.
Q: Can I perform lying pull downs with resistance bands? A: Yes—anchor bands overhead and lie on a bench, but note bands alter the resistance curve and may change muscle activation; focus on control and consistent tension.
Q: What grip variations are most effective? A: Wide pronated grips emphasize outer lats, neutral grips target mid-lat and scapular stabilizers, and close or supinated grips increase lower-lat and biceps involvement. Choose based on desired emphasis.
Q: How often should I include lying pull downs in my program? A: For most trainees, 1–3 sessions per week is effective—use frequency according to recovery, overall volume, and training phase (higher during hypertrophy blocks).
Q: What common mistakes reduce the effectiveness of this exercise? A: Overloading, using momentum, arching the lumbar spine, and initiating the pull with the arms rather than the scapulae are common faults that reduce isolation and increase injury risk.
Q: Are lying pull downs safe for those with shoulder injuries? A: They can be, if performed with controlled range of motion, light loads, and appropriate grip selection; consult a physical therapist for individualized recommendations and start with pain-free ROM.
Q: How do I progress strength on the lying pull down? A: Progress via incremental load increases, manipulating tempo (slower eccentrics), adding paused contractions, and increasing weekly volume systematically while monitoring recovery.
Q: What equipment should I prioritize for a home setup that supports lying pull downs? A: A sturdy adjustable bench and a cable tower or functional trainer with overhead pulley are ideal; if space is limited, use high-quality resistance bands with a secure overhead anchor.
Q: How do I maintain a cable pulldown machine? A: Regularly inspect cables for frays, lubricate pulleys per manufacturer instructions, tighten fasteners, and replace worn components promptly to ensure safe operation.
Q: Can lying pull downs replace pull-ups in a routine? A: They are a valuable complement but not a complete replacement—pull-ups offer greater core demand and functional carryover; use lying pull downs as an accessory or regression for those building pull-up strength.