
DIY Tricep Pulldown: Design, Build, and Train Safely at Home
Understanding the DIY Tricep Pulldown: Purpose, Benefits, and Risks
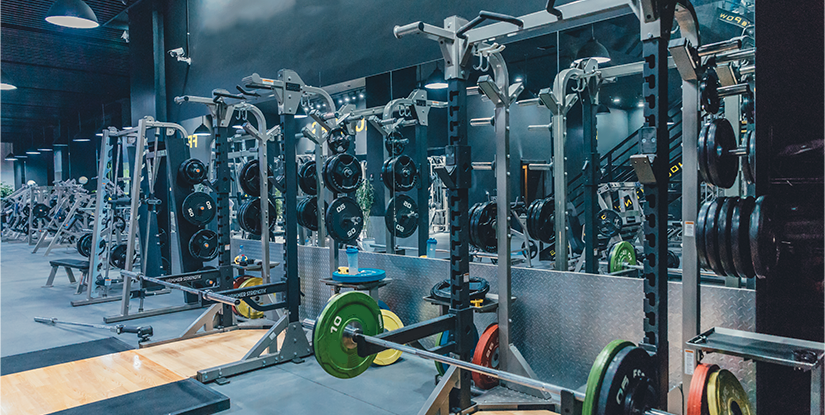
A DIY tricep pulldown is a homemade cable-based solution that replicates the vertical cable pulldown movement used to isolate the triceps, particularly the long head. For people building home gyms on a budget or with limited space, a well-designed DIY pulldown station can provide targeted upper-arm training without the cost or footprint of a commercial machine. Understanding the movement mechanics, the muscular emphasis, and the safety trade-offs is the first step toward a successful DIY project.
This section explains the exercise purpose, the benefits of a DIY approach, and the potential risks. It covers how a pulley-based system differs from free-weight tricep work and when a DIY pulldown is appropriate versus investing in a commercial machine or choosing alternative exercises.
Muscles Targeted and Biomechanics
The tricep pulldown primarily targets the triceps brachii, with particular emphasis on the long head when using a straight-bar or rope attachment and an overhead line of pull. The triceps have three heads: long, lateral, and medial. A vertical pulldown movement with the elbow extending against resistance from above increases long-head activation because the shoulder is flexed, placing that head under tension.
Biomechanically, the pulldown offers a consistent line of tension throughout the range of motion when properly rigged. Unlike free-weight skull crushers, a cable or pulley provides near-constant resistance, which can reduce sticking points and allow for smoother eccentric control. This makes it useful for hypertrophy-focused work, high-volume sets, and controlled tempo training. Key cues include keeping the elbows tucked, avoiding forward shoulder movement, and fully extending the elbow without locking out aggressively to maintain tension in the muscle rather than stressing the joint.
Advantages and Limitations of a DIY System
The advantages of a DIY tricep pulldown include cost efficiency, customization, and adaptability. You can tailor the height, pulley placement, and handle options to the user and available space. DIY rigs can use existing squat rack uprights, door anchors, or a dedicated frame with pulleys and carabiners. They also enable you to experiment with variations such as single-arm pulldowns or different attachment types without buying multiple machines.
However, limitations and risks must be acknowledged. DIY systems can fail if components are underspecified: cheap pulleys, thin cables, or poor anchor points can lead to sudden failure and injury. There is also the issue of load increments; many DIY systems rely on free weights or resistance bands which change the resistance curve. Additionally, precise weight stacks and safety catches found on commercial machines are harder to replicate, so attention to secure attachment, redundancy, and regular inspection is crucial. Users should weigh these trade-offs and follow engineering and safety best practices when building and using a DIY tricep pulldown.
Designing and Building a Safe DIY Tricep Pulldown Station
Designing a DIY tricep pulldown involves selecting appropriate materials, calculating load capacities, and planning for safety redundancies. A successful design balances functionality with secure anchoring and ease of adjustment. This section outlines core design choices and provides actionable advice to ensure your build supports the intended loads and movements safely over time.
Before buying parts, evaluate the intended loads, user weight, and training style (e.g., heavy low-rep strength vs. high-rep hypertrophy). Decide whether the system will attach to an existing structure (squat rack, beam, wall) or require a freestanding frame. Anchor choice is the single most important factor for safety: using structural-grade hardware and rated components reduces the chance of catastrophic failure.
Materials and Tools: What You Need and Why
Select materials and hardware rated above your maximum expected load. Recommended components include a high-quality steel pulley rated for at least 1,000 lbs (to include a safety margin), a 5/16" or 3/8" stainless steel cable with swaged ends rated for similar loads, and plated steel carabiners and quick links rated for working loads. If using rope, choose braided nylon with a high breaking strength and use proper splicing or hardware. For frame material, 11- or 12-gauge rectangular steel tubing provides good stiffness with reasonable cost; alternatively, a heavy-duty wooden beam (properly reinforced) can work but requires conservative load ratings.
Tools typically include a drill with metal bits, an angle grinder or hacksaw for cutting metal, a torque wrench for tightening bolts to spec, and swaging tools if you plan to make custom cable terminations. Safety gear—safety glasses, gloves, and hearing protection—is essential. Finally, consider using commercial-grade pulley kits sold for home gyms, which bundle pulleys, cables, and hardware with clear load ratings, minimizing guesswork.
Mechanical Considerations: Pulley Placement, Cable Routing, and Weight Options
Pulley placement dictates the line of pull and thus the movement pattern. For a tricep pulldown, the pulley should be placed overhead or behind a slightly elevated anchor point to maintain vertical or near-vertical tension when standing. Use smooth idler pulleys to reduce friction and preserve resistance consistency. Routing the cable should avoid sharp bends—use additional guide pulleys if required to maintain a smooth arc.
Consider weight-loading options: you can attach a free-weight loading pin for plates, use a selectorized weight stack if repurposing parts from an old machine, or pair the pulley with heavy resistance bands for variable tension. Each option changes the feel of the exercise: plates provide linear resistance, bands increase resistance toward the top of the movement, and weight stacks offer quick increments. Factor in safety stops or catch mechanisms if plates are used, such as a travel-limiting pin or secondary strap to prevent the weight from dropping suddenly. Finally, always include redundancy for critical connections—use two independent carabiners or a secondary safety line to catch the load in case of primary failure.
Step-by-Step Construction and Installation
Constructing a DIY tricep pulldown requires careful sequencing: preparing the anchor, assembling the pulley system, terminating cables, and conducting load tests. Follow a systematic approach and verify each component against its rated capacity before adding weight. This section provides a detailed assembly checklist, practical tips for attachment, and a testing protocol to certify the system before use.
Work methodically: assemble the frame or anchor first, then install pulleys and routing hardware, terminate the cable, and attach a handle. Avoid skipping the testing phase—many failures occur due to improper termination or overlooked weak points rather than the pulley or cable itself.
Assembly Steps: From Anchor to Handle
1. Prepare the anchor: If attaching to a squat rack, use bolted mounting plates or manufacturer-rated attachment points. For wall or beam mounting, use lag bolts into structural studs or engineered beam flanges; avoid drywall anchors. Ensure mounting hardware is rated for more than your max working load.
2. Install pulleys: Mount the top pulley securely with a shackle or thick bolt. If using a free-standing frame, weld or bolt a cross-beam with gussets to resist bending. Place any intermediate guide pulleys to achieve the desired cable path, maintaining smooth angles.
3. Terminate cable: Use swaged fittings or mechanical clamps rated for cable. Thread the cable through pulleys, attach to the weight carriage or loading pin, and secure with proper thimbles and clips. For rope-based systems, splice loops and reinforce with whipping or protective sleeves at contact points.
4. Attach handle and safety features: Choose a straight bar, V-bar, or rope and use a locking carabiner. Add secondary safety straps or a stopper to limit travel. Label the system with max recommended load and inspection dates.
Testing and Adjustments: Load Testing and Regular Inspections
Never train on a fresh build without conducting progressive load tests. Start with no load and run the cable through its full travel 50–100 cycles to seat hardware. Incrementally add weight in 10–20% steps to about 150% of your intended working load; if using bands, apply equivalent tensile loads. Observe for deformation, excessive wobble, or unusual noise. If any component shows strain, stop and reinforce the system.
Establish a maintenance routine: visually inspect cables for fraying, pulleys for groove wear, carabiners for corrosion, and bolts for looseness before every session. Perform a detailed inspection monthly and log findings. Replace worn cables immediately—do not attempt field repairs with knots or improvised clamps. Keep a spare cable and spare carabiners on hand for quick replacement to minimize downtime while maintaining safety.
Programming and Using Your DIY Tricep Pulldown Effectively
Once your DIY tricep pulldown is built and tested, programming becomes the focus. Proper technique, exercise variations, set and rep ranges, and progression strategies will determine whether your setup improves strength and hypertrophy. This section covers movement fundamentals, common variations, and practical programming templates for different goals.
Training safely on a DIY system also means managing load progression and recovery. Because cable systems offer constant tension, they can be particularly effective for controlled eccentrics and high-volume sets. However, pay attention to joint health and avoid abrupt heavy lockouts; use tempo and partial ranges where appropriate to build strength gradually.
Exercise Variations and Technique Cues
Common variations on the tricep pulldown include: straight-bar pulldowns (emphasize overall triceps), rope pulldowns (increase long-head and lateral-head engagement with external rotation), single-arm pulldowns (address imbalances), reverse-grip pulldowns (shift emphasis toward the medial head), and overhead cable extensions if the pulley can be adjusted behind the user. Select attachments based on comfort, elbow strain, and training goals.
Key technique cues: keep the torso upright without excessive forward lean; tuck elbows to isolate the triceps and avoid substituting shoulder extension; drive the elbows downward and slightly backward rather than pushing the bar with the hands; control the eccentric on the way up to maintain tension. For full range, stop just short of a hard elbow lockout to keep constant tension on the muscle and protect the joint. Use slow eccentric tempos (e.g., 3–4 seconds) for hypertrophy emphasis and explosive concentric reps for power work.
Sample Training Programs and Progression Strategies
Hypertrophy-focused program: 3–4 sets of 8–15 reps with a 2–3 second concentric and 3–4 second eccentric tempo. Use a moderate load that reaches near-failure on the last set. Incorporate drop sets or rest-pause sets every 8–12 workouts to stimulate adaptation. Train triceps 2x per week, pairing with pushing movements like bench press and overhead press.
Strength-focused program: 4–6 sets of 4–6 reps with heavier loads using controlled three-second eccentrics and aggressive but safe concentric effort. Use single-arm variations to eliminate weakness imbalances and include low-volume heavy sessions once per week. Progress by small load increases (2.5–5 lbs) or by adding a rep each session until you cycle down for recovery.
Rehabilitation and joint-friendly approach: prioritize high-rep low-load work (3–4 sets of 15–25 reps) focusing on perfect form and controlled tempo. Use rope attachments and shallow ranges to reduce peak elbow stress. Incorporate mobility work and monitor elbow pain; if pain occurs, reduce load and consult a professional.
Frequently Asked Questions
This FAQ section answers eight common, practical questions about building, using, and maintaining a DIY tricep pulldown system. Each answer provides actionable guidance and clarifies safety and programming concerns for home gym users.
1. Is a DIY tricep pulldown safe to build at home?
Yes, a DIY tricep pulldown can be safe if you follow conservative engineering principles and use rated hardware. The most important safety factors are selecting pulleys and cables rated well above your expected maximum load, anchoring into structural members (not drywall), and including redundancy in critical connections. Conduct progressive load testing before use, and inspect components regularly for wear. If you lack mechanical experience, consider purchasing a pre-made pulley kit or consulting a qualified fabricator. Never improvise with household rope or weak hardware—failure of these components causes sudden load release and risk of injury.
2. What pulley and cable specifications should I choose?
Choose a pulley with sealed bearings and a working-load limit of at least 1,000 lbs to provide a safety margin. For cables, stainless steel aircraft cable in 5/16" or 3/8" diameter with swaged end fittings rated similarly is a common choice. Use stainless or galvanized hardware to prevent corrosion. If using rope, select high-strength braided nylon and terminate with spliced loops and thimbles, but cable is generally more durable and resistant to abrasion. Pay attention to pulley groove size to match cable diameter to prevent slippage and abrasion.
3. Can I use resistance bands instead of weights with a DIY pulley?
Yes, resistance bands can be integrated with a pulley to provide variable tension and reduce the need for heavy plates or a weight stack. Bands are lighter and portable, but they change the resistance curve—tension increases as the band stretches. This can be advantageous for accommodating sets and reducing joint stress at the start of the movement. Anchor the band securely and consider doubling or tripling bands to reach desired resistance. Inspect bands for wear or micro-tears regularly and replace them at the first sign of degradation to avoid rupture under load.
4. How do I avoid elbow pain while using the pulldown?
Elbow pain often stems from poor technique, excessive load, or abrupt lockout at the top of the movement. Keep elbows tucked, use a controlled eccentric, and avoid forceful hyperextension. Choose attachments and grip widths that feel comfortable—ropes often allow a more natural wrist rotation that reduces strain. Reduce load and increase reps if pain begins; add forearm mobility and eccentric-focused conditioning gradually. If pain persists despite conservative adjustments, stop and consult a qualified medical professional.
5. What attachments work best for tricep pulldowns?
Common attachments include a V-bar, straight bar, rope, and single-hand handles. Ropes allow a greater range of motion and external rotation at the end of the movement, increasing lateral head activation. Straight bars are more stable and useful for heavier loads. Single-handle attachments enable unilateral work to address strength imbalances. Choose an attachment that suits your comfort and the training stimulus you want; having two or three options expands programming versatility.
6. How often should I train triceps using the pulldown?
Frequency depends on goals: for hypertrophy, train triceps 2 times per week to provide sufficient stimulus and recovery. For strength-focused protocols, 1–2 heavy sessions per week with accessory volume is typical. Monitor recovery—if triceps remain sore for prolonged periods or performance stalls, reduce frequency or adjust volume. Pair pulldown sessions with chest or shoulder days thoughtfully to avoid overworking pressing patterns in a single microcycle.
7. What are common failure points to inspect regularly?
Inspect cable ends for fraying, pulley grooves for sharp wear, carabiners and shackles for deformation, mounting bolts for loosening, and frames for cracks or movement. Also check welded joints if applicable. Perform a quick visual inspection before each session and a hands-on detailed inspection monthly. Replace components at the first sign of fatigue—preventive replacement is cheaper and safer than repairing after failure.
8. Can a DIY pulldown replace commercial machines for good results?
A properly designed DIY pulldown can match the function of commercial machines for tricep work and yield excellent results when paired with sound programming. While commercial machines provide refined ergonomics and integrated safety features, a DIY solution offers customization and cost savings. The trade-off is the need for careful engineering and ongoing maintenance. If you prioritize convenience and maximum adjustability, a commercial machine may still be preferable; for flexible, budget-conscious lifters, a DIY system is a viable and effective alternative.