
Dual-Station Performance: How a Power Rack and Functional Trainer Unlock Complete Strength, Mobility, and Space Efficiency
Why pairing a power rack and functional trainer delivers full-spectrum strength and mobility
Combining a power rack and functional trainer creates a single, highly versatile station that covers heavy barbell strength, unilateral cable work, and targeted mobility. A power rack provides the mechanical safety and stability required for maximal compound lifts — squats, bench, deadlift variations — while a functional trainer (dual adjustable pulley) supplies constant tension, multi-angle rows, anti-rotation training and precise accessory movements. Together they reduce equipment redundancy: instead of separate machines for lat pulldowns, cable crossovers, and smith-bar alternatives, a dual-station setup handles these tasks with a smaller footprint and higher programming flexibility.
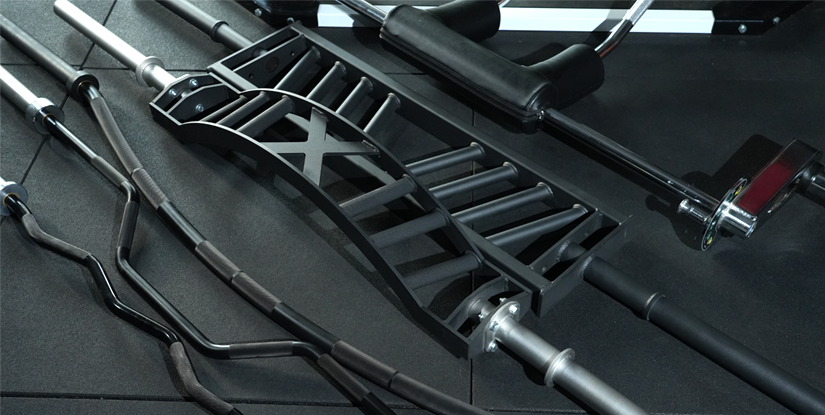
Key equipment specs and practical ranges to evaluate when choosing units: typical commercial-grade power racks list load capacities between 800–2000 lb (360–900 kg) depending on tubing and welds; look for 11–3 gauge steel and 3x3" uprights for heavy lifting. Functional trainers often provide 200–300 lb (90–140 kg) per stack or less in cable-based resistance; select units with adjustable ratio pulleys and 10–1:1 pulley ratios for precision. Footprint benefits: a combined dual-station can replace multiple single-purpose machines and save 30–60% of floor area compared to equivalent setups in boutiques, depending on model and storage choices.
Integration workflow — a repeatable session template that uses both stations efficiently:
- 1. Warm-up (6–10 minutes): low-load cable rotations, banded T-spine mobility using the functional trainer.
- 2. Primary strength (20–30 minutes): heavy compound barbell work in the power rack — squats or bench at 75–90% 1RM with spotter arms or safeties set to appropriate depth.
- 3. Secondary strength/hypertrophy (12–20 minutes): unilateral cable single-arm rows, split-squat variations, anti-rotation chops on the functional trainer at controlled tempos.
- 4. Accessory & mobility (8–12 minutes): triceps pushdowns, face pulls, and loaded stretches across both stations.
Real-world application: for a small-group training studio, the combined station supports both heavy strength days and high-rep metabolic classes by quickly swapping between barbell and cable-based stations, improving throughput and class variety. Practical tip: map out quick-change workflows (barbell → cable swap in under 90 seconds) with marked storage positions for bars, collars, and handles to minimize downtime.
Strength progression protocols: sample 12-week plan using both stations
This 12-week plan balances heavy barbell progression inside the power rack with accessory and mobility work on the functional trainer. It's organized in three 4-week blocks: accumulate (weeks 1–4), intensify (weeks 5–8), and peak/convert (weeks 9–12). Progression rules: increase load by 2.5–5% when target reps are met for two consecutive sessions; drop 10% and add 2–3 reps for autoregulation if a session fails.
Sample weekly split (4 days):
- Day A — Heavy lower: Rack back squat 4x5 @75–85% 1RM; Romanian deadlift 3x6; Cable single-leg RDL 3x8 each side.
- Day B — Push: Rack bench press 5x5 @70–80% 1RM; Overhead cable press 3x10; Triceps pushdown 3x12.
- Day C — Pull: Rack deadlift variations (block pulls or deficit) 3x3–5 depending on phase; Cable rows 4x8; Face pulls 4x12.
- Day D — Full-body metabolic/conditioning: Complex of barbell + cable circuits (e.g., 5 rounds of 6 RDL + 10 cable chops + 12 goblet squats) focusing on tempo and minimal rest.
Practical setup, programming, and best practices for installation, safety, and maintenance
Installation and placement are critical. Required clearances: allow at least 36–48" (90–120 cm) in front of the rack for bar path and walk-around room, and 24–36" (60–90 cm) on each side for handle and storage access. Ceiling height: for Olympic lifting and full standing presses you want 8–9 ft (2.4–2.7 m) minimum; power racks with pull-up rigs can require higher ceilings if adding kipping or muscle-up work. Use 3/4" rubber flooring with interlocking tiles under the rack area and a thicker 1" or 3/4" deadlift platform where dropping loads may occur.
Anchoring and safety: many racks are stable without bolting on level concrete floors, but if you have tile or raised gym floors bolt or use heavy-duty floor anchors per manufacturer specs. For functional trainers, check rated anchor bolts for the pulley towers and verify cable assembly torque specs. Safety accessories to add immediately: spotter arms, safety pins rated to at least 1.5x your projected working loads, and multi-grip pull-up attachments for varied lat stimulus.
Programming best practices:
- Pair heavy barbell movements with light-to-moderate cable accessory work in the same session to reduce cumulative CNS fatigue while maintaining hypertrophic volume.
- Use the trainer for prehabilitation: 3–4 sets of 8–15 slow-tempo face pulls, banded external rotation and single-leg cable work 2–3 times weekly.
- Scale for beginners with technique-first phases: 4–6 weeks of lower intensities (50–65% 1RM equivalents) emphasizing tempo control on cables and movement patterns inside the rack.
Maintenance checklist (actionable):
- Weekly: wipe down cables and pulleys after use, inspect cables for fray, check bolts for visible loosening.
- Monthly: lubricate guide rods and grease pin-lock areas, check pulley bearings and replace any noisy pulleys.
- Annual: full torque check of frame bolts, replace high-wear handles and swapping cables after manufacturer time recommendations (commonly 3–5 years depending on usage).
Space-efficient layout and visual elements
Design a compact floorplan: position the power rack along a long wall with the functional trainer adjacent or attached (many modular systems bolt together). Minimum recommended overall footprint for a combined station is about 8' x 6' (2.4 x 1.8 m) for solo training; allocate 10' x 8' (3 x 2.4 m) if you expect partner spotting, movement flow, or storage of multiple bars and plates. Visual elements to include in photos and shop pages: a labeled floorplan diagram (showing clearances, cable travel arcs, and storage hooks), annotated close-ups of pulley ratios and steel gauge, and before/after usage photos demonstrating space saved compared to single-purpose machines.
Lighting and mirrors: install diffuse overhead lighting to reduce glare off metal and a full-length mirror positioned so athletes can monitor bar path and torso angle during squats and presses. Suggested storage: vertical plate trees and horizontal bar arms integrated into or adjacent to the rack to maintain quick-change efficiency. For boutiques: add signage with programming cues and quick-swap labels to speed transitions between barbell-heavy sets and cable-based superset stations.
FAQs
What are the primary benefits of combining a power rack and functional trainer?
Combining them provides maximal-load capability with the rack and multi-planar, constant-tension accessory work with the trainer. This enables complete programming from strength to mobility while saving floor space and increasing session variety.
Is a combined station suitable for beginners?
Yes — beginners benefit from learning barbell safety in the rack and using cables for movement quality. Start with technique-focused weeks (50–65% intensities), prioritize tempo and joint control, and progress load as form solidifies.
How much space do I need for a dual station?
Minimum functional footprint ~8' x 6' (2.4 x 1.8 m); recommended 10' x 8' (3 x 2.4 m) for comfortable use, barbell changes and partner spotting. Allow at least 8–9 ft ceiling for overhead lifts.
What are safe load and pulley specs to look for?
Choose racks with 11–3 or 11-gauge steel and 3x3" uprights for heavy lifting (800–2000 lb ratings). Functional trainers with 200–300 lb stacks per side and low-friction pulleys with rated cable assemblies are ideal for progressive accessory loading.
How should I program strength vs. accessory work?
Do heavy compound lifts first in the session within the rack, then use the functional trainer for unilateral work, corrective movements, and higher-volume hypertrophy. Use a 2–4 day split with autoregulation rules for progression.
Can a combined station replace separate cardio or conditioning machines?
Not entirely — it replaces many resistance machines and supports metabolic circuits, but dedicated cardio (rower, bike) still has unique benefits. Incorporate short barbell+ cable complexes for conditioning if space limits adding cardio machines.
What maintenance does a functional trainer require?
Regular inspections: weekly wipe down, monthly pulley and cable checks, annual torque and cable replacement per manufacturer guidance. Address any fraying cable immediately to avoid failure.
Should I bolt the rack to the floor?
On level concrete, many heavy racks are stable unbolted; bolt if using raised floors, tile, or if you need permanent anchoring for heavy dynamic lifts. Follow manufacturer anchor recommendations.
How does this setup support rehabilitation and mobility?
The trainer enables controlled, high-rep eccentric work, anti-rotation drills, and progressive ROM-loaded stretches; combine with rack-based tempo lifts to restore strength while protecting tissues.
What accessories should I buy first?
Start with high-quality Olympic bar, calibrated plates, safety spotter arms, a set of handle attachments (D-handle, triceps rope), and plate storage. Prioritize collars and a good bench that fits in the rack.
Can I use both stations simultaneously for small groups?
Yes — configure quick-swap workflows and designate storage and signage. Ensure clearances and staggered start times to avoid interference in movement arcs.
How do I scale the design for a boutique gym?
Invest in modular units that bolt together, add mirrored walls and clear storage, and design small-group programming where transitions between rack and trainer are choreographed to be under 90 seconds.
Are there cost savings compared to buying multiple single-purpose machines?
Often yes — a combined dual-station reduces the need for separate plate-loaded and selectorized machines and lowers long-term footprint costs, increases programming versatility and member throughput, improving ROI when matched to programming.