
Equipment for Fitness Studio: Essential Gear, Layout, and Budget Guide
Overview: Why Equipment Selection Defines Studio Success
In the competitive landscape of fitness studios, equipment is more than a collection of machines. It is an asset that directly influences member experience, instructor efficiency, safety, and revenue stability. The right mix of gear supports diverse programs—from high‑intensity interval training (HIIT) and functional training to yoga and mobility classes—while fitting within your space, power capacity, and budget. This section outlines a framework to tailor equipment decisions to your target client, time of day patterns, and service model, ensuring every square foot and watt-hour contributes to growth.
To translate strategy into practice, studios should begin with a disciplined assessment: who are your core members, what classes will you offer, and what is the typical class size? An informed approach uses data such as peak utilization times, class mix, and retention rates. For example, a boutique studio focusing on functional training for 8–16 members per class will require different equipment density than a mid‑size multifunction studio hosting 25–40 participants per hour. Consider space per user, energy use, and potential expansion in your plan. This is not just about buying more; it is about buying the right tools that empower trainers, reduce setup time, and minimize downtime between sessions.
Key decision criteria include space and layout constraints, safety and compliance, power availability, and total cost of ownership. The following bullet list captures practical considerations that shape long‑term success:
- Target client and class formats: boutique, mid‑size, or hybrid models each demand a different equipment mix.
- Space and ceiling height: squat racks and plyo boxes require clear run‑outs and tall clearance.
- Load capacity, safety standards, and maintenance access: durable construction and easy serviceability reduce downtime.
- Electrical and plumbing requirements: cardio machines, water access, and climate control influence operating costs.
- Budget vs. lifecycle costs: initial price vs. depreciation, warranty, and ongoing maintenance.
- Vendor support and warranties: local service, parts availability, and response times.
Practical takeaway: plan for a modular layout that can adapt to class formats, with zones for cardio, strength, and mobility. A phased rollout—start with core pieces and add specialty gear as membership grows—helps manage cash flow and ensures equipment remains productive for longer.
Case study snapshot: A 1,800‑sq‑ft studio targeting 24–28 guests per peak hour invested in 4 treadmills, 2 functional rigs, 2 cable‑based machines, 6 benches, and 6 mats. After 12 months, utilization averaged 75% during peak classes, with a 20% increase in class attendance and a 12% rise in new memberships attributed to improved class variety and reduced setup times.
Core Categories of Fitness Studio Equipment
Equipment can be broadly categorized into three main groups: (1) strength and resistance tools, (2) cardio apparatus, and (3) functional training and flexibility gear. A balanced mix supports a wide range of programs, from structured circuits to autonomous workouts. The following sections provide practical guidance on selecting gear within each category, with emphasis on space efficiency, safety, and lifecycle costs.
Strength and resistance gear forms the backbone of most studios. Prioritize versatility, adjustability, and footprint. Cardio equipment drives throughput and calories burned but demands energy and service commitments. Functional and mobility tools increase program variety and help members train for real‑world tasks. When choosing items, align them with your class formats, staff expertise, and maintenance capabilities.
Strength Training Equipment: Selection Guide
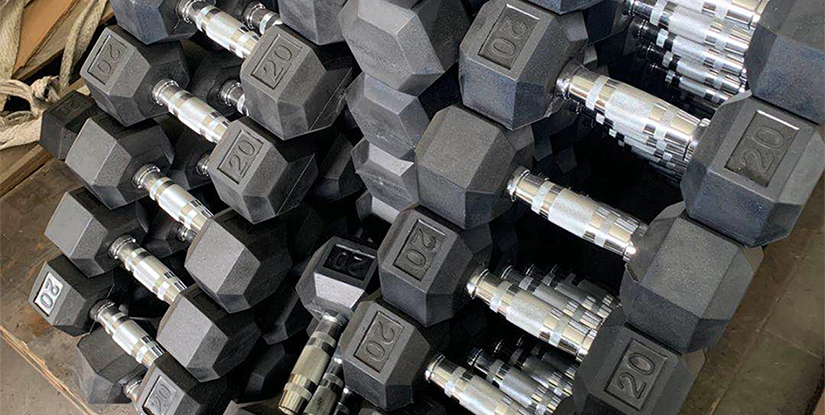
The core of any strength program is a mix of free weights, machines, and racks. A well‑rounded setup for a 2,000–3,500‑sq‑ft space typically includes two to four squat racks or power racks, a multi‑gyms/multi‑stations unit, adjustable benches, and a curated set of free weights (dumbbells, kettlebells, and an Olympic bar and plates). In addition, consider a cable pulley station for functional movements and a compact leg extension/curl combo if space allows. Key procurement steps include:
- Assess load capacity and safety certifications; ensure compatible fall protection for racks.
- Choose modular rigs that can be reconfigured for evolving class formats.
- Invest in durable benches with multiple incline presets and space‑efficient storage.
- Allocate space for a warm‑up/cool‑down zone with minimal clutter.
Implementation tip: group resistance tools by movement pattern (pushing, pulling, hip hinge, squat patterns) to streamline class flow. Regular inspection of pins, collars, and weight plates reduces injury risk and downtime. A practical maintenance routine includes monthly inspections, quarterly full calibration checks on machines, and annual safety reviews.
Cardio Machines: Matching Demand to Space
Cardio devices drive member engagement and program diversity. A mid‑size studio typically supports 6–12 cardio units, with treadmills, stationary bikes, rowers, and hybrid options. When selecting cardio gear, consider footprint, serviceability, noise levels, uptime, and energy consumption. Use a mix that supports variable intensity, from brisk walking to 90% VO2 max sprints. Practical guidelines include:
- Match machine capabilities to class formats—treadmills and bikes for steady‑state sessions; rowers and assault bikes for interval work.
- Prioritize ergonomic designs, low maintenance requirements, and robust warranty terms.
- Plan electrical load: a typical 1,000–1,500‑W treadmill with 3–4 units can be expected to require dedicated circuits in larger rooms.
- Estimate annual energy cost per unit and factor it into operating budgets.
Real‑world tip: stagger cardio zones with sound dampening options to minimize noise transfer between classes. Track utilization with simple checklists—record hours of use per week and per unit to identify underutilized gear that can be repurposed or sold.
Functional Training and Flexibility Tools
Functional training devices—medicine balls, kettlebells, resistance bands, stability balls, battle ropes, plyo boxes, medicine balls, and suspension straps—offer high value in compact footprints. These tools enable scalable workouts for all levels and integrate well with group classes as well as personal training. Selection considerations include:
- Variety and progressive overload potential without overcrowding space.
- Quality of grip, finish, and safety features to withstand heavy use.
- Storage efficiency: wall racks and compact shelving help keep the floor clear.
- Maintenance: inspect grips, cords, and anchor points regularly.
Practical tip: create a dedicated functional zone with visual cues to direct flow and minimize interference with cardio spaces. For example, allocate a 12′ × 20′ zone for rigs, bands, and mats, with a visible tape boundary to maintain order during busy times.
Layout, Acquisition, and Vendor Management
Effective layout planning translates equipment selection into a seamless user journey. It reduces wait times, simplifies trainer workflows, and supports safety protocols. This section covers space planning, procurement processes, and ongoing vendor management to maximize uptime and ROI.
Layout principles include zoning, sightlines, and clear traffic patterns. Start by mapping your floor plan with a scale drawing, noting fixed elements such as pillars, doorways, and electrical panels. Then allocate zones for cardio, strength, and functional spaces with 3–5 feet of clearance around equipment. A practical approach is to model peak class demand and test different configurations with lightweight markers or tape before ordering equipment. This helps you anticipate bottlenecks and adjust layouts before purchase decisions lock in place.
Acquisition best practices involve a staged procurement plan, vendor comparison, and a transparent ROI model. Suggested steps:
- Create a requirements list with must‑haves, nice‑to‑haves, and would‑be‑greats tied to your class schedules.
- Issue a structured RFP to multiple suppliers, focusing on delivery timelines, installation, warranty, and service response times.
- Negotiate bundled warranties and service packages to reduce total cost of ownership.
- Plan for delivery logistics, assembly time, space clearance, and staff training on new equipment.
Maintenance and lifecycle management reduce downtime and extend equipment life. Establish a maintenance calendar with preventive checks, calibration, part replacement, and incident reporting protocols. Track asset age, utilization, and repair history to inform future replacements and budget planning. A robust maintenance program typically reduces unplanned downtime by 20–30% and extends useful life by 15–25% over a 5‑ to 7‑year horizon.
Case Studies, Budget Scenarios, and Practical Tips
Real‑world examples help translate theory into action. Case studies illustrate how different studio models optimize equipment mix, space, and staffing while maintaining a high class experience. A boutique 1,200‑sq‑ft studio may prioritize compact, multi‑functional units and heavy emphasis on functional training accessories, while a commercial 5,000‑sq‑ft space will require more cardio throughput and multiple strength zones. Consider the following practical scenarios:
- Case A: Boutique studio with 8–12 treadmills or bikes, 2 rigs, 2 cable stations, 20–30 benches and a dedicated mobility area. Expected outcomes: higher class variety, shorter lineups, and improved member retention if programming is dynamic.
- Case B: Balanced commercial gym with 12–18 cardio units, 4–6 rigs, 4–6 benches, foam rollers, and a broader range of strength machines. Expected outcomes: greater daily throughput, broader member base, and stronger cross‑selling opportunities to personal training and small group coaching.
Budgeting guidelines span three tiers: starter, growth, and scale. Starter plans (roughly 20k–40k) focus on essential cardio and resistance essentials, with modular assets that allow for expansion. Growth plans (40k–100k) add multiple zones, more racks, and higher quality cardio equipment, plus space for mobility and recovery. Scale plans (100k+) emphasize brand‑driving features, premium client experiences, and advanced functional zones. When planning budgets, incorporate the following: installation costs, delivery times, warranties, maintenance reserves, and anticipated revenue growth tied to capacity improvements.
Staff training and safety protocols are non‑negotiable. A well‑trained team improves program quality and reduces injury risk. Implement a standardized onboarding checklist for new equipment, with hands‑on demonstrations, safety briefings, and quick reference guides for routine maintenance tasks. Create a safety culture by posting floor‑level safety reminders, conducting monthly equipment checks, and recording near‑miss incidents to guide future improvements.
Frequently Asked Questions
Q1: What equipment is essential for a new fitness studio with limited space?
A new studio with limited space should prioritize modular, multi‑use gear that covers core movement patterns. Start with: 2–4 adjustable benches, 2–3 compact power racks or squat racks, a cable pulley station, a storage rack for free weights (dumbbells and kettlebells), a small cardio trio (treadmill, bike, and rower if possible), and a versatile floor mat zone for mobility and warm‑ups. Choose high‑quality, space‑efficient units with easy reconfiguration options. Plan for future expansion by selecting gear that can be upgraded or added to without a complete redesign. A staged approach minimizes upfront risk and helps you gather member feedback before scaling up.
Q2: How do I determine the right balance between cardio and strength equipment?
The balance depends on your target market, class formats, and peak usage. For a boutique functional‑training emphasis, allocate more space to rigs, cable machines, and free weights (roughly 40–60% of the floor plan). For a general‑purpose studio with many cardio classes, reserve more area for cardio units (about 40–60%). Use a zoning approach to minimize cross‑traffic and ensure safe equipment transitions. Track utilization monthly and adjust the mix based on demand, while maintaining a core set of versatile machines that can serve multiple class types.
Q3: What are the best practices for budgeting and ROI calculations?
Begin with a conservative cash flow projection that includes purchase price, delivery, installation, warranties, maintenance reserves, and expected utilization. Use a simple ROI model: estimated annual revenue uplift from new capacity minus annual operating costs (including maintenance and energy). Consider depreciation for tax purposes and factor in resale value after useful life. Create multiple scenarios (conservative, base, aggressive) to prepare for market changes. Document non‑monetary benefits, such as improved member retention, higher class capacity, and enhanced trainer productivity, as these often drive long‑term ROI beyond direct revenue figures.
Q4: How should I select vendors and manage warranties?
Request quotes from at least three reputable suppliers and compare delivery times, installation scope, warranty terms, and service commitments. Prefer vendors offering bundled service contracts, on‑site maintenance, and readily available replacement parts. Review warranty coverage for wear items (belts, cables, upholstery) and schedule formal service windows that align with your class timetable to minimize downtime. Maintain a single point of contact for service requests to streamline response times and track issue resolution. Building a long‑term relationship with a preferred vendor can yield priority support, better pricing, and faster part availability.
Q5: How can I ensure safety and compliance with equipment in a busy studio?
Safety starts with proper layout and clear floor markings. Ensure adequate space between machines, secure storage for weights and accessories, and ankle/hand protection where needed. Implement standard operating procedures for setup, teardown, and weight changes. Provide staff training on spotting, proper form cues, and emergency protocols. Regularly inspect hardware, pins, collars, and upholstery. Keep class schedules visible to manage crowd flow and prevent overcrowding in any zone. Compliance also means staying updated on local regulations for gym facilities and ensuring all equipment meets safety standards from reputable manufacturers.
Q6: What maintenance routines help extend equipment life and reduce downtime?
Establish a preventive maintenance calendar: daily wipe‑downs and safety checks, weekly inspection of moving parts and alignment, monthly lubrication where required, quarterly calibration checks for machines, and annual professional servicing. Maintain an inventory of spare parts and a quick‑access log for repairs. Assign responsibility to a dedicated technician or partner with a local service contractor. Track incidents to identify recurring problems and adjust procurement or setup to reduce future breakdowns. Regular maintenance reduces downtime, preserves warranty coverage, and preserves resale value when you refresh equipment.
Q7: How should I plan for future expansion while starting with a lean setup?
Adopt a modular, scalable approach. Choose equipment with upgrade paths (e.g., racks that accept additional modules, benches that accommodate attachments, or cardio units that can be supplemented with workflow accessories). Use a phased expansion plan tied to member growth, class demand, and revenue milestones. Maintain a flexible floor plan with pre‑marked zones and easily movable furniture to re‑configure as programs evolve. Regularly solicit member feedback to guide the next round of purchases and adjust budgets accordingly. A thoughtful expansion strategy minimizes risk and accelerates return on investment over time.