
Comprehensive Fitness Equipment Guide: Bars, Barbells, Selection, and Best Practices
Understanding Barbells and the Typical Barbell Diameter
The barbell is a core piece of fitness equipment in strength training, powerlifting, Olympic lifting, and general fitness. One of the most frequently asked technical questions is: what is the typical barbell diameter? In practice, the answer depends on the bar type and intended use. Industry-standard dimensions are well established: an Olympic men's bar generally has a shaft diameter of 28 mm and weighs 20 kg; an Olympic women's bar typically measures 25 mm in diameter and weighs 15 kg. Powerlifting bars are thicker—commonly 29 mm to 29.5 mm in diameter—to provide increased rigidity under maximal loads. Specialty bars like trap (hex) bars, safety squat bars, and technique bars can vary widely in diameter and geometry, while most home or general-purpose bars fall between 25 mm and 29 mm.
Key quantitative specifications to know:
- Olympic men's bar: 28 mm diameter, 20 kg weight, 2,000–2,500 lb tensile strength for lower-end bars, 190,000–205,000 psi tensile strength for premium bars.
- Olympic women's bar: 25 mm diameter, 15 kg weight, typically similar tensile ratings to men's bars.
- Powerlifting bars: 29–29.5 mm diameter, 20 kg weight, higher knurling aggressiveness, and often 200,000+ psi tensile strength.
- Loadable sleeve length: Commonly 41 cm (16.25 in) for Olympic bars, enabling several plates to be loaded for maximal lifts.
How does diameter matter? The shaft diameter influences grip strength demands, bar whip (flexibility), and hand positioning comfort. A thinner bar (25–28 mm) generally allows more secure closing of the hand for athletes with smaller hands and can be beneficial for high-repetition Olympic lifts where friction and wrist mechanics matter. Thicker bars (29 mm) are favored in powerlifting for deadlifts and squats because they reduce bend and distribute load across the hands differently. Research into grip span shows even small changes (2–3 mm) can alter maximal grip strength by measurable percentages; for many lifters, a 25 mm vs. 29 mm bar can change perceived difficulty by 5–10% on maximal grip-dependent lifts.
Practical guidance for selecting a bar based on diameter:
- Assess training goals: Olympic lifters and CrossFit athletes often prefer 25–28 mm bars for snatch and clean & jerk technique; powerlifters targeting maximal single-effort strength generally prefer 29 mm bars.
- Match hand size: Measure palm width (across metacarpals). If under 8.5 cm, test a 25–28 mm bar for comfortable wrap; if larger than 9.5 cm, a thicker bar may feel better.
- Consider knurling, shaft length, and sleeve rotation: A thinner shaft with aggressive knurling can still feel different from a thicker smooth shaft.
Real-world application: a university strength program replaced all multipurpose 28 mm bars with 29 mm power bars after coaches noticed excessive whip during heavy squats and deadlifts. Within six months, peak single-rep maxes in squats increased by 3–5% across varsity athletes, attributed to reduced bar flex and improved confidence during heavy attempts. Conversely, a CrossFit box swapping to thinner 25 mm bars saw improved clean turnover speed and fewer wrist complaints among smaller athletes. These case examples illustrate that understanding the typical barbell diameter for your context is practical, not just theoretical.
Types of Barbells and Their Diameter Variations
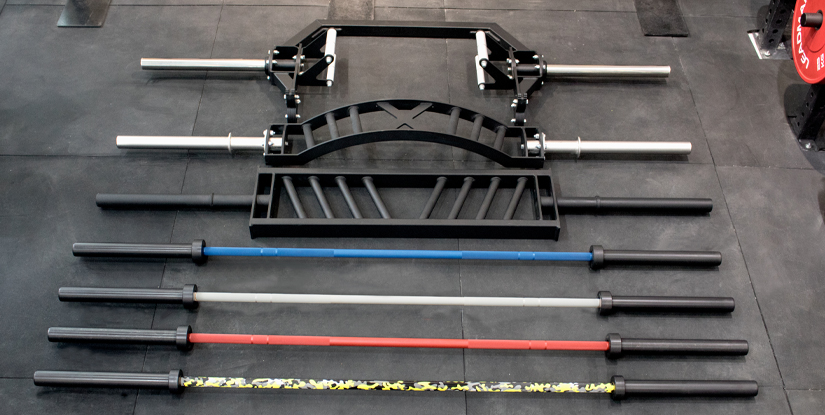
Barbells are designed to match specific lifting modalities. Primary categories and typical diameters include Olympic weightlifting bars (25–28 mm), power bars (29–29.5 mm), deadlift-optimized bars (sometimes similar diameter to power bars but with different whip and knurl), technique bars for novices (often lighter with 25 mm or less), and specialty bars like cambered or safety squat bars which alter shaft diameter and shape. The diameter variation is deliberate: thinner shafts permit a tighter grip and improved wrist wrap for dynamic lifts, while thicker shafts increase stability and longevity under compressive loads.
Standardized manufacturing tolerances: reputable manufacturers hold diameters within ±0.25 mm tolerance. International competition bars adhere to governing body specs: IWF (International Weightlifting Federation) requires 28 mm for men and 25 mm for women; IPF (International Powerlifting Federation) allows thicker power bars but regulates knurling and center knurl presence. For home gyms, lower-cost bars might mix features: a 28 mm shaft with low tensile steel—understanding both diameter and material strength is essential when selecting a bar for heavy training.
How Diameter Affects Grip, Performance, and Training Adaptations
Biomechanically, the bar’s diameter changes the hand's contact surface area and grip mechanics. A thinner bar increases the ability to fully close the thumb and fingers around the shaft, improving pinch and crushing grip, which benefits Olympic lifts and high-rep sets. The thicker bar reduces the mechanical advantage of finger flexors slightly but can encourage stronger forearm development over time and provide a different sensory feedback during maximal lifts. In terms of performance, competitive powerlifters often prefer thicker bars for decreased whip which promotes consistent bar path—empirical observations show that thicker bars correlate with small but significant increases in maximal lifts due to increased stability and improved neural confidence in heavy attempts.
Training adaptation considerations:
- Grip-specific programming: thinner bars allow lifters to focus on technical speed work; thicker bars can be used periodically to develop crushing grip and forearm hypertrophy.
- Periodization: alternate bar diameters across training cycles. For example, use 25–28 mm bars for technique and speed phases, switch to 29 mm for strength or peaking phases.
- Accessory work: farmer’s walks and thick-handled implements can replicate thick-bar demands without changing major competition bars.
Selection Criteria for Fitness Equipment: Practical Buying Guide
Choosing the right fitness equipment requires matching goals, space, budget, and expected user profile. Whether buying a barbell or a multi-station machine, start with a checklist and objective specs. Key metrics include build quality (welds, steel grade, tensile strength), load capacity, warranty, sleeve design, knurling pattern, finishing (zinc, black oxide, hard chrome), and cost per expected year of service. Example benchmarks: commercial-grade bars often advertise tensile strengths above 190,000 psi and working load limits exceeding 1,000 kg; home-grade bars may list lower tensile strengths (150,000–170,000 psi) and recommended max loads around 300–700 lbs.
Step-by-step buying guide:
- Define use case: home, garage, boutique box, high-traffic commercial gym.
- Set budget range and allocate a priority ratio: e.g., 40% on bars, 30% on plates, 30% on racks and flooring for a home setup.
- Prioritize safety features: loadable sleeve locking, rack safety pins, rated j-hooks, and plate collars.
- Inspect specs: verify diameter, length, tensile strength, warranty, and replacement part availability.
- Test if possible: feel knurling, rotation, and whip in person; if buying online, choose reputable retailers with return policies.
Buying-by-context examples:
- Home gym (single athlete, occasional heavy lifts): a 28 mm multipurpose bar with 1,000 lb rating and medium knurl works well; pair with bumper plates and a compact power rack.
- CrossFit or high-repetition facility: opt for a 28 mm Olympic bar with bushings/bearings that prioritize sleeve rotation and a 165–190k psi tensile rating for durability under drops.
- Powerlifting facility: prioritize 29–29.5 mm power bars with aggressive knurling, 200k+ psi tensile strength, and longer warranty; include dedicated deadlift bars if heavy pulling is frequent.
Cost vs. durability considerations: a mid-range commercial bar may cost $250–$400 and last many years under moderate use; premium bars priced $500–$1,000+ offer superior tensile strength and machining. For gyms, calculating cost per year (purchase price divided by expected service life) helps justify higher upfront costs. For example, replacing a $300 bar every 3–4 years due to rust and wear equals $75–$100 per year, whereas a $700 premium bar with a 10-year service life equates to $70 per year and usually reduces downtime and replacement hassles.
Selection for Home Gyms: Space, Budget, and Versatility
Home purchases demand efficiency. Prioritize multipurpose equipment, space-saving designs, and noise control (especially for apartment dwellers). Suggested components and specs for a balanced home setup: a 28 mm multipurpose bar (20 kg) with a 1,000 lb rating, set of bumper plates for safe dropping, a compact power rack with safety pins, adjustable bench, and rubber flooring (6–8 mm thick). Budget allocation example: 40% bars/plates, 30% rack, 15% bench, 15% flooring and accessories. Practical tips: choose barbells with corrosion-resistant finishes (cerakote, black oxide) if storing in a humid area; if space is limited, consider foldable racks or plate storage that doubles as a bench stand.
Selection for Commercial Gyms: Durability, Throughput, and Standards
Commercial facilities should select equipment rated for continuous heavy use. Look for bars with 190k+ psi tensile strength, lifetime warranties, and replaceable bushings/bearings. Choose racks and rigs with reinforced welds, 11–13 gauge steel, and powder coat finishes. Operational considerations: maintain an inventory of spare collars, bushings, and j-hooks; choose manufacturer lines that provide fast replacement parts. Metrics to evaluate vendor proposals: mean time between failures (MTBF), average replacement lead time, and service-level agreements (SLA). Case study: a 25-location gym chain standardized on a 20 kg, 28 mm bar with 200k psi rating and saw a 40% reduction in bar-related service calls over three years when compared with mixed vendor purchases, illustrating the value of standardization for maintenance and training consistency.
Maintenance, Safety, and Best Practices for Longevity
Proper maintenance prolongs equipment life and reduces injury risk. Bars require routine inspection, cleaning, and lubrication. Common issues include rust, sleeve binding, worn knurling, and bent shafts from improper storage. A maintenance schedule aligned to usage frequency ensures consistent performance. For commercial environments, implement daily visual checks, weekly deep-cleaning, and monthly inspection logs. Home gyms can follow a simplified schedule: wipe-down after each use, monthly thorough cleaning and lubrication, and an annual full inspection.
Maintenance checklist (actionable and frequency-based):
- After each session: wipe sweat and chalk from bars and plates to prevent corrosion.
- Weekly: inspect bar sleeves for smooth rotation; check collars and snap rings; wipe knurling with a nylon brush.
- Monthly: apply light oil to bar sleeve bearings or bushings if manufacturer recommends; treat any surface rust with a 3M Scotch-Brite pad and light lubricant.
- Quarterly/Annually: test bar straightness on a flat rack; measure sleeve spin tolerance; verify rack anchor bolts and weld integrity.
Best practices for safe use:
- Always use collars or clamps to secure plates on the sleeves.
- Center the bar and check the load balance before heavy attempts.
- Spot heavy lifts where appropriate, and use safety pins or straps in the rack for maximal attempts.
- Train staff on equipment removal and storage to prevent bent bars—store horizontally on racks with padding or vertically in rated holders, not leaning against walls.
Case example: a college athletic department implemented a bar maintenance log, lube schedule, and staff training program. In two years, they reduced bar replacements by 60% and saw fewer grip-related complaints in athletes. The cost savings on bar replacements alone offset the minor labor costs of the maintenance program, underlining that preventive care is a cost-effective strategy.
Routine Maintenance Checklist and Step-by-Step Procedures
Step-by-step bar maintenance procedure for a monthly session:
- Remove the bar from the rack and place on two padded saw horses to prevent shaft contact with the floor.
- Use a nylon brush to remove chalk and debris from knurling. For stubborn residue, repeat while applying a degreaser diluted per manufacturer guidance.
- Inspect sleeves for wobble; check end rings and snap rings for wear. If bearings are exposed, apply a small amount of bearing-safe lubricant and rotate the sleeve to distribute.
- Wipe the entire bar with a lightly oiled rag (3-in-1 oil or light machine oil) to prevent rust. For stiffer finishes (stainless, hard chrome), follow manufacturer cleaning guidance to avoid surface damage.
- Record findings in the equipment log and tag any bars requiring repair or replacement.
Maintenance ROI: expect to extend a bar's usable life by 2–3x with consistent care versus neglect, especially in humid environments where corrosion accelerates.
Safety Protocols, Spotting, and Setup Best Practices
Set up the training environment for ergonomic safety. Recommended practices include setting rack pin heights to allow safe unracking without hyperextension, teaching proper bar path for squats and presses, and using safety straps for bench and squat works. For Olympic lifts, ensure adequate ceiling height, bumper plates rated for dropping, and platform space of at least 8 x 8 feet to permit safe execution. Staff training should cover emergency procedures, equipment removal protocols, and daily safety walk-throughs. In commercial settings, require lifters to use collar clamps and educate new members on bar types (e.g., warn novices that power bars have more aggressive knurling and different feel than technique bars).
Training Applications and Programming Around Equipment
Equipment choice should align with training periodization and specific performance goals. Programming strategies change based on bar type, diameter, and associated equipment. Typical programs consider factors like grip fatigue, bar whip, and technical demands. For instance, during a strength-focused mesocycle, integrate thicker 29 mm power bars for heavy singles and triples to reduce whip and increase joint stability under maximal loads. During technique and speed cycles, prioritize 25–28 mm Olympic bars to fine-tune turnover and explosive mechanics.
Actionable programming templates:
- Strength (8–12 weeks): 3–4 heavy sessions/week using a 29 mm power bar for squats and deadlifts; sets of 3–5 reps at 80–95% 1RM with long rest intervals.
- Power/Speed (4–8 weeks): velocity work with 25–28 mm Olympic bar; 6–8 sets of 2 reps at 40–60% focusing on bar path and bar speed, use contrast training with sled or plyometrics.
- Hypertrophy/Accessory (6–12 weeks): incorporate thick-grip implements and high-rep bars for forearm development; 8–12 rep ranges with short rest.
Example progression for a collegiate lifter preparing for competition:
- Weeks 1–4 (Technique): 25–28 mm bar, 3 sessions/week, focus on snatch and clean drills, high volume low intensity (60–70% 1RM).
- Weeks 5–9 (Strength): transition to 29 mm power bar for squats and pulls, 80–90% 1RM, low volume high intensity.
- Weeks 10–12 (Peaking): reintroduce competition-standard bar diameter (depending on event) and reduce volume while keeping intensity high for tapering.
Case study: a high school strength program implemented a periodized switch between bar diameters and saw a 6% average increase in total competition lifts over an academic year. Coaches attributed gains to improved specificity during peaking phases and better grip resilience built during heavy blocks using thicker bars.
Programming with Different Bar Diameters
Incorporate diameter-specific variations deliberately. When switching from 28 mm to 29 mm bars, reduce grip-dependent volume by 10–20% for the first 2–3 weeks to allow neuromuscular adaptation. Use thick-grip holds, farmer carries, and direct forearm work as accessory lifts during these transitions. Track metrics: record bar type for each session and monitor variables like grip failure rates, training RPE, and bar path changes across weeks to quantify adaptation and inform programming adjustments.
Examples, Case Studies, and Progression Templates
Progression template for a recreational lifter aiming to add 20–40 lbs to squat in 12 weeks:
- Weeks 1–4: 28 mm bar, 4 sets of 6–8 reps at 70–75% 1RM, focusing on form and tempo.
- Weeks 5–8: switch to 29 mm power bar, 5 sets of 3–5 reps at 80–88% 1RM, add partial pause squats and heavy holds.
- Weeks 9–12: deload week then maximal singles at 90–95% on power bar with tapering support exercises.
Monitoring outcomes: track weekly load progression, subjective soreness, and grip complaints. Expect short-term dips in performance when switching diameters but long-term gains in strength and resilience when periodized appropriately.
FAQs
Q1: What is the typical barbell diameter for Olympic competition? A1: For Olympic competition, the typical barbell diameter is 28 mm for men and 25 mm for women, per IWF specifications. These diameters influence grip and performance and are standardized to ensure equity across competitions.
Q2: Does bar diameter affect how much weight I can lift? A2: Indirectly. Bar diameter alters grip mechanics and perceived difficulty; thicker bars may feel harder initially for those with smaller hands but can increase bar stability. Any effect on maximal weight tends to be modest (often cited at 3–8%), but it can be meaningful near maximal efforts.
Q3: Should I change bar diameter during a training cycle? A3: Yes. Periodized training often alternates thinner bars for technique and speed phases and thicker bars for strength and peaking phases. This approach leverages the mechanical differences between bar types for specific adaptations.
Q4: How do I care for a barbell to prevent rust? A4: Wipe down after each use, perform monthly deep-cleaning with a soft brush, and apply light oil to the shaft and sleeves as recommended. For surface rust, use a non-abrasive pad and lubricate afterward. Control humidity where equipment is stored.
Q5: What are practical specs to check when buying a commercial bar? A5: Check shaft diameter, weight, tensile strength (psi), sleeve rotation system (bushing vs bearing), loadable sleeve length, knurling pattern, finish, and warranty. Also confirm vendor service and replacement part availability.
Q6: Is a thicker bar always better for powerlifting? A6: Not always. While thicker power bars are common in powerlifting for their stability and reduced whip, some athletes prefer slightly thinner competition bars for grip comfort. Test bars when possible and align choice with competition regulations.
Q7: How should I store bars to avoid bending? A7: Store horizontally on padded racks or vertically in rated sleeves designed for bar storage. Avoid leaning bars against walls or stacking heavy plates on unprotected shafts. Proper storage reduces the risk of permanent bending and improves longevity.