
Complete Guide to the Floor Seated Lat Pulldown: Equipment, Technique, and Programming
Overview and Benefits of the Floor Seated Lat Pulldown
The floor seated lat pulldown is a modified variation of the traditional lat pulldown that places the athlete on the floor rather than on a dedicated bench. This adjustment changes the mechanics of the movement, increases stabilization demands, and emphasizes latissimus dorsi engagement while reducing lower-back shear. The exercise is particularly useful in environments with limited space or limited access to seated machines and can be implemented with cable machines, low pulleys, resistance bands anchored low, or functional trainers.
From a training perspective, the floor seated lat pulldown offers multiple benefits. Because the lower body is fixed on the floor, pelvic tilt and lumbar extension are minimized, which reduces compensatory efforts from the erector spinae. This makes the variation attractive for trainees with lower-back sensitivity or those rehabbing from certain spinal conditions. In addition, maintaining a rigid torso while pulling from a low anchor point increases the requirement for scapular retraction and depression, promoting stronger posterior chain activation and better posture correction.
Practical benefits also include versatility and scalability. The movement can be loaded from light to heavy, performed unilaterally or bilaterally, and adapted for different ranges of motion and grips. For coaches and gym owners, the floor seated lat pulldown is an efficient addition to back development protocols because it requires minimal equipment modifications and can be introduced as an accessory lift that complements compound moves like deadlifts and pull-ups.
Who benefits most from the exercise? Beginners who struggle with pull-up variations, athletes looking to increase lat width without stressing the spine, and older adults who need a back-strengthening exercise with a lower risk profile. Physical therapists may also prescribe the floor variant when progressive loading is needed without excessive spinal loading. The key takeaway: the floor seated lat pulldown is a targeted, controllable, and adaptable exercise for improving lat strength and scapular mechanics while offering distinct safety benefits.
Equipment, Setup, and Popular Variations
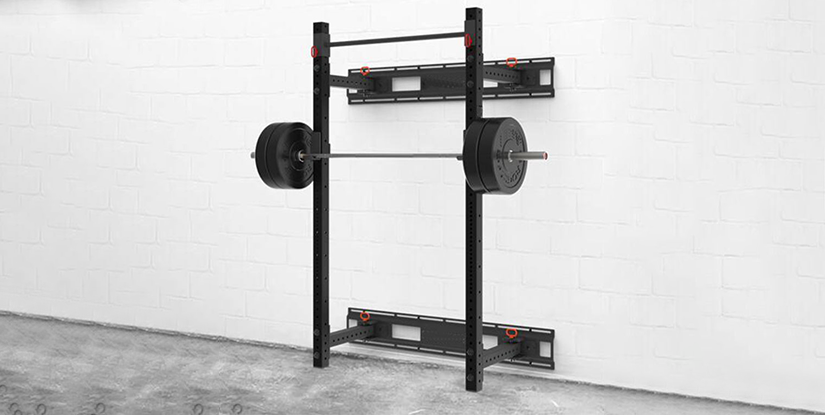
Choosing appropriate equipment and setting up correctly are essential to performing the floor seated lat pulldown safely and effectively. The primary equipment options include a cable machine with a low pulley, a functional trainer, resistance bands anchored at low height, or a lat pulldown machine used creatively by sitting on the floor and adjusting the seat or using a bench. Each option changes friction, range of motion, and stability demands.
Standard setup steps include anchoring the cable or band low, securing the chosen attachment (wide bar, V-grip, rope, or single handle), and sitting on the floor with legs extended or slightly bent. Feet can be pressed flat or dorsiflexed to maintain tension in the posterior chain. The torso should remain erect or slightly leaned back (10–20 degrees) with the chest lifted and shoulders down and back. Grip choice (wide pronated, neutral, or supinated) affects muscle emphasis and should be chosen based on training goals or mobility limitations.
Common variations expand utility and target different parts of the back. Examples include wide-grip floor seated lat pulldowns for greater lat flare, narrow-grip V-handle pulls for lower-lat emphasis and biceps engagement, single-arm low-pulley rows for unilateral control, and rope attachments to allow a greater scapular range. Bands can create a different resistance curve—lighter at the start, heavier at the peak—whereas cables provide consistent tension throughout the movement.
Choosing Equipment and Attachments
Selecting the right attachment modifies biomechanics and influences muscle recruitment. Wide straight bars increase shoulder abduction, emphasizing the upper and outer lat fibers and creating a broader pull. A neutral (parallel) handle or V-bar decreases shoulder abduction and often feels more natural for those with shoulder impingement or limited external rotation. Single handles allow unilateral training which is valuable for correcting asymmetries and improving neuromuscular control.
Consider the loading medium: cables offer a smooth, linear resistance and precise incremental loading. Resistance bands are portable, cost-effective, and provide variable resistance, but they change the load curve—often making the top of the pull harder. If using bands, anchor securely to avoid recoil risk and choose thickness to match training intent. Regardless of attachment, ensure secure connections and inspect equipment for wear before each session.
Practical tips: match grip width to shoulder mobility, use a neutral grip if internal rotation or shoulder pain is present, and alternate attachments across sets to vary stimulus. For progressive overload, prefer plate-loaded cables or machines where small incremental increases in weight are possible. When using bands, stack sets or alter band thickness to achieve gradual progression.
Floor Seating and Accessory Options
How you position your lower body on the floor affects stabilization and range of motion. Sitting with legs extended places more emphasis on hamstring tension and encourages a more upright torso, whereas bending knees and planting feet reduces posterior chain tension and allows a slightly greater trunk lean. Use a mat for comfort and consider a small pad under the hips if posterior pelvic tilt is uncomfortable. For those who need extra trunk elevation, a low plyo box or stable bench can raise the hips slightly and expand the range of motion at the shoulder without converting the movement into a conventional seated pulldown.
Accessories that improve performance include wrist straps for grip-limited trainees, a lumbar pad or folded towel to support the lower back in cases of mild discomfort, and a mirror or video device for technique feedback. For unilateral work, a single-handle attachment combined with a low anchor point helps isolate lat engagement while challenging core stability. Finally, using tempo cues and partial reps (such as slow negatives) can intensify stimulus without adding heavy loads.
Technique, Common Mistakes, and Progressions
Executing the floor seated lat pulldown with precise technique maximizes muscle activation and minimizes injury risk. Start by setting a moderate weight that allows controlled movement through a full range of motion. Sit as discussed—either legs extended or knees bent—engage the core, and retract the scapula before initiating the pull. The primary motion occurs at the shoulder joint: focus on driving the elbows down toward the ribs while maintaining scapular depression and retraction rather than simply pulling with the arms.
Breathing and tempo are important: inhale before the pull, exhale through the concentric phase, and use a controlled 2–4 second eccentric return. Avoid ballistic movements or using momentum from the torso. A cue that helps many trainees is “elbow-to-hip,” which keeps the pull traveling in a vertical-to-diagonal plane and maximizes lat engagement. Maintain neutral neck alignment—do not crane the head forward to reach the bar.
Progressions should be systematic. Begin with bodyweight or band-supported sets to learn patterning, then progress to light cable loads with higher reps and quality focus. Once form is solid, increase load in small increments, move to more challenging grips (wider or pronated), or transition to unilateral variations. Incorporating tempo changes, paused reps at peak contraction, and eccentric overload are advanced strategies to increase strength and hypertrophy without drastically increasing weight.
Proper Form and Execution
Key technical checkpoints are essential to perform the exercise correctly. Set the shoulders: depress and retract before initiating the pull. Keep the chest elevated to maintain thoracic extension and avoid a rounded upper back. As the bar descends, lead with the elbows rather than the hands—this changes the emphasis from biceps to lats. Pause briefly at the bottom for a full contraction, squeezing the scapulae together to ensure maximum recruitment.
Return the weight under control, allowing the shoulders to flex and the lats to lengthen without losing tension or collapsing the upper back. If range of motion is limited, perform partial reps and gradually work toward a fuller stretch. Use lighter weights to practice movement patterns and prioritize quality over quantity. Video recording or coach feedback is helpful for identifying common deviations like scapular winging or thoracic rounding.
Common Mistakes and Corrections
Several errors frequently undermine effectiveness. One is using excessive torso lean or momentum—trainees must stop using hip drive to jerk weight. Correction: reduce load, maintain an upright torso, and use slower tempo. Another mistake is letting the shoulders shrug up toward the ears; this disengages the lats and shifts work to the traps. Cue: ‘shoulders down’ and consciously depress before pulling.
Grip errors include too-narrow or too-wide hand placement relative to shoulder mobility; both can cause discomfort or reduce force production. Adjust grip width to a position where the upper arm can travel naturally without impingement. Finally, incomplete range of motion—either stopping short of peak contraction or failing to allow a full eccentric stretch—limits adaptation. Implement tempo prescriptions and brief holds at end ranges to reinforce full-range training.
Progressions and Programming
Programming the floor seated lat pulldown depends on goals. For hypertrophy, use 3–5 sets of 8–15 reps with moderate rest (60–90 seconds) and focus on time under tension and controlled eccentrics. For strength and neural adaptation, perform 3–6 sets of 3–6 reps with heavier loads and longer rest (2–4 minutes), ensuring strict form. For muscular endurance or conditioning, use higher reps (15–25) and shorter rest intervals.
Integrate the movement into full routines as either an accessory to compound pulling movements or as a primary horizontal/vertical pull in limited-equipment sessions. Example sequencing: after compound lifts (deadlifts, rows, pull-ups), follow with floor seated lat pulldown for focused lat work. Use it as an alternative to heavy machine pulldowns during periods of lower back recovery. Track progress with load increases, rep targets, improved range of motion, or enhanced mind-muscle connection.
Maintenance, Safety, and Buying Guide
Maintaining equipment and following safety guidelines prolongs service life and protects users. Inspect cables, pulleys, bands, and attachments regularly for fraying, cracking, or deformation. Replace worn bands and cables promptly. Keep pulleys free of debris, lubricate moving parts per manufacturer instructions, and ensure anchor points are rated for the loads being used. When using floor setups, check floor surfaces and mats to avoid slippage or instability.
Safety protocols include using a spotter or coach when handling heavy loads, starting with a lighter weight to test range and movement pattern, and using straps only when necessary to bypass grip limitations. Warm-up with dynamic mobility for the shoulders and thoracic spine, and include activation work—band pull-aparts or scapular retractions—before loading the pulldown. For those with shoulder issues, substitute neutral-grip attachments or reduce range to a pain-free position while rebuilding mobility through specific drills.
When buying equipment for the floor seated lat pulldown, evaluate durability, adjustability, and space requirements. For commercial gyms, invest in plate-loaded low-pulley stations with a variety of attachments and high-quality cabling. For home setups, a compact functional trainer, resistance band set with rigid anchors, or used cable machine with a low pulley can be cost-effective. Consider portability if you plan to train in different locations and ensure anchor points are sturdy and OSHA-compliant if in a professional setting.
Maintenance and Safety Tips
Regular maintenance checklist: visually inspect cables weekly, test pulley smoothness monthly, and replace bands at the first sign of micro-tears. Keep user manuals accessible and follow torque specifications for bolts and fasteners. For bands, store out of direct sunlight to prevent UV degradation and avoid sharp-edged anchors. Clean grip surfaces and attachments to maintain hygiene and reduce slip risk during sweaty sessions.
Safety practices should include educating users on proper load increments (no sudden, large jumps), ensuring adequate warm-up, and validating the stability of low anchors when performing unilateral or heavy two-handed pulls. Use matting to protect knees and hips and reduce contact stress. If someone experiences sharp pain—especially in the shoulder or elbow—stop immediately and refer to a qualified clinician.
What to Look for When Buying
Key buying criteria: build quality, warranty, modularity, and footprint. For cables and pulleys, prefer heavy-gauge steel and sealed bearings for longevity. Attachments should be forged or steel-plated rather than hollow cast metal. If space is limited, choose a functional trainer with dual adjustable pulleys that allows low-anchor configurations; these can replicate the floor seated lat pulldown without additional machinery.
Budget considerations: commercial-grade machines cost more but yield greater durability in high-traffic environments. Home trainers and band systems are affordable but require careful inspection for safety. Factor in the cost of attachments and maintenance; cheap cables or bands may fail earlier, increasing lifetime costs. Finally, evaluate user ergonomics—check that the pulley height and travel path align with typical user anthropometrics to enable smooth, effective pulls.
FAQs
-
Q1: Is the floor seated lat pulldown better than the traditional seated lat pulldown?
A1: It depends on goals. The floor version reduces lumbar load and increases scapular control, making it preferable for trainees with lower-back issues or those emphasizing scapular mechanics. The traditional seated lat pulldown allows a larger range for some users and may be preferable for maximal loading. -
Q2: Can beginners perform the floor seated lat pulldown safely?
A2: Yes. Beginners benefit from the stability and simplified setup. Start with lighter loads or resistance bands, focus on scapular retraction, and progress gradually as technique improves. -
Q3: Which grip should I use to target the lats more effectively?
A3: A wide pronated grip emphasizes outer lat fibers and width, while a neutral or slightly narrower grip shifts emphasis to lower-lat fibers and can be easier on the shoulders. Rotate grips across sessions to ensure balanced development. -
Q4: How often should I include this exercise in my program?
A4: Include it 1–3 times per week depending on recovery and overall volume. For hypertrophy, 2 sessions weekly with moderate volume is common. Adjust frequency based on response and other pulling work in your plan. -
Q5: Can I use resistance bands instead of a cable machine?
A5: Yes, bands are a viable alternative, especially for home or portable setups. They alter the resistance curve and require secure anchoring. Choose band thickness to match intended intensity and complement with tempo control. -
Q6: What are signs of improper form during the exercise?
A6: Common signs include torso swinging, shoulders shrugging toward the ears, elbows flaring excessively, and neck craning. These indicate load is too heavy or lack of scapular control—reduce weight and correct cues. -
Q7: How do I progress if I can already do high reps easily?
A7: Increase resistance, change to slower eccentric tempos, add paused reps at peak contraction, or move to unilateral variations to overload without drastically increasing weight. -
Q8: Is this exercise appropriate during rehabilitation?
A8: It can be appropriate under professional guidance, especially for controlled loading of the lats while limiting lumbar stress. A clinician should prescribe load, range, and progression based on the individual case. -
Q9: How should I warm up before performing floor seated lat pulldowns?
A9: Perform general shoulder and thoracic mobility drills, band pull-aparts, face pulls, and light activation sets with minimal resistance to prime scapular muscles and reduce injury risk. -
Q10: Are there specific contraindications for this exercise?
A10: Acute shoulder impingement, recent rotator cuff tears, or uncontrolled spinal conditions may contraindicate the movement. Consult a medical professional before performing if you have recent injuries. -
Q11: What metrics should I track to measure progress?
A11: Track load lifted, reps performed, range of motion quality, and subjective measures like perceived effort and pain. Video recordings and periodic strength tests (e.g., 1–5 rep max attempts under safe conditions) are useful for long-term tracking.