
Free Standing Pull Up Bar: Selection, Setup, and Training Guide
Overview and Benefits of a Free Standing Pull Up Bar
A free standing pull up bar is a versatile piece of fitness equipment designed to allow vertical pulling movements without requiring wall or ceiling mounting. This type of rig can range from a simple single-bar frame to a multi-grip tower with dip and leg raise attachments. For users who live in rented spaces, lack appropriate wall anchors, or want a portable solution for a garage or backyard, a free standing pull up bar delivers the principal benefits of pull-up training with minimal installation constraints.
Beyond installation flexibility, these units support a wide range of training styles: bodyweight strength, calisthenics progressions, weighted pull-ups, and even suspension training using additional accessories. Selecting the right free standing pull up bar means balancing footprint, weight capacity, and adjustability to match your goals and space. Below, the subsections define the equipment precisely and explain the physical and practical benefits you can expect.
What is a Free Standing Pull Up Bar?
A free standing pull up bar is a self-supporting frame that provides a stable horizontal bar for pull-ups and chin-ups without requiring permanent fixation to a building structure. Typical designs include freestanding towers, squat rack attachments with overhead bars, and single-post frames with stabilizing feet. Materials range from light-gauge steel suited to portable models to heavy-gauge tubular steel in commercial-grade towers.
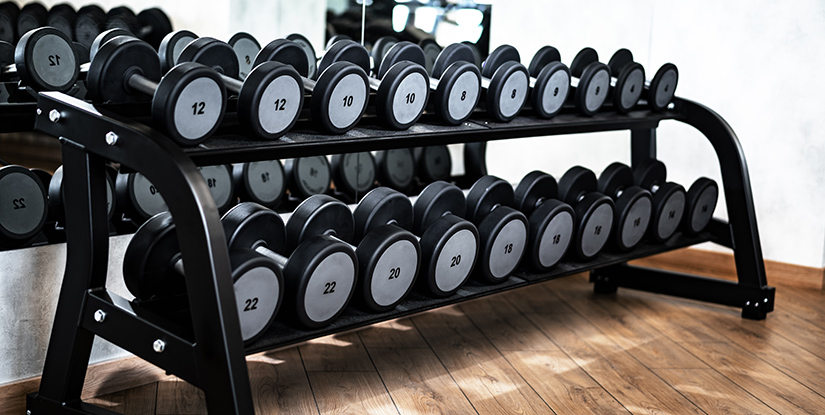
Common configurations include single-bar frames for minimal footprints, multi-grip bars offering neutral and angled handles, and towers that combine pull-up bars with dip stations and leg-raise pads. Some units fold or disassemble for storage and transport, while others are intended as permanent fixtures in a home gym. Knowing the configuration helps match the unit to available space and training needs.
Manufacturers often publish specifications such as maximum user weight, bar diameter, adjustable height ranges, and the overall footprint. For example, a portable single-post free standing pull up bar might specify a 300 lb capacity and fold flat for transport, whereas a heavy commercial tower could rate for 700–1000 lb and include widened feet for increased stability. Understanding the design and specs is the first step toward choosing a model that fits both your workouts and safety requirements.
Physical and Practical Benefits
Physically, the primary benefit of using a free standing pull up bar is the ability to perform compound, vertical-pulling movements that engage the back, biceps, forearms, shoulders, and core. Pull-ups and their variations recruit multiple large muscle groups, making them efficient for strength and hypertrophy goals. These exercises also translate directly to functional strength used in daily activities and sport.
Practically, a free standing pull up bar offers several advantages. First, it removes the need for structural modifications—important for renters or those without exposed studs. Second, it can be placed outdoors or moved to different rooms to accommodate seasonal or spatial needs. Third, many models include multi-purpose attachments that convert the station into a dip station, a bench support, or a landmine anchor point. This multi-functionality increases the equipment’s value per square foot.
Additional practical benefits include scalability: users can add weight with belts, use resistance bands for assistance, or attach gymnastic rings to expand exercise options. For small-space gyms, selecting a compact footprint model that retains stability while offering multiple grip positions provides a solid return on investment. Ultimately, the combination of accessibility, exercise variety, and portability makes the free standing pull up bar a core tool for home and small commercial gyms.
How to Choose the Right Free Standing Pull Up Bar
Choosing the right free standing pull up bar requires evaluating your training goals, available space, and expected load. A model that is ideal for a lightweight, mobile setup may not be sufficient for heavy weighted pull-ups or high-frequency commercial use. Before purchase, measure ceiling height, floor space, and door widths if you plan to bring a preassembled unit through your home. Also consider future upgrades—if you plan to add accessories, ensure the chosen frame supports them safely.
Key selection criteria include stability, weight capacity, adjustability, and build quality. Comparing models across these dimensions will help you prioritize what matters most: portability, multi-functionality, durability, or budget. Below are crucial feature considerations and material and design variations that influence performance and longevity.
Key Features to Compare
When comparing free standing pull up bars, focus on: weight capacity, footprint and base stability, bar diameter and grip options, height adjustability, and ease of assembly. Weight capacity is essential—if you intend to add weighted belts or use the bar for dynamic kipping or muscle-up work, choose a model with a substantially higher load rating than your current body weight. Many commercial-style rigs advertise load capacities of 800–1000+ lbs, which affords a wide margin for dynamic movement and attachments.
Footprint and base design determine how much wobble you’ll experience during kipping or weighted reps. Wide, triangulated bases and cross-support bracing reduce sway. If floor space is limited, look for units with a smaller footprint but supplementary stabilizers or optional floor anchors. Height adjustability is another practical feature; telescoping posts allow users of different heights to set the bar at optimal levels for dead hangs, pull-ups, and muscle-ups. Bar diameter and grip variety influence comfort and training specificity: thicker bars increase grip challenge, while multi-grip bars provide neutral, angled, and wide positions for varied stimulus.
Other practical features include built-in step-up pegs, bolt-on dip stations, and attachment points for resistance bands or plate storage. Consider the time required for assembly and whether the unit ships in sections you can bring indoors through standard doorways. User reviews and third-party tests can reveal real-world stability and durability beyond manufacturer claims.
Materials, Design Variations, and Portability
Materials and fabrication methods strongly affect longevity. Heavy-gauge cold-rolled steel with powder coating resists bending, rust, and chipping; welded joints at high-stress points increase structural integrity compared with bolt-together frames that may loosen over time. Stainless steel or zinc-plated hardware resists corrosion for outdoor placement, while thicker tubing (e.g., 11–14 gauge) supports higher loads and reduces flex.
Design variations include single-post, A-frame, and tower-style rigs. Single-post units offer a minimal footprint and transportability but can be less stable under lateral loads. A-frame designs use angled supports to widen the base and improve stability, while tower-style rigs provide multiple stations and greater accessory compatibility. Portability considerations include weight of components, whether the unit breaks down into manageable sections, and the availability of caster wheels for repositioning.
For users who travel or have limited storage, look for models advertised as “folding” or “collapsible” with quick-release pins. Keep in mind that increased portability can sometimes reduce maximum load capacity, so match the portability requirement to your intended training intensity. When purchasing, confirm whether the manufacturer offers replacement parts and clear assembly instructions—this enhances long-term usability and reduces downtime for maintenance or transport.
Setup, Safety, and Training Tips
Proper setup and safety practices are essential for maximizing performance and reducing injury risk when using a free standing pull up bar. Even a well-built rig can become hazardous if assembled incorrectly or used on an uneven surface. Before your first workout, read the manufacturer’s manual thoroughly, verify all fasteners are tightened to specified torque values, and test the unit under controlled loads. Also confirm floor compatibility—uneven concrete, soft soil, or slippery surfaces can undermine stability.
Training on a free standing pull up bar requires progression and attention to technique. Pull-ups are high-skill, high-strength movements; beginners should prioritize joint safety and controlled ranges of motion, while advanced users should manage load and volume to reduce shoulder strain. Below are detailed assembly and anchoring practices followed by progressive training protocols for different experience levels.
Proper Assembly and Anchoring
Begin by assembling the unit on the intended workout surface, or at least verifying component fit before moving it into place. Follow the sequence in the manual, typically starting with base assembly, adding vertical posts, crossbars, and the pull-up bar last. Use a torque wrench or recommended tightening method for bolts—over-tightening can strip threads, while under-tightening allows movement that will loosen further with use. Where the design permits, use lock washers, thread-lock compound, or nylon-insert lock nuts to maintain fastener integrity.
Anchoring is crucial for units that will experience dynamic loads. If the frame includes predrilled holes for floor anchors, consult a professional to assess floor material before drilling. For portable setups, consider adding sandbags, weight plates, or dedicated stabilizer feet to reduce sway. Place the unit on a level surface and check plumb with a spirit level; uneven legs can be shimmed or adjusted if the design allows. For outdoor installations, a concrete pad increases longevity and safety.
Before first use, perform a staged load test: apply bodyweight slowly in a controlled hang, then add 10–20% additional load incrementally (using a weighted vest or plates placed on a stable platform) to observe any deflection or movement. Recheck fasteners after the first few workouts and periodically thereafter. Keep the work area clear of obstacles to prevent trips and ensure users can safely dismount in case of slip or failure.
Progressive Training Programs and Exercises
Progression on the free standing pull up bar should follow the principles of load management and technical mastery. For beginners, start with assisted variations: band-assisted pull-ups, negative (eccentric) reps, and horizontal rows using low bar positions. A sample beginner progression over 8 weeks might look like: weeks 1–2 focus on 3 sets of 6–8 assisted reps; weeks 3–4 reduce assistance and add negatives; weeks 5–8 aim to achieve 3 sets of 5–8 strict unassisted pull-ups.
Intermediate athletes can add volume and intensity through weighted pull-ups, varied grip positions, and tempo manipulations (e.g., 3–1–1 slow negatives). Program design could alternate a heavy day (fewer reps, added weight) with a volume day (higher reps, bodyweight), and include accessory work like biceps curls, scapular pulls, and lat-focused rows to address weak points. Example split: Day A—weighted sets of 3–5 reps × 4–6 sets; Day B—bodyweight supersets with core work, 8–12 reps × 3–4 sets.
Advanced progressions include muscle-ups, L-sit pull-ups, and kipping variations for athletes who require dynamic or gymnastic strength. These movements demand strong scapular control, shoulder mobility, and core stability; include dedicated mobility sessions and scapular strength drills to mitigate injury risk. Always supersede quantity with quality—performing strict, controlled reps yields better long-term strength and joint health than excessive volume with poor form.
Maintenance, Troubleshooting, and Accessories
Routine maintenance extends the life of a free standing pull up bar and preserves safety. A maintenance schedule should include regular inspections of welds and fasteners, cleaning and lubrication of moving parts if present, and surface care to prevent rust. A basic maintenance checklist takes only a few minutes but prevents small issues from becoming structural failures. Below, detailed maintenance practices and troubleshooting tips are presented alongside common accessory options that improve training versatility.
Understanding common failure points—loose bolts, corroded surfaces, and worn grips—helps prioritize inspection focus. Accessories can both expand training options and introduce additional load paths; ensure accessories are compatible and rated for the stresses you intend to apply. The subsections below provide actionable maintenance steps and an accessory guide with practical use cases.
Maintenance and Longevity Tips
Create a quarterly inspection routine: check all visible welds for cracks, feel for play at bolted joints, and confirm that any telescoping mechanisms lock securely. Re-torque bolts according to manufacturer specs after the first 10–20 hours of use and then periodically—vibration and dynamic loading can gradually loosen hardware. Replace any damaged bolts with equal-grade replacements rather than improvising hardware. Keep a small toolkit near the equipment for quick adjustments.
Rust prevention is critical if the unit is exposed to humidity or outdoor conditions. Use a mild detergent for routine cleaning and apply a light coat of machine oil to exposed steel surfaces and fasteners annually. Touch up paint chips with matching powder-coat paint or a rust-inhibiting spray to prevent corrosion from spreading. For units used in high-sweat environments, wipe down the bar and grips after each session to reduce acid and salt buildup that accelerates wear.
If you notice unexpected movement, inspect feet for deformation, check floor surface for wear, and confirm accessory attachment points are intact. Small repairs such as replacing a worn rubber foot or tightening a loose gusset plate can often restore stability. For major structural concerns—welding cracks or bent main posts—retire the unit from service and consult a qualified fabricator or the manufacturer’s warranty and repair procedures.
Useful Accessories and Upgrades
Accessories expand the functionality of a free standing pull up bar and can target specific training goals. Common add-ons include: dip attachments, landmine anchors, adjustable step-up pegs, resistance band anchors, gymnastic rings, and mat systems for fall protection. When adding accessories, ensure attachment points are rated for dynamic loads—rings and bands introduce different vectors than static weight plates and can magnify stress on welds and bolts.
Practical accessory pairings: use gymnastic rings for ring rows and muscle-up transitions; attach loop resistance bands for assisted pull-ups and added resistance in concentric phases; add a dip station to the same frame to construct a full upper-body calisthenics setup. Consider a rubber floor mat or interlocking EVA tiles under the station to reduce noise, protect flooring, and stabilize the base on slightly uneven surfaces. For outdoor rigs, UV-resistant grips and stainless hardware increase longevity.
When choosing accessories, prioritize compatibility and manufacturer recommendations. Avoid improvising attachments that alter load paths unless engineered for that purpose. Well-chosen accessories turn a single free standing pull up bar into a compact but comprehensive strength station capable of supporting diverse training modalities.
Buying Guide: Price, Warranty, and Where to Buy
Before purchasing a free standing pull up bar, establish a budget range and prioritize the features that most directly affect safety and training outcomes. Entry-level portable models can cost under $150, mid-range home-gym towers typically range from $250 to $700, and commercial-grade rigs can exceed $1000. Price correlates with material quality, thickness of steel, complexity of design, and included accessories. Factor in shipping and assembly costs that may significantly increase the total purchase price for heavier units.
Warranty terms reveal manufacturer confidence in their product. Look for at least a one-year warranty on structural components and longer coverage (3–10 years) on frames for higher-end models. Verify what the warranty covers: welding defects, frame failure, or hardware issues. Some brands also provide replacement parts and customer support to help with assembly and maintenance—valuable services that reduce long-term ownership cost.
Price Ranges and Value Considerations
When considering price, evaluate value through the lens of durability and multi-functionality. A mid-range model with a higher load capacity, thicker tubing, and modular attachments will typically offer better long-term value than an inexpensive unit that requires replacement after a few years. If you plan to perform weighted or dynamic movements, invest in sturdier units with reinforced bracing rather than relying on add-on stabilizers for a cheaper frame.
Consider total cost of ownership: shipping, assembly tools or professional assembly, accessories (bands, rings, dip attachments), and potential floor anchoring. Buying from reputable sellers or specialty fitness retailers often includes better support, clearer return policies, and easier access to replacement parts. Check user reviews for common issues and long-term performance; consistent complaints about wobble or fastener failure are red flags even for seemingly inexpensive models.
Where to Buy and Warranty Tips
Buy from established fitness retailers, manufacturer direct stores, or well-reviewed e-commerce platforms. Specialty fitness stores typically provide more detailed product advice and clearer warranty processes, while large online marketplaces can offer price competition and broader selection. When buying online, confirm shipping methods and whether the item ships fully assembled or in multiple boxes. For heavy units, ask about white-glove delivery or curbside policies that affect installation logistics.
Before finalizing a purchase, read the warranty terms and confirm the return window and restocking fees. Photograph the unit upon delivery to document any transport damage, and contact the seller immediately if components are missing or damaged. Retain packaging and follow return procedures—many online returns require the original packing materials. If buying used, inspect welds, fasteners, and posts thoroughly and verify that replacement parts are still available from the manufacturer.
FAQs (专业 style)
- Q1: What is the typical weight capacity for a free standing pull up bar?
A1: Typical home models range from 300–600 lbs; commercial rigs often exceed 800–1000 lbs. Choose a model rated well above your expected loads, especially for weighted or dynamic movements. - Q2: Can I use a free standing pull up bar outdoors?
A2: Yes, if the unit has corrosion-resistant hardware and powder coating. Consider stainless bolts, UV-resistant grips, and anchoring to a concrete pad for longevity. - Q3: How do I reduce wobble on a freestanding unit?
A3: Ensure correct assembly and tight fasteners, use a level surface, add stabilizer feet or weight plates to the base, and consider floor anchors if compatible with the model. - Q4: Are free standing pull up bars suitable for muscle-ups?
A4: Some tower-style, rigid rigs are suitable if they have minimal flex and sufficient vertical clearance. Verify manufacturer recommendations for dynamic gymnastic movements. - Q5: Do I need to anchor my free standing pull up bar to the floor?
A5: Anchoring is recommended for units used with heavy or dynamic loads. Portable models may instead rely on widened bases or added weights for stability. - Q6: What maintenance does a free standing pull up bar require?
A6: Regularly inspect welds and fasteners, wipe down grips after use, touch up paint chips, lubricate moving parts, and re-torque bolts periodically. - Q7: Can I attach gymnastic rings to a free standing pull up bar?
A7: Yes—rings are common accessories, but ensure attachment points and hardware are rated for dynamic loads and that the frame shows no excessive deflection. - Q8: How tall should the bar be for muscle-ups?
A8: Allow sufficient clearance above your head for a full muscle-up transition—typically 3–4 feet above standing reach. Adjustable-height posts help configure appropriate clearance. - Q9: Are there space-saving models for small homes?
A9: Yes, single-post and foldable models offer minimal footprints. Verify stability features and consider wall-mounted dip supports to expand functionality without extra floor space. - Q10: What is the best bar diameter for grip strength?
A10: Standard diameters range from 28–32 mm. Thicker bars (38–50 mm) increase grip challenge; choose based on training goals and hand size. - Q11: Is assembly difficult?
A11: Complexity varies—some models assemble in under an hour with common tools; larger rigs may require two people and more time. Check manuals and look for online assembly videos. - Q12: How do resistance bands integrate with a free standing pull up bar?
A12: Bands can provide assistance for beginners or added resistance for advanced users. Use secure anchors or band pegs and inspect bands regularly for wear. - Q13: What should I look for in a warranty?
A13: Seek comprehensive structural coverage, clear terms for parts replacement, reasonable warranty length, and accessible customer support for repairs and spare parts.