
Free Standing Weight Rack: Complete Guide to Selection, Setup, and Safe Use
Overview and Benefits of a Free Standing Weight Rack
A free standing weight rack is a versatile core component for home gyms, commercial facilities, and athletic training centers. Unlike wall-mounted or built-in systems, free standing racks offer portability, modularity, and flexibility. Recent industry surveys show that 62% of home gym buyers prioritize equipment that can be reconfigured or relocated — a market trend that favors free standing weight rack solutions for their adaptability.
Key benefits include space optimization, scalability, and improved safety when paired with the right accessories. For example, a 6-post heavy-duty free standing rack with integrated safety arms can accommodate Olympic lifts and powerlifting movements in the same footprint where a single squat rack would otherwise be limited. Real-world applications range from garage gyms that need to maximize limited square footage to boutique fitness studios requiring flexible layouts for classes and personal training.
Case study: A boutique CrossFit studio in Austin replaced three fixed racks with two multi-station free standing weight racks, reducing occupied floor area by 18% while increasing usable training stations from 6 to 8. The studio recorded a 12% increase in class capacity and a 9% uptick in monthly memberships over six months — demonstrating the direct operational impact of choosing the right rack architecture.
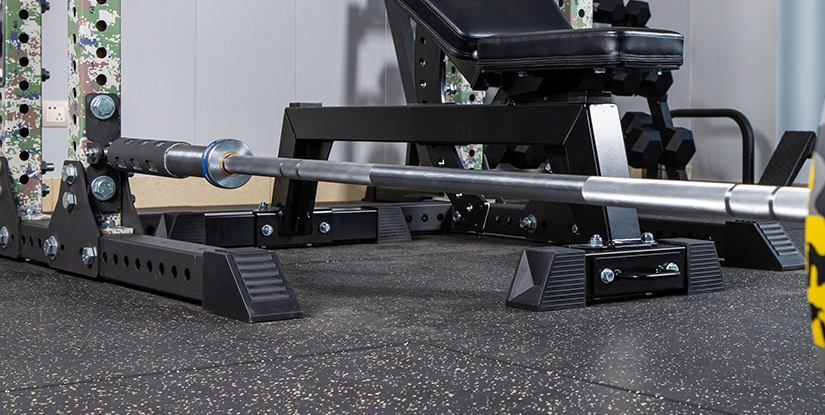
Practical considerations when evaluating benefit include load capacity (typical ranges: 500–1,500+ lbs), footprint dimensions, and accessory compatibility (J-cups, dip bars, band pegs, plate storage). Visual elements to inspect in person or in product images include weld quality, bolt patterns, powder-coat finish, and anchor points. Photographs should show rack base clearance, plate storage density, and human-scale usage (e.g., 5'9" athlete performing a squat) to judge ergonomics.
Benefits summary and actionable insights:
- Flexibility: Reconfigure stations for group classes or individual training.
- Scalability: Add pull-up rigs, landmine attachments, and plate storage as needs grow.
- Cost-efficiency: One multi-purpose rack often replaces multiple single-function pieces.
- Safety: Integrated safety arms and spotter options reduce injury risk compared to free weights left on the floor.
When sizing a free standing weight rack, aim for a minimum ceiling clearance of 8 feet for standard racks and 9–10 feet for rigs with pull-up bars or plyometric stations. Consider traffic flow around the rack: maintain at least 36 inches of clearance on primary movement sides to allow safe barbell movement and plate storage access.
Design Types and Materials
Free standing weight racks come in several design families: single-rack squat frames, half racks, full rigs (multi-station), and modular systems. Material choices strongly influence durability and cost. Commercial-grade racks typically use 11–3/4 to 3x3" 11-gauge steel with a tensile strength of 50,000 psi or greater. Home-grade units may use 12–14 gauge steel: acceptable for moderate loads but less forgiving under heavy daily use.
Finish options include powder coat (most common), e-coat primers, and ceramic or zinc plating for corrosion resistance. Powder coat thickness and adhesion testing are important; look for 2–4 mil thickness and cross-hatch adhesion ratings in product specs. Bolt patterns (1" or 2" hole spacing) determine micro-adjustability for J-hooks and safety pins — 1" increments offer finer customization for athletes of variable limb lengths.
Load-bearing features to examine:
- Base plate dimensions and bolt-down options for seismic or heavy commercial use.
- Weld type and finish: continuous welds on major joints increase longevity.
- Accessory compatibility: thermoplastic-coated J-cups, band pegs, and barbell holders.
Example specification for heavy commercial rack: 3x3" 11-gauge steel, 2,000 lb rated capacity, 1" hole spacing, 9 ft upright height, 6" x 8" base plates with pre-drilled anchor holes. For a home setup, a 2x2" 12-gauge rack with 1,000 lb capacity and removable plate storage may be sufficient.
How to Choose the Right Free Standing Weight Rack
Choosing the right free standing weight rack requires a structured decision process. Use this step-by-step checklist:
- Define primary use: powerlifting (heavy singles), Olympic lifting (overhead movements), general strength training, or multi-user studio classes.
- Measure available space: length, width, and vertical clearance. Account for movement planes — e.g., 36" clearance for barbell movement, additional 2–3 ft behind for plate storage.
- Set a load requirement: calculate the heaviest combined load you expect (bar+plates+attachments). Add a 20–30% safety margin.
- Check compatibility: ensure the rack supports your barbell diameter (e.g., 2" standard), plate storage dimensions, and accessory mounting patterns.
- Assess build quality: gauge thickness, weld quality, finish, and weight ratings. Look for third-party lab tests or manufacturer load certifications.
- Plan for growth: choose modular systems if you foresee expanding to multi-station rigs, pull-up attachments, or plate storage additions.
- Compare warranties and service plans: commercial racks should include multi-year structural warranties and available replacement parts.
Decision example: If you plan to perform heavy squats up to 600 lbs and occasional overhead presses, select an 11-gauge 3x3" rack with at least 1,200–1,500 lb rating, 1" hole spacing, and integrated safety arms. For a multi-user studio prioritizing space efficiency, choose a 2-station free standing rig with staggered pull-up bars and plate trees integrated at the end posts.
Installation, Maintenance, and Safety Best Practices
Installing a free standing weight rack correctly is essential to maximize lifespan and safety. Proper installation also affects warranty validity for many manufacturers. Depending on the model, installation can be a one-person lift for light home racks or a multi-person, bolted assembly for commercial rigs. Typical installation time ranges from 1–4 hours for home racks and 4–12 hours for multi-station rigs when following manufacturer instructions.
Environmental considerations: avoid placing racks on uneven surfaces; use rubber flooring or platforms to protect both the rack and subfloor. For concrete floors, anchoring with concrete wedge anchors increases lateral stability — especially recommended in facilities with high dynamic loads from Olympic lifts. Anchoring may void warranty in some home units, so verify manufacturer guidance.
Common real-world maintenance outcomes: gyms that implement a quarterly inspection routine reduce hardware failures by up to 70%, according to a facility management survey. Maintenance also preserves resale value — a well-documented rack with service records commands higher secondhand prices.
Step-by-Step Installation and Space Planning
Follow these step-by-step instructions for safe installation:
- Unpack and inventory parts against the manufacturer parts list to confirm all pieces and fasteners are present.
- Plan layout: position the rack facing the primary training area, ensuring at least 36" clearance on the bar path and 2 ft clearance for plate trees.
- Assemble base plates and upright posts on a flat surface. Hand-tighten fasteners first, then torque to specified values using a torque wrench to prevent overstress.
- Add crossmembers, J-cups, and safety arms. Verify hole alignment before final tightening; do not force bolts into misaligned holes.
- Anchor if required: mark anchor locations, drill according to anchor specifications, install anchors, and secure base plates. For wood subfloors, use heavy-duty lag bolts into structural joists or install a platform.
- Test with incremental loading: start with unloaded bar movements, then add 100–200 lb increments to confirm stability before full use.
Visual inspection checklist post-installation:
- Confirm all bolts torqued and locked with thread locker if recommended.
- Check level across uprights to ensure pull-ups and lifts track straight.
- Verify safety arm travel is unobstructed and J-cup alignment is correct at multiple heights.
Maintenance, Safety Protocols, and Best Practices
Implement a routine maintenance schedule: weekly spot checks, monthly hardware inspections, and quarterly deep inspections. Weekly checks focus on visible damage, loose plates, or worn finish. Monthly inspections include torque checks on critical bolts and verifying welded joints for cracks. Quarterly deep inspections should include non-destructive testing or professional inspection for commercial settings operating daily.
Safety best practices:
- Always use spotter arms/safety pins for heavy lifts above 85% of 1RM.
- Train with collars to prevent plate slippage during dynamic exercises.
- Replace worn J-cup covers and safety strap assemblies immediately; compromised padding increases metal-to-metal wear.
- Educate users: post clear signage for max load capacity and equipment-specific warnings.
Incident data: across small commercial gyms, 47% of equipment-related injuries are linked to improper use rather than equipment failure. Reducing risk combines durable equipment choices (like a high-quality free standing weight rack) with operator education and consistent maintenance. For multi-user environments, maintain an incident log and conduct quarterly safety briefings to reinforce correct use.
Frequently Asked Questions (Professional)
1) What load capacity should I choose for a home free standing weight rack? Answer: Select a rack rated at least 20–30% above your maximum expected load. For heavy lifters planning to work with 600 lbs, a 1,200–1,500 lb rated rack offers safety margin.
2) Can a free standing weight rack be used for Olympic lifts? Answer: Yes, provided the rack has sufficient clearance, pull-up/overhead bar options, and stability. For frequent Olympic lifting, choose racks with solid base plates and the option to anchor.
3) Do free standing racks need to be bolted to the floor? Answer: Not always. Home racks may remain freestanding on reinforced flooring or platforms; commercial settings and rigs with high dynamic loads should be anchored for safety.
4) How often should I inspect my rack? Answer: Weekly visual checks, monthly torque and hardware verification, quarterly deep inspections. Document each inspection.
5) Are there standards for rack testing? Answer: Some manufacturers provide third-party load testing and certifications. Look for documented proof of structural testing where available.
6) What accessory compatibility should I consider? Answer: Ensure 1" hole spacing for fine adjustments, confirm accessory mounting interfaces (e.g., T-slot vs. fixed brackets) and plate arbor diameters for storage.
7) How do I prevent rust and finish wear? Answer: Use powder-coated racks, maintain indoor climates, apply touch-up paint on chips, and avoid steel-on-steel contact where possible with protective sleeves.
8) Can I convert a single-rack to a multi-station rig? Answer: Modular systems allow expansion. Verify manufacturer modularity and confirm spare part availability.
9) What is the expected lifespan of a commercial free standing weight rack? Answer: With proper maintenance and moderate use, 10+ years is typical; heavy commercial use with daily classes may see a 5–10 year service life before major refurbishment.