
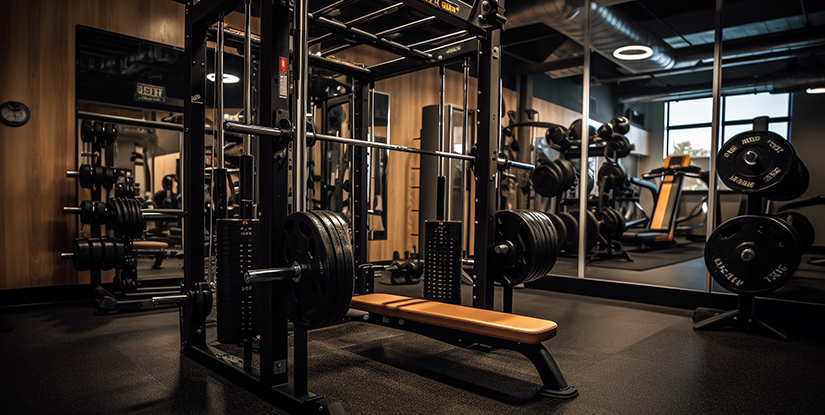
how to make your own home fitness equipment
DIY Home Fitness Equipment: Principles, Safety, and Core Concepts
Building your own home fitness gear is about more than saving money. It’s a strategic approach to customize a workout space that fits your goals, space, and schedule. A well-planned DIY setup can replicate many essential gym functions—strength, mobility, endurance, and recovery—without the recurring monthly cost of a gym membership. On average, a gym membership in the United States ranges from about $30 to $60 per month, which translates to roughly $360–$720 per year. Over five years, that’s $1,800–$3,600. When you invest in durable DIY equipment, you’re buying freedom: more workouts, more consistency, and less travel time to the gym.
Core concepts for DIY equipment revolve around safety, adaptability, and load management. Start with fundamental lifts (squat, hinge, push, pull, carry) and ensure your gear can safely handle occasional overloads—think 20–40% more than your typical working weight for testing. Prioritize stable platforms, secure handles, and robust anchoring. Materials should resist tears, abrasion, and impact, especially for items like sandbags or plyo boxes. Finally, design should accommodate growth: choose items and configurations that can be incrementally adjusted as strength and skill improve.
In practice, begin with a clear plan: measure space, list core movements, estimate costs, and set a maintenance schedule. A practical DIY stockpile includes a versatile weight (sandbags or adjustable dumbbells), a stable platform for jumping and step work, a doorway anchor for suspension or bands, and a simple storage system to keep a compact space organized. Below are safe, scalable strategies that combine affordability with real-world usage.
- Focus on stability: a solid, level surface and secure anchoring prevent injuries during dynamic moves.
- Design for accessibility: choose grips, heights, and loads that accommodate beginners and seasoned athletes alike.
- Think in workouts, not just individual tools: plan circuits that mix load-bearing moves with mobility, cardio, and recovery.
Assessing Your Space and Budget
Before you cut lumber or fill a bag, map your space. Measure ceiling height, doorway widths, and floor type. Consider safety margins: leave a 2–3 foot clearance around equipment for dynamic moves, and avoid placing gear near walls or electronics. Budget-wise, allocate: 40% for primary load (sandbag, dumbbell substitutes), 30% for a stable platform, 20% for anchors and safety gear, and 10% for storage and maintenance. Realistic budgeting helps you prioritize quality over quantity. For example, a sturdy plyo box and a reinforced doorway anchor can be purchased or built for under $100–$150 if you source materials thoughtfully, while a robust sandbag setup may cost $60–$120 depending on fabric and fill.
Additionally, plan for future upgrades. If you start with basic sandbags, you can swap to higher-grade weights or add a compact barbell and plates later. Create a simple project list with milestones: month 1 (basic strength kit), month 3 (pull-up capability), month 6 (full-body circuit with cardio elements). This phased approach helps you stay motivated and reduces the risk of injuries from rushing builds.
Materials, Tools, and Substitutions
Choose materials that balance durability, cost, and availability. Common, budget-friendly options include:
- Heavy-duty, double-stitched canvas or reinforced fabric for sandbags.
- Durable PVC or wooden handles with secure fasteners for improvised dumbbells.
- Wood or sturdy foam for plyo box tops; glue and screws for stability.
- Door anchors or wall-mounted brackets for suspension-style work and bands.
- Resistance bands made from natural latex or synthetic fibers; clamp handles for grip comfort.
When substitutions are necessary, prioritize safety and load testing. If you replace a fabric bag with a rigid container, ensure there are no sharp edges, and test lifts with very light loads before progressing. For woods, use hardwoods or plywood with a moisture seal and smooth edges to avoid splinters. Always deburr and sand any rough edges before use.
Safety, Testing, and Maintenance
Safety is non-negotiable. Create a 3-step safety protocol: pre-check, during, and post-workout. Pre-check includes inspecting seams, handles, and anchor points for wear. During a workout, maintain stable footing, keep a clear path, and avoid compromised equipment. Post-workout, inspect components for any signs of fatigue, creases in fabric, or loosening screws. Schedule monthly inspections for critical parts (handles, anchors) and quarterly checks for structural wood components. A simple maintenance routine keeps injuries at bay and extends equipment life: wash fabric, re-tighten fasteners, replace worn grips, and re-seal wood surfaces yearly.
Practical Projects: Step-by-Step Builds You Can Do Today
Below are hands-on builds that cover a wide range of workouts—from strength to mobility. Each project includes a practical use case, a materials list, and a step-by-step guide with safety tips. They’re designed to be completed with common tools and readily available materials.
DIY Sandbag Weights: Build a Versatile Strength Tool
Use a sandbag to approximate barbell and dumbbell work in a compact form. Sandbags are adaptable for front squats, carries, presses, and lunges, and you can adjust weight quickly by adding or removing material.
- Materials: heavy-duty duffel or canvas sack, Ziploc-style bags, sand or gravel, duct tape, and a seam-sealing method (optional: a vinyl cover for durability).
- Construction: fill inner bags with sand in 2–3 kg (5–7 lb) increments. Seal, place into outer canvas, and secure with duct tape. Double-bag to prevent leaks. Attach a simple strap handle by wrapping a belt or strap around the bag and tying with a secure knot in multiple directions.
- Testing: lift with light weight, check for tears, verify that the handle remains secure under dynamic movement.
- Use cases: goblet squats, cleans, carries, and overhead presses. Progression can be achieved by adding weight or increasing range of motion.
- Maintenance: replace outer fabric if stitching begins to fail; rotate bag contents to prevent settling; store in a dry place.
Tips: For better grip, apply athletic tape to the handle every few weeks and consider a fabric sleeve to reduce abrasion on hands. A sandbag can be built in under $40 using recycled materials, though premium fabrics may push this toward $60–$100.
Plyo Box and Stability Platform
A sturdy plyo box expands jump training, step-ups, and elevated push-ups, while a separate stability platform supports balance work and plyometric cooldowns.
- Materials: 3–4 cm plywood or wooden boards (for top surface), 2x6 lumber for sides, wood screws, non-slip grip tape or rubber feet.
- Construction: cut top to 18x18 inches (adjust to space). Create two side panels with 2x6 boards, secured to the base, and attach the top with screws that allow easy replacement if needed. Sand all edges and apply grip tape to the top.
- Safety checks: test with 2x body weight before routine use; ensure corners are smooth and no protruding screws.
- Use cases: box jumps (start with 6–8 inches), incline push-ups, step-ups with loads, and balance drills on a separate platform.
Maintenance: periodically inspect screws, reseal wood if water exposure occurs, and replace the grip tape when slick. This project can typically be completed in a weekend with basic tools.
Doorway Pull-Up Bar and Suspension Compatibility
A reliable doorway setup expands upper-body pulling work without floor space costs. Use a heavy-duty doorway pull-up bar that brackets into studs or a freestanding frame. Suspension options can be added with bands or straps anchored to the bar.
- Materials: commercially rated doorway bar, optional strap anchor, resistance bands, doorframe protectors (to prevent wall damage).
- Installation: align bar with studs or use a freestanding frame; install doorframe protectors to distribute load and protect trim.
- Safety checks: confirm load rating, inspect mounting points before every use, and avoid using the bar if any wobble is detected.
- Usage: pull-ups, chin-ups, body rows, and band-assisted movements for beginners.
Tip: Start with band-assisted pulls if a full pull-up is not yet possible. Keep movements strict and controlled to protect shoulders.
DIY Resistance Bands and Cord-Based Systems
Resistance bands and cord-based rigs offer scalable resistance for pressing, pulling, and mobility work. You can craft simple anchors and handles from durable cords and attach to a door anchor or fixed ceiling point.
- Materials: latex resistance bands (or robust nylon webbing with tubes), door anchor, handles, carabiners, and a protective sleeve for cords.
- Construction: attach bands to handles and anchor points; test tension in a controlled environment before performing dynamic moves.
- Usage: banded push-ups, rows, face pulls, banded good mornings, and assisted squats.
- Maintenance: inspect for cracks or tears; replace bands every 6–12 months depending on use and exposure to sunlight.
Note: Avoid overstretching bands beyond their rated tension. Store away from heat and direct sunlight to extend life.
FAQ-Style Guidance: Step-by-Step Best Practices
In this section, we pull together actionable, practical steps to ensure your DIY gear is safe, effective, and sustainable. Each step includes concrete actions, checklists, and common pitfalls to avoid.
Frequently Asked Questions
- Are DIY home gym projects safe? Yes, if you follow proper testing, load limits, and regular maintenance. Start with lighter weights and shorter sessions to validate stability. Always inspect gear before every workout and replace worn components promptly.
- What materials deliver the best value? Durable canvas bags, reinforced fabric, hardwood plywood with edge sealing, and robust anchor hardware provide excellent balance between cost and longevity. Avoid thin plastics and questionable hardware that can fail under load.
- How much can I save by DIYing equipment? Depending on the project, you can save 40–70% versus buying commercial equivalents, especially for large items like plyo boxes or multi-purpose sandbags. Savings depend on materials chosen and local prices.
- Can I build a complete gym with DIY gear? Yes, a well-planned kit can cover most fundamental movements: squat/hinge, push/pull, carry, and mobility. For advanced barbell work or heavy heavy lifts, consider incremental upgrades or hybrid setups with some ready-made components.
- What about maintenance and replacement? Create a quarterly inspection schedule, keep spare handles and buckles, and replace bands or fabric bags every 6–12 months, depending on use and exposure.
- How should I store DIY gear? Keep items in a dry, cool area. Use wall-mounted racks or labeled bins to reduce clutter and protect edges from impact during workouts.
- Are there safety risks with water jugs or sand-filled items? They can leak or shift if not sealed properly. Ensure inner bags are double-sealed, outer coverings are intact, and loads are tested with light movements before heavier sets.
- How do I test a new DIY piece before full use? Perform a staged test: light-load reps, dynamic movements within a controlled area, and a 24–48 hour cooldown period to identify any weakness in construction.
- What if I have a tiny space? Focus on compact, multi-use pieces (sandbag, resistance bands, door anchor) and a sturdy plyo box with a small footprint. Vertical storage helps maximize floor space.
- Can I upgrade later? Yes. Start with essential pieces and gradually add heavier weights, a barbell, or a more robust frame. Plan upgrades around your evolving goals and available space.
- How do I learn proper form with DIY gear? Use mirrors, record yourself, compare to reputable guidance online, and, when possible, attend a clinic or consult a trainer for form checks on key lifts.
- What beginner projects should I start with? Start with a sandbag and a plyo box, add a doorway pull-up bar, and incorporate bands for assisted movements. These items cover most fundamental movements and scale with you.
- Are there any legal or safety regulations to consider? For most homes, DIY gear falls under personal use. If you own a shared facility or commercial space, verify local codes on structural alterations and ensure compliance with weight-bearing guidelines.
With thoughtful planning, your DIY home gym becomes a powerful, sustainable training hub. The key is to start small, test thoroughly, and gradually add components that enhance safety, versatility, and progression.