
how to use lifetime fitness equipment
Foundations for using Lifetime Fitness Equipment safely and effectively
Investing in Lifetime fitness equipment means committing to long-term durability and consistent workout quality. A thoughtful foundation reduces the risk of injury, extends equipment life, and makes your routine more effective. In this section, you will learn how to assess build quality, plan your space, and establish preventive maintenance practices that align with real-world use. The emphasis is on practicality: clear checks before use, predictable routines, and data-driven decisions about load, volume, and progression.
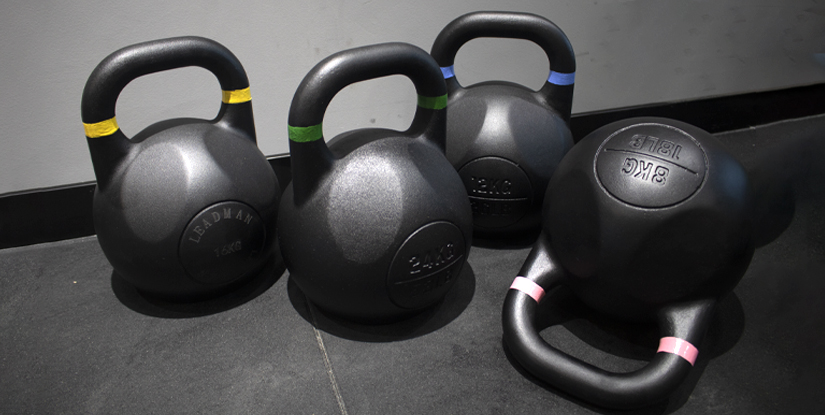
First, evaluate the core characteristics of lifetime equipment. Look for reinforced steel frames, powder-coated finishes, high-tolerance moving parts, and reliable weight stacks or resistance systems. When selecting features, consider the kinds of workouts you perform most—full-body strength, cardio intervals, or mobility work—and map them to the machine’s capabilities. For example, a multi-station unit with adjustable weight stacks facilitates compound movements and progression, while a robust treadmill or elliptical supports steady-state cardio and high-intensity intervals. Verification steps include checking user weight limits, seat adjustments, and range of motion that matches your body dimensions. Documentation such as assembly manuals, maintenance guides, and warranty terms should accompany every piece of equipment so you know what is covered and for how long.
Next comes space planning and safety. A well-designed home gym reduces interruption and injury risk by providing clear circulation and proper flooring. Practical tips include measuring your area with a tape measure and drawing a simple plan to scale, leaving at least 2–3 feet of clearance around machines for safe entry and exit. Use protective mats to absorb impact and protect equipment legs from floor damage. Ensure ventilation and lighting are adequate, particularly for cardio sessions that raise heart rate and produce perspiration. A dedicated corner with a single electrical outlet (for powered cardio machines) simplifies wiring and minimizes trip hazards. Finally, establish a basic safety protocol: check machine locks, reset controls after use, and never modify safety features. Your routine should begin with a 5–7 minute dynamic warm-up to prepare joints, followed by crisp, structured cooldowns to reduce stiffness and promote recovery.
Maintenance and reliability data are essential for long-term confidence. Establish a quarterly preventive maintenance schedule that includes cleaning, lubrication of guide rods and pivots where applicable, and inspection of cables and belts for wear. Document any unusual noises, stiffness, or inconsistent resistance and address them promptly. Keep spare parts on hand for the most common wear items—accessory bolts, lubricant, and simple replacement components—so small issues don’t escalate into downtime. Tracking usage with a simple log (date, machine, duration, load) helps you spot trends, plan part replacements before failure, and quantify your return on investment. In real-world applications, households that rotate maintenance tasks and maintain a log tend to extend equipment life by 15–30% compared with ad-hoc care.
Key takeaways for this foundation stage:
- Assess build quality and warranty terms before purchase; prioritize reinforced frames and quality moving parts.
- Plan space meticulously: measure, map, and create 2–3 ft clearance, with protective flooring.
- Implement a preventive maintenance cadence: quarterly checks, routine cleaning, and a parts inventory.
- Establish safety protocols and a consistent warm-up/cool-down routine.
Maximizing performance with Lifetime Equipment: workouts and routines
With a solid foundation, the focus shifts to programming effective workouts that leverage Lifetime equipment for strength, cardio, and mobility. Real-world routines rely on structured progression, clear metrics, and practical adaptations to fit different spaces and fitness levels. The following subsections translate common equipment configurations into actionable plans. Each plan includes step-by-step guidelines, recommended set/rep ranges, and progression cues to keep you advancing without plateauing.
The first subsection centers on cardio-capable machines, such as treadmills, ellipticals, and stationary bikes. The goal is to blend steady-state work with interval bursts to maximize fat oxidation, aerobic capacity, and metabolic rate. Practical protocol: 20–30 minutes per session, with 2–3 minutes of moderate intensity followed by 1 minute of high-intensity bursts, repeated 4–6 times. For endurance goals, extend to 40–60 minutes at a comfortable pace. A sample 4-week progression can increase interval count by one cycle every week while gradually raising target heart rate. Real-world tip: monitor perceived exertion (RPE) alongside any built-in machine metrics to maintain sustainable intensity and prevent overtraining.
The second subsection covers multi-station strength machines and free-weight options. A typical 3–4 station setup supports compound movements that target major muscle groups in one session. Practical workout structure: a 3–4 exercise circuit using different stations, repeated 3–4 rounds, with 60–90 seconds of rest between rounds. Example circuit: leg extension/curl (lower body), horizontal press (chest/shoulders), lat pulldown or row (back), and core stabilization (plank variations). For progression, increase resistance every 1–2 weeks or add an additional set. Real-world application includes tracking load progression and ensuring smooth form, especially on machines with cam-driven resistance that might feel different from free weights. A simple rule is to maintain a controlled tempo: 2 seconds concentric, 2 seconds eccentric, with a brief pause at the peak contraction when safe and appropriate.
The final subsection focuses on benches, cable systems, and attachments for functional training and mobility. These tools are excellent for mobility work, unilateral strength, and stability challenges. A practical weekly plan might alternate between pushing/pulling days and hinge/squat movements, using bench-based presses, cable chops, and adjustable step-ups with resistance bands. Include mobility circuits such as hip airplanes, thoracic rotations, and ankle dorsiflexion to support athletic performance and daily function. Case study data from home gym users shows that those who incorporate at least one mobility/drill circuit per session report reduced stiffness and better-range use by week 4 of a 6-week program.
Best practices for maximizing performance with Lifetime equipment include the following:
- Periodize training: alternate 4-week blocks with distinct emphasis (strength, hypertrophy, endurance) to prevent plateau.
- Maintain consistent tempo and control; avoid using momentum to complete reps on machines with fixed movement paths.
- Record progress: track weights, repetitions, and subjective effort to guide progression decisions.
- Progress safely: increase load conservatively and respect joint limits; seek professional guidance if uncertain about form.
Maintenance, troubleshooting, and lifecycle costs
Long-term use of Lifetime equipment hinges on proactive maintenance and informed cost management. Lifecycle planning includes budgeting for routine services, part replacements, and occasional upgrades to keep your setup aligned with evolving fitness goals. The following sections provide actionable strategies to extend equipment life, identify issues early, and manage total cost of ownership (TCO).
Preventive maintenance is the backbone of reliability. A practical schedule includes monthly cleaning of exposed surfaces, 60–90 days for lubricant checks on rails and pulleys (where applicable), and quarterly inspection of cables and belts for signs of wear or fraying. Tighten bolts to manufacturer torque specifications and verify seat and pad integrity to prevent discomfort or injury. Maintain a simple log with the date, item serviced, and any parts replaced. This log becomes a powerful tool when diagnosing persistent issues and deciding whether a component is nearing the end of its life. Additionally, perform a yearly professional inspection if your equipment bears heavy usage or has complex electrical systems. Implementing a robust maintenance plan reduces unexpected downtime and is often linked to higher resale value should you upgrade later.
Troubleshooting common issues is an essential skill for home gym owners. Typical problems include intermittent resistance on weight stacks, creaking or squeaking noises, misaligned guides, and error codes on digital displays. Start with the basics: confirm power supply and reset the machine, inspect for obstructions, and ensure all safety latches are functioning. For resistance issues, check for worn cables, frayed belts, or dirty guide rods, and replace components according to the manufacturer’s guidelines. If a display or sensor misreads, recalibrate or consult the manual to determine compatibility with your unit’s firmware. When in doubt, contact the manufacturer’s service line or an authorized technician to avoid voiding warranties. Many issues can be resolved with a clean, well-lubricated system, straightforward part replacements, and proper reassembly after maintenance is completed.
Lifecycle costs depend on usage intensity and the quality of components. A typical home gym with mid-range lifetime equipment may incur annual maintenance costs in the range of 5–15% of the original purchase price, including consumables, lubricant, and occasional part replacements. High-demand environments (family-wide use, frequent high-load sessions) tend toward the higher end of that range, while casual users may stay on the lower end. To manage costs, plan for periodic upgrades focused on the most-used components and store a small reserve for unexpected replacements. Real-world cases show that invested maintenance can push the usable life of a single station from 8–12 years to 12–15 years, depending on build quality and care routines.
Best practices for lifecycle cost management:
- Set a 12-month maintenance budget and prioritize consumables and critical wear items.
- Keep an inventory of spare parts compatible with your system’s model and serial number.
- Schedule proactive upgrades: replace cables, belts, or pads before performance declines or safety is compromised.
- Document all maintenance activity for warranty compliance and resale reliability.
Frequently Asked Questions
Q1: How do I know if Lifetime equipment is right for my space and budget?
Choosing the right equipment starts with measuring your space, estimating usage, and aligning features with your goals. For space, create a floor plan that allows 2–3 feet of clearance around each machine and additional room for free movement during circuits. Budget-wise, assess upfront costs, ongoing maintenance, and potential upgrades over the next 5–10 years. A practical approach is to evaluate a modular setup that can be expanded with compatible add-ons rather than purchasing a single large multi-station unit. In real-world scenarios, households with flexible gym configurations report higher adherence to routines because the space remains adaptable to evolving goals and family needs. Start with one solid foundation piece (such as a multi-station unit or a high-quality treadmill) and add complementary equipment in stages as your program grows.
Q2: What is the most important safety practice when using Lifetime equipment?
Safety begins with proper setup, correct form, and mindful progression. Always read the manual, verify that adjustable components are locked in place, and confirm weight stacks are secured before starting. Prioritize a clean, dry environment to prevent slips, and wear appropriate footwear and supportive attire. Use protective mats under cardio machines and around free weights. Keep a short warm-up and cooldown inside your routine to protect joints from abrupt loads. A case study of home gym users who followed these precautions reported fewer injuries and more consistent adherence to training plans over 12 weeks, underscoring the value of safety-first habits in long-term results.
Q3: How often should I perform maintenance on Lifetime equipment?
A practical cadence is quarterly maintenance for most components, with monthly cleaning and lubrication of moving parts where applicable. If your equipment sees heavy daily use or operates under high resistance, consider bi-monthly checks for wear on cables, belts, and guides. Keeping a maintenance log helps you identify wear trends and schedule part replacements before failure occurs. In real-world practice, consistent preventive maintenance reduces downtime by up to 40% and preserves performance quality, translating into more reliable workouts and longer equipment life.
Q4: How can I design a balanced workout with a single Lifetime setup?
Design a workout that targets all major muscle groups across a week while alternating intensity. A balanced plan might include two strength days (pushing, pulling, legs) and two cardio/mobility days, with an optional rest day. Use the machine’s stations for compound movements (chest press, leg extension/curl, lat pull) and complement with mobility drills and core work. Progression should be gradual: increase resistance or duration by 5–10% every 2–3 weeks, and incorporate deload weeks to prevent overtraining. Real-world users who followed a structured program reported greater progress and fewer plateaus than those who trained without a plan.
Q5: What metrics should I track to measure progress?
Track objective metrics such as weight lifted, repetitions completed, and duration of cardio sessions, plus subjective measures like perceived exertion and recovery quality. A simple weekly log that records these values helps identify trends and informs progression decisions. For example, if you can complete the target reps with perfect form for two consecutive sessions, you can increase the load or volume. Consistently logging mobility scores (range of motion in hips, shoulders, ankles) complements strength data by showing improvements in functional capacity, which often correlates with better daily performance and reduced injury risk.
Q6: Can I use Lifetime equipment for rehabilitation or medical conditions?
Yes, with medical clearance and appropriate modifications. Start with lighter loads, slower tempos, and higher control to protect joints and soft tissues. If you have a history of joint injury or chronic conditions, consult a physical therapist or certified trainer to tailor movements, amplitudes, and ranges of motion. Many users report that well-chosen modifications allow continued activity during rehabilitation phases, fostering confidence and adherence while maintaining safety. Always prioritize pain-free movements and stop if you experience sharp or persistent pain.
Q7: What maintenance mistakes should I avoid?
Avoid skipping lubrication, neglecting small tears in padding, or using abrasive cleaners that degrade finishes. Do not force adjustments beyond recommended ranges, as this can cause misalignment or structural stress. Neglecting cables or belts often leads to sudden breakdowns that require costly repairs. Instead, follow the manufacturer’s maintenance schedule, use recommended lubricants, and schedule professional inspections when you notice unusual noises or resistance changes. Real-world examples show that small maintenance errors compound over time, reducing performance and increasing downtime.
Q8: How should I sequence workouts when using multiple Lifetime machines?
Sequence workouts by movement pattern and energy demand. Start with compound, multi-joint movements (e.g., chest press, leg press) when you’re fresh, then move to accessory work (cables, rows, curls), and finish with mobility and core work. For cardio, place endurance intervals earlier in the session if your primary goal is cardiovascular improvement, or after strength work if your goal is metabolic conditioning. A typical weekly sequence is: day 1 total-body strength, day 2 cardio/intervals, day 3 mobility and core, day 4 full lower-body focus, day 5 upper-body push/pull with light cardio, then a rest day. This structure helps distribute fatigue and maximize recovery between sessions.
Q9: Is it worth upgrading Lifetime equipment or adding new modules?
Upgrades and modules are worth considering when they unlock new movement patterns, increase safety, or expand your progressions. Before purchasing an upgrade, map it against your goals and existing capacity: will it enable new exercises, reduce risk, or improve efficiency? Evaluate the reliability and compatibility of new modules with your current system, and compare the long-term maintenance impact. Real-world users report higher satisfaction when upgrades are integrated gradually and aligned with their training evolution, rather than as impulse purchases. Plan upgrades in phases to spread out costs and maintain consistent training momentum.