
Leg Press Feet: Optimal Foot Placement, Technique, and Safety for Better Results
Understanding the Leg Press Machine and Why Foot Placement Matters
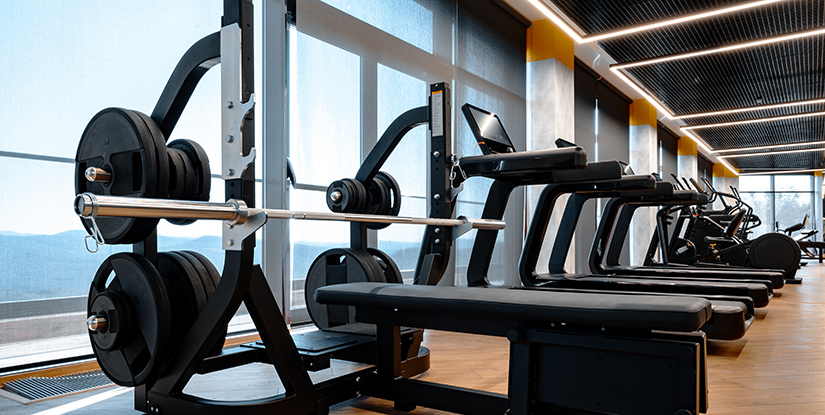
The leg press is a staple of strength training and rehabilitation because it targets the quadriceps, glutes, hamstrings, and adductors while providing a controlled platform for heavy loading. However, subtle changes in foot placement dramatically alter which muscles bear the load and how forces travel through the knee, hip, and ankle joints. Paying attention to the position of your feet on the footplate—height, width, and angle—translates directly into exercise specificity, injury risk mitigation, and measurable performance improvements.
Foot placement affects joint angles, range of motion, and muscular emphasis. For example, a higher foot position increases hip flexion and shifts emphasis toward the glutes and hamstrings. A lower placement increases knee flexion and emphasizes the quadriceps. Lateral and medial shifts—placing feet wider or narrower—change the contribution of the adductors and abductors. Understanding these relationships allows you to select foot positions that meet your goals: hypertrophy, strength, or rehabilitation.
Beyond muscle targeting, foot placement drives joint stress patterns. Too low a foot position with excessive knee flexion can increase patellofemoral pressure, aggravating anterior knee pain. Extremely wide stances can overload the adductors and strain the sacroiliac region if mobility or core stability is lacking. Effective programming blends mechanical understanding with individual anatomy: limb length, ankle dorsiflexion, and hip internal rotation will all influence what is safe and productive for a given trainee.
Practical considerations matter as well. Footplate size, machine angle, sled travel, and backrest angle differ between plate-loaded and stacked machines. These equipment variables interact with foot placement decisions. A comprehensive approach assesses personal mobility, machine geometry, and training goals before prescribing a specific 'leg press feet' strategy. Below, we break down the biomechanics and common positions with actionable examples and tips you can use immediately at the gym.
Biomechanics of Foot Placement: How Feet Change Joint Demands
From a biomechanical perspective, foot placement changes the lever arms at the hip and knee and alters the center of pressure on the footplate. When feet are placed higher, the hip moment arm increases, meaning more torque is generated at the hip relative to the knee. This translates into greater activation of the posterior chain—glutes and hamstrings—especially during the concentric phase. Conversely, a lower foot position shortens the hip moment arm and lengthens the knee moment arm, directing load to the quadriceps.
The sagittal plane changes (front-to-back foot shifts) affect range of motion and shear forces. Placing the feet further forward reduces knee flexion and can allow heavier loads with less patellar stress, while pulling the feet closer to the torso increases knee flexion and quadriceps demand but may also increase tibiofemoral compressive forces. Foot angle (toes out vs. neutral) influences femoral rotation and can change the emphasis on medial or lateral quadriceps heads.
Understanding how these mechanical relationships interact with individual anatomy is essential. For example, trainees with limited ankle dorsiflexion will naturally adopt a more posterior foot position to achieve depth, which may shift work to the posterior chain. A simple assessment—observe range of motion and report of comfort at different foot placements—helps you choose positions that maximize force production while minimizing injurious stress.
Common Foot Positions and Muscle Emphasis: Practical Examples
There are three commonly used foot placements on the leg press: high, mid, and low, plus variations in width and toe angle. Each has predictable muscle emphasis and practical uses:
- High Foot Placement: Feet positioned higher on the plate increase hip flexion and recruit glutes and hamstrings more. Use for glute-focused hypertrophy and balanced posterior chain development; useful when targeting deadlift assistance or hip drive.
- Mid Foot Placement: Feet centered on the plate create a balanced distribution between quads and glutes. This is the default position for general strength and hypertrophy programs and is safest for most lifters.
- Low Foot Placement: Feet lower on the plate emphasize knee flexion and quadriceps. Use with controlled depth to hypertrophy the quads and for athletes needing explosive knee extension power.
- Wide vs Narrow Stance: Wider stances recruit adductors and can reduce the required hip range; narrow stances emphasize the quadriceps. Adjust according to limb length and hip mobility.
- Toe Angle: Toes pointed slightly outward can reduce knee valgus risk and distribute load more evenly across the quadriceps; be cautious with excessive turnout which increases hip external rotation and may stress the groin.
Practical tip: perform 2–3 sets experimenting with smaller changes (2–4 cm up or down, 5-degree toe adjustments) and use a rep range where fatigue is consistent (8–12 reps for hypertrophy) to perceive which placement yields the best muscle tension and comfort.
Best Practices for Safe and Effective Leg Press Use
Safe and effective leg press performance begins with proper setup and movement awareness. Before loading the sled, ensure the backrest and footplate allow you to achieve the target joint angles without compensatory spine flexion or knee valgus. A typical setup includes seating so that when the sled is racked, knees are at roughly 90 degrees or slightly more depending on machine geometry and personal mobility. Tighten the core and keep the lumbar spine in neutral as you press. A controlled eccentric descent and smooth concentric drive prevent jarring forces and reduce tendon strain.
Foot-placement-specific cues help maintain alignment: press evenly through the whole foot, avoid driving through the toes only, and keep knees tracking over the second and third toes. Many lifters unconsciously let the knees collapse inward at depth; use a narrower load and deliberate cueing—'knees out' or 'push the floor apart'—to encourage proper tracking. If available, use a mirror or record a set to observe knee travel and hip control.
Load selection is another cornerstone of safe training. The leg press allows for relatively heavy loading because the spine is supported, but that advantage requires disciplined progression. Start with weights that allow consistent technique for your programmed reps: if your last reps degrade into uncontrolled hip hinge or knees collapse, reduce the load. Use the leg press to target a specific rep quality: heavy 4–6 reps for strength with full recovery, 8–12 for hypertrophy with controlled tempo, and higher reps for endurance or conditioning. Tempo matters: a slow, controlled descent of 2–4 seconds increases time under tension and reduces momentum-driven compensations.
Step-by-Step Setup and Movement Cues
1) Adjust the seat/backrest so you can place your feet at the chosen footplate position and achieve the desired starting knee angle—commonly around 90–110 degrees. 2) Place your feet firmly on the plate: toes forward or slightly turned out depending on the cue. 3) Brace your core and maintain a neutral spine, avoiding excessive lumbar rounding or hyperextension. 4) Unlock the sled, perform a controlled eccentric descent until your knees reach the planned depth without pain, and push through the whole foot in a smooth concentric drive.
Key cues: 'drive through the heels' (to emphasize posterior chain), 'push through the midfoot' (for balanced activation), and 'knees track over toes' (for joint alignment). If you experience discomfort, pause and test different foot heights or reduce depth. Use safety stops or pins where available to avoid getting trapped under the sled if form or strength fails mid-set.
Finally, integrate breathing: inhale on descent, brace, and exhale during the concentric phase. Avoid breath-holding for high-volume sets; for maximal single-effort lifts, a Valsalva maneuver controlled by experienced lifters can stabilize the spine, but this should be used judiciously.
Load Selection, Tempo, and Progression Strategies
Choose load based on objective: for strength, use heavier loads with lower reps (3–6) and longer rest (2–4 minutes). For hypertrophy, favor moderate loads with 8–15 reps, shorter rest (60–90 seconds), and controlled eccentric phases. For joint resilience or rehab, use lighter loads and higher reps with strict technique. Track performance with objective measures—rep ranges, RPE, or bar speed—so progress is deliberate.
Progression strategies include linear load increases, volume progression (more sets or reps), and intensity techniques like drop sets or tempo modifications. For instance, you can add 2–5% load once you can complete two extra reps beyond your target across all sets. Another method is micro-loading: small incremental increases (1.25–2.5 kg) to maintain technical quality while slowly increasing stimulus.
Tempo variations—slow eccentrics, paused reps at the bottom, or explosive concentric drives—alter the training stimulus without dramatic load changes. Use paused reps to address sticking points and reduce momentum; use explosive concentric efforts when training for power, ensuring that foot placement remains stable and knees track properly under speed.
Troubleshooting, Variations, and Integrating the Leg Press into Your Program
Even with solid technique, issues may arise: anterior knee pain, lower back discomfort, or lack of perceived activation. Troubleshooting begins with mobility checks. Limited ankle dorsiflexion often forces deeper knee flexion or posterior positioning that shifts work away from the intended muscle group and may create discomfort. Hip mobility or femoral internal rotation limits will change knee tracking. Address mobility with targeted stretches and soft tissue work before persisting with heavy leg press loads.
Form faults are often technique-based. Common problems include too much knee travel past the toes (which increases shear at the knee for certain individuals), excessive lumbar rounding at depth, or unilateral dominance where one leg pushes harder than the other. Use lighter loads, reduce depth, and incorporate unilateral variations such as single-leg press or split squats to correct imbalances. Video analysis or coach feedback is invaluable for precise corrections.
Program integration: the leg press is an accessory to free-weight lower-body lifts like squats and deadlifts. Use it to add volume while sparing the spine, to target specific muscle groups after compound lifts, or as a primary movement for trainees unable to squat. Placement in a workout depends on goals—for strength cycles, perform heavy leg presses after squats or on a separate day; for hypertrophy, include higher-volume leg press work later in the session.
Addressing Pain, Mobility Limits, and Form Faults
If you experience pain, first identify the pain location: anterior knee, medial knee, hip, or lower back. Anterior knee pain often stems from patellofemoral stress due to excessive depth or low foot placement; remedy with higher foot placement, reduced depth, or quadriceps-hamstring balance work. Medial knee or groin pain can result from excessive stance width or toe-out; reduce width and check hip rotation strength. Lower back pain may be caused by uncontrolled lumbar flexion—reduce load, check backrest angle, and ensure core bracing.
Mmobility interventions include ankle dorsiflexion drills (knee-to-wall stretches), hip flexor and glute activation work, and thoracic mobility to improve overall squat and press mechanics. Address unilateral dominance by incorporating single-leg work like Bulgarian split squats or single-leg presses, using lighter loads and higher reps to build symmetry.
When faults persist, reduce complexity: simplify the movement, reduce load, and perform slow tempo reps focusing on hip-knee coordination. Consistent, measured progress and data tracking (weights, reps, RPE) helps determine when to safely increase intensity again.
Variations and Complementary Exercises for Balanced Development
Leg press variations expand training possibilities: single-leg press, narrow and wide foot positions, or changing the sled angle to alter movement demands. Single-leg press corrects imbalances and enhances unilateral stability; use lighter loads with strict control. Alternating foot positions across cycles can promote balanced development—e.g., 4 weeks focused on high foot placement for posterior chain, followed by 4 weeks lower placement to emphasize quads.
Complementary exercises include squats (back and front), Romanian deadlifts, split squats, and lunges. For hip drive and sprint performance, pair leg press work with glute activation circuits and explosive plyometrics. For knee tracking issues, incorporate band-resisted lateral walks and glute med strengthening. Use accessory movements to plug weak links discovered during leg press sessions.
Programming example: on lower-body day, begin with compound lifts (squats or deadlifts), follow with 3–4 sets of leg press using a mid foot placement for 8–12 reps, then finish with unilateral single-leg work and core stability to reinforce balance and prevent compensation.
FAQs
1. How should I position my feet on the leg press to target my quads?
To emphasize the quadriceps, place your feet lower on the plate and maintain a narrower stance. A lower foot position increases knee flexion and leverages the knee moment arm, directing more work to the quadriceps during both the eccentric and concentric phases. Keep toes pointed forward or slightly out, maintain even pressure through the midfoot, and avoid excessive depth if it causes discomfort. Start with moderate loads and controlled tempo—4 seconds down and a smooth drive up—to maximize quad tension while minimizing joint stress. If you have patellofemoral pain, reduce depth and consult a clinician before heavy loading.
2. Does a higher foot placement on the leg press really work the glutes more?
Yes. A higher foot placement increases hip flexion at the bottom of the movement and shifts the mechanical emphasis toward the glutes and hamstrings. This position increases the hip moment arm and reduces relative knee moment demand, meaning the posterior chain contributes more during the concentric drive. Use this placement when you want to target glute hypertrophy or develop stronger hip extension for athletic movements. Combine with cues like 'drive through the heels' and a deliberate pause to ensure the glutes are engaged and not masked by quad dominance.
3. Is it safe to use heavy loads on the leg press?
The leg press allows heavy loading because the spine is supported, but safety depends on technique and mobility. Heavy loads are appropriate when you can maintain neutral lumbar position, knees tracking properly, and controlled range of motion. Use progressive loading, prioritize form, and employ safety stops or pins. If you experience lower back pain, knee discomfort, or loss of control at depth, reduce load and reassess foot placement and mobility. For maximal single reps, experienced lifters may use bracing techniques, but caution is advised if you have cardiovascular concerns or lack coaching oversight.
4. How can I correct one leg doing more work than the other during leg press?
Unilateral dominance often shows as one leg consistently pushing harder. Correct with single-leg variations like single-leg press or Bulgarian split squats to equalize strength and coordination. Reduce the load and perform higher-rep sets focusing on slow, controlled movements and symmetry. Video analysis helps identify technical asymmetries—hip hiking, early knee extension, or foot position differences. Address mobility or neural drive issues with targeted activation drills and progressive unilateral loading until the imbalance resolves.
5. What should I do if my knees cave inward during the leg press?
Knee valgus during leg press commonly results from weak hip abductors, poor ankle stability, or excessive load. Use cues like 'knees out' or 'push the floor apart' to re-engage the glute medius. Strengthen lateral hip muscles with band walks, clamshells, and single-leg Romanian deadlifts. Temporarily reduce load and narrow depth until knee tracking improves. If valgus persists despite corrections, consult a physiotherapist to assess joint integrity and movement patterns before continuing heavy loading.
6. Can the leg press replace squats in my program?
The leg press can functionally replace squats for trainees with spinal restrictions or those needing to add volume without axial loading. However, squats offer unique benefits for core stability, balance, and intersegmental coordination that the leg press cannot fully replicate. For general strength and athletic development, it is best used as a complement rather than a full replacement—use leg press for volume, accessory hypertrophy, or when spine loading needs to be minimized.
7. How often should I include leg press work in my weekly routine?
Frequency depends on training goals and overall program structure. For hypertrophy, 2–3 weekly sessions with 6–12 sets total per week for a given muscle group is typical; split that across sessions with varied foot placements to distribute stimulus. For strength, incorporate 1–2 focused heavy sessions per week alongside squats and deadlifts. For rehabilitation or conditioning, higher frequency with lower loads and controlled volume can be useful. Monitor recovery indicators—soreness, performance consistency, and sleep—to adjust frequency appropriately.