
Lever Pulldown Fitness Equipment: Comprehensive Guide to Selection, Technique, and Maintenance
Overview of Fitness Equipment and the Lever Pulldown
The lever pulldown is a staple in both commercial gyms and well-equipped home facilities. It is a variation of the traditional lat pulldown that uses a lever arm mechanism rather than only a cable and fixed bar, offering different biomechanics and loading characteristics. Understanding what a lever pulldown is and how it differs from other pulldown styles is essential for trainers, gym owners, and athletes who want to optimize back development, posture, and pulling strength.
Lever pulldown machines typically allow the trainee to generate force through a lever arm pivoting around a fulcrum; the resistance can be provided by a weight stack, plate-loaded system, or integrated resistance device. This design changes the moment arm and often gives a more consistent resistance curve for the targeted muscles, particularly the latissimus dorsi, teres major, posterior deltoid, and the upper back stabilizers. Because of its mechanical advantages, a lever pulldown can feel more natural for some users and can reduce strain on the shoulders when compared with some cable-based designs.
When integrating a lever pulldown into programming, consider the user population, training goals, and space constraints. For hypertrophy and muscle balance, slow controlled repetitions with a full range of motion are effective; for strength, heavier loads with lower repetition ranges are appropriate. The lever pulldown can also be useful in rehabilitation contexts because its fixed pivot point and guided path reduce the need for complex stabilization, allowing therapists to isolate movement patterns and monitor progress reliably.
- Key benefits: improved lat activation, reduced shoulder stress, predictable resistance curve.
- Common uses: strength training, hypertrophy, postural correction, and rehabilitation.
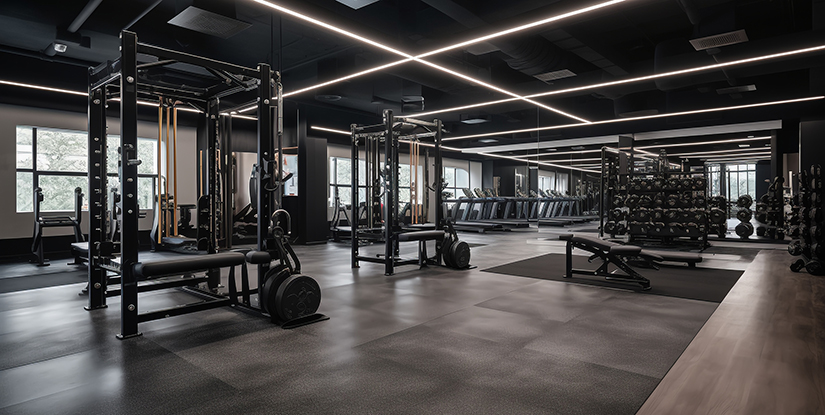
- Typical settings: commercial gyms, physiotherapy clinics, and advanced home gyms.
What is a lever pulldown?
A lever pulldown machine typically features a lever arm attached to a pivot with handles for pulling down. Unlike traditional cable lat pulldown machines that rely on a cable routing system, lever pulldown devices convert linear muscular effort into rotational force around a pivot. The lever may be fixed in length or adjustable, and resistance is commonly applied via weight stacks, plates, or magnetic/resistance cartridges. This translates to a different torque profile across the range of motion, which can feel more or less challenging at different joint angles depending on the machine design.
Because the lever imposes a predetermined path, it allows for consistent repetition mechanics and simpler load monitoring — useful for both novices learning technique and advanced athletes tracking strength progression. Many modern lever pulldown designs include adjustable thigh pads, seat height, and handle options to accommodate anthropometric differences and training modalities. The specificity of movement makes it easier to target the lats while minimizing compensatory patterns from the biceps or lower back.
Typical lever pulldown grips include wide neutral handles, pronated bars, or multi-grip attachments. Some units allow unilateral work by disconnecting one side of the lever, which is valuable for correcting asymmetries or working at different intensities per side. When selecting or programming a lever pulldown exercise, it’s important to match the attachment, hand placement, and seat adjustments to the athlete’s anatomy and training objectives.
Muscles targeted and training benefits
The primary muscle targeted by lever pulldown is the latissimus dorsi — a large, flat muscle that contributes to shoulder adduction, extension, and internal rotation. Secondary muscles include the teres major, rhomboids, trapezius (mid and lower fibers), posterior deltoid, and the biceps brachii (as an assisting elbow flexor). Additionally, the core and lumbar extensors act isometrically to stabilize the torso during controlled pulldown movements.
Training benefits of the lever pulldown are multifaceted. For hypertrophy, the machine’s stable path and isolation potential allow high-quality repetitions with reduced compensatory movement, enabling targeted overload. For strength, the equipment supports higher absolute loads with reliable mechanics. In postural and rehabilitative contexts, the lever design can reduce shear at the shoulder joint, making it a preferred option for those recovering from rotator cuff or impingement issues when used under professional supervision.
Further advantages include ease of technique instruction, lower skill ceiling for effective execution compared to free weights, and safety for heavy sets as the guided path minimizes risk of abrupt deviation. Practical tips: use a variety of grips to emphasize different portions of the back, maintain a controlled eccentric phase to maximize time under tension, and avoid excessive torso lean that shifts load away from the lats.
Types of Lever Pulldown Machines and Key Design Features
Lever pulldown machines come in several formats designed to meet different needs: plate-loaded versus weight-stack, single-arm versus dual-arm, fixed-length versus adjustable-lever, and integrated multi-grip versus single-bar designs. Understanding these variants helps gyms and individuals choose the right unit for space, budget, and training demands. Each design influences biomechanics, maintenance requirements, and programming flexibility.
Plate-loaded lever pulldowns generally appeal to strength-focused facilities because they allow incremental loading with standard plates and often have a more robust, commercial-grade construction. Weight-stack machines offer convenience and quick weight selection, making them ideal for high-turnover commercial gyms and physiotherapy clinics. Dual-arm units permit symmetric bilateral loading, while single-arm options enable unilateral work to address asymmetries or provide rehabilitation protocols that require isolating one side.
Other design features to consider include pivot placement, which affects the resistance curve; handle options for pronated, supinated, neutral, or multi-angle grips; seat and thigh restraint adjustments to stabilize the pelvis; and footprint and height which determine the machine’s suitability for home or commercial spaces. Some manufacturers provide modular attachments such as chest pads, reverse-grip handles, or extended lever arms for taller users.
- Plate-loaded vs weight-stack: trade-offs between load granularity and convenience.
- Single vs dual-arm: choose unilateral for corrective work, bilateral for max strength.
- Attachments: multi-grip handles expand exercise variety and muscle emphasis.
Variants and attachments
Common variants of lever pulldown equipment include seated dual-arm levers, standing lever rigs, and combo stations that pair pulldowns with low rows or chest-supported rows. Seated dual-arm levers are widespread in commercial environments; they provide stable torso support and adjustable thigh pads. Standing rigs can be used for more dynamic training and often have a larger footprint suitable for athletic performance centers. Combo stations maximize space efficiency by offering multiple pulling options within the same chassis.
Attachments significantly increase exercise variety. Multi-grip handles allow narrow, neutral, and wide grips that emphasize different back fibers. Close-grip V-handles shift emphasis to the lower lats and rhomboids, while wide pronated bars more heavily recruit the upper lat and teres major. Some systems offer rotating handles to maintain wrist neutrality through the range of motion, reducing strain on the wrist and forearm. Consider attachments that match client needs: rehab clients may need ergonomic neutral grips, while athletes could benefit from a variety of grip widths to simulate sport-specific pulling actions.
Practical recommendation: when choosing attachments, prioritize durable components and quick-change designs. For multi-user settings, ensure the most common handle choices (wide, neutral, narrow) are always available to accommodate different training protocols and hand sizes.
Mechanical design features and user adjustability
Mechanical elements such as the lever arm length, pivot placement, cam shapes, and fulcrum bearings determine the machine’s resistance profile. A longer lever arm generally increases the range of motion but may change perceived load at different joint angles. Some manufacturers build variable-cam designs to create a specific torque curve that matches human strength patterns; others use straight levers for consistent mechanical simplicity. High-quality bearings and bushings ensure smooth motion and reduce maintenance frequency.
User adjustability is critical for usability and safety. Adjustable seat height and thigh restraints help align the user’s shoulder joint with the pivot and stabilize the pelvis to isolate the lats. Foot platforms, back pads, and range-of-motion stops can be valuable for accommodating mobility limitations or for therapists prescribing partial-range work. Evaluate how easy adjustments are to perform: tool-free, pin-based adjustments are preferable in busy gyms to minimize downtime between users.
Durability considerations: steel gauge, weld quality, and powder-coated finishes affect longevity in commercial settings. Check manufacturer load ratings and warranty terms. For commercial buyers, corrosion-resistant materials and easily replaceable parts reduce lifecycle costs. For home users, prioritize compact footprints, noise control (low bearing friction), and compatible attachments for the space available.
Proper Technique, Programming, and Common Mistakes for Lever Pulldown
Mastering lever pulldown technique involves posture, grip selection, controlled tempo, and correct use of the machine’s adjustments. A proper set starts with seat and thigh pad adjustments to ensure the shoulders align with the pivot and the hips are stable. Hand position matters: wide grips target the outer lat fibers while closer grips shift emphasis to the lower lats and mid-back. Regardless of grip, maintain a tall chest and avoid excessive thoracic flexion to preserve upper-back engagement and minimize spinal strain.
Tempo and range-of-motion cues are crucial. A typical hypertrophy prescription uses a 2-1-2 tempo (2 seconds eccentric, 1-second pause, 2 seconds concentric) with full lat engagement at the bottom and controlled return. Avoid jerky movements or relying on momentum; the machine’s guided path can create a false sense of security that encourages swinging. Instead, focus on initiating the pull with scapular depression and retraction followed by elbow-driven movement to maximize lat recruitment and reduce biceps dominance.
Common mistakes include using too much weight, pulling the bar or handles behind the neck, excessive torso lean forward or backward, and inadequate seat/leg stabilization. Pulling behind the neck increases shoulder impingement risk and should be avoided; instead, bring the handles to the upper chest with a slight backward lean and a proud chest. Reduce weight if scapular control is lost or if the trainee substitutes lower back momentum for arm pulling.
- Essential technique: align pivot with shoulder, keep chest lifted, initiate with scapula.
- Avoid: behind-the-neck pulls, swinging, excessive grip width beyond comfort.
- Tempo tip: use slow eccentrics to increase time under tension and hypertrophic stimulus.
Step-by-step technique and cues
Start by adjusting the seat so that when seated the user’s shoulders sit slightly below the lever pivot. Lock thigh restraints to prevent the hips from rising during the concentric phase. Choose an appropriate handle and ensure a secure grip: thumbs can be wrapped for maximal security or kept over the handle for greater forearm involvement depending on training goals. The initial position should be with arms extended, scapulae slightly protracted to establish full range.
Execution sequence: 1) initiate the pull by depressing the scapulae and engaging the lats; 2) retract the scapulae as the elbows move down and back; 3) finish with the handles touching or approaching the upper chest without excessive neck flexion; 4) control the eccentric phase, allowing the shoulders to return under tension to full extension. Coaching cues: "lead with the elbows," "keep the chest proud," and "slow on the way down." Monitor for common compensations: shoulder shrugging signals trap dominance, and hip drive indicates too much load or weak scapular control.
For trainees with limited shoulder mobility, reduce the range slightly and add mobility work separately. For strength-focused sets, use lower reps but ensure the same technical sequence to avoid creating motor pattern errors under load. Use unilateral variations to correct asymmetries and include isometric holds at the bottom of the movement to reinforce lat tension and scapular control.
Programming, progressions, and sample workouts
Programming the lever pulldown should align with periodization goals. For hypertrophy: 3–5 sets of 8–12 reps with controlled 2–1–2 tempo, moderate rest (60–90 seconds), and a focus on progressive overload via load increments or increased time under tension. For strength phases: 4–6 sets of 3–6 reps at higher load, slower eccentric control, and longer rests (2–3 minutes). For endurance or conditioning: 2–4 sets of 12–20 reps with shorter rest and a brisk but controlled tempo.
Progression strategies include increasing load by small increments, manipulating tempo (e.g., longer eccentrics), adjusting grip variations to change mechanical demand, and incorporating advanced techniques such as drop sets, rest-pause, or paused eccentrics. Unilateral progressions help fix imbalances by ensuring each side works through full range with appropriate loading. For clients with rehab needs, progress from machine-assisted partial range to full range and then to higher-load bilateral work as tolerated.
Sample sessions:
- Hypertrophy day: Warm-up 5–10 min, 4x10 lever pulldown (2-1-2), supersetted with incline dumbbell row 3x10.
- Strength day: Warm-up, 5x5 heavy lever pulldown, accessory single-arm rows 3x8 each side.
- Rehab progression: 3x12 partial-range unilateral pulldown focusing on scapular control, followed by low-load TR X-band pulls for scapular endurance.
Maintenance, Buying Guide, and How to Choose the Right Equipment
Maintaining lever pulldown equipment increases lifespan and ensures user safety. Regular inspection of pivot bearings, bushings, cables (if present), attachment points, and weight stack operations will prevent sudden failures. A preventative maintenance schedule should include daily visual checks in high-use environments and monthly lubrication and hardware torque inspections. For home users, a quarterly review is typically sufficient provided usage is moderate.
When purchasing, consider intended user population, budget, available floor space, and required durability. Commercial-grade machines are built for frequent heavy use and often have longer warranties and replaceable parts, whereas home units balance cost and footprint but may not sustain high-volume use without accelerated wear. Evaluate the warranty coverage for bearings, frames, and moving parts; a solid warranty is often indicative of manufacturer confidence and availability of spare components.
Accessibility and fit matter. Check seat height range, thigh restraint adjustability, and handle ergonomics to ensure the target population can use the machine safely. Consider serviceability: can common wear parts be ordered locally? Is the machine modular for future expansion? Measure ceiling height and footprint to confirm compatibility. Energy use and noise are additional factors for home and apartment settings where quiet operation may be preferred.
- Maintenance checklist: pivot lubrication, fastener torque, pad inspection, handle integrity.
- Buying priorities: durability, ergonomics, warranty, footprint, and serviceability.
- Space planning: account for movement clearance, user approach, and accessory storage.
Maintenance and inspection checklist
Create a maintenance log that records weekly, monthly, and annual tasks. Weekly checks in a commercial setting should include visual inspections for loose bolts, pad tears, and abnormal noises during operation. Monthly tasks include lubricating pivots per manufacturer instructions, inspecting bearings for play, and testing the weight selector or plate receivers for smooth engagement. Annual maintenance often involves deeper inspection of structural welds, re-torqueing all major fasteners, and ordering replacement bushings or bearings if wear is detected.
Specific items to monitor: 1) Pivot play — any lateral or axial movement often indicates worn bearings; 2) Handle and cable integrity — frayed cables or cracked grips must be replaced immediately; 3) Weight stack alignment — stuck or misaligned plates can cause pin damage and increased wear; 4) Upholstery — torn pads should be repaired to avoid further degradation and hygiene issues. Keep spare pins, handles, and basic tools on site for quick fixes and minimize downtime. For home users, follow manufacturer care guides closely and avoid overloading plate sleeves beyond rated capacities.
Safety protocols: train staff to take machines out of service when faults are detected, and place clear signage until repairs are complete. Establish supplier relationships for expedited parts replacement to maintain equipment uptime in high-traffic facilities.
Buying considerations: home vs commercial, budget, and footprint
For commercial purchases prioritize robust construction, heavy-duty bearings, and long-term warranty support. Expect higher upfront costs but lower lifetime costs due to durability and parts availability. Evaluate manufacturer service networks and delivery/installation options — professional installation reduces initial alignment issues that can shorten equipment life. Consider user demographics: taller athletes may need higher seat adjustment ranges and longer lever arms; rehabilitation clients benefit from fine-grain adjustment options and neutral grips.
Home buyers should assess space constraints and noise. Compact or foldable units may save room but check stability under heavy loads. Look for plate-loading options if you already own standard plates to save money; conversely, weight-stack systems are more convenient for single users or small home gyms. Budget realistically: extremely low-cost units often have compromised frames, substandard bearings, and limited warranties. Balance price with features you will consistently use — multiple grip attachments and easy adjustments are worth paying for if they improve training adherence.
Examples: a mid-range commercial lever pulldown suitable for boutique gyms will prioritize a 2–3 mm steel gauge frame, sealed bearings, and replaceable handle sets. A home-oriented model may use thinner steel but include a smaller footprint and quieter bushings. Always ask for in-person demos where possible and request user dimensions to verify comfort and range of motion for the primary trainees.
FAQs
-
Q1: Is a lever pulldown better than a cable lat pulldown?
A1: "Better" depends on goals. Lever pulldowns provide a guided pivot and predictable resistance curve, which can improve muscle targeting and reduce shoulder strain. Cable pulldowns offer more variability in path and attachments and can be more versatile for functional training. Choose based on user needs: consistency and isolation favor lever designs; versatility favors cable systems.
-
Q2: Can beginners safely use a lever pulldown?
A2: Yes. The guided path and adjustable settings usually make lever pulldowns beginner-friendly. Ensure seat and thigh pads are set correctly and start with light loads to practice scapular control and elbow-driven pulling mechanics before increasing weight.
-
Q3: How often should I service a lever pulldown unit?
A3: High-use commercial units should have weekly visual checks, monthly lubrication and inspection, and an annual deep maintenance. Home units with moderate use can follow a quarterly inspection schedule with annual servicing as needed. Always follow the manufacturer's maintenance schedule.
-
Q4: What are common injuries related to improper pulldown use?
A4: Common issues include shoulder impingement from behind-the-neck pulls, lower back strain from excessive torso lean and momentum, and biceps tendon overload if the elbows lead the movement. Correct setup and technique minimize these risks.
-
Q5: Can lever pulldowns be used for unilateral training?
A5: Many lever designs allow unilateral work either by individual arms or by detaching one side, enabling correction of asymmetries and targeted rehabilitation. If the machine is bilateral only, single-arm cable variations may be used as an alternative.
-
Q6: What grip should I use to target lower lats?
A6: A close neutral grip or V-handle tends to emphasize the lower lat fibers and the mid-back. Ensure full range without torso compensation; pair with rowing movements for comprehensive lat development.
-
Q7: How do I choose between plate-loaded and weight-stack lever pulldowns?
A7: Plate-loaded units offer fine control for heavy loading and are preferred by strength-focused facilities if plates are readily available. Weight-stack machines are convenient for quick changes and are often safer in multi-user environments. Consider throughput, budget, and whether you already own standardized plates when deciding.