
Ultimate Guide to Choosing and Using a Multi Functional Trainer Smith Machine Squat Rack
Equipment Overview: What a Multi Functional Trainer Smith Machine Squat Rack Is and Why It Matters
A multi functional trainer smith machine squat rack combines three key pieces of resistance training hardware into a single integrated station: a smith machine (guided-barbell system), a functional trainer (cable-pulley system), and a squat rack (adjustable uprights and safety stops). For commercial gyms, personal training studios, and serious home lifters, this hybrid solution improves space efficiency, user versatility, and overall workout programming. It supports compound lifts (squats, bench presses), isolation movements (cable flyes, tricep pushdowns), and assisted variations (guided smith-machine rows), reducing the need for multiple standalone stations.
Market data illustrates demand: the global strength training equipment segment has steadily expanded, with industry reports estimating the commercial sector contributes a significant share—many facilities find multifunctional units lower capital expenditure per user station by 20–40% compared to separate units. Real-world adoption is highest where floor space costs exceed $50/sq ft annually, making equipment density a financial priority.
Key performance specifications that distinguish models are:
- Load capacity: common commercial units support 800–1,200 lb (363–544 kg) total resistance on the smith and 400–600 lb (181–272 kg) on cable stacks.
- Footprint: typical dimension range is 6–10 ft (1.8–3 m) wide by 4–6 ft (1.2–1.8 m) deep—critical when planning gym layouts.
- Adjustability: number of pulley positions (10+ recommended), smith bar increments, safety catch increments, and storage points for accessories.
Benefits include:
- Versatility: one-station solution for strength, hypertrophy, and functional training.
- Safety: guided bar reduces spotter need; adjustable catches protect lifters during maximal attempts.
- Commercial durability: welded frames, electroplated guide rods, and high-grade pulleys improve lifespan.
Practical tip: when evaluating models, request load-test certificates, warranty details (frame warranty 5–10 years typical), and maintenance logs for used units. For home setups, prioritize size and noise-reduction features; for commercial buyers, consider modular add-ons like leg press attachments and dual weight stacks to support simultaneous users.
Key Components and How Each Affects Performance
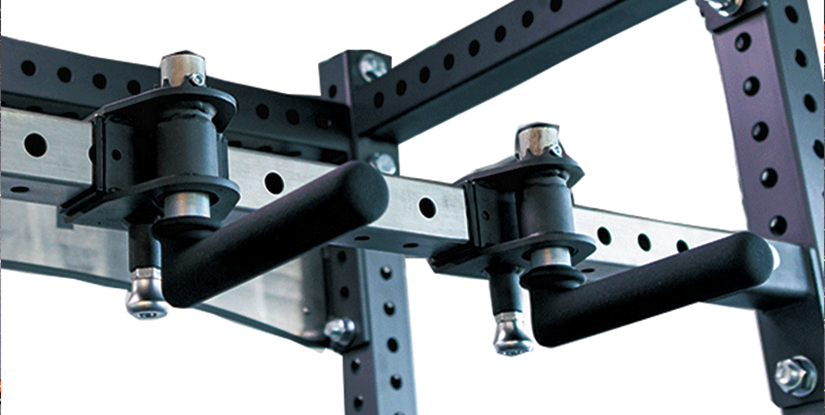
Understanding component-level differences helps specify the right unit for your needs. Core components include the guided bar (smith rail), cable/pulley system, uprights and safety catches, weight stacks or plate holders, and accessory integration points. Each affects usability and training options.
Guided bar characteristics:
- Linear bearings vs. bushing systems: linear bearings provide smooth, low-friction movement ideal for heavy lifts; bushings are quieter but may wear faster under high loads.
- Counterbalance systems: some smith machines include counterbalance springs to offset bar weight—useful for beginners or rehab clients.
Cable/pulley specifics:
- Pulley quality: sealed ball-bearing pulleys with 2" sheave diameter reduce wear and enable heavier loads.
- Cable material: coated aircraft cable resists fraying; typical tensile strength ratings are 4,000–10,000 lb.
Safety and adjustability:
- Incremental catch positions (minimum 20 positions recommended) allow precise rack height for diverse athlete heights.
- Safety pins and mechanical locks should be rated to at least the maximum intended user load with an additional 30% safety margin.
Case example: a boutique gym upgraded to a multifunctional trainer smith machine squat rack and reduced peak-hour wait times by 35% while increasing program variety for small-group training classes. The decision hinged on specifying dual cable stacks and independent smith-bar locks to allow two users to train safely at once.
Setup, Programming, and Safety: Step-by-Step Guide to Deploying and Using Your Station
Proper installation and programming maximize safety and return on investment. Begin with a site assessment: measure ceiling height, confirm floor load capacity, and ensure adequate clearance—recommend at least 36 inches (90 cm) behind and to the sides to allow full ROM and accessory use. For commercial installations, allocate a minimum 60–72" (1.5–1.8 m) clear vertical space above the smith bar path to accommodate overhead movements.
Step-by-step setup checklist:
- Unpack and inventory components against manufacturer bill of materials.
- Position unit on flat, level surface; use vibration-dampening mats if on hard flooring.
- Anchor uprights if recommended—commercial installations may require bolting to concrete slabs using specified anchors.
- Install weight stacks/cable attachments, thread cables per schematic, and check pulley alignment.
- Perform static and dynamic load tests: 125% of expected maximum load for 100 cycles to confirm bearing integrity.
- Train staff on safety features, emergency bar release, and user protocols.
Training program integration:
- Strength block (4–8 weeks): use smith bar for squat variations and bench press for controlled overload; cable-based accessory work for hypertrophy.
- Functional block (3–6 weeks): emphasize single-arm cable patterns, anti-rotation chops, and assisted bodyweight movements.
- Rehab and beginner progression: leverage counterbalance and guided movements to reintroduce load with low injury risk.
Safety best practices:
- Enforce slide-locks when loading/unloading plates or using the smith bar; never leave unsecured weight stacks in a position where cables could disengage.
- Establish clear zone markings (e.g., floor tape) to prevent accidental collisions in busy areas.
- Implement pre-use checklists for staff: cable tension, pulley wear, guide-rod lubrication, and visible frame cracks.
Practical tip: include a visible placard on the machine showing common progression templates and recommended safety stops for popular lifts (e.g., bar set 2" below upright shoulders for bench press). For personal trainers, design circuit templates that combine three movements—smith compound, cable unilateral exercise, and accessory plate-loaded movement—to keep session density high.
Step-by-Step Installation and Initial Testing (Detailed)
Installation should be methodical to ensure long-term reliability and safety. Start by reading the user manual end-to-end and confirming you have required tools (torque wrench, thread-lock, concrete anchors). Use two or more trained technicians for assembly; large frames can be heavy and alignment-sensitive.
Detailed testing protocol:
- Visual inspection: check welds, paint finishes, and bolt grades (grade 8 recommended for main stress points).
- Tightening: follow torque specs in sequence—cross-pattern for base plates to avoid warping.
- Functional test: run the smith bar through full travel empty, then with incremental loads (25%, 50%, 75%, 100% of intended max) while inspecting movement smoothness and guide rod clearance.
- Cable test: apply max stack load and perform 50 repeated reps at moderate speed to observe any slippage or fraying; measure stack travel and compare to spec.
- Emergency check: verify mechanical locks engage under load and visual indicators show correct alignment.
Documentation: log serial numbers, test loads, and technician sign-off for warranty requirements. Schedule first preventive maintenance at 3 months or 500 hours of use—whichever comes first.
Maintenance, Procurement, and ROI: Long-Term Management and Business Case
Maintaining a multi functional trainer smith machine squat rack extends lifespan and reduces downtime. Create a tiered maintenance plan: daily, monthly, quarterly, and annual tasks. Daily tasks are quick visual checks and wipe-downs; monthly tasks include lubricating guide rods and inspecting cables; quarterly tasks cover pulley replacements and full hardware torque checks; annual tasks may require professional inspection and bearing replacement.
Maintenance checklist (actionable):
- Daily: clean sweat and dust, inspect for loose pins or visibly damaged accessories.
- Monthly: lubricate guide rods with recommended silicone oil, tension check cables, confirm safety-catch alignment.
- Quarterly: replace worn pulleys, inspect bearings, test counterbalance springs.
- Annually: full teardown inspection, weld inspection under lighting, reapply protective coatings where needed.
Cost and ROI analysis example: a commercial unit with upfront cost $8,000–$12,000 (mid-range) can reduce the need for three separate stations (smith, functional trainer, squat rack) that might total $18,000–$25,000. Assuming incremental revenue of $200/month from reduced member churn and additional small-group classes (estimated 20 members at $10/month incremental), payback can occur in 2–4 years. Factor in maintenance (~$300–$600/year) and expected useful life (8–12 years) for total cost of ownership calculations.
Case study: a 45-member boutique studio installed a dual-stack multifunctional station. They reported a 22% increase in class capacity and a 12% rise in member retention over 9 months. The diversified programming enabled by the machine—barbell-driven strength cycles, cable-based metabolic circuits, and rehab-focused private sessions—translated directly to higher utilization and faster ROI.
Troubleshooting quick guide:
- Squeaky guide rods: clean with isopropyl, then apply manufacturer-approved lubricant—do not use household oil.
- Cable fraying: remove from service immediately, replace cable assembly, inspect end fittings and swage quality.
- Smith bar binding: check alignment of uprights and bearing wear; replace bearings if movement is uneven.
Procurement best practices:
- Request three bids with total cost of ownership projections, including shipping, installation, and first-year maintenance.
- Negotiate warranty extensions and parts guarantees—aim for at least 5 years on frame and 1–2 years on moving parts.
- Ask for references from gyms with similar throughput and request hours-of-use data.
Maintenance Checklist and Troubleshooting (Detailed)
A predictable maintenance rhythm prevents failures. In commercial settings, track maintenance in a digital log with date, technician, task, and part numbers replaced. Replace consumables (cables, pulleys) at the first sign of >10% wear based on visual inspection or when performance degrades. Keep a stock of critical spares: a spare cable assembly, two pulleys, and a set of fastening bolts to reduce downtime to under 24 hours in case of common failures.
Common symptoms and corrective actions:
- Excessive play in the smith bar: inspect linear bearings; replace if radial play exceeds 1 mm or if there’s audible grinding.
- Irregular cable travel: realign pulleys, check for bent sheaves; if cable tracks off the pulley face, replace the pulley and cable concurrently.
- Unexpected weight stack slippage: inspect selector pin integrity, stack plate wear, and ensure cable clamps are torqued to spec.
Frequently Asked Questions (专业)
- Q1: Is a multi functional trainer smith machine squat rack suitable for beginners?
A: Yes—the guided smith bar and adjustable counterbalance allow beginners to learn movement patterns safely. Begin with light loads and emphasize form before adding external resistance. - Q2: How much space do I need?
A: Allow 6–10 ft width and 4–6 ft depth as a baseline; include additional clearance for accessory use and multiple users. - Q3: Can two users train on one unit simultaneously?
A: Some dual-stack models permit two users (one on smith, one on cables) if safety stops and movement paths don’t conflict; verify manufacturer guidance. - Q4: What maintenance schedule should commercial operators follow?
A: Daily visual checks, monthly lubrication and cable inspection, quarterly pulley and bearing checks, annual full inspection and certification. - Q5: Are smith machines safe for heavy squats?
A: Yes, when properly used with safety catches and correctly set bar height; however, they alter bar path—balance program with free-bar variations. - Q6: What certifications are important?
A: Look for ISO manufacturing standards, CE marking (where applicable), and load-test documentation; commercial buyers often require UL or equivalent safety testing. - Q7: How do I choose between linear bearings and bushings?
A: Linear bearings offer smoother motion for high-load environments; bushings can be quieter and cheaper but may wear faster under heavy use. - Q8: What is the expected lifespan?
A: With proper maintenance, 8–12+ years in commercial settings; home units typically last longer per unit of use due to lower daily cycles. - Q9: Can this unit replace a full commercial setup?
A: It can replace multiple stations for most training needs, but powerlifting-specific facilities may still require dedicated competition racks and free barbells. - Q10: What accessories should I prioritize?
A: Essential add-ons include adjustable bench, landmine attachment, lat pulldown bar, ankle cuff, and dual handles for varied grip work. - Q11: How do I calculate ROI for a studio?
A: Factor purchase price, installation, maintenance, utilization increase, and incremental revenue from expanded programming; typical payback ranges 2–4 years. - Q12: Are there common warranty exclusions?
A: Yes—improper installation, overload beyond rated capacity, and normal wear items (cables, grips) are commonly excluded; negotiate clarity before purchase.