
Complete Guide to the One Arm Straight Lat Pulldown: Technique, Programming, and Variations
Overview and Benefits of the One Arm Straight Lat Pulldown
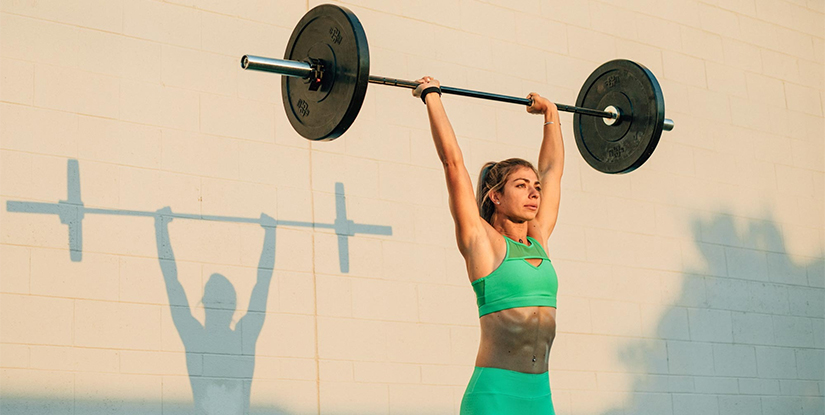
The one arm straight lat pulldown is a unilateral pulling movement performed primarily on a cable machine using a straight bar or a single handle. It isolates each side of the latissimus dorsi and supporting scapular muscles, allowing lifters to correct asymmetries, improve mind-muscle connection, and increase overall back thickness and width. Unlike bilateral pulldowns, the unilateral approach places emphasis on balanced development and reveals side-to-side strength differences that may be masked during two-arm work.
Beyond muscular development, the one arm straight lat pulldown provides several functional benefits. It trains anti-rotational stability through unilateral loading, enhances scapular control and proprioception, and translates to improved performance in pulling sports and daily activities that require strong one-sided pulling. For rehabilitation or prehab, it allows careful load progression while maintaining a controlled range of motion.
Typical benefits include:
- Targeted lat activation and deeper stretch at the top of the range of motion.
- Improved muscle balance by addressing unilateral strength or size discrepancies.
- Enhanced mind-muscle connection due to focused, single-arm work.
- Greater potential for progressive overload with fine-tuned weight adjustments on cable machines.
When programmed correctly, the one arm straight lat pulldown complements compound pulling moves like rows and pull-ups. It is especially useful in phases where technique refinement, unilateral strength development, or muscular detail is prioritized. Because of the cable’s constant tension, it also allows controlled eccentric emphasis and tempo manipulation for hypertrophy-focused phases.
Muscles Targeted and Biomechanics
The primary muscle targeted is the latissimus dorsi, a large, fan-shaped muscle that spans the lower to mid back and contributes to shoulder adduction, extension, and internal rotation. When performing a one arm straight lat pulldown, the lat receives concentrated load as the arm pulls down and the torso stabilizes against rotational forces. Secondary muscles engaged include the teres major, posterior deltoid, rhomboids, and lower trapezius for scapular retraction and depression.
Other contributing muscles are the biceps brachii and brachialis, which assist elbow flexion, and the forearm musculature involved in grip. The core and obliques play an important stabilizing role because unilateral pulling creates rotational torque on the spine and torso that must be resisted to maintain optimal posture.
Biomechanically, the movement emphasizes a vertical pulling arc. A straight bar or handle keeps the elbow moving close to the torso, which maximizes lat engagement. Adjusting hand position (overhand, neutral, slight supination) changes the angle of pull and can emphasize different portions of the lat and arm musculature. The constant tension provided by the cable throughout the descent and ascent creates continuous load, which is beneficial for hypertrophy work and controlled tempo training.
Technique and Variations
Mastering the one arm straight lat pulldown begins with setup and attention to posture. Proper technique reduces injury risk and increases target muscle activation. Start seated at a lat pulldown station: thighs secured under the pads, feet flat, chest upright, and shoulder blades slightly retracted. Grasp the single handle or one end of a straight bar with a firm grip. Initiate the movement by depressing the scapula, then pull the handle down toward the upper chest, driving the elbow toward the hip to emphasize lat engagement.
Key cues include keeping the chest up, avoiding excessive torso lean or twisting, and pulling the elbow down and back rather than focusing on the hands. A controlled eccentric (return) phase allows the lat to stretch fully under tension, increasing time under tension for hypertrophy. Tempo manipulation—such as a 3-1-1 (eccentric-pause-concentric) or 2-0-2 tempo—can be used to emphasize control and muscle damage or speed-strength depending on the training goal.
Common variations modify range, unilateral emphasis, and training stimulus. Examples include using a straight bar vs. a single D-handle, varying grip orientation (neutral vs. pronated), performing a standing single-arm pulldown for core challenge, or using a kneeling variation to limit torso movement. Each variation targets the lat slightly differently and can be incorporated into periodized programming.
Setup, Grip, and Execution Details
Begin by adjusting the thigh pads so your legs are held down firmly—this anchors the torso and prevents excessive body swing. Choose a handle that allows a natural wrist alignment; a single D-handle offers a neutral grip that often reduces shoulder stress compared to a pronated straight bar. Sit tall with a slight forward lean from the hips but maintain a neutral spine. Retract and depress the scapula prior to pulling to pre-engage the shoulder stabilizers and create a stronger starting position.
During the concentric phase, focus on driving the elbow down and back, imagining trying to tuck the elbow into the back pocket. Avoid shrugging the shoulder or using momentum—if the torso is moving excessively, reduce the load. At the bottom, aim to touch the handle to the upper chest or just below the collarbone while maintaining scapular depression. On the eccentric return, allow the arm to extend until you feel an appropriate stretch in the lat while keeping tension on the cable; do not let the shoulder blade wing forward or the lower back arch excessively.
Practical tips:
- Use a strap or hook attachment if grip limits reps—this isolates the lat better by removing grip fatigue.
- Record a set on video to check elbow path and torso stability—ideal elbow motion is vertical and close to the body.
- If pain arises in the shoulder, test a neutral grip and lighter weight; persistent pain should be evaluated by a professional.
Common Mistakes and How to Fix Them
Several recurring errors reduce effectiveness and increase injury risk. One common mistake is over-using the biceps and forearm by initiating movement with the arm rather than the shoulder blade. To fix this, cue scapular depression first, then pull the elbow down. Another frequent issue is excessive torso lean or rotation, which turns the exercise into a cheat movement. Solution: lower the weight, shorten the range of motion slightly, and re-focus on controlled reps with a neutral spine.
Allowing the shoulder to shrug or the scapula to wing during the pull often indicates weak scapular stabilizers or too much load. Strengthening lower traps and rhomboids with targeted accessory work and reducing load will improve form. Poor elbow path—flaring the elbow away from the body—reduces lat emphasis and shifts load to the posterior deltoid. Visualize pulling the elbow to the hip and keep the hand path closer to the torso.
Finally, grip choice and hand positioning matter. Using an overly wide or awkward grip can change the mechanics and create discomfort. Try multiple handles and observe which gives the best lat activation with minimal shoulder strain. Incrementally increase load while maintaining strict form; this ensures progressive overload without compensatory patterns.
Programming, Equipment, and Safety
Integrating the one arm straight lat pulldown into a training plan depends on goals: hypertrophy, strength, or rehabilitation. For hypertrophy, aim for 8–15 reps per set with 3–4 sets per side, focusing on controlled tempo and full range of motion. To build unilateral strength, use lower reps (4–8) with heavier loads for 3–5 sets, ensuring adequate rest between sets. For rehabilitation or technique work, use light loads for higher reps (12–20) emphasizing tempo and scapular control.
Placement in a routine can vary. Use it as an accessory after heavy compound pulls like deadlifts and bent-over rows if the goal is hypertrophy, or as a primary horizontal/vertical pulling movement on a back-focused day if the objective is to correct imbalance. When paired with bilateral exercises, place unilateral work later in the session when fatigue is manageable and form can be maintained.
Equipment choices affect execution and comfort. Cable machines with single-handle attachments provide constant tension and precise load increments. Straight bars integrate well for those who prefer a pronated grip but may increase shoulder stress. Alternative implements include resistance bands (for home use), single-arm lat machines, or modified pulleys. Select attachments that allow a natural wrist angle and smooth travel path to protect the shoulder joint.
Programming and Progression Strategies
Create progression by manipulating load, volume, tempo, and range of motion. A straightforward linear progression for hypertrophy might involve adding small weight increments every 1–2 weeks while keeping reps within a target range. For strength phases, focus on low-rep sets and gradually increase intensity while reducing volume. Periodization strategies—such as alternating 4–6 week blocks of hypertrophy and strength—help break plateaus and optimize long-term development.
Other progressive techniques include:
- Tempo changes: slow eccentrics for increased time under tension and micro-tears to stimulate growth.
- Cluster sets: short rest intervals within a set to accumulate quality reps with heavier loads.
- Pre-exhaust: performing an isolation lat exercise first to increase recruitment during heavier compound work.
- Unilateral overload: temporarily increase volume on the weaker side to address imbalances, then return to balanced programming.
Track performance metrics such as reps per weight per side to objectively monitor improvements and identify asymmetries. Adjust recovery—sleep, nutrition, and accessory mobility work—to support progression and reduce injury risk.
Safety, Common Injuries, and Troubleshooting
Safety centers on shoulder health and spinal stability. Avoid excessive loading that causes the torso to jerk or revolve. Shoulder impingement can occur with poor scapular mechanics or a grip that forces internal rotation; switch to a neutral grip and ensure scapular depression before pulling. If pain is persistent, consult a physical therapist to assess rotator cuff strength, scapular kinematics, and thoracic mobility.
To troubleshoot common issues, first regress technique—use lighter loads and slower tempos to rebuild neuromuscular control. Integrate mobility work for the thoracic spine and posterior shoulder capsule to improve range of motion. Strengthen scapular stabilizers such as the lower trapezius and rhomboids with specific exercises like prone Y-raises and band pull-aparts. For grip fatigue limiting performance, use straps or heavy-grip training alternately.
Finally, consider body positioning: some individuals benefit from a slight torso lean or angling the handle toward the hip to achieve a more favorable pull path. Experiment in training logs and note which adjustments increase lat tension without introducing discomfort.
FAQs (Professional Style)
1. What exactly is the one arm straight lat pulldown and who should include it in their program?
The one arm straight lat pulldown is a unilateral vertical pulling exercise performed on a cable machine that emphasizes individual latissimus dorsi activation. It is performed by pulling a single handle or one end of a straight bar down toward the torso while keeping the torso stable and the elbow traveling close to the body. This exercise is particularly suitable for lifters who want to correct asymmetries, improve unilateral strength, or enhance mind-muscle connection. It is also useful in rehabilitation settings where controlled, side-specific loading is necessary. Beginners can perform light single-arm variations to learn movement patterns, while intermediate and advanced trainees use it to fine-tune lat development and address weak sides.
In practice, strength athletes may use it as accessory work after heavier compound pulls, bodybuilders often integrate it for volume and detail, and rehabilitation protocols may include it for progressive loading. The key criterion for inclusion should be a clear training objective—balance, hypertrophy, or technique—rather than using it indiscriminately.
2. How do I set up the machine and pick the right handle for maximal lat activation?
Set the thigh pads so your legs are secured and your torso stays anchored during the pull. Select a single D-handle for a neutral grip if shoulder comfort is a priority; choose one end of a straight bar if you prefer a pronated orientation. Position your seat height so that the cable aligns vertically with your hand at the top of the pull and allows a full but controlled range of motion. Begin with scapular depression and slight retraction to engage the lower traps and rhomboids before the concentric phase.
Handle selection should prioritize natural wrist alignment and minimal shoulder internal rotation. If you experience discomfort with a straight bar, switch to a D-handle or rope and re-evaluate form. Using a handle with a thicker grip or an angled attachment can sometimes facilitate better lat recruitment depending on individual anatomy.
3. What is the ideal rep range and volume for hypertrophy versus strength?
For hypertrophy, the optimal rep range commonly falls between 8–15 reps per set, with 3–4 sets per side and a controlled tempo emphasizing the eccentric phase. Keep rest between 60–90 seconds for metabolic stress and time under tension. For unilateral strength development, target 4–8 reps per side with higher intensity and 3–5 sets, allowing 2–3 minutes of rest for recovery. For rehabilitation or technique work, higher reps (12–20) with lighter loads and slower tempos are appropriate to build endurance and motor control.
Adjust volume based on proximity to failure: more sets or frequency may be needed when using submaximal loads. Always monitor recovery and avoid excessive unilateral volume that may create imbalances if not balanced with bilateral work.
4. How can I ensure I’m feeling the exercise in my lats and not just my biceps or shoulders?
Begin each rep by cueing a scapular depression to initiate lat engagement; imagine pulling your elbow to the hip rather than bending the elbow with the hand. Reduce weight if you notice dominant biceps contraction or shoulder shrugging. Slow the eccentric phase to increase lat stretch and time under tension. Use tactile feedback—lightly tap the lat during contraction to identify activation—or perform a few isolation lat contractions beforehand to prime the muscle.
If consistent biceps dominance persists, consider using straps to mitigate grip fatigue and allow greater focus on the lat. Additionally, practice single-arm rows and lat-focused isometrics to reinforce proper neuromuscular patterns.
5. Are there specific variations that reduce shoulder strain for those with prior impingement?
Yes. A neutral-grip single D-handle variation typically reduces shoulder internal rotation and impingement risk compared to a pronated straight bar. Performing the movement with a slightly more vertical torso or using a standing single-arm cable pulldown can also alter mechanics to reduce discomfort. Limiting the range of motion to avoid end-range elevation or external rotation that provokes symptoms is prudent. Emphasize scapular control and avoid aggressive adduction at the bottom if pain emerges.
Rehabilitative strategies also include strengthening rotator cuff and scapular stabilizers and ensuring thoracic mobility is adequate to allow healthy shoulder mechanics.
6. How should I incorporate the one arm straight lat pulldown around compound lifts like pull-ups and rows?
Use the one arm straight lat pulldown as an accessory after heavy compound lifts if the goal is hypertrophy, because compound movements should generally be prioritized when fresh. If the goal is to address unilateral weakness, place it earlier in the session to allow higher quality reps for the weaker side. A practical structure: compound vertical/horizontal pull (e.g., pull-ups or rows) as the primary exercise, followed by 2–4 sets of one arm straight lat pulldown for unilateral volume and detail.
Alternatively, if pull-ups are not feasible or form is compromised, make unilateral pulldowns the main vertical pull and program rows afterward. Tailor placement based on individual recovery and strength profiles.
7. Can I use resistance bands to perform a one arm straight lat pulldown at home?
Resistance bands are a practical home alternative. Anchor a band overhead and perform single-arm pulldowns while standing or kneeling. Bands provide variable resistance—less at the start and more at the end of the range—and change the tension curve compared to cables. To mimic the cable’s constant tension, choose a heavier band and focus on controlled eccentric work to maintain tension throughout the range.
Be mindful that band anchoring position affects angle and shoulder mechanics. Ensure secure attachment and gradual progression in band resistance to prevent abrupt loading that can strain the shoulder.
8. How do I correct side-to-side imbalances using this exercise?
First, objectively assess the imbalance by logging reps, sets, and weight lifted per side. Begin by matching volume to the weaker side: either add extra sets or perform an additional few reps on the weaker side at the end of the session for 4–6 weeks. Avoid overloading the weaker side excessively—prioritize consistent, slightly higher-quality volume to promote neural adaptation and hypertrophy.
Integrate unilateral rowing and scapular stabilization work to complement pulldowns. Re-test regularly and normalize volume once the imbalance decreases. If the discrepancy is due to a mobility or neural control issue rather than pure strength, include corrective mobility and motor control drills.
9. What are the best accessory drills to improve performance on the one arm straight lat pulldown?
Accessory drills that enhance scapular control, thoracic mobility, and posterior chain strength will improve pulldown performance. Recommended exercises include band pull-aparts, face pulls, prone Y and T raises, single-arm dumbbell rows, and lat-focused isometric holds. Thoracic extension drills and foam roller mobilizations help optimize the upper back position for stronger pulls.
Additionally, cuff strengthening with light external rotation and scapular retraction drills under low load will reduce injury risk and support load progression on unilateral pulldowns.
10. How can I measure progress objectively when training with unilateral pulldowns?
Track load, sets, and reps per side in a training log. Use consistent tempo and range of motion to ensure comparisons are valid. Periodic max-rep testing at a fixed submaximal weight or timed sets can help quantify endurance gains. Video recordings provide qualitative feedback on technique changes and symmetry over time. Measure circumference and take progress photos if hypertrophy is a goal, and reassess asymmetries every 4–8 weeks.
For strength focus, note when you can add weight while maintaining strict form. Objective tracking reduces guesswork and helps direct programming adjustments precisely.
11. When should I consult a professional about pain during this exercise?
Consult a qualified medical or rehabilitation professional if you experience sharp, reproducible pain during movement, persistent shoulder instability, numbness/tingling, or if pain does not improve after a brief period of reduced loading and technique modification. A physical therapist can assess rotator cuff integrity, scapular mechanics, and mobility restrictions and recommend targeted interventions. Persistent discomfort should not be ignored, as continuing to train through pain can exacerbate underlying issues.
In many cases, slight adjustments in grip, load, and posture resolve discomfort. However, if pain limits daily function or severe symptoms occur, prioritize professional evaluation for safe, evidence-based management.