
One Hand Pulldown: Complete Fitness Equipment Guide and Practice
Overview: What the One Hand Pulldown Is and Why It Matters
The one hand pulldown is a unilateral pulling exercise typically performed on a cable machine using a single handle attachment. It emphasizes one-sided latissimus dorsi engagement, improving muscular balance, intermuscular coordination, and core stability. Because you work one arm at a time, the exercise exposes strength differences between sides and creates opportunities to correct asymmetries that bilateral movements can mask.
Functionally, the one hand pulldown translates to improved performance in athletic pulling patterns, climbing, and functional lifting that require unilateral control. Practically, it is accessible for many gym-goers because it requires minimal equipment: a cable machine or suitable resistance band and a single handle. The movement is adaptable for beginners through to advanced trainees and can be programmed for strength, hypertrophy, or rehabilitation goals.
In context of fitness equipment, the one hand pulldown highlights the importance of adjustable, high-quality cable systems and ergonomic attachments. Selecting the right handle, adjusting seat height and torso position, and fine-tuning weight increments are all equipment-dependent factors that influence technique and results. Understanding these details ensures safer, more effective sessions and maximizes the value of gym time.
Benefits of the One Hand Pulldown
The one hand pulldown offers several tangible benefits that make it a valuable inclusion in well-rounded training programs. First, unilateral loading addresses bilateral strength imbalances. When one side is weaker, bilateral exercises can allow the stronger side to compensate; unilateral work directly challenges each side. This approach helps even out strength and hypertrophy over time.
Second, single-arm pulls enhance core activation and anti-rotation strength. Stabilizing the torso against lateral forces requires increased engagement of obliques and deep core musculature. That improvement carries over to better posture and reduced injury risk in dynamic activities. Third, the exercise improves neuromuscular coordination because the body must control the pull without contralateral assistance, leading to cleaner movement patterns in compound lifts and sport-specific actions.
Other practical advantages include flexibility in set-up and progression: you can vary grip, attachment type, and torso angle to emphasize different portions of the lat, teres major, or rhomboids. It is also a safer alternative when you need to reduce spinal loading while still providing an effective upper-back stimulus.
Muscles Targeted and Biomechanics
The primary target of a one hand pulldown is the latissimus dorsi, a broad, flat muscle that controls shoulder adduction, extension, and internal rotation. Secondary muscles include the teres major, posterior deltoid, rhomboids, and lower trapezius, which contribute to scapular retraction and stabilization. The biceps brachii and brachialis assist as elbow flexors during the concentric phase. The core—especially the obliques and transversus abdominis—plays a crucial stabilizing role to prevent rotation and lateral flexion.
From a biomechanical perspective, performing the pull unilaterally changes the force vector relative to the spine and shoulder. The line of pull can be adjusted by changing the cable column height: high-to-low emphasizes downward adduction, whereas a more vertical pull focuses on the posterior-lateral fiber recruitment. Controlled eccentric lowering increases time under tension, improving muscle architecture and tendon resilience. Paying attention to scapular movement—initiating the rep with scapular depression and retraction—ensures the target muscles are optimally loaded while reducing excessive strain on the shoulder joint.
Practical tip: slightly leaning back with a neutral spine and braced core increases lat contribution and reduces reliance on forearms. Use a full range of motion but stop short of shrugging the shoulder into the ear; instead, finish by drawing the elbow past the torso and squeezing the scapula.
Equipment Options and Proper Setup for the One Hand Pulldown
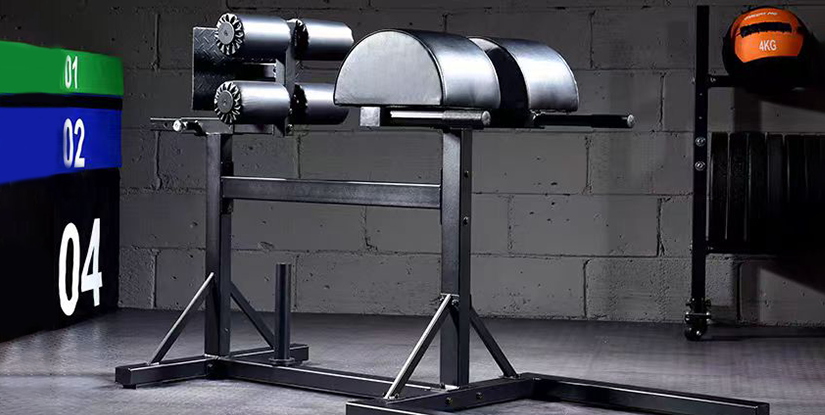
Choosing the right equipment and setting it up correctly are foundational for an effective one hand pulldown. The standard option is a cable machine with a single D-handle or single-hand grip. Most commercial cable machines allow micro-loading through stacks, which is useful for progressive overload on unilateral lifts. A high-quality cable column with smooth, low-friction movement helps preserve tempo and reduces joint stress. Additionally, adjustable pulleys enable you to vary the angle—top-to-bottom or slightly diagonal—which changes muscle emphasis.
Attachments matter: D-handles, single-hand grips, or rotating single-grip handles each alter wrist position and grip comfort. A strap or padded handle can reduce grip fatigue and shift emphasis to the back muscles. For home gym users, resistance bands anchored overhead provide a cost-effective alternative that mimics the cable line of pull. While bands create variable resistance—more tension at the top—they are practical for light to moderate training and rehabilitation.
Setting up correctly involves seat height, torso position, and handle selection. Seat height should allow your working arm to begin with a slight stretch of the lat while maintaining a neutral spine. The torso should be slightly reclined or upright depending on the cable angle; lean back modestly to create a stable base. Feet should be flat on the floor, hip-width apart, with knees slightly bent. Use a weight that allows controlled eccentric lowering and a strong peak contraction; because unilateral work is usually more challenging than bilateral equivalents, anticipate using about 60-80% of your typical bilateral load on each side.
Cable Machine Variations and Attachments
Cable machines vary by design: single-stack, dual-stack, functional trainers with independent pulleys, and plate-loaded cable towers. Functional trainers are the most versatile for one hand pulldowns because they allow precise pulley height adjustments and independent loading. Single-stack machines with fixed pulleys work well but may have limitations in adjustment range. Choose a machine that offers minimal friction and a stable base to avoid wobble during unilateral work.
Attachments influence wrist alignment, grip fatigue, and muscle targeting. Common options include:
- D-handle: provides a neutral or pronated grip depending on rotation; good for general lat emphasis.
- Single ergonomic handle: allows wrist rotation for a more natural movement and reduced strain.
- Rope attachment with one rope end: less common but useful for a wider range of motion and scapular engagement.
- Lat bar single handle: longer single-hand bars permit different wrist placements and row-like pulls.
Alternatives: Resistance Bands and Home Setups
For home or travel scenarios, resistance bands and pulley systems are viable substitutes. Anchor a band overhead and use a single-handle attachment or wrap the band around your palm for a similar top-down line of pull. Bands offer progressive tension—resistance increases as you approach the contracted position—so adjust repetitions or tempo to ensure adequate stimulus. Use multiple bands in parallel or adjust anchoring height to mimic different cable angles.
Other home setups include anchor-and-strap kits, doorway pulleys, or adjustable anchor points on pull-up rigs. If you lack a dedicated seat, perform a kneeling variation where you kneel on a mat and pull downward; this creates a stable base and simplifies setup. When using home equipment, prioritize secure anchoring to avoid sudden releases and inspect bands for wear regularly to prevent breakage. These adaptations maintain training consistency when gym access is limited and still allow focused unilateral development.
Programming and Technique: Mastering the One Hand Pulldown
Programming the one hand pulldown requires clear objectives. For hypertrophy, use moderate loads with 8-15 reps per side, emphasizing controlled eccentrics and a one- to two-second pause at peak contraction. For strength, lower repetitions (3-6) with heavier loads and longer rest are appropriate, but ensure spinal stability and scapular control at heavier weights. For endurance or conditioning, higher reps of 15-25 with shorter rest can be useful, particularly when bands are used. Because the exercise is unilateral, include it within a balanced routine that also addresses pressing movements, lower-body work, and anti-rotation core training.
Progression strategies include increasing load, adding reps, decreasing rest, slowing tempo, introducing paused contractions, and reducing assistance (e.g., moving from bilateral to unilateral versions, or from machine to band). Track side-to-side metrics: record reps and load for each side separately and focus on bringing the weaker side up to par by occasionally starting sets with the weaker arm or adding an extra set for it. Always prioritize form over load to avoid compensatory trunk rotation or scapular elevation, which diminish effectiveness and raise injury risk.
Proper Form and Common Mistakes
Executing the one hand pulldown with correct form ensures maximum benefit and reduces injury potential. Begin by setting the pulley at an appropriate height and selecting a handle that allows a neutral or slightly pronated grip. Sit with feet grounded, torso braced, and chest slightly proud; reach up and grasp the handle with the arm extended. Initiate the movement by pulling the scapula down and back, then drive the elbow toward the hip in a controlled arc. Focus on squeezing the lat at the bottom of the movement and control the weight on the way up, resisting the tendency to let the shoulder shrug.
Common mistakes include using momentum (leaning excessively), shrugging the shoulder, allowing trunk rotation, and relying on arm flexors rather than scapular retraction. Another frequent error is using too heavy a weight for unilateral work, which results in compromised ROM and forearm dominance. To correct these, reduce load, slow the tempo, use full range of motion, and cue scapular initiation: think "pull the shoulder blade down before bending the elbow." Video yourself or have a coach check alignment to ensure consistency.
Programming: Sets, Reps, Progressions and Sample Workouts
Designing a program around the one hand pulldown depends on goals. For balanced hypertrophy, include 3–4 sets of 8–12 reps per side, twice per week, and pair with rows and pull-ups for comprehensive back development. For strength phases, perform 3–5 sets of 3–6 reps per side with heavier loads and longer rest (2–4 minutes), and include accessory single-arm rows for reinforcement. For rehabilitation or corrective training, use lighter loads, higher reps (12–20), and deliberate tempo focusing on eccentric control and scapular mechanics.
Sample workouts:
- Hypertrophy day: 4 sets x 10 reps per side one hand pulldown; 3 sets x 8–10 bent-over rows; 3 sets x 12 face pulls.
- Strength day: 4 sets x 5 reps per side one hand pulldown; 4 sets x 4 weighted pull-ups; accessory banded rows 3 sets x 12.
- Rehab/Corrective: 3 sets x 15 controlled tempo per side one hand pulldown; 3 sets x 12 single-arm face pulls; 2 sets x 20 band dislocations.
Safety, Maintenance, and Buying Guide for One Hand Pulldown Equipment
Safety begins with correct technique and extends to equipment inspection and maintenance. For cable machines, routinely check cables for fraying, pulleys for smooth rotation, and handle attachments for secure fastenings. If using resistance bands, inspect them for nicks, clouding, or thinning; replace bands regularly and store them away from direct sunlight to prolong life. Use collars or secure locking carabiners where applicable, and ensure seat pins and adjustment mechanisms are fully engaged before starting a set.
When incorporating unilateral pulling into training, listen to the body. Shoulder pain, sharp elbow discomfort, or radiating sensations require immediate assessment and modification. Keep a program of mobility and rotator cuff strengthening to support the shoulder complex. Gradually increase loading and avoid sudden large jumps in weight that can compromise form. For older adults or those rehabbing a shoulder, prioritize higher-repetition light-load work to stimulate blood flow and motor control without excessive compressive forces.
Safety Considerations and Injury Prevention
Key safety practices include appropriate warm-up, scapular activation drills, and progressive loading. Warm-up sets using low loads or bands that re-establish scapulothoracic rhythm are valuable; perform 2–3 light sets of 10–15 reps focusing on form. Maintain neutral spine and avoid excessive torso rotation during heavy sets. Keep wrist alignment neutral to avoid ulnar deviation or undue stress on the elbow. If you experience shoulder impingement symptoms—pain at the front or side of the shoulder—pause overhead or high-lat angles and consult a movement professional.
For rehabilitation contexts, coordinate with physiotherapists to integrate the one hand pulldown safely. Emphasize eccentric control and low-intensity high-volume strategies early in recovery, then progress to more challenging tempos and resistances as tolerated. Use pain-free range of motion and track progress with objective measures, such as load lifted and symmetry between sides.
Buying Checklist and Maintenance Tips
When purchasing or choosing a gym for access to suitable hardware, consider these criteria:
- Adjustable pulley height and low-friction pulleys for smooth movement.
- Quality attachments (rotating handles, comfortable grips) and secure carabiners.
- Appropriate weight increments—small plates or micro-loading options help progression on unilateral lifts.
- Stability of the machine base and seat adjustability to fit various body sizes.
- Warranty and service options for commercial purchases.
FAQs: Professional Answers to Common Questions (10)
Q1: How does the one hand pulldown differ from a traditional lat pulldown?
A1: The one hand pulldown is unilateral, isolating one side at a time to reveal and correct strength imbalances, increase core anti-rotation demand, and allow targeted muscle activation. Traditional lat pulldowns are bilateral and may mask side-to-side differences.
Q2: What grip should I use for the best lat engagement?
A2: A neutral or slight pronated grip often yields optimal lat engagement while reducing shoulder stress. Rotating handles can improve wrist comfort and maintain a natural path of pull.
Q3: How much weight should I use compared to bilateral pulldowns?
A3: Start with approximately 60–80% of your per-arm equivalent from bilateral loads, adjusting downward if form or scapular control is compromised. Prioritize controlled eccentric and full range rather than maximal weight.
Q4: Can beginners use one hand pulldowns effectively?
A4: Yes—beginners benefit from unilateral motor learning and can use light loads or bands to master scapular mechanics and develop balanced strength before progressing to heavier loads.
Q5: Are one hand pulldowns good for shoulder rehab?
A5: They can be appropriate when prescribed by a clinician. Controlled, low-load unilateral pulls emphasize motor control and scapular stability, which are useful in many rehab protocols.
Q6: How often should I train unilateral pulling per week?
A6: For most trainees, 1–3 sessions per week with 2–4 sets per side per session is sufficient, depending on volume from other back work and individual recovery capacity.
Q7: What are progressions if I plateau on load?
A7: Use micro-loading, increase time under tension, add paused contractions at peak, or increase set volume. Address weaker sides first and include accessory rowing variations.
Q8: How do I avoid compensatory trunk rotation?
A8: Brace the core, slightly widen your base with feet, and use lighter loads if rotation occurs. Cue scapular initiation: depress then retract before elbow pull to reduce trunk compensation.
Q9: Are resistance bands an effective substitute for cables?
A9: Yes, bands are practical and effective for many contexts, though they provide variable resistance and may alter the strength curve. They are excellent for technique work and home training.
Q10: What signs indicate I should stop this exercise?
A10: Sharp joint pain, radiating sensations, sudden instability, or persistent shoulder impingement symptoms warrant stopping and consulting a professional. Mild muscle soreness is normal; acute pain is not.