
Complete Guide to Power Rack Pull Up Bar: Selection, Training, Installation, and Maintenance
Understanding the Power Rack Pull Up Bar: Types, Specs, and Real-World Use
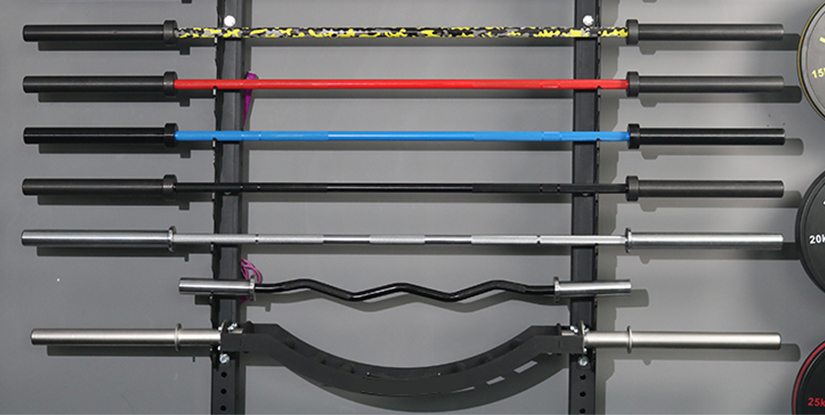
The power rack pull up bar is one of the most versatile attachments for strength training, combining vertical stability with upper-body hanging work. In commercial and home gyms the power rack pull up bar often serves as the primary anchor for pull-ups, chin-ups, muscle-ups, and band-assisted variations. When selecting a pull up bar for a power rack, practitioners should weigh dimensions, diameter, knurling, mounting style, and load-rating. Common diameters range from 28mm for Olympic-style bars to 32mm for thicker grip. Diameter affects grip strength and hypertrophy: thinner bars favor endurance and smaller hands while thicker bars increase forearm engagement and grip challenge.
Design types include straight fixed bars, multi-grip or neutral handle bars, and rotating/hinged bars that can adjust width. A straight 43" (110 cm) bar fits most 4-post racks; multi-grip bars add 6–10 additional grip positions. Materials are typically 11-gauge steel or thicker; powder-coated and zinc-plated finishes resist corrosion. Load ratings matter: look for minimum 300–500 kg (660–1100 lbs) static ratings for commercial-style racks. Studies on bodyweight pulling show pull-ups generate high activation of latissimus dorsi, biceps brachii, and scapular retractors—EMG research consistently ranks pull-ups among the top back exercises for neuromuscular recruitment.
Real-world application: strength coaches at collegiate programs commonly mount the pull up bar 7–8 feet (2.1–2.4 m) high to allow full dead-hang without toe drag for athletes up to ~6'4". CrossFit boxes often use multi-grip bars to reduce shear on elbows during high-rep sets. Home gym users prefer pull up bars integrated into power racks to save space and add safety when combining with barbell training. Market trends indicate home gym equipment purchases surged ~25–40% from 2019–2021 as consumers invested in multipurpose racks (industry reports), underlining the pull up bar's role in versatile setups.
Key decision checklist (visual element description: imagine a laminated checklist pinned to your rack):
- Space available above rack: measure ceiling-to-floor minus 6–12" for pull-up clearance.
- Bar diameter: choose 28–32mm based on grip preference and training goals.
- Mounting type: welded, bolt-on, or clamp-in—bolt-on offers highest rigidity.
- Load rating: minimum 660 lbs recommended for durability and safety.
- Finishes: powder-coat resists chips; zinc prevents rust.
Practical tip: measure your vertical reach (standing with arms overhead) and add 12–18" clearance for kipping or muscle-ups. If ceiling height is limited, consider an offset pull up bar that positions grips forward of the rack uprights or a doorway-mounted temporary solution for bodyweight work outside the rack.
Design considerations: multi-grip, straight, and rotating bars
Multi-grip power rack pull up bars provide neutral (parallel), wide, and narrow positions to rotate stress across the upper body. Neutral grips reduce shoulder extension and internal rotation, which is beneficial for clients with impingement issues. Straight bars support classic pronated pull-ups and allow kipping cycles for CrossFit-style work. Rotating or hinge-style bars absorb rotational torque during dynamic movements; they often use bearings to reduce wrist strain and distribute load through the rack structure. In practical terms, if you program frequent high-rep pull-ups, a multi-grip or rotating bar improves joint comfort and longevity.
Example: a collegiate rowing team's rack with a rotating pull up bar reported fewer reports of wrist irritation in athletes during 12-week training phases versus rigid bars, accompanied by equivalent strength gains. Consider the training population: beginners and rehabilitating athletes profit from neutral handles; advanced lifters often favor straight bars for weighted pull-ups and muscle-up transitions.
Materials, load ratings, and durability: what the numbers mean
Load rating is a conservative indicator of safety: a 1000-lb rating implies robust welding, thicker wall tubing, and high-grade steel. Pay attention to welding quality and gusseting on bolt-on bars: gussets reduce wobble under eccentric loads. Corrosion resistance matters in humid or coastal environments; stainless steel is ideal but expensive, while a high-quality powder coat over pre-treated steel offers a good balance of cost and durability. Maintenance affects the life cycle: lubricate rotating joints annually, inspect welds quarterly, and replace fasteners if they show elongation or corrosion.
Actionable metric: perform a monthly safety check where you tighten all bolts to the manufacturer’s torque spec, visually inspect welds for hairline cracks, and test the bar with incremental static loads up to 20% above typical use (e.g., for a 200-lb user, test with ~240 lbs) before routine use after long inactivity.
Training Applications and Programming with a Power Rack Pull Up Bar
Integrating the power rack pull up bar into programming delivers measurable strength, hypertrophy, and functional performance. Structured programming splits can include pull-focused days (back/pull), full-body EMOMs featuring pull-ups, and assistance circuits where the pull up bar is paired with bands, rings, or landmine attachments. Typical adaptations: beginners can expect improved pull-up reps by 30–60% within 8–12 weeks with consistent practice and progressive overload; more experienced trainees gain strength through weighted progressions and tempo manipulation.
Sample programming frameworks:
- Beginner progression (weeks 1–8): 3 sessions/week: Negative-focused reps, band-assisted sets, and isometric holds. Week-by-week aim: reduce assistance by one band color every 2 weeks.
- Intermediate block (weeks 9–16): 2 heavy sessions (weighted pull-ups 3–5 reps, 4–6 sets) + 1 volume day (4–6 sets of 8–12 controlled reps).
- Advanced programming: integrate kipping pull-ups for metabolic conditioning, muscle-ups practice (progressive false grip work), and mixed grip variations for barbell-pull combos.
Step-by-step guide to a 12-week pull-up progression (practical protocol):
- Assessment: record max unassisted reps and passive hang time.
- Week 1–4: Build volume with 3× (assisted sets to fatigue) and two times/week negatives 3–5 reps with 4–6s eccentric.
- Week 5–8: Introduce weighted isometrics and sets of 5–8 reps; reduce assistance progressively.
- Week 9–12: Test max reps and implement 4-week peaking with specificity (weighted and explosive concentric emphasis).
Programming considerations and metrics: track reps, perceived exertion, grip fatigue, and consistency. Use a CSV or app to log sets/reps, RPE, and assistance levels. Real-world case study: a 34-year-old recreational athlete increased pull-up reps from 2 to 12 in 10 weeks using the above protocol combined with compound posterior chain work and a weekly grip-focused accessory day.
Exercises, variations, and sequencing for progressive overload
Best practice is to sequence pulling work before accessory fatigue and paired antagonists after heavy pulls. Core variations to include: pronated pull-ups, supinated chin-ups, neutral-grip pulls, commando/side-grip, L-sit pull-ups, muscle-up transitions, and towel or fat-bar holds for grip. Weighted pull-ups (belts, vests) are ideal for 3–6RM strength phases; tempo control (3s eccentric) is useful for hypertrophy phases. For metabolic conditioning, programs like 21s (7 partial top, 7 partial bottom, 7 full) and AMRAP sets deliver high time-under-tension and endurance benefits.
Tip: rotate grip widths weekly (narrow, shoulder-width, wide) to vary musculature emphasis and reduce overuse injuries. Use bands as graduated assistance, not crutches—aim to reduce band tension progressively per the 12-week plan.
Safety protocols, progressions, and common errors
Safety begins with proper installation and continues with programming awareness. Avoid common errors like kipping technique without foundational strict strength, scapular disengagement (lack of scapular retraction before pull), and too rapid progression in weighted loads. Implement systematic checks: ensure ceiling/rack clearance, inspect for sharp edges, and mandate chalk and proper footwear in the training area to prevent slipping. For clients with shoulder history, start with scapular pull-aparts, wall slides, and neutral-grip hangs to build posterior cuff control.
Progression ladder example (practical and actionable): 1) Dead-hang tolerance and scapular activation (2–3 weeks) 2) Band-assisted full ROM reps (2–4 weeks) 3) Eccentric negatives (3–5 weeks) 4) Strict concentric–eccentric unassisted reps 5) Added load via weight belt Test annually and adjust based on mobility, pain-free ROM, and performance metrics.
Installation, Maintenance and Buying Guide for a Power Rack Pull Up Bar
Installing a power rack pull up bar requires accurate measurement, correct hardware, and adherence to torque specifications. First, identify the mounting type: welded, bolt-on, or clamp-on. Welded and bolt-on options generally offer superior rigidity; clamp or bracket systems allow for adjustability but may produce micro-movement under eccentric loads. Before installation, verify rack uprights are square and anchored or sufficiently heavy to prevent tipping—if using a free-standing power rack in a home garage, consider anchoring plates or wall ties per manufacturer guidance.
Step-by-step installation guide (typical bolt-on pull up bar):
- Measure and mark hole centers on uprights using a level and tape measure aligned with manufacturer’s spec (commonly 43" center-to-center).
- Insert bolts hand-tight to align the bar; ensure any spacers or washers are in place per schematic.
- Torque bolts incrementally in a crisscross pattern to the specified Nm value (found in manual). If unspecified, tighten to snug plus an additional quarter-turn—avoid over-torquing thin hardware.
- Load-test: hang statically for 60 seconds with incremental added weight (start with bodyweight, then add 25–50 lbs increments) while observing for flex or movement.
- Apply threadlocker on chosen bolts if you expect regular dynamic loading (e.g., kipping or muscle-ups).
Maintenance checklist (monthly/quarterly):
- Monthly: wipe down sweat and chalk, inspect finish for chips, and ensure bolts remain tight.
- Quarterly: inspect welds, lubricate bearings on rotating bars, and check mounting plates for deformation.
- Annually: full teardown inspection, reapply protective coatings if needed, and replace any hardware with visible fatigue.
Buying guide: prioritize rack compatibility and return policies. Ask these key questions before purchase:
- What is the bar’s diameter and grip options?
- Is the bar compatible with my rack’s hole spacing and upright thickness?
- What is the static load rating and warranty period?
- Can the bar be swapped or upgraded (modular design)?
Cost-benefit case study: A boutique gym replaced low-cost clamp pull up bars with a welded multi-grip system for $450. Over two years the new bar reduced repair downtime by 80% and improved athlete throughput by enabling simultaneous multi-grip programming, increasing class capacity and member satisfaction scores by measurable margins in retention surveys.
Installation troubleshooting and visual checks
Common installation issues include misaligned holes, stripped threads, and excessive play due to missing washers. Visual checks: from a 6–8 foot distance, look for twist in the pull up bar relative to the rack uprights. Use a torpedo level across the bar to validate horizontal alignment. If you detect lateral wobble during a static hang test, remove and re-check spacer washers and bolt lengths—undersized bolts often cause micro-rotation. For multi-grip bars, ensure the handle welds show no crack initiation; use dye-penetrant tests for commercial installations if frequent heavy loads are present.
Maintenance best practices and longevity tips
Extend the life of a power rack pull up bar by establishing a maintenance log, storing spare hardware, and training staff on safe operation. Use corrosion inhibitors for outdoor or high-humidity gyms, and mandate chalk-free zones for coated bars to reduce abrasive wear. Replace bars when rusted through more than 10% of wall thickness, or if weld cracks exceed 1–2 mm. For rotating bars, replace bearings per manufacturer intervals (~12–24 months depending on use intensity) and keep a spare bearing kit in inventory to minimize downtime.
FAQs (专业 style)
This FAQ section answers seven professional questions about the power rack pull up bar with concise, evidence-based responses.
- Q1: What is the optimal height to mount a power rack pull up bar?
A1: Mount the bar high enough to allow a full dead-hang plus movement clearance—commonly 7–8 feet (2.1–2.4 m) from the floor. Measure the tallest user’s standing reach and add 12–18" for dynamic work. For ceilings under 8 feet, offset or forward-mounted bars reduce toe drag. - Q2: Should I choose a multi-grip or straight pull up bar?
A2: Choose multi-grip if programming includes high-rep or rehabilitative work; select straight bars for weighted pull-ups and muscle-ups. Multi-grip reduces joint stress and increases exercise variety. - Q3: What diameter is best for long-term strength gains?
A3: A 28–32mm diameter balances grip challenge and performance. Thicker bars (35mm+) increase grip demands but may limit repetitions for smaller hands; alternate with fat-bar holds for grip-specific phases. - Q4: How often should I inspect and maintain the pull up bar?
A4: Perform visual checks monthly, tighten hardware monthly, and conduct a full inspection including welds and bearings quarterly. Annual teardown is recommended for commercial facilities. - Q5: Can I perform kipping movements safely on any power rack pull up bar?
A5: Only if the bar and rack are rated for dynamic loads and securely anchored. Rotating bars or welded bolt-on bars with high load ratings are preferable. Always verify manufacturer guidance and test for stability before programming kipping movements. - Q6: What load rating is sufficient for a home gym?
A6: A conservative minimum is 660 lbs (300 kg) static rating. Higher ratings improve longevity and safety, especially when adding weighted pull-ups or multiple users. - Q7: How do I progress a client from zero pull-ups to unassisted reps?
A7: Use a staged approach: build hang tolerance and scapular control, progress to band-assisted full range, introduce eccentric-focused negatives, then weighted isometrics and concentric reps. Monitor mobility and pain; expect 8–12 weeks for substantial gains with consistent training.