
Pull Down Bar: Complete Guide to Selection, Installation, and Training
Understanding Pull Down Bars: Types, Mechanics, and Key Benefits
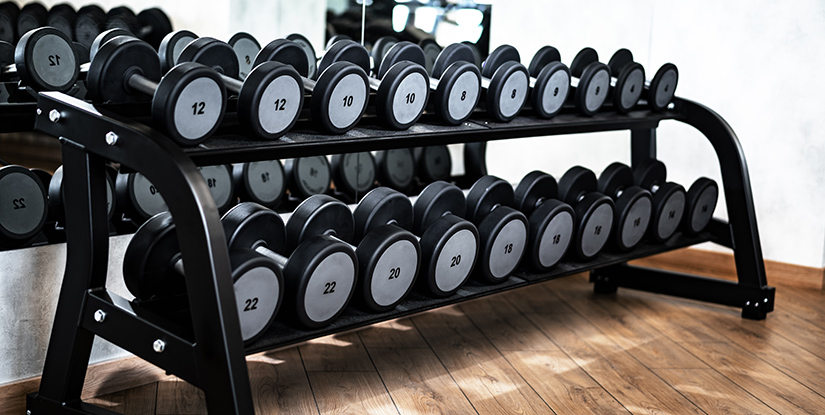
A pull down bar is a versatile attachment used primarily with cable machines to train the upper back, lats, and arm muscles. Although commonly associated with the lat pulldown exercise, pull down bars come in multiple shapes and sizes—each designed to change grip angles, load distribution, and muscle activation. Understanding the various types and how they affect movement patterns is essential for anyone building a home gym, equipping a commercial facility, or programming targeted strength work.
Mechanically, pull down bars convert a cable’s vertical or angled pull into a handle for the athlete to grip while seated or kneeling. The bar’s length, curvature, and grip rings determine hand placement and range of motion. Standard straight bars provide a pronated or supinated position depending on hand placement; V-bars and cambered lat bars place the hands closer and can increase biceps involvement; wide lat bars emphasize the outer lat fibers and create a broader pulling arc. Shorter multi-grip bars add neutral grips that reduce shoulder strain and allow users to maintain more ergonomic wrist positions.
Benefits of integrating a quality pull down bar into training include improved latissimus dorsi development, balanced upper-body strength, and greater control over progressive overload. Pull down bars help lifters train vertical pulling mechanics without needing a pull-up bar or spotter, which is valuable for beginners. They also offer rehabilitation advantages: by adjusting grip and load, athletes can gradually restore scapular control after shoulder issues. For trainers, pull down bars expand exercise variety and enable precise manipulation of tempo and load for hypertrophy or strength phases.
- Common types: straight lat bars, wide curved bars, V-shaped/close-grip bars, neutral/multi-grip bars.
- Key mechanical differences: grip width, bar curvature, knurling, and attachment points.
- Primary uses: lat pulldowns, cable rows (with appropriate rigging), triceps pressdowns (with smaller bars), and assisted pull-up setups.
Types of Pull Down Bars and When to Use Each
Choosing the right type depends on training goals and anatomical considerations. A long wide lat bar is ideal for athletes aiming to emphasize external rotation and width of the back; it allows a broad grip that recruits the outer lat fibers and teres major. For trainees with shoulder discomfort, neutral-grip or multi-grip bars reduce impingement risk by keeping the humerus in a more natural plane. Close-grip V-bars shift emphasis toward the middle back and biceps, useful for improving arm pulling strength and elbow flexion capacity.
Another curveball is the cambered or lat pulldown bar with a slight bend—this design increases the natural arc of movement, allowing a deeper stretch at the top of the contraction while enabling a safer finish near the chest. Shorter bars and rope attachments are versatile for triceps pressdowns and face pulls when used with cable columns. Selection should consider not only the exercise but also the rig you're using: some bars are better suited to low row stations while others are optimized for high-pulley lat towers.
- Wide bars: best for width and outward lat recruitment.
- V-bars: best for sternum-to-hands line, increased biceps involvement.
- Neutral/multi-grip: best for shoulder health and natural wrist orientation.
Benefits for Strength, Hypertrophy, and Posture
Pull down bars provide a controlled vertical pulling modality that targets the lats, rhomboids, traps, and biceps. For hypertrophy, they allow precise tempo control and isolation—reducing momentum and ensuring time under tension. Strength athletes benefit from progressive loading and specific variations (close grip for mid-back strength, wide grip for scapular retraction power). Because the movement encourages scapular depression and retraction when performed correctly, regular lat pulldowns improve upper-back postural tone and reduce forward shoulder posture commonly associated with desk jobs.
Practical advantages include accessibility—unlike pull-ups, lat pulldowns are scalable by weight plates or selectorized stacks, making them suitable for novices who cannot yet lift their bodyweight. Additionally, pull down bar variations can be used in rehabilitation protocols to retrain scapular control and eccentrically load tissue during recovery phases. For programming, they’re an effective accessory in upper-body push/pull splits and in compound-focused full-body routines.
- Postural gains: improved scapular mechanics and thoracic extension when combined with proper technique.
- Scalability: ideal for progressive overload across all skill levels.
- Rehab applications: controlled eccentric loading and range-of-motion management.
Choosing the Right Pull Down Bar: Features, Compatibility, and Purchase Considerations
Selecting a pull down bar involves evaluating material quality, grip options, attachment compatibility, and load capacity. Material often dictates feel and durability—stainless steel and chrome-plated steel provide corrosion resistance and a smooth finish, while powder-coated steel offers a more aggressive grip texture. Consider knurling: many lat bars feature light knurling or no knurling to avoid wrist abrasion during high-repetition sets. Weigh comfort against grip security and choose a finish that suits your typical training intensity and gym environment.
Grip diameter and pattern are crucial. Standard diameters vary between 22 mm and 32 mm: thicker bars increase forearm demand and improve grip strength carryover, whereas thinner bars favor beginners or those with smaller hands. Multi-grip bars with built-in neutral handles provide alternate positions that can relieve shoulder stress and expand exercise options. Also, consider whether you want a long lat bar (for wide grips) or a shorter model if space is limited.
Compatibility is frequently overlooked. Ensure the bar’s connection point matches your cable machine’s carabiner or swivel hook. Some commercial-grade bars come with built-in swivels, reducing torque and twisting during lifts. For home gym adapters or plate-loaded pulleys, check the hole diameter and whether bushings are included. Load capacity should exceed the maximum weight you plan to use; bars rated for 600–1000+ pounds are common in commercial settings, while home-use bars may be rated lower but still more than adequate for most lifters.
- Materials: stainless/chrome vs powder-coated—choose based on durability and feel.
- Grip options: diameter, knurling, and multi-grip variations for joint health.
- Compatibility: attachment type, swivel presence, and fitting diameter for your rig.
- Load rating: pick a capacity comfortably above your training needs for safety.
Comparing Popular Models and Price Ranges
When evaluating models, balance features against budget. Entry-level lat bars for home use range from $30–$80 and typically include a straight bar with basic coating and a standard carabiner hole. Mid-range options ($80–$200) often add multi-grip handles, a more refined finish, and improved swivels. Premium commercial bars ($200+) provide hardened steel, polished chrome, advanced ergonomic curves, and higher load capacities. While premium durability is desirable for commercial gyms, many home lifters find mid-range bars deliver the best value considering cost and functionality.
Recommended purchases depend on usage: single-user home gyms may prioritize comfort and multi-grip versatility, while commercial buyers should prioritize durability and warranty. Look for user reviews regarding swivel performance, bending under high loads, and long-term finish wear. If you plan to use the bar for multiple exercises (e.g., triceps pressdowns, cable rows), seek a bar with a neutral grip and reliable swivel to minimize cable twisting and improve smoothness of motion.
- Budget home-use: straight bars, basic coating, adequate for lighter loads.
- Mid-range: multi-grip, improved finish, stronger swivels for frequent training.
- Premium/commercial: hardened steel, polished chrome, high load ratings, and warranty support.
Practical Tips for Buying and Testing
Test a pull down bar where possible. Check the feel in hand—does the grip match your hand size? Move it through a full arc to ensure the swivel is smooth and there’s no binding. If you can’t test in-person, scrutinize return policies and warranties. Look for bars with documented load ratings and consider buying from reputable brands that publish dimensions and material specs. Be skeptical of extremely low-priced options if you plan to load them heavily.
Consider accessories: rubber bumpers, protective sleeves, and bushings prolong lifespan and reduce noise. If mounting to a home rack, confirm compatibility with your pulleys and check whether extra adapters are required. Finally, account for shipping and return logistics, particularly for heavy or long bars that may incur higher delivery fees.
- Test for grip comfort and swivel smoothness before purchase.
- Verify return policies and warranty details for online purchases.
- Consider accessories and adapters to ensure long-term usability.
Installation, Safety, and Programming: Getting the Most from Your Pull Down Bar
Proper installation and safety practices ensure longevity of equipment and reduce risk of injury. Most pull down bars require minimal assembly but must be paired with compatible pulleys and anchored systems. Wall- or ceiling-mounted cable towers need secure fasteners into structural members; avoid using drywall anchors alone. If mounting to a power rack, ensure the bar’s swivel and hook can pass cleanly through attachment points without binding. For plate-loaded or selectorized rigs, align the bar with the pulley center to prevent side-loading and premature wear.
Safety checks are straightforward but essential: inspect the bar and attachment hardware for cracks, excessive wear, or deformation before each training cycle. Swivels should rotate freely and not feel sloppy; cables should run true on pulleys without rubbing. Lubricate swivel joints and pulleys per manufacturer guidance and replace worn bushings promptly. For personal safety, maintain good technique—avoid uncontrolled rocking or leaning that shifts load from musculature to the lumbar spine and shoulders.
Programming with a pull down bar can be adapted to many goals. Beginners should start with controlled tempo sets of 3–4 sets of 8–12 reps focusing on scapular depression and full range of motion. Intermediate lifters can add intensity via drop sets, slow eccentrics, or paused reps at peak contraction. Advanced athletes can use heavier loads for lower rep ranges or cluster sets to train strength while maintaining tension. Because the pull down bar enables precise load increments, it’s ideal for progressive overload and microloading strategies.
- Installation: secure anchoring, correct pulley alignment, and structural integrity checks.
- Maintenance: regular inspection, lubrication, and timely replacement of worn parts.
- Programming: scale intensity with reps, tempos, and grip variations to target strength or hypertrophy.
Step-by-Step Installation and Maintenance Checklist
Begin installation by confirming that your anchor points (rack, wall beam, or ceiling joist) are rated for the expected loads. Use a stud finder and torque-rated hardware for wood mounts; for concrete, use expansion anchors rated for dynamic loads. Attach the pulley assembly first, confirm smooth cable routing, and then install the pull down bar with its swivel. Run the cable through the intended range and observe any binding or rubbing against frame elements.
Maintenance is preventive: monthly inspections of the bar, swivel, and cable for wear will catch issues early. Apply light machine oil to swivel bearings as specified and wipe down the bar after sessions to remove sweat and corrosive salts. Replace cables at the first sign of fraying and rotate bushings if wear appears uneven. Keep a maintenance log if the equipment is used in a professional setting to track part replacements and service intervals.
- Installation steps: verify anchor, mount pulley, test routing, attach bar, perform load test.
- Maintenance steps: visual inspection, lubrication, clean-down, and cable/bushing replacement schedule.
Training Progressions, Technique Tips, and Sample Routines
Technique is paramount: sit upright with a slight lean back (10–20 degrees), chest lifted, and initiate each rep by retracting the scapula before elbow flexion. Pull the bar to the upper chest or sternum line rather than behind the neck to minimize shoulder impingement risk. Control the eccentric phase—3–4 seconds down—while avoiding jerking motions that transfer load to the lumbar spine. Use a full range of motion to maximize recruitment of the latissimus dorsi and reinforce proper movement patterns for pull-ups.
Progressions: start with light weight for neuromuscular coordination, progress by increasing load or reducing rest intervals, and introduce variations (wide, close, neutral grips) to prioritize different muscle regions. Example routines include an upper-pull day (lat pulldown 4x8–10, seated rows 3x10–12, face pulls 3x12–15) and a full-body day where pull downs serve as the primary vertical pull. For strength cycles, use 5x5 schemes with heavier loads; for hypertrophy, target 3–4 sets of 8–15 with controlled tempo.
- Technique cues: initiate with scapular retraction, pull to chest, control the eccentric phase.
- Progression tips: add weight gradually, vary grip widths, and integrate tempo training.
- Sample split: Pull day—lat pulldown, single-arm cable rows, face pulls, hammer curls.
Frequently Asked Questions (Professional)
-
Q: What is the difference between a wide lat pulldown bar and a V-bar? A: A wide lat pulldown bar emphasizes lateral expansion of the upper back by placing the hands wider apart and increasing external rotation demands. A V-bar (close-grip) shortens the lever and increases biceps and middle-back recruitment. Choose wide grips for width and V-bars for thickness and arm involvement.
-
Q: Can I use a pull down bar for assisted pull-ups? A: Yes. Many cable systems and lat towers allow you to simulate an assisted pull-up by attaching a wide bar to a low or high pulley and adjusting resistance. Pairing a pull down bar with a knee pad or attachment for assisted modes can provide controlled assistance through the vertical pulling range.
-
Q: Is it safe to pull to the back of the neck? A: Pulling behind the neck is generally not recommended because it places the shoulder in external rotation and increases risk of impingement. Pull to the upper chest or sternum while maintaining scapular retraction for a safer and more effective lat engagement.
-
Q: How often should I add pull down bar work to my routine? A: Frequency depends on goals and recovery. For hypertrophy, 2–3 sessions per week with varying intensity is effective. For strength, 1–2 focused heavy sessions with accessory volume can suffice. Monitor fatigue and shoulder health to adjust frequency.
-
Q: What maintenance steps prevent premature wear? A: Regularly inspect swivels and bushings, lubricate per manufacturer guidelines, wipe down the bar after use, and replace frayed cables immediately. Proper alignment of pulleys reduces lateral forces that accelerate wear.
-
Q: Can different grips truly change muscle activation? A: Yes. Grip width and type (pronated, supinated, neutral) change moment arms and joint angles, shifting emphasis across the latissimus dorsi, teres major, rhomboids, and biceps. Systematic variation can address weak links and promote balanced development.
-
Q: What load rating should I look for in a home-use pull down bar? A: For most home users, a bar rated 600–1000 lbs provides a large safety margin. If you plan heavy commercial use or high-frequency training, invest in commercial-grade bars with higher ratings and warranties.
-
Q: How do I reduce shoulder pain during pulldowns? A: Use a neutral or slightly narrower grip, avoid pulling behind the neck, focus on scapular retraction before elbow flexion, and reduce load to prioritize controlled range of motion. Consider physical therapy if pain persists to assess mobility and rotator cuff function.