
Complete Guide to Choosing and Using a Pull Up Bar Kit for Home Fitness
Types of Pull Up Bar Kits and How to Choose the Right One
Selecting the right pull up bar kit for your home gym starts with understanding the main categories available and matching them to your space, goals, and budget. Pull up bars come in doorway, wall-mounted, ceiling-mounted, and free-standing designs. Each category offers specific advantages and constraints—doorway bars are portable and easy to install but limited in load and exercise variety; wall- or ceiling-mounted bars provide the most stability and load capacity for weighted pull-ups; freestanding rigs or power racks offer full gym versatility at a higher cost and footprint.
To choose intelligently, evaluate the available mounting surfaces, the maximum load you plan to work with (bodyweight only vs. added plates), the range of motion required for kipping or muscle-ups, and the degree of permanence you’re comfortable with. Consider accessories included in kits—such as mounting hardware, angled grips, or removable handles—which can influence value. Finally, user reviews and load certification (e.g., tested weight limits) can help you avoid products that look great in photos but fail in real use.
Doorway Pull Up Bar Kits: Pros, Cons, and Best Uses
Doorway pull up bars are traditionally the most affordable and most portable option. They typically require no permanent installation: many designs either press against the door frame using brackets or use a leverage-based “suspension” method that distributes force. The biggest advantages are convenience and low cost—perfect for renters, travelers, or people with limited space. However, these kits are generally rated for static bodyweight pull-ups and light dynamic movement; they are not ideal for weighted pull-ups, kipping, or highly dynamic movements because of potential stress on door frames and the bar hardware.
When evaluating a doorway kit, check the weight limit, the type of padding that contacts the frame (to prevent damage), and how the bar secures itself. Look for steel construction, multiple grip positions, and clear weight certification. Practical tips: measure your doorframe width and depth before purchasing, inspect the frame for cracks or weakness, and avoid aggressive kipping or muscle-up practice on these bars. If you want portability plus durability, consider a kit that includes a removable mounting bracket that elevates the bar away from the frame while distributing load to stronger studs.
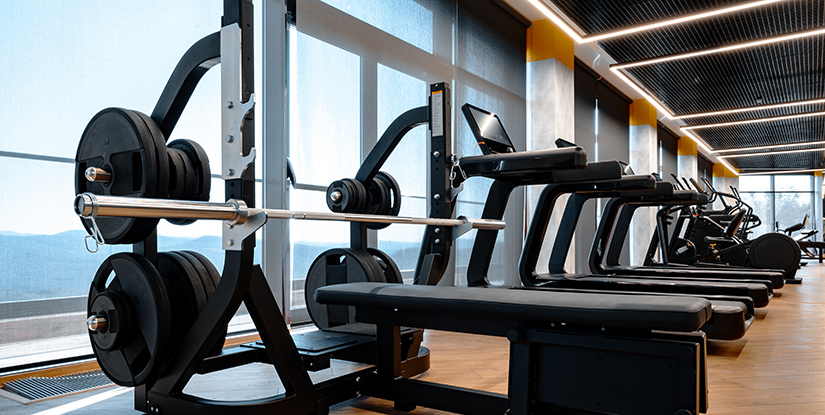
Wall-mounted, Ceiling-mounted, and Freestanding Kits: Stability and Capacity
Wall-mounted and ceiling-mounted pull up bar kits are the most robust choice for serious strength training. When anchored correctly into studs or concrete, these bars can support heavier loads and dynamic movements like muscle-ups and weighted pull-ups. Wall-mounted kits often provide multi-grip arrangements and can be paired with additional attachments (dip handles, resistance band anchors). Ceiling-mounted bars are excellent for maximizing clearance and allow for longer, multi-grip bars suited to gymnastic movements.
Freestanding rigs and power racks represent the premium end of the spectrum, offering the greatest versatility—integrated pull up bars, squat racks, and attachment points for accessories. They require the most floor space and investment but are ideal if you plan to expand a home gym. When choosing any of these more permanent solutions, ensure that the mounting hardware included is grade-rated, that you can access load-bearing studs or concrete, and that you follow manufacturer torque and fastener size guidelines. If unsure, hire a professional installer to guarantee safety and longevity.
Installation, Safety, and Maintenance: Practical Steps and Checklists
Proper installation and ongoing maintenance are critical for safety and equipment lifespan. A pull up bar kit that is poorly installed or maintained can cause injury and damage to property. Before installation, identify the type of surface you will mount to—wood stud, concrete, brick, or hollow frame—and select fasteners that are rated for that substrate. Gather the right tools (drill, stud finder, torque wrench, level) and read the manufacturer instructions carefully. If your kit includes a template, use it; misaligned holes are a common, avoidable error.
Once installed, follow a recurring safety checklist: visually inspect all bolts and attachment points before each session, check for hairline cracks in mounting surfaces, and test for wobble by applying progressive load. For public or shared spaces, create a maintenance log documenting inspections and torque readings. This approach reduces risk and prolongs the service life of your kit.
Proper Installation Steps: From Site Prep to Final Torque
Start by choosing the installation location: ensure adequate clearance for full range of motion and that nearby objects won't interfere (lights, cabinets, ceiling fans). Use a stud finder to locate center studs; for concrete or masonry, mark the anchor points accurately. Lay out the mounting plate and mark holes, then pre-drill pilot holes using the appropriate masonry or wood bit. If installing on drywall over studs, ensure the bracket spans at least two studs for distributed load. Temporarily hang the bracket and use a level to confirm alignment before final torque.
When tightening fasteners, follow manufacturer torque specifications where provided, and tighten in a star pattern for multi-bolt plates. Over-tightening can strip threads or damage wood; under-tightening can lead to gradual loosening and failure. After a few sessions, re-check torque, as initial loading can compress mating surfaces and alter fastener tension. If installing in a rental property, consult your landlord and consider non-invasive alternatives like freestanding rigs or high-quality doorway kits designed to protect frames.
Safety Checks and Maintenance Practices to Extend Lifespan
Regular maintenance improves safety and extends the lifespan of your pull up bar kit. Inspect all moving parts, welds, and weld joints for signs of fatigue or corrosion. Clean metal surfaces periodically with a mild detergent to remove sweat and grime, then dry thoroughly to prevent rust. Lubricate threaded interfaces with a light machine oil to prevent seizing, and replace any worn bolts or washers immediately with grade-matched hardware.
Set up a maintenance routine: weekly visual checks for frequent users, monthly torque and wear inspections, and annual full hardware replacement if the kit sees heavy use or outdoor exposure. Keep a small maintenance kit nearby with spares—bolts, washers, and a multi-tool—so you can address issues before they become hazards. For users adding weight plates or chains, err on the side of over-specifying the kit’s capacity and keep an audible inspection method: short test sets to feel for creaks or movement that hint at developing problems.
Training Programs and Exercises with a Pull Up Bar Kit
A pull up bar kit is a foundation piece for upper-body strength and athleticism. With the right progressions, it supports novices through bodyweight mastery and advanced athletes pursuing weighted pull-ups, muscle-ups, and gymnastic strength. Effective programming balances volume, intensity, and recovery while incorporating variations to target different muscle groups—latissimus dorsi, biceps, rear delts, and core. Structure sessions with a warm-up, skill or strength work, accessory exercises, and a cooldown to maximize gains and minimize injury risk.
Programming should be tailored to experience level. Beginners need frequent practice of core movement patterns and assistance work; intermediates require structured progressive overload; advanced athletes integrate weighted sets, tempo work, and explosive movements. Use measurable metrics—reps, sets, tempo, and RPE—to track progress and adjust volume over 4–8 week cycles.
Beginner Progressions: Building Strength and Technique
Start with reproducible, low-risk regressions before moving to full pull-ups. Common initial steps include dead-hang scapular retractions, assisted pull-ups (band-assisted or using a partner), and negative eccentrics—slowly lowering from the top position for 3–6 seconds. These build tendon resilience and neuromuscular control. Aim for consistency: three sessions per week with 12–20 total quality reps distributed across sets is a practical early goal.
Examples of a simple beginner cycle: Week 1–2: 3×8 scapular retractions + 3×3 negative reps; Week 3–4: 4×5 band-assisted pull-ups + 3×6 core hovers. Track progress by reducing assistance, increasing eccentric time, or adding reps. Incorporate accessory exercises—bent-over rows, inverted rows, and biceps curls—to address weak links. Additionally, prioritize shoulder mobility and thoracic extension to maintain safe, efficient pull-up mechanics.
Advanced Variations, Programming, and Accessory Integration
Advanced athletes use the pull up bar kit for weighted pull-ups, muscle-ups, L-sits, and explosive pull-ups. Programming focuses on progressive overload—adding small weighted increments, adjusting tempo, and manipulating set/rep schemes (e.g., 5×5 heavy for strength, 8–12 for hypertrophy, and cluster sets for maximal intensity without excessive fatigue). Periodization helps manage volume: accumulate work over multiple microcycles and then deload to permit recovery.
Accessory work is crucial: scapular stability drills, rotator cuff strengthening, and posterior chain conditioning support higher loads. Use variations to address plateaus: wide-grip pull-ups to increase lat emphasis, commando or neutral grips for elbow comfort, and slow eccentrics to build tension tolerance. For muscle-ups, practice transition drills on low bars or rings, ring rows with elevated feet, and explosive pull-ups for triple extension and momentum control. Track metrics like rep quality, bar speed, and perceived exertion to guide progression and reduce overuse risk.
FAQs
1. What should I look for in a pull up bar kit if I plan to add weight?
If you plan to perform weighted pull-ups, prioritize structural strength and proper anchoring. Look for bars rated for at least 2–3 times your intended working weight to include dynamic forces. Wall- or ceiling-mounted kits anchored into solid studs or concrete are preferred over doorway models. Check that the kit includes grade-rated bolts and a clear maximum load rating. Consider wider mounting plates, thicker steel tubing (at least 1.5" diameter recommended for heavy use), and a manufacturer warranty that covers heavy-load use. Finally, inspect user reviews for real-world reports of the kit handling weighted work.
2. Can I install a wall-mounted pull up bar in an apartment?
Installing a wall-mounted pull up bar in an apartment is possible but requires landlord permission and careful site selection. You must anchor into load-bearing studs or concrete; hollow drywall anchors alone are not sufficient for dynamic loads. If permanent modification is not permitted, consider non-invasive alternatives like high-quality doorway kits that protect frames or freestanding rigs that do not require wall attachment. Document permissions and, when in doubt, consult a professional installer to avoid damage and liability.
3. How often should I inspect and maintain my pull up bar kit?
Frequency of inspection depends on usage. For moderate home use (2–4 sessions per week), perform a quick visual and manual check weekly—ensure bolts are snug and look for rust or deformation. Conduct a more thorough inspection monthly: re-torque bolts per manufacturer specs, check welds and fasteners, and clean contact surfaces. Heavy or commercial use merits weekly torque checks and quarterly hardware replacement. Maintain a log of inspections and any part replacements to track the kit’s condition over time.
4. Are doorway bars safe for children or untrained users?
Doorway bars can be used by children or untrained users under supervision, but exercise caution. Ensure the doorframe is robust and the bar is properly installed. Supervise all activity and avoid dynamic or swinging movements that could stress the frame. Use mats underneath to reduce injury risk from falls. For children, consider lower bars specifically designed for youth or adjustable racks that allow safe height and support. Always assess the user’s strength and movement competence before permitting independent use.
5. What accessories improve a pull up bar kit’s functionality?
Accessories that enhance a pull up bar kit include grip attachments (neutral handles, angled grips), dip handles, resistance band anchors, and ab straps. Chalk or liquid chalk improves grip for heavy sets but requires careful cleaning to prevent buildup. Protective padding for contact points protects doorframes and reduces noise. For advanced training, a pulley or suspension attachment can add variety. Choose accessories rated for the same load capacity as your primary kit to maintain safety.
6. How do I prevent elbow or shoulder pain from pull-ups?
Prevent pain with proper warm-up, progressive loading, and attention to technique. Warm up the shoulders and scapula with band pull-aparts, internal/external rotations, and light rows. Progress slowly: use assistance or limit range if you lack strength. Avoid sudden jumps in volume or weight, and incorporate eccentric control to build tendon resilience. Mix grip variations to reduce repetitive stress and program recovery days with mobility work and rotator cuff strengthening. If persistent pain occurs, consult a healthcare professional.
7. Can I use a pull up bar outdoors, and what care does it need?
Outdoor use is possible but increases exposure to corrosion and UV damage. Choose powder-coated or stainless-steel kits rated for outdoor use, and bolt them into masonry or treated posts. Regularly inspect for rust, reapply protective coatings as needed, and tighten fasteners more frequently than indoor setups. Consider a weatherproof cover when not in use. For long-term outdoor installations, investing in marine-grade hardware dramatically extends service life.