
Essential Guide to Pull Up Exercise Equipment: Selection, Use, and Training Tips
Understanding and Choosing Pull Up Exercise Equipment
Pull up exercise equipment ranges from compact doorway bars to full power towers and assisted gym machines. Selecting the right piece requires matching equipment capabilities to your goals: pure bodyweight strength, hypertrophy, rehabilitation, or skill work. This section breaks down the primary categories and the features that determine usability, durability, and training outcomes. Understanding these distinctions helps you invest in equipment that supports progressive overload, safe technique, and long-term training consistency.
Before choosing a model, consider user weight capacity, grip options, mount type (permanent vs. portable), and complementary accessories like resistance bands or dip stations. Budget, available space, and whether you prefer a fixed installation or removable solution will affect which equipment is practical for daily use. Below are detailed analyses of common types and the construction factors that influence safety and performance.
Common types of pull up exercise equipment and how they work
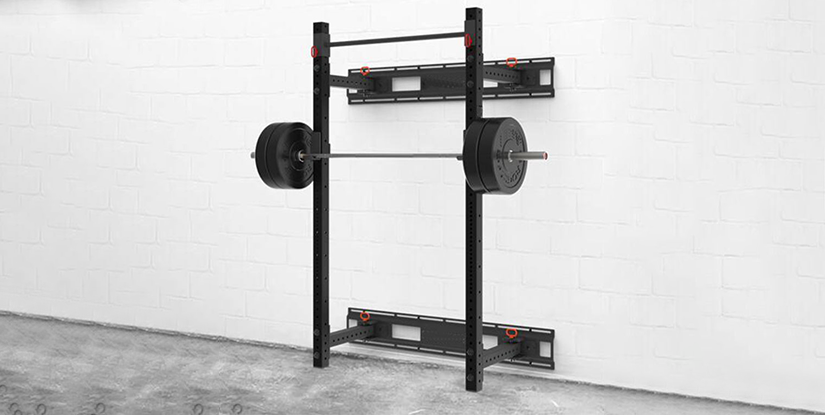
There are several mainstream categories of pull up equipment, each offering distinct advantages and limitations. A classic wall- or ceiling-mounted pull up bar is compact and sturdy, ideal for users seeking minimal footprint and maximal rigidity. Doorway-mounted bars are portable and affordable, but they often have lower load capacity and may stress the doorframe unless installed correctly. Free-standing power towers combine pull up bars with dip stations and sometimes push-up platforms—these are excellent for varied calisthenics routines but require floor space and stable footing.
Assisted pull-up machines, commonly found in commercial gyms, use counterweights or a stack to offset bodyweight, enabling controlled progressions for beginners. For home use, resistance bands provide the same assistance by reducing effective load; they are inexpensive and highly adaptable. Specialty bars—such as multi-grip or rotating swivel bars—allow targeted grip variations to reduce joint stress and emphasize different muscle groups. When choosing, match the device to your training goal: skill and strict form favor rigid bars, while beginners or rehab clients benefit from adjustable assistance systems.
Practical examples: a 180 lb trainee aiming for strict pull-ups might prefer a fixed steel wall-mounted bar rated for 500+ lbs; a new trainee or someone rehabbing a shoulder may start with a doorframe bar combined with progressive resistance bands or a power tower equipped with a stepping platform for partial range reps. Consider also the availability of accessories—handles, straps, or a lat pulldown attachment—that expand functionality.
Materials, build quality, and load capacity: what to look for
Material choice directly impacts longevity, safety, and feel. High-grade welded steel with a corrosion-resistant finish (powder coating or zinc plating) is standard for durable pull up bars and towers. Cheap tubular steel or poorly welded joints often fail under dynamic loads, so inspect welds, bolt quality, and manufacturer load ratings. Load capacity should include a safety margin: choose equipment with a rated capacity at least double your bodyweight if you plan dynamic movements (kipping, muscle-ups) or weighted pull-ups.
Grip surface matters for comfort and control. Knurled steel or textured rubber grips reduce slippage and hand fatigue. Multiple grip widths and neutral-grip handles can reduce strain on the wrists and shoulders, which is important for longevity and technique refinement. For portable systems, check the locking mechanism that secures the bar in place—quarter-turn pins, heavy-duty bolts, or reinforced clamps are preferable to simple pressure-fit designs.
Other practical checks include warranty terms, availability of replacement parts (end caps, bolts, mounting plates), and whether the product is certified to relevant safety standards. For commercial-grade equipment, certifications and third-party testing add confidence. Finally, read user reviews focusing on long-term use—issues such as loosening bolts, rust formation, or foam grip deterioration often appear only after months of use and indicate likely maintenance requirements.
Installation, Use, Training, and Maintenance
Correct installation and consistent maintenance ensure safety and performance over the equipment’s lifespan. Installation decisions—anchoring into studs, masonry, or using freestanding units—determine the rigidity of the setup and the permissible dynamic movements. This section covers practical installation steps, routine maintenance checks, and actionable training methods to maximize the return on your investment.
Training on pull up equipment requires progressive planning and technique emphasis. Whether using assistance bands, weighted vests, or negative-only reps, structure your program around incremental load increases, frequency adjustments, and accessory work that targets supporting musculature. Maintenance prevents premature failure and keeps safety margins intact; schedule inspections and follow manufacturer torque specs for fasteners.
Installation and safety checks, space and accessory considerations
Installation varies by model. For wall- or ceiling-mounted bars, locate studs or use masonry anchors; lag bolts into solid wood studs or concrete anchors into brick/CMU are recommended. Avoid mounting into drywall alone. Measure vertical clearance—allow at least 8–12 inches above your head for full pull-up range, and 2–3 feet of clearance front-to-back for kipping or dynamic motions. Power towers require a flat, level surface and ideally a rubber mat to prevent slippage and protect flooring.
Key safety checks: torque all bolts to manufacturer specs, periodically re-tighten fasteners after the first week of heavy use, and perform monthly inspections for rust, hairline cracks in welds, or foam degradation on grips. For portable doorway bars, verify the doorframe integrity before each session and replace any protective pads that compress excessively. Accessories like dip handles, resistance bands, or weight plates should be rated and inspected regularly; a damaged resistance band can snap and cause injury.
Space planning examples: a compact studio might opt for a wall-mounted bar and a light set of resistance bands; a home garage gym could install a power tower and allocate 3x3 feet for movement plus space for a bench or plyo box. Consider lighting and ventilation too—comfort affects consistency. If you plan to perform weighted pull-ups, confirm that the floor under the equipment can handle dropped weights safely or use dedicated kettlebell platforms and bumpers.
Programming, technique, progressions, and accessory movements
Effective programming blends specificity with incremental overload. Start by benchmarking current capability: count strict reps, measure dead-hang time, and test for scapular control. For beginners who cannot complete full pull-ups, use assisted methods: resistance bands (looped or anchored), partner assistance, or negative eccentrics where you slowly lower from the top position. Plan sessions 2–3x per week, cycling intensity (max effort) and volume (reps x sets) across microcycles to avoid overtraining.
Technique essentials: maintain a hollow-body or slightly engaged core, retract and depress the scapula before initiating a pull, and lead with the chest rather than the chin to ensure full lat engagement and reduce shoulder impingement risk. Avoid excessive swinging; if momentum creeps in, regress to controlled reps or pause at the top and bottom of each rep to build strength. For weighted progressions, add 2.5–5 lb increments using a dip belt or weighted vest once you can execute 8–12 strict reps consistently.
Accessory exercises that accelerate progress include inverted rows (progressive incline), lat pulldowns for higher volume work, scapular pull-ups for hinge strength, and bicep-focused movements for elbow flexor support. Rotator cuff activation and thoracic mobility drills improve shoulder health; incorporate band pull-aparts, face pulls, and doorway stretches. Example 8-week progression: weeks 1–2 focus on negatives and band-assisted reps; weeks 3–5 increase volume with strict sets; weeks 6–8 implement weighted sets and skill drills like chest-to-bar reps or muscle-up transitions if appropriate.
Frequently Asked Questions (12 professional-style answers)
Q1: What is the best pull up exercise equipment for beginners? A1: For beginners, a combination of a sturdy doorway or wall-mounted pull up bar and a set of resistance bands offers the most cost-effective path. Bands provide graded assistance, allowing progressive reduction of assistance as strength improves. Look for a bar with secure mounting and a weight rating comfortably above your bodyweight.
Q2: How do I choose between a power tower and a wall-mounted bar? A2: Choose a power tower if you need multiple exercise stations (dips, leg raises) and have floor space. Choose a wall-mounted bar for maximum rigidity and minimal footprint; it’s better for weighted or dynamic pull-ups if anchored correctly.
Q3: How often should I inspect my pull up equipment? A3: Perform a basic safety check before each session (visual inspection of fasteners and grips) and a thorough inspection monthly, tightening bolts and checking welds, paint, and anchors.
Q4: Can I use resistance bands with any pull up bar? A4: Most bars accommodate bands, but ensure the attachment point is secure and that bands do not abrade metal surfaces. Use protective sleeves or anchor bands to designated handles when available.
Q5: What weight capacity do I need for dynamic movements? A5: For dynamic or weighted movements, choose equipment rated at least two times your bodyweight, and preferably 500+ lbs for commercial-grade use to account for impact loads.
Q6: Are doorway bars safe for heavy users? A6: Doorway bars are suitable for light-to-moderate use but often lack the rigidity for heavy or dynamic use. Heavy users or those performing weighted pull-ups should opt for a properly mounted wall or ceiling bar or a power tower.
Q7: How do I prevent hand pain and blisters? A7: Improve grip with chalk or knurled steel grips, rotate grip width, and gradually build volume. Incorporate grip-specific training like farmer carries to strengthen the forearms and reduce blister formation.
Q8: Is an assisted pull-up machine better than bands? A8: Assisted machines are excellent for controlled, consistent assistance in a gym setting. Bands are more portable and scalable for home use. Both have a place depending on access and goals.
Q9: How long should a pull up training session be? A9: Sessions focused on pull-ups can range from 20 to 45 minutes, depending on warm-up, accessory work, and rest intervals. Prioritize quality over duration—focus on controlled reps and progressive overload.
Q10: When should I replace pull up equipment? A10: Replace equipment at signs of structural damage: cracks in welds, bent tubing, or persistent rust compromising metal thickness. Replace worn grips or bands sooner to maintain safety and comfort.
Q11: Can pull up bars damage doorframes? A11: Poorly designed or improperly installed doorway bars can damage frames. Use protective pads, follow load recommendations, and avoid jamming systems that concentrate force on thin framing. Prefer stud-mounted or reinforced options where possible.
Q12: What accessories improve pull up training? A12: Useful accessories include resistance bands (varied tensions), dip belts for progressive loading, gymnastics rings for instability training, chalk for grip, and a pull up assist pulley or ab straps for varied core work. These expand exercise variety and progression pathways.