
Seated Rope Lat Pulldown: Equipment Guide, Technique, and Programming
Understanding the Seated Rope Lat Pulldown: Purpose, Benefits, and Muscles Targeted
The seated rope lat pulldown is a cable-based pulling exercise commonly found in commercial gyms and home setups with a cable tower. It uses a rope attachment on a high pulley and is performed seated with knees anchored under pads. Unlike wide-grip bars or V-handles, the rope provides independent handle movement and greater scapular freedom. This translates into unique benefits for back development, scapular control, and functional strength.
Primary benefits include improved latissimus dorsi engagement, enhanced rear deltoid and teres major activation, and robust development of the rhomboids and middle trapezius when performed with proper scapular retraction. Because the rope allows a neutral wrist position and the possibility of pulling the ends apart at the bottom of the movement, it encourages a stronger contraction and greater range of motion compared with rigid bars. For lifters seeking both hypertrophy and functional strength, the seated rope lat pulldown offers a versatile stimulus.
The exercise targets several muscle groups simultaneously. The latissimus dorsi is the prime mover, responsible for shoulder adduction and extension. Secondary muscles include the biceps brachii and brachialis for elbow flexion, posterior deltoids for horizontal extension, and the scapular stabilizers (rhomboids and trapezius) which play a key role in maintaining proper shoulder positioning and controlling the descent. Core isometrics also contribute to stabilizing the torso during seated performance, particularly when heavier loads are used.
Examples of use cases: rehabilitation and prehabilitation programs often use the seated rope lat pulldown to retrain scapular motion and build eccentric control in the posterior shoulder complex. In strength and hypertrophy routines, it can replace or supplement wide-grip pulldowns to focus on deeper contraction and mid-back thickness. Athletes who require powerful pulling mechanics — rowers, climbers, and grapplers — will find the seated rope variant useful for developing grip endurance and scapular stability that transfer to sport-specific movements.
- Key takeaway: The seated rope lat pulldown is a versatile cable exercise that prioritizes lat engagement, scapular control, and mid-back development while allowing neutral wrist positioning and enhanced end-range contraction.
- Who benefits most: Lifters pursuing hypertrophy, athletes training pulling mechanics, and rehabilitation clients needing controlled scapular retraction.
Comparing Seated Rope Lat Pulldown with Other Pulldown Variations
When comparing the seated rope lat pulldown to alternatives like straight-bar pulldowns, single-arm pulldowns, or machine-assisted rows, the rope stands out for its independent handle movement and end-range contraction options. A straight bar favors bilateral symmetry but limits wrist rotation and often reduces the scapular range of motion. In contrast, a rope enables the lifter to rotate the hands and separate the ends at the bottom, which can amplify muscular activation in the lower lat portion and posterior shoulder.
Single-arm or unilateral pulldowns offer distinct benefits in addressing side-to-side imbalances, but they require greater core stability and may reduce maximum loading due to isolation. Rows emphasize horizontal pulling planes and are superior for developing thickness in the mid-back; however, the seated rope lat pulldown emphasizes vertical pulling and shoulder extension, making it more specific for lat width and scapular depression mechanics. Understanding these differences helps coaches and athletes select the right tool for a training phase.
Practical examples: use straight-bar pulldowns early in a mesocycle to build load tolerance and mass; switch to seated rope variations later to focus on contraction quality and scapular control. Integrate single-arm pulldowns intermittently to address unilateral asymmetries.
Anatomical Focus and Functional Transfer
Anatomically, the latissimus dorsi originates across the lower thoracic and lumbar vertebrae, sacrum, and iliac crest and inserts into the humerus. This broad origin explains its role in powerful adduction and extension of the shoulder. During the seated rope lat pulldown, emphasizing a full eccentric lengthening followed by a powerful concentric contraction leverages the lat’s long lever arm for growth and strength.
Functionally, strengthening the lat with this movement improves performance in everyday and sport-specific tasks: pulling motions (climbing, rowing), overhead stabilization (lifting objects from overhead down toward the body), and improving posture by counteracting rounded shoulders via stronger scapular retractors. For athletes, better lat strength can enhance stroke power in rowing and pulling force in grappling. For general population clients, it can improve carrying and lifting mechanics and reduce shoulder injury risk when combined with rotator cuff and scapular stabilization training.
Equipment Components, Setup, and Practical Adjustments for Optimal Performance
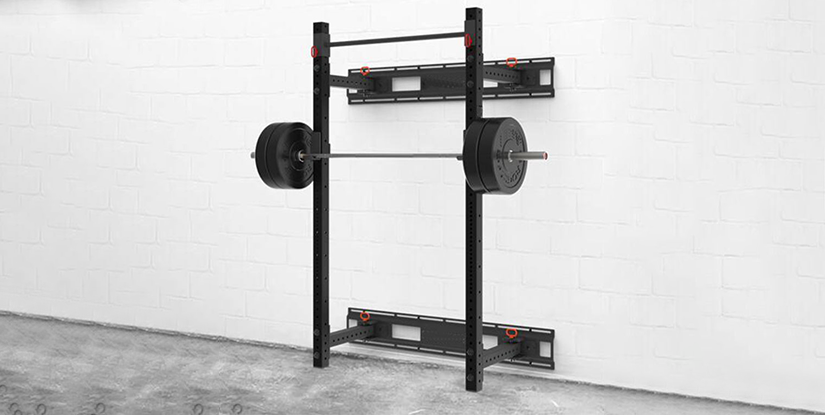
Understanding the hardware and setup for a seated rope lat pulldown is fundamental to performing the exercise safely and effectively. The standard setup includes a high pulley cable, a rope attachment with plastic or rubber ends, a bench or seat with adjustable knee pads to anchor the thighs, and weight plates or a stack. Quality equipment will allow smooth cable travel, adjustable seat height, and a firm, ergonomic rope grip. Before initiating any session, verify the integrity of the rope ends, check that the pulley rotates freely, and ensure the bench’s knee pads secure you without pinching.
Seat height and knee pad positioning are critical. The objective is to anchor your thighs so your torso remains stable and does not rise during the concentric phase. When seated, your feet should be flat on the floor, knees bent at roughly 90 degrees under the thigh pads. Adjust the seat so that your arms can reach the rope overhead without shoulder discomfort — if the seat is too low, you’ll be forced into an awkward scapular position; too high and you lose range of motion. A correct setup allows full scapular upward motion at the top and controlled scapular retraction at the bottom.
Grip choice and hand positioning influence muscle emphasis. Grasp the rope near the ends with a neutral wrist — thumbs roughly pointing upward — and consider slightly pulling the rope apart at the end of the concentric phase to maximize lower-lat contraction. Do not wrap the rope tightly around your fingers or use a thumbless grip unless supervised; a secure grip mitigates slipping and allows better force transfer. Cues like “pull the elbows down and back” or “separate the rope ends” can help lifters achieve the desired muscular focus.
- Adjustment tips: Use a lighter weight during setup to check range of motion; ensure you can control the eccentric without your torso swaying.
- Accessory equipment: Chalk or light grip aids can help with sweat; a chest strap isn’t necessary but a tight knee strap can prevent upward torso motion during heavy sets.
Common Setup Mistakes and How to Fix Them
Many lifters inadvertently commit setup errors that reduce effectiveness or increase injury risk. A common mistake is insufficient knee anchoring: if the knee pads are too loose or positioned incorrectly, the torso will lift during the pull, turning a lat exercise into a partial row that recruits excessive lumbar extension. To fix this, tighten or lower the knee pads and perform a test rep focusing on keeping the chest stationary.
Another frequent issue is an overly wide grip or holding the rope too close to the center. This limits the neutral wrist advantage and reduces the rope’s capacity to provide independent movement. Hold the rope near the ends and practice separating them at the bottom. Additionally, selecting too heavy a weight is a typical error — excessive load leads to momentum-driven reps and poor scapular control. Use a load that permits controlled 6–12 rep ranges with clean eccentric phases for hypertrophy emphasis or 3–6 reps with perfect form for strength-focused sets.
Finally, poor seat height adversely affects shoulder mechanics. Adjust seat height so your shoulders are not hiked and you can fully depress and retract the scapula through the movement. When in doubt, film a few reps or ask a coach to check your setup.
Rope Attachments and Modifications: Choosing the Right Hardware
Rope attachments vary by diameter, length, and end cap style. Thicker ropes increase forearm recruitment and may improve grip endurance, while thinner ropes allow a firmer hand position and potentially higher lat loading. Some ropes have rubberized ends for safety and better tactile feel; others feature long tassels that may reduce end-range separation. When selecting a rope for your setup, prioritize durability and comfortable end grips.
Modifications include using wrist straps for maximal loading phases, swapping to single D-handles for unilateral emphasis, or adding a straight-bar attachment if you want to change stimulus. For home gyms with limited pulley height, consider setting the pulley to the highest anchor and using a small bench; if the pulley is too low, a lat pulldown cannot replicate the same vertical line of pull and may shift emphasis. For cable towers with adjustable cables, ensure the pulley is aligned vertically overhead to maintain correct biomechanics. Regularly inspect swivels and carabiners for wear and replace frayed ropes promptly to avoid sudden failure.
Proper Technique: Step-by-Step Execution, Breathing, and Common Errors to Avoid
Executing the seated rope lat pulldown with correct technique ensures maximum muscular activation and minimizes injury risk. Start by sitting upright with your feet flat, knees secured under the pads, and hands grasping the rope ends. Maintain a slight natural lumbar curve, a tall chest, and neutral neck alignment — avoid craning the head forward. Begin the movement by initiating scapular depression and retraction rather than pulling with the arms; cue the elbows to move down toward the hips while driving the hands and rope ends slightly toward your chest or upper sternum depending on the desired lat emphasis.
Controlled tempo is essential. A recommended cadence for hypertrophy is a 2–3 second eccentric (return) and a 1–2 second concentric (pull) with a brief 0–1 second isometric squeeze at peak contraction. For strength phases, use slower eccentrics and controlled concentrics while keeping reps low. Proper breathing supports bracing: inhale during the eccentric lower phase and exhale forcefully during the concentric pull. This breathing pattern aids intra-abdominal pressure and spinal stability, particularly with heavier loads.
At the bottom of the movement, aim to pull the rope ends apart and slightly toward your torso centerline to emphasize the lower lats and posterior deltoids. Do not throw the shoulders back into overextension; the final position should be scapular retraction with the elbows below the plane of the shoulders but not forcing spinal hyperextension. Return to the start with a controlled ascent, allowing the scapula to elevate and shoulders to return to a relaxed overhead position while maintaining core stability. Avoid fully relaxing the shoulders between reps as this reduces tension and may promote momentum in subsequent reps.
- Tempo tips: Use metronome-style counts (e.g., 2-0-1) to control eccentric and concentric phases.
- Breathing cue: Inhale on the release, exhale on the pull; brace your core on heavier sets.
Detailed Step-by-Step Execution with Cues and Examples
Step 1: Position yourself — seat low enough for full range but high enough to keep the torso stable; secure knees. Step 2: Grip the rope near the ends, thumbs wrapped around for security. Step 3: Pre-tension — inhale and depress the scapula slightly to create a stable shoulder girdle. Step 4: Pull — initiate by pulling the elbows down and back toward your hips while exhaling through the concentric. Think "elbows to hips" rather than "hands to chest." Step 5: Peak contraction — at the bottom, separate the rope ends and hold a 0–1 second squeeze. Step 6: Return — control the ascent, allowing the scapula to upwardly rotate and the shoulders to return to the starting overhead position; do not collapse the chest.
Use specific cues: "lead with the elbows," "pull the rope ends apart," and "keep chest tall." Examples: for a hypertrophy set of 8–12 reps, select a load that permits a two-second eccentric and one-second concentric, focusing on full contraction. For a strength-focused set of 4–6 reps, employ heavier weight, tighten the core, and control the eccentric for 3 seconds.
Common Technical Errors and Corrective Drills
Common errors include torso rocking, shrugging of the shoulders, excessive lumbar extension, and initiating the pull with the biceps rather than the scapular musculature. Corrective drills can isolate and retrain proper mechanics. To reduce torso rocking, perform paused pulldowns: hold the bottom position for 2–3 seconds and then return slowly. This enforces stability and discourages momentum. To address shrugging, do scapular depression drills: from the top position, depress the scapula without flexing the elbows to strengthen the lower trapezius and lat initiation pattern.
Band-assisted lat pulldown variations help teach the eccentric control and proper lat activation by providing variable resistance and reducing overload. Single-arm eccentric pulldowns — where you lower the weight slowly with one arm while the other assists concentrically — can correct side-to-side deficits. Video feedback and filming from the side allow you to check torso movement and seat position; often minor seat adjustments or lighter loads resolve persistent technique faults.
Programming, Variations, Progressions, and Safety Considerations
Programming the seated rope lat pulldown depends on goals: hypertrophy, strength, endurance, or rehabilitation. For hypertrophy, typical sets and reps are 3–4 sets of 8–12 reps with moderate rest (60–90 seconds) focusing on tempo and contraction. For strength, use 4–6 sets of 3–6 reps with heavier weight, longer rest (2–3 minutes), and strict form. For muscular endurance or circuit training, perform 2–3 sets of 15–20 reps with short rest (30–45 seconds). Always prioritize progressive overload by increasing weight, reps, or improving contraction quality over time.
Variations expand stimulus and address weaknesses. Single-arm seated rope pulldowns emphasize unilateral strength and reveal imbalances. Lean-back variations slightly change the line of pull and emphasize the lats’ role in shoulder extension. Wide-to-narrow grips can be replicated by varying hand placement on the rope or switching to a long bar attachment. Another effective variation is the eccentric-focused pulldown, where the concentric is assisted and the eccentric is performed slowly to generate high muscular tension for hypertrophy and tendon adaptation.
Progressions are logical: begin with light loads and mastery of technique, progress to moderate loads for hypertrophy, then introduce heavier sets or advanced variations (e.g., tempo manipulations, isometric holds). Integrate the seated rope lat pulldown with complementary back and shoulder exercises — horizontal rows, face pulls, and rotator cuff work — to create balanced posterior chain development. Periodize training with phases emphasizing volume, intensity, and recovery to avoid plateaus and overuse.
- Programming examples: 12-week cycle: Weeks 1–4 (technique & volume) 3x10–12; Weeks 5–8 (intensity) 4x6–8; Weeks 9–12 (peaking/strength) 5x3–5.
- Integration: Use the seated rope lat pulldown as an early primary pull in upper-body days or as an accessory after heavy rows to emphasize finishing contractions.
Injury Prevention and Common Contraindications
While the seated rope lat pulldown is generally safe, certain conditions warrant caution. Individuals with recent rotator cuff tears, unstable shoulders, or acute cervical spine issues should avoid heavy overhead pulldowns until cleared by a medical professional. Shoulder impingement can be aggravated by poor technique — especially if the lifter elevates the shoulders or aggressively tilts the head forward. To prevent injury, use conservative loading, emphasize scapular initiation, and maintain full thoracic mobility.
Warm-up routines should include shoulder mobility drills, band pull-aparts, and light pulling sets to ramp tissue temperature and movement patterns. After intense sessions, include targeted posterior cuff work and soft-tissue maintenance for the lats and scapular muscles. If pain occurs during the motion (sharp or radiating), stop and consult a professional; persistent discomfort often signals technique issues or underlying pathology that requires assessment.
Equipment Selection and Buying Recommendations
If purchasing equipment for a home gym, prioritize a cable tower with a high-quality high pulley, smooth bearings, and an adjustable seat. Choose ropes with solid end caps and replaceable components. For versatile setups, consider a tower that allows low and high pulley use so you can perform single-arm variations and other cable movements. Budget models can work but inspect pulley smoothness and stack stability before purchase. In commercial settings, confirm that the rope’s tensile rating and swivel are maintained to safety standards.
Accessories to consider: a sturdy bench with ergonomic knee pads, chalk or liquid grip for sweaty hands, and optional wrist straps for heavy sets. For portability, modular rope attachments and carabiners let you swap handles based on training goals. Lastly, schedule routine maintenance — lubricate pulleys, tighten bolts, and inspect swivels — to prolong equipment life and ensure safe operation.
FAQs: Professional Answers to Common Questions (10 Questions)
The following FAQs address frequent practitioner and lifter queries about the seated rope lat pulldown. Answers are concise and professional, offering practical guidance and evidence-based suggestions where appropriate. Use these responses to troubleshoot technique, programming, and equipment decisions.
- Q1: Is the seated rope lat pulldown better than a wide-grip pulldown for lat development?
A1: Both are effective; the rope emphasizes neutral wrist position and lower-lat contraction while wide-grip increases lat stretch and upper-lat emphasis. Use both within a balanced program.
- Q2: How heavy should I go on the seated rope lat pulldown?
A2: Select a load that allows strict technique for your target rep range — moderate for hypertrophy (8–12 reps), heavier for strength (3–6 reps). Avoid momentum and torso swinging.
- Q3: Can the seated rope lat pulldown help with posture?
A3: Yes, when combined with scapular stabilization and thoracic mobility work, strengthened lats and mid-back can counteract rounded shoulders and improve posture.
- Q4: How often should I include this exercise in a program?
A4: 1–3 times per week depending on volume tolerance; beginners may train it once per week, intermediate lifters 2–3 times with varied intensity and volume.
- Q5: Are there safer alternatives for those with shoulder pain?
A5: Single-arm low-pulley rows, resistance-band pulldowns with controlled range, and face pulls can be safer initially. Consult a clinician for individualized advice.
- Q6: Should I separate the rope ends at the bottom?
A6: Yes, separating the rope ends at peak contraction enhances lower-lat activation and is a useful cue for improving muscular engagement.
- Q7: Do I need wrist straps for this exercise?
A7: Not usually required; straps can be useful for maximal strength sets where grip limits performance. Use them sparingly to avoid underdeveloping grip strength.
- Q8: How do I correct torso rocking during the movement?
A8: Reduce load, secure knee pads, film your set, and perform paused pulldowns to reinforce strict movement. Core bracing also helps mitigate rocking.
- Q9: Can I use the seated rope lat pulldown for progressive overload?
A9: Yes — increase load, change reps, adjust tempo, and enhance contraction quality. Periodize intensity and volume to continue progression without overuse.
- Q10: What accessory work complements the seated rope lat pulldown?
A10: Horizontal rows, face pulls, external-rotation work for the rotator cuff, and thoracic extension mobility drills create balanced posterior chain development and shoulder health.