
Maximizing Lower‑Body Power and Safety with a Smith Machine Power Rack
Why Choose a Smith Machine Power Rack for Lower-Body Power Training
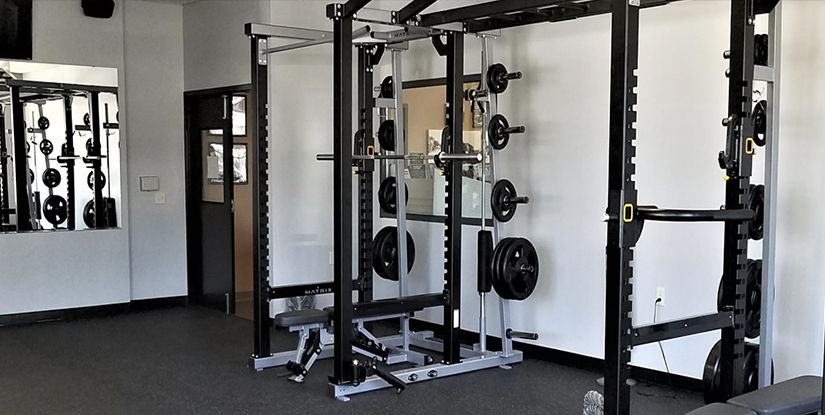
The smith machine power rack combines a guided bar path with integrated safety catches and often a multi-position rack frame, creating a hybrid that is particularly useful for lower-body power development where load control, safety, and repeatable mechanics matter. For athletes and coached lifters, the primary appeal is the ability to expose the neuromuscular system to relatively high loads and power-specific velocities while reducing technical variability that can derail progress. Novice lifters can produce meaningful strength gains — commonly 20–35% over an 8–12 week block for lower‑body movements with consistent progressive overload — and guided systems like a smith machine power rack increase training density by allowing more high‑quality top sets with less technical failure.
From a practical perspective, the smith machine power rack improves session efficiency. Loading and unloading are quicker, safety stops reduce the need for spotters in heavy sets, and the vertical or slightly angled guide reduces lateral bar drift seen in free‑bar squats. In gyms focused on speed-strength or complex training (contrast sets alternating heavy strength work with plyometrics), the smith machine power rack lets you perform heavy, controlled squats or split squats immediately before explosive jumps, with reduced risk of technical breakdown that would otherwise blunt potentiation effects.
Specific data points to consider when programming: use 70–90% of estimated 1RM for strength-focused sets, 30–60% for velocity work and power sets when paired with intent to move fast, and 8–12 reps at moderate loads for hypertrophy phases. When transferring to sport, athletes often move from 3–5 heavy strength sets (3–6 reps) to 4–8 power sets (1–6 reps at lighter loads but maximal intent) across a macrocycle to convert strength into rate of force development. The smith machine power rack supports both phases by offering safe heavy loading and reliable bar paths for explosive concentric intent.
Practical tips for selection and use: evaluate the rack’s bar guide angle (0–7 degrees of cant can alter hip recruitment), check safety catch increments (10–25mm increments allow micro adjustments for partials and drop sets), and prefer models with plate storage and band attachment points to implement accommodating resistance. Visual setup descriptions: imagine a lifter positioned so the bar travels directly over the midfoot during a squat — mark foot position on the platform with tape to reproduce bar path across sessions. For unilateral work, use the machine’s fixed path to safely load single-leg split squats and Bulgarian split squats while maintaining alignment under load.
Key Mechanical Advantages and Limitations
Advantages are clear: stability, repeatability, and integrated safety. Stability reduces non-productive stabilizer work, letting the prime movers be trained with higher mechanical tension or velocity. Repeatability enables strict progression tracking; a lifter can reliably reproduce bar path, depth, and tempo for accurate volume and intensity mapping. Safety features (auto-locks, spotter catches) mean lifters can push intensity without a human spotter, increasing access for solo training.
Limitations include reduced activation of some stabilizers compared with free‑bar lifts, which can slightly reduce transfer to tasks requiring balance and dynamic trunk control. EMG studies on guided squats vs free squats show mixed results; commonly, guided squats reduce activation of lateral stabilizers while preserving or even increasing quad activation when form is constrained. For athletes who require triple-extension coordination and transverse plane control (e.g., soccer, basketball), supplement guided work with unloaded or lightly loaded free-bar drills to retain transfer. Finally, the fixed plane can impose a suboptimal path for lifters with unique limb lengths; careful foot placement and using adjustable bench/blocks helps tailor mechanics.
Programming and Progressions: Building Strength, Power, and Hypertrophy with a Smith Machine Power Rack
Programming on a smith machine power rack should integrate phases: accumulation (volume/hypertrophy), intensification (strength), and conversion (power/presenting sport application). An example phasing model: 4 weeks hypertrophy (8–12 reps, 60–75% 1RM, 3–5 sets), 6 weeks strength (3–6 reps, 75–90% 1RM, 3–6 sets), 2–4 weeks conversion (1–6 reps, 30–70% for velocity, plus plyometrics). Use weekly undulating variables to balance recovery — e.g., Monday heavy strength, Wednesday dynamic/velocity, Friday moderate hypertrophy or accessory volume.
Step-by-step progression rules to follow:
- Progressive overload: increase load 2.5–5% when prescribed reps are hit for all sets for two consecutive sessions.
- Volume control: keep weekly hard sets per movement between 8–20 depending on training age (novice 8–12, intermediate 12–18, advanced 15–20).
- Auto-regulation: use RPE (rate of perceived exertion) 6–9 to adjust loads — if RPE is >9 on two successive sessions, deload 5–10% or reduce sets by 1–2.
- Accommodating resistance: add bands or chains on the smith machine to manipulate load at lockout and improve rate of force development.
Programming examples by goal:
- Strength: 4 weeks, 4 sets x 4–6 reps at 80–88% 1RM with 2–4 min rest; include paused sets and 2 back-off sets at 70% for form reinforcement.
- Power: contrast sets — 3 heavy sets x 3 reps at 85% (strength) followed by 3 explosive sets x 6 reps at 30–40% on the smith machine or free jump squats; rest 2–3 minutes between pairs.
- Hypertrophy: 4–5 sets x 8–12 reps at 65–75% with controlled eccentrics and 60–90s rest; include slow‑eccentric partials on the smith machine to increase time under tension.
12-Week Sample Program and Weekly Breakdown
This 12-week model transitions from hypertrophy to power conversion. Weeks 1–4 (Accumulation): three lower‑body days per week with day 1 heavy quad focus (Smith back squat 4x8 @ 65–70%), day 2 unilateral (Bulgarian split squats 4x10), day 3 posterior chain (Smith Romanian deadlifts 4x8). Weeks 5–10 (Intensification): shift to 3x5 @ 78–88% on main Smith squat day, include 2 paused sets and 1 back‑off set. Keep accessory volume at 6–10 sets/week per muscle group. Weeks 11–12 (Conversion): reduce top sets to 3x3 at 80% then add 4x6 explosive jumps or ballistic smith squat jumps at 30–40% to convert strength to rate of force development.
Weekly microstructure example (Week 7): Monday heavy (Smith squat 5x5 @ 82–85%), Wednesday speed day (6x2 @ 40–50% intent maximal speed), Friday volume (3x10 @ 65% with tempo 3‑1‑0). Reassess estimated 1RM at Week 8 and adjust loads; implement a deload week if mean session RPE exceeds 8 for three consecutive sessions.
Setup, Safety Protocols, and Accessory Exercises for Optimal Transfer
Proper setup for the smith machine power rack is critical. Start with the following checklist: adjust safety pins to a height that allows a full-range eccentric without jamming (set pins 2–4cm below lowest comfortable depth), align bar so it tracks over midfoot when standing with feet shoulder-width and bar resting across the posterior deltoids for back squat or at the hips for belt squats, and tape foot markers or use in-plate markers on the platform to maintain identical stance. Visual element descriptions: a simple coaching visual is a side-view photo showing the bar vertical line intersecting the midfoot; another useful visual is an overhead marker indicating toe angle and stance width measured in cm for reproducible setup.
Safety protocols include regular equipment inspection (check bearings, hooks, and catch integrity), using collars on plates if the rack does not have integrated plate storage, and programming built-in 'safety first' sets where the last set stops 1–2 reps shy of failure and records RPE. For athletes returning from injury, implement isometric and tempo eccentrics on the smith machine to control joint loading before progressing to dynamic concentric work.
Accessory exercises to maximize transfer: unilateral split squats to correct imbalances, Romanian deadlifts for posterior chain strength, and sled pushes or belt squat variations to preserve horizontal force production. Incorporate mobility and activation drills: banded hip flexor stretches, glute bridging, and ankle dorsiflexion warm-ups. Use numbered progression steps for accessory inclusion: 1) screen mobility and strength asymmetries, 2) assign 2–3 corrective drills 3x10–15 daily, 3) integrate accessory sets 2x/week at end of sessions with 2–3 sets of 8–15 reps.
Case Study: Returning a 45‑Year‑Old Athlete from Knee Reconstruction
Profile: 45‑year‑old recreational soccer player, 9 months post-ACL reconstruction, cleared for progressive loading. Objective: restore single-leg strength and power while minimizing graft strain. Intervention using the smith machine power rack: weeks 1–4 focus on controlled bilateral tempo smith squats at 40–60% 1RM (3s eccentric, 1s pause, 3x8–10) to re‑teach depth and symmetrical loading; include pain-free ROM and monitor swelling. Weeks 5–8 introduce unilateral smith-assisted split squats with 3x6–8, incorporate banded lateral walks and eccentric step‑downs for neuromuscular control. Weeks 9–12 progress to 3x4 heavy smith partials at 75–85% to build force, paired with low‑impact plyometrics (double‑leg box jumps at 20–30cm, 3x5) once clinical markers (effusion, ROM, strength symmetry >90%) are met.
Outcome measures: track single‑leg hop distance, isometric quad torque, and patient‑reported outcome measures. In real-world application, this structured approach yielded safe progression while maintaining athlete confidence, because the guided bar path reduced fear of uncontrolled perturbations and allowed precise load increments during crucial graft remodeling phases.
Frequently Asked Questions
Q1: Is a smith machine power rack better than a free squat for building athletic transfer?
A1: The smith machine power rack excels at controlled, high-load repetitions and velocity work with safety, making it excellent for building raw force and targeted hypertrophy; however, free squats better train stabilizers, balance, and transverse-plane control. Best practice: combine both — use smith-based work for heavy strength blocks and free-bar variations or single‑leg drills to maintain transfer.
Q2: How should beginners program on a smith machine power rack?
A2: Beginners benefit from 2–3 sessions per week focusing on technique and progressive overload: start with 3 sets of 8–12 reps at 60–70% estimated 1RM for squats, add unilateral work, and limit hard set volume to 8–12 sets per week per major muscle group. Emphasize tempo and full ROM for motor learning.
Q3: Can plyometrics be combined with smith machine work?
A3: Yes — smith machine strength sets followed by low-to-moderate intensity plyometrics (contrast training) enhance rate of force development. Use heavy sets (80–85% 1RM) then perform 3–5 explosive jumps at 30–40% or bodyweight; rest 2–3 minutes between pairs to maximize potentiation.
Q4: What are the ideal rep ranges for power vs hypertrophy on this equipment?
A4: Power: 1–6 reps at lighter loads (30–60% for high-velocity) or heavy singles/doubles for maximal strength expression; Hypertrophy: 8–15 reps at 60–75% with controlled tempo. Adjust sets so weekly effective volume matches goals (e.g., 10–20 hard sets/week per muscle group).
Q5: Are there injury risks unique to the smith machine power rack?
A5: Risks include over-reliance on a fixed path that can perpetuate poor movement patterns and joint stress if stance and bar position are not individualized. Prevent by assessing limb mechanics, adjusting foot position, and balancing guided work with free-movement drills.
Q6: How do I convert free‑bar 1RM to an estimated smith machine 1RM?
A6: There’s no exact conversion; many lifters can handle slightly more on guided systems due to stability, but individual differences apply. Use conservative estimates — begin at 90–100% of free-bar 1RM and refine across 3–4 sessions using RPE and performance to calibrate.
Q7: What accessories improve transfer from smith machine training?
A7: Unilateral split squats, Romanian deadlifts, sled work, lateral lunges, and core anti-rotation drills improve transfer by addressing stability, horizontal force, and trunk control. Program 2–3 accessory drills per session focusing on weak links identified in screening.
Q8: How often should experienced lifters deload when using a smith machine power rack?
A8: For intermediate/advanced lifters, schedule a lighter week every 4–6 weeks or when mean session RPE exceeds 8 for 2–3 weeks. Deloads reduce volume by 30–50% or intensity by 5–10% to promote recovery and long‑term adaptation.
Q9: Can the smith machine be used for Olympic lifting transfer?
A9: It’s limited for full snatch/clean technique due to fixed bar path and lack of freedom for catch mechanics. However, it is useful for partial pulls, deficit pulls, and strong positional strength work (e.g., hang variations) to improve second‑pull strength when combined with free-bar technical practice.
Q10: How do I set safety catches for depth-specific training?
A10: For full squats, set pins slightly below the intended depth to allow a controlled stop without jamming the eccentric. For pause or partial work, place pins at specific heights to standardize ROM (e.g., 5cm above floor for three-count pauses). Always test with light loads first.
Q11: Is banded or chain resistance recommended on a smith machine?
A11: Yes — bands/chains create accommodating resistance that changes load across ROM, beneficial for improving lockout strength and rate of force development. Anchor bands securely and start with modest tension to assess movement quality.
Q12: What are objective measures to track progress on a smith machine power rack?
A12: Track estimated 1RM, mean concentric velocity (if using a velocity device), RPE, weekly hard sets, and functional tests (vertical jump, single-leg hop). Regularly log stance width and foot placement to ensure consistency.
Q13: Should older athletes rely on a smith machine power rack?
A13: The smith machine power rack is advantageous for older athletes because it reduces fall risk and allows precise load progression. Use conservative intensity progressions, prioritize joint-friendly tempos and monitor recovery markers (sleep, soreness, and joint swelling). Combine guided work with balance and proprioception drills to maintain functional resilience.