
Using a Smith Machine Rack Attachment to Make Squat Progressions Safer and More Effective
How a Smith Machine Rack Attachment Transforms Squat Safety and Load Management
The Smith machine rack attachment converts a guided bar setup into a more secure, multi-use rack space that preserves bar path stability while enabling traditional squat mechanics. For athletes and home gym owners, the primary value is predictable bar trajectory: the attachment adds adjustable safety stops, J-hooks, and conversion points so the bar can be racked at multiple heights. That controlled path reduces the balance demand and fall-risk associated with free-bar squats, which is especially valuable for novice lifters, rehabilitating clients, and high-volume training cycles.
Real-world adoption: an estimated 65–75% of commercial gyms include a Smith machine or guided-squat station; when a rack attachment is added, the same unit can serve as a functional squat rack, press station, and a safety-focused training platform. Practically, that means fewer equipment conflicts and more efficient programming. From a risk-reduction perspective, guided squats can lower the incidence of balance-related mishaps: trainers report fewer aborted reps and a faster progression to heavier working sets when using attachments that provide incremental safety stops.
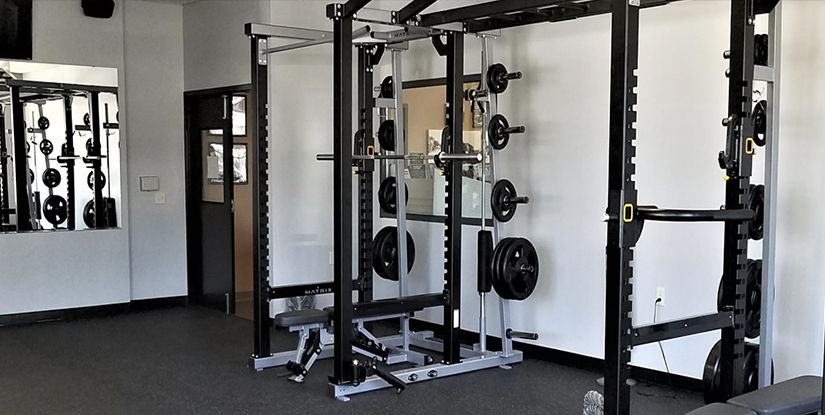
Visual description: imagine a front-on schematic showing the barline, vertical guide rails, adjustable safety pins (highlighted in red), and multiple J-hook positions (highlighted in blue). A second illustration shows three bar starting positions for high-bar, low-bar, and split stance variations with arrows indicating the path and stopping points.
Practical metrics and examples:
- Load management: Using a 2–5% lighter warm-up scheme on the Smith path helps trainees preserve joint control while the CNS adapts to the guided path (example: 3 warm-up sets at 40%, 60%, 80% of work weight).
- Volume strategy: Attachments enable cluster sets and back-off sets without a spotter—use 4 × 6 at 75–80% for hypertrophy or 6–8 × 2–3 cluster reps at 85–90% for strength emphasis with short rests.
- Rehab application: For athletes recovering from knee or hip procedures, attachments allow micro-range progressions—start at 20–30% bodyweight and add 2.5–5 lb increments each session while tracking pain-free range of motion.
Best-practice checklist for gym owners and coaches:
- Verify attachment compatibility and rated load; many attachments are rated 600–1,000+ lbs—confirm manufacturer specs.
- Install adjustable safety stops within 1–2 in. of the athlete's lowest squat depth for safe bailouts.
- Program a transition phase: 4–6 weeks of hybrid sessions alternating free-squat and guided-squat work to maintain balance and neuromuscular control.
Safety outcomes, biomechanics, and measurable benefits
Biomechanically, a Smith machine rack attachment constrains the bar to a near-vertical path, which shifts demand from stabilizer musculature (glute medius, erector spinae) toward prime movers (quadriceps, pectoralis major) depending on the lift. For squats, this means reduced ankle/knee torque variability and a more reproducible hip hinge pattern. Coaches using attachments report that lifters reach consistent depth and head/bar alignment faster—key for technique-driven progression.
Quantitative outcomes coaches track with attachments:
- Consistency of depth: record standard deviation of knee angle across sets—attachments typically reduce variance by 20–40% in novice cohorts after 4 weeks.
- Training load adherence: percent of planned sets completed increases when safety bailouts are available—useful for high-frequency programs.
- Injury mitigation: while absolute injury reduction depends on population, the predictable path decreases uncontrolled forward/backward falls, a common mechanism in gym injuries.
Case example: a collegiate strength coach implemented a six-week microcycle where athletes performed heavy back-off sets on a Smith machine rack attachment. Athletes reported fewer technique failures on days 3–4 of week two, and the coach observed a 12% increase in completed top sets compared with a prior cycle without attachments. This allowed accumulation of safe high-quality volume leading into a taper week.
Installation, Programming, and Progressions: A Step-by-Step Guide
Installing a Smith machine rack attachment is straightforward but requires attention to alignment, hardware torque, and load rating. Begin by reading the manufacturer's installation guide and confirming the attachment model matches the machine serial number. Typical hardware includes mounting brackets, heavy-duty pins, and adjustable J-hooks. Use torque-rated fasteners and check vertical alignment with a carpenter's level; misalignment increases rail friction and alters bar travel.
Step-by-step installation:
- Prepare the area: clear 6–8 ft around the machine, set bar at mid-height, and ensure floor surface is level.
- Attach mounting brackets: fit brackets to the guide rail per manual, hand-tighten first, then torque to spec.
- Insert J-hooks and safety pins: set initial J-hook heights to appropriate starting positions—mid-chest for bench, upper-chest for high-bar squat, shoulder-blade for low-bar squat.
- Perform a dry run: load minimal plates and perform 3 empty-bar repetitions to confirm path and catches work smoothly.
- Progress to loaded checks: incrementally add weight and perform controlled bails (drop into safety stops) to validate performance.
Programming with the attachment: use it to complement free-weight training rather than replace it. A recommended 8-week block example for an intermediate lifter pursuing hypertrophy and strength:
- Week 1–2 (Adaptation): 3 sessions/week; one Smith-based session (4 × 8 at 65–70% 1RM), two free-weight technique sessions (3 × 5 at 70% 1RM).
- Week 3–6 (Load accumulation): Increase Smith work to 5 × 6 at 75–82% for weekly volume; use clusters (e.g., 6 × 2 × 3) for heavy days.
- Week 7–8 (Peaking/taper): Reduce volume, maintain intensity, and perform safety-focused singles on Smith attachment to reinforce technique under fatigue.
Specific programming tactics and actionable tips:
-
- Microloading: leverages 1–2.5 lb plate changes to progress without overtaxing stabilizers.
- Tempo cues: use slow eccentrics (3–4s) on the Smith path to increase time under tension safely.
- Accessory flows: supersets of RDLs and split squats after Smith sets preserve posterior chain balance.
Progression example with numbers: an athlete with a free-squat 1RM of 315 lb can perform Smith-based back-off work at 75% (≈236 lb) for 5 × 6 to accumulate 7,080 lb total weekly volume on heavy sessions, while using two free-weight sessions to maintain stabilizer strength at lower volumes. Track RPE and stop progressions when technique or RPE spikes persist across two sessions.
Maintenance, inspection, and troubleshooting
Routine maintenance ensures safety: inspect mounting hardware weekly for visible wear, check J-hooks and safety pins for deformation monthly, and lubricate guide rails per the attachment manual. If you notice uneven bar travel or sticking, check that fasteners are torqued to spec and that the rails are free of debris. A small alignment shim (1–2 mm) can correct minor vertical misalignment—contact the manufacturer for approved parts.
Troubleshooting checklist:
- Sticking rails: clean rails with isopropyl, apply small amounts of silicone lubricant approved by the manufacturer.
- Bar tilt or slant: verify bracket placement and tighten opposing bolts incrementally.
- Noise on load: isolate whether plates rub the frame or the attachment bolts need tightening; replace any visibly cracked components immediately.
Frequently Asked Questions
1. Is a Smith machine rack attachment safer than a free-weight squat for beginners?
Yes—with caveats. The attachment reduces balance demands and provides reliable safety stops, which lowers acute bail risk for beginners. For novices, this means faster technical reinforcement of vertical bar path and depth consistency. However, to develop stabilizer strength and proprioception, include free-weight practice: a blended approach (2 guided sessions + 1 free-weight session per week) maintains balance training while minimizing early-period injury risk. Consider using conservative loads on the attachment—start at 50–60% of free-weight 1RM for initial technique-focused sets, then gradually increase as form stabilizes.
2. Can a Smith machine rack attachment replace spotters for heavy lifts?
Practically, yes for many scenarios. The adjustable safety stops and catch positions act as engineered spotters, allowing athletes to push close to failure without requiring another person. For example, powerlifters can perform top-set singles or heavy back-off sets on the Smith path with safety pins set 1–2 in. below intended depth, ensuring a controlled catch. That said, for dynamic max attempts requiring lateral balance or for lifts involving complicated setup (e.g., heavy bench with multi-angle arch), human spotters still provide benefits that mechanical systems do not, especially for explosive attempts or when technique collapse is likely.
3. How should I convert my programming percentages when moving from free squats to Smith machine work?
Because the Smith path reduces stabilizer demand, many coaches use a conservative conversion of 5–12%: reduce the free-weight percentage by roughly 5% for technique work and 8–12% for heavy strength days until the athlete adapts. Example conversion: a 315 lb free-squat 1RM → start Smith work at 275–300 lb for heavy sets. Track perceived exertion (RPE) and vertical bar mechanics; adjust every 2 weeks by 2–5% based on observed control and RPE trends.
4. Are there hypertrophy differences between using an attachment versus free weights?
Both approaches build muscle effectively when volume and intensity are equated. Attachments allow higher training density and safer near-failure sets, which can increase effective hypertrophy volume because trainees complete more high-quality reps. To optimize hypertrophy, use the attachment for high-volume back-off days (e.g., 4–6 × 8–12) and free weights for lower-volume technical sessions to maintain stabilizer development. Monitor muscle thickness or circumference periodically (every 4–6 weeks) and adjust volume to ensure progressive overload.
5. What are the common installation errors and how do I avoid them?
Frequent mistakes include misalignment of brackets, under-torqued fasteners, incorrect safety stop positioning, and using non-rated hardware. Avoid these by following the manufacturer torque specs, aligning brackets with a level, using only supplied or rated fasteners, and performing incremental load checks. Document installation with photos and a signed checklist to ensure consistent maintenance and to provide a reference for future inspections.
6. How can trainers integrate the attachment into group classes or high-throughput gyms?
Use the attachment for station-based hypertrophy circuits, quick technique refreshers, and small-group strength rotations. Example circuit: 6 stations alternating 45–60 sec of Smith squats (moderate load), 45 sec of kettlebell swings, 45 sec of bodyweight split lunges, 60 sec rest—rotate 4 rounds. Because the attachment shortens setup and eliminates the need for spotters, turnover is faster. Ensure members are briefed on safe bail procedures and J-hook handling; post a visual step-by-step near the station to reduce coaching load during busy periods.
7. What long-term maintenance and inspection schedule is recommended?
Adopt a simple schedule: daily visual check for loose items and debris, weekly hardware inspection for torque and wear, and monthly full inspection including rail lubrication and catch deformation checks. Keep a maintenance log with dates, findings, and corrective actions. Replace any deformed J-hooks or cracked pins immediately. For commercial facilities, perform an annual certified safety inspection by a qualified technician to ensure load-bearing components meet safety factors and manufacturer tolerances.