
Space-Smart Strength: How a Smith Cable Rack Transforms Small Gyms into High-Performance Zones
Design & Space Efficiency: Why a Smith Cable Rack Is Ideal for Small Gyms
The modern small gym or home training studio needs to balance versatility with footprint. A combined smith cable rack—integrating a guided barbell track (Smith) with multi-directional cable stations—delivers that balance by replacing separate smith machines, cable columns, and multiple racks. Typical commercial smith cable racks occupy a footprint of roughly 6–8 feet wide by 4–6 feet deep while consolidating the function of 4–6 standalone machines; this consolidation alone can reduce required floor space by 30–50% compared with an equivalent free-weight setup plus cables.
Design choices affect how effectively a smith cable rack saves space: a dual-stack cable column on either side, a centrally mounted guided bar with integrated safety stops, and plate-storage pegs all contribute to compactness. Many manufacturers spec load capacities in the 1,000–2,000 lb range for the smith bar, and cable stack resistances commonly range from 200–300 lb per stack—suitable for both novice and advanced trainees. Choosing a unit with adjustable cable pulleys (high/low/mid) and a reversible bar carriage maximizes exercise variety without adding additional machines.
Practical layout tips for small facilities:
- Place the rack against a wall with at least 36 inches of free space on the working side to allow bar path and cable exercise arcs while maintaining traffic flow.
- Use vertical plate holders and accessory storage on the rack itself to keep the surrounding floor clear and reduce trip hazards.
- Combine functional flooring and anchoring zones so the smith cable rack serves as a multi-station hub—pair it with a foldable bench to switch between pressing and rowing configurations quickly.
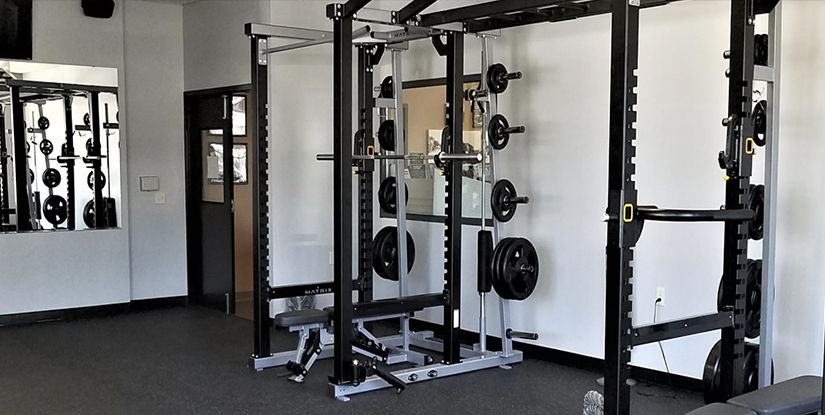
Visual element description: imagine a 72" wide frame with two 200-lb weight stacks flanking a centrally guided bar; the cables have four pivot points for high/low/mid applications, and integrated J-cups and safety catches fold flush when not in use. This single footprint supports squats, bench press, cable crossovers, seated rows, lat pulldowns, and landmine-style rotational work.
Real-world application: boutique studios using a smith cable rack often report increased equipment utilization because trainers can program superset circuits around one station. From an operations view, fewer machines mean lower equipment maintenance overhead and simpler cleaning protocols—key for compact, high-turnover facilities.
H3: Layout Planning & Measured Example
Begin layout planning by measuring the usable training area and mapping customer flow. Example: a 600 sq ft studio can allocate a 48 sq ft zone for a smith cable rack and adjacent 30 sq ft for benching and mobility work, enabling a high-density functional floor plan that still accommodates 6–8 clients. Follow these steps:
- Measure ceiling height (minimum recommended 80–84 inches for many models; confirm manufacturer specs).
- Allocate a 36" clearance path on one side for movement and spotting positions.
- Position accessory racks (bands, handles, benches) within 5–7 feet of the unit to keep circuits tight.
Example case calculation: replacing two cable stacks and a smith machine with one smith cable rack freed 75 sq ft—equivalent to adding a small group-training zone or three extra cardio stations.
Programming & Performance: Training Protocols That Exploit the Smith Cable Rack
The smith cable rack excels at structured strength progressions, tempo work, and high-density metabolic conditioning because it supports both guided barbell patterns and independent cable resistance. For strength-focused users, the guided path improves safety on near-maximal sets and isolates concentric force generation. For hypertrophy and rehab, the adjustable pulley geometry enables transverse plane control and unilateral work without extra machines.
Use these programming templates:
- Strength block (6–8 weeks): 3 sessions/week; compound emphasis. Example session: Smith squat 5x5 at 80% of 1RM, rest 2–3 minutes; cable row 4x8-10; single-leg cable RDL 3x8 each. Progression: add 2.5–5% load every 1–2 weeks or add a set.
- Hypertrophy block (8–12 weeks): 4 sessions/week; medium rep ranges. Example session: Smith incline press 4x8-12 with 2-second eccentric; superset with cable crossovers 3x12; finish with drop-set cable curls.
- Metabolic/conditioning circuit: 30–40 minute AMRAP using smith thrusters, cable rows, and kettlebell swings; maintains intensity and reduces transition times.
Data-backed outcomes: guided mechanics improve movement consistency—useful for novices where bar path variability can reduce load safely lifted by 10–20% compared to free weights. For rehab clients, cables permit low-load control across ranges of motion, enabling progressive overload without joint-compromising shear forces.
H3: Sample 8-Week Progression (Detailed)
Week 1–2 (Foundational): Focus on technique—Smith bar squats 3x8 at RPE 6; cable horizontal row 3x10; single-arm cable press 3x10 each. Emphasize tempo (3-second eccentric) and full range. Week 3–5 (Load Accumulation): Increase to 4x6 at RPE 7–8 for smith compounds; add unilateral accessory volume. Week 6–8 (Intensity & Peaking): Introduce cluster sets for strength (e.g., 5 clusters of 2 reps at 90% with 30s intra-cluster rest for smith lifts) and heavier cable loads for 6–8 reps. Track session RPE and logfile weights for progressive overload and to prevent stagnation.
Actionable tip: log barbell path deviations and cable pulley angles to ensure consistent setup between sessions—small adjustments in handle height can change muscle emphasis dramatically.
Installation, Safety & Maintenance: Best Practices and Step-by-Step Checklist
Installing a smith cable rack properly is essential for safety and longevity. Follow a step-by-step checklist and a periodic maintenance schedule to avoid wear-related failures. Always consult the manufacturer's manual for anchor requirements—many commercial racks require bolting to a reinforced floor pad or concrete substrate to meet load specs, while some home units rely on ballast plates and do not require bolting.
Step-by-step installation guide:
- Inspect delivery and inventory parts: confirm frame sections, screws, cable stacks, pulleys, safety catches, and hardware kits match the packing list.
- Assemble heavy frame first with two technicians—align base plates and torque bolts to manufacturer torque specs (use a calibrated torque wrench when provided).
- Attach cable stacks and route cables: confirm pulleys are oriented correctly and cable sleeves are seated; perform initial tensioning per spec (no slack, but not over-tensioned).
- Verify safety stops and smith carriage: test travel limits at low loads and gradually add plates while verifying smooth travel and locking mechanisms.
- Anchor or ballast: bolt to concrete or install recommended ballasting; if anchoring, use chemical anchors and follow local codes.
Maintenance best practices (monthly/quarterly):
- Monthly: Clean and inspect cables, pulleys, and moving parts; apply manufacturer-approved lubricant to linear bearings.
- Quarterly: Check bolt torque, inspect welds and frame integrity; replace frayed cables immediately.
- Annually: Full safety audit—verify stack tolerances, cable elongation, and bearing wear; budget for parts replacement (pulleys, cables) as preventative maintenance.
Practical safety checks: before each session, ensure J-hooks and safety catches engage cleanly; verify cable handles and carabiners are rated and without deformities. For commercial settings, document daily visual inspections and maintain a log for insurance and compliance.
H3: Troubleshooting & Common Installation Pitfalls
Common pitfalls include under-torqued bolts, misrouted cables causing uneven resistance, and improper anchoring. Troubleshoot by isolating the problem: if carriage binds, unload and inspect guide rods and bearings; if cable stack skips, check pulley alignment and check for frayed wire or damaged end fittings. Replace worn parts rather than attempting temporary fixes. Ensure staff are trained on correct re-racking procedures and on reporting maintenance issues through a simple ticketing system.
Frequently Asked Questions & Practical Answers
This FAQ block answers 13 common, specific questions trainers, facility owners, and home gym users ask about smith cable racks. The answers combine practical steps, real-world considerations, and measurable metrics so you can act immediately.
- Q1: What is the ideal footprint for a smith cable rack in a 600 sq ft studio?
A1: Aim for a 6–8 ft width by 4–6 ft depth allocation (approx. 48–72 sq ft) including 36" clearance on the working side. This keeps traffic flow smooth and allows for benches and mobility zones within the remaining area.
- Q2: Can I use a smith cable rack instead of free weights for strength gains?
A2: Yes—guided smith lifts can be programmed for linear progression and heavy loads, improving safety and consistency. For maximal neuromuscular adaptations, include periodic free-weight sessions; but a smith cable rack supports 80–95% of strength development when programmed correctly.
- Q3: What maintenance schedule minimizes downtime?
A3: Daily visual checks, monthly lubrication and cable inspection, quarterly torque checks, and an annual professional safety audit will minimize downtime and extend equipment life by years.
- Q4: How many different exercises can one smith cable rack support?
A4: A well-specified unit supports 40–60 distinct exercises when including all pulley positions, bar movements, and accessories—ranging from squats and presses to face pulls and single-leg work.
- Q5: Is bolting the rack to the floor always required?
A5: Not always; follow manufacturer guidance. Commercial installations typically require bolting to concrete for maximum safety; some home models rely on ballast plates and do not require permanent anchoring.
- Q6: What are the load capacity benchmarks to look for?
A6: Look for a smith carriage rated 1,000–2,000 lbs for commercial use and cable stacks 200–300 lb per column; higher ratings provide longevity and safety margin for heavy training environments.
- Q7: How do I program group classes around one smith cable rack?
A7: Use circuit stations that rotate clients every 6–8 minutes: station A (smith squats), station B (cable row/press superset), station C (accessory/core). This maximizes utilization and keeps transitions short.
- Q8: Can the smith cable rack be used for rehab clients?
A8: Absolutely—the guided bar reduces shear, and adjustable cables enable fine-grained load control across ranges of motion, making it suitable for progressive rehab protocols when supervised by a clinician.
- Q9: What accessories are must-haves?
A9: Adjustable bench, dual single-handles, lat bar, tricep rope, ankle strap, and landmine adapter are essential to unlock the full exercise library.
- Q10: How much should I budget for maintenance parts annually?
A10: Budget 2–5% of equipment cost annually for replacement cables, pulleys, and bearings; higher-usage commercial settings should plan for the upper end of that range.
- Q11: How to train staff on safe usage?
A11: Provide a 2–4 hour hands-on session covering setup, spotting, quick-change transitions, and daily inspection checklists; follow with quarterly refreshers and a written operations manual.
- Q12: Are there resale considerations?
A12: Units from reputable brands with service records retain value. Keep service logs, replace worn parts, and maintain original hardware to improve resale price in the secondary market.
- Q13: What KPIs should operators track after installation?
A13: Track utilization rate (% of sessions using the rack), downtime (hours/month), average session length, and maintenance cost per month. Aim to keep utilization over 30% for boutique studios and maintenance downtime under 2% of operating hours.