
Comprehensive Guide to Strength Training with Barbell: Equipment, Technique, Programs, and Safety
Overview: Why strength training with barbell matters and evidence-based benefits
Barbell-based strength training remains the backbone of progressive resistance work for athletes, tactical populations, and general fitness enthusiasts. Barbells allow for compound, multi-joint lifts—squat, deadlift, bench press, overhead press—that recruit large muscle groups and create high mechanical tension, a primary driver of hypertrophy and strength gains. Evidence from health organizations and sports science supports resistance training at least twice weekly for improved musculoskeletal health, metabolic function, and functional capacity.
Key statistics and practical implications:
- Public health guidance: The WHO and major health bodies recommend muscle-strengthening activities involving major muscle groups on 2 or more days per week for adults; barbells are an efficient way to meet this guideline.
- Performance impact: In trained and untrained populations, structured barbell programs typically yield measurable 1-rep max (1RM) increases within 8–12 weeks. Novice linear progression models often produce week-to-week 2.5–5% strength gains early in training.
- Clinical outcomes: Resistance training improves bone mineral density, reduces sarcopenia risk, and enhances insulin sensitivity—important outcomes for aging populations and metabolic disease prevention.
Practical application: For a busy adult, two 45–60 minute barbell sessions per week—focusing on squat, hinge, press, and row—covers strength, functional movement, and time-efficient caloric expenditure. For athletes, customizing volume and intensity across 3–6 sessions can target power, hypertrophy, or maximal strength phases.
Examples and comparisons:
- Case example: A moderately trained 28-year-old following a 3x/week barbell program (squat, bench, deadlift, assistance) increased squat 1RM from 140kg to 165kg in 16 weeks by employing progressive overload and weekly auto-regulation with Rate of Perceived Exertion (RPE).
- Comparison to machines: Barbells require stability and intermuscular coordination, often yielding superior transfer to real-world and sport-specific tasks compared to isolated machine work.
Actionable checklist to get started:
- Schedule: 2–3 barbell sessions/week initially.
- Focus: Squat, hinge, press, row/vertical pull patterns.
- Progression: Add 1–2.5kg (small plates) per session for upper body or 2.5–5kg for lower body when technique is solid.
- Track: Log loads, sets, reps, and RPE; review monthly for trends.
Benefits and supporting data
Barbell training confers multiple measurable benefits across performance and health. In strength and conditioning literature, compound barbell lifts generate high force outputs and hormonal responses conducive to hypertrophy and strength. For example, large muscle group engagement in exercises like the back squat elevates systemic metabolic demand and supports greater caloric burn per session compared to isolated exercises.
Relevant data points to guide program design:
- Volume-response: Meta-analyses show greater weekly training volume correlates with larger hypertrophic responses; when programming barbells, aim for 10–20 hard sets/week per major muscle group depending on experience.
- Intensity guidelines: To increase maximal strength, prioritize loads in the 80–95% 1RM range with lower rep ranges (1–6) and sufficient rest (2–5 minutes). For hypertrophy, 60–85% 1RM and 6–12 reps per set are common.
By aligning sets, reps, and intensity with client goals and using barbells to deliver compound stimulus, coaches can design efficient programs with predictable outcomes.
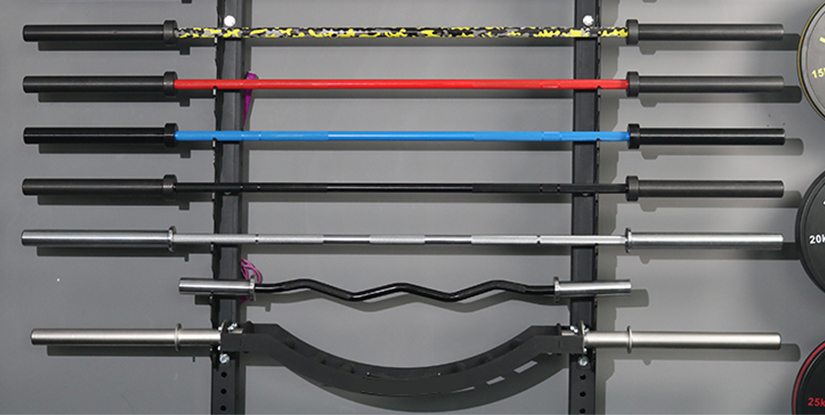
Types of barbells, plates, and attachments: real-world selection guide
Choosing the right equipment influences safety, longevity, and training quality. Key barbell categories include:
- Olympic men’s barbell (20kg): 28-29mm shaft, rotating sleeves; suitable for cleans, snatches, and general strength work.
- Olympic women’s barbell (15kg): 25mm shaft; useful for smaller hand spans and Olympic lifts.
- Power bar: Stiffer shaft, less whip, knurling optimized for powerlifting; excellent for heavy squats and deadlifts.
- Specialty bars: Safety squat bars, trap bars (hex bars), and cambered bars can reduce joint stress or target specific mechanics.
Plate selection: Use calibrated plates for testing 1RM and fractional plates (0.25–1kg) for fine progression. Bumper plates are essential for Olympic lifts and safe drops; iron plates are cost-effective for general strength.
Maintenance and gym layout: Keep a dedicated lifting area with 2 meters of clear space, a rack with safety pins, and visible load charts. Inspect bar sleeves for smooth rotation and plates for cracks. Replace bar bearings if spin becomes gritty to prevent torque transfer to lifter wrists and shoulders.
Choosing and using barbell equipment safely: setup, technique, and maintenance
Safety is foundational when programming strength training with barbell. Proper setup reduces injury risk, improves lift efficiency, and allows for heavier, repeatable loading. Start by creating a baseline safety protocol: assess mobility, establish technical primitives, and implement equipment checks before each session.
Baseline screening and prep steps:
- Movement screen: Check ankle dorsiflexion, hip hinge pattern, thoracic extension, and shoulder mobility to identify compensations that affect lifts.
- Warm-up routine: 8–12 minutes dynamic warm-up including bodyweight squats, hip hinges, band pull-aparts, and light barbell sets gradually increasing weight.
- Technique primer: Use PVC pipe or unloaded bar to groove movement before adding load.
Rack and bar setup for key lifts (step-by-step):
- Back Squat setup:
- Bar height: set rack so you can un-rack with slight knee extension (bar ~mid-chest).
- Grip: hands just outside shoulders, elbows slightly down and chest high.
- Foot position: shoulder-width with toes slightly out; descend with hips back and knees tracking toes.
- Safety: set pins at or just below the bottom range to catch failed reps during training sets.
- Deadlift setup:
- Foot placement: mid-foot under bar, shins close to bar, hip hinge to grip.
- Back position: neutral spine, shoulders slightly in front of bar, lat engaged.
- Lockout: drive through heels, extend hips fully, reset for subsequent reps.
Practical safety tips and equipment maintenance:
- Use collars/clips every set to prevent plates sliding and changing leverage mid-rep.
- Inspect bar knurling and sleeves monthly; clean chalk and debris to maintain grip and prevent rust.
- Rotate barbells across stations to reduce concentrated wear; keep spare bars if programming high-volume groups.
- Include spotters for heavy singles on bench press or use a power rack with safety pins to reduce risk.
Common errors to correct with drills:
- Butt wink in squat: remediate with hip mobility drills, reduced depth, and tempo squats.
- Rounded back in deadlift: reinforce hip hinge with kettlebell swings and Romanian deadlifts using lighter loads.
- Elbow flaring on bench: strengthen scapular stability and practice paused bench presses to enforce groove.
Setup and technique: coaching cues and drills
Effective coaching prioritizes simple, repeatable cues and progressive drilling. For the squat: "chest up, knees out, sit between heels." Cue breath and brace: inhale into the belly, brace the core (Valsalva for heavy sets), then descend with controlled tempo. Use box squats to teach depth control and tempo squats (3s descent) to build eccentric control.
For the deadlift: cue "chest tall, hips back, push the floor away." Practice hip hinge with lighter Romanian deadlifts and hip hinge to a wall to ingrain movement. Glute bridges and banded pull-throughs build posterior chain activation important for lockout strength. For bench press: emphasize scapular retraction and a stable foot drive; paused bench sets eliminate bounce and improve power off the chest.
Programming tips for technique retention:
- Include at least one technical accessory per session (tempo reps, pause reps, or lighter volume focused on form).
- Use video feedback weekly for lifters training alone to detect drift in bar path and joint angles.
- Apply progressive overload conservatively: increase load only when form is maintained across all prescribed reps.
Safety gear and maintenance: what to buy and how to care
Useful safety gear for barbell training includes:
- Power rack with adjustable safety pins (essential for solo heavy work).
- Lifting belt for near-maximal efforts to improve intra-abdominal pressure when bracing correctly.
- Wrist wraps and knee sleeves for joint support under heavy loads; use sparingly to allow tendon adaptation.
- Quality barbell with rotating sleeves for Olympic-style lifts and consistent knurling for grip.
Maintenance schedule (practical):
- Weekly: wipe down bars and plates to remove chalk and sweat; check collars.
- Monthly: inspect bar sleeves for smooth spin; tighten bolts on racks; lubricate bearings if needed.
- Annually: load test racks and replace worn protective coatings on plates and racks to maintain safety ratings.
Budgeting advice: Invest in a solid power rack and one quality bar first. Bumper plates and fractional plates can be added as training needs grow. For home gyms, prioritize floor protection and barbell storage to extend equipment life.
Programming and progression with a barbell: templates, periodization, and tracking
Structured programming turns effort into predictable results. When using barbells, select a periodization model aligned with experience level and goals. Common frameworks include linear progression (best for novices), undulating periodization (useful for intermediate lifters), and block periodization for advanced athletes targeting peaking phases.
Beginner example (linear progression):
- Frequency: 3 full-body sessions/week (e.g., Monday, Wednesday, Friday).
- Main lifts: Squat, Bench Press, Deadlift (rotating focus), Overhead Press twice weekly as accessory.
- Progression rule: Add 2.5kg to upper-body lifts and 5kg to lower-body lifts each successful session when all sets are completed with good form.
Intermediate example (undulating): 4 sessions/week dividing heavy, volume, speed, and technique days. Use 5x5 heavy days, 3x8 volume days, and speed work (50–70% 1RM) for power development. Rotate assistance work to target weak links: glute ham raises, Romanian deadlifts, rows, and core stability exercises.
Advanced considerations: Employ block periodization with accumulation (volume), intensification (load), and realization (peaking) blocks. Integrate deload weeks every 4–6 weeks or when objective fatigue markers (RPE drift, jump height loss) are observed.
Tracking progress: Implement simple, objective metrics:
- Log: weight, sets, reps, RPE, and bar speed if available.
- Testing intervals: 8–12 week 1RM or AMRAP (as many reps as possible) tests to recalibrate loads.
- Monitor: resting heart rate variability or subjective wellness to spot overreach early.
Example 12-week program outline (hypertrophy-to-strength):
- Weeks 1–6 (Accumulation): 3–4x/week, 8–12 reps, 60–75% 1RM, 12–20 sets/week per lift.
- Weeks 7–9 (Intensification): 3x/week, 4–6 reps, 75–85% 1RM, increase load by 2.5–5% each week if form holds.
- Weeks 10–12 (Peaking): 2–3x/week, 1–3 reps, 85–95%+ 1RM with longer rests and reduced volume.
Step-by-step progression plan for a 12-week strength cycle
Step 1: Baseline testing and goal-setting (week 0)
- Test conservative 1RM or 3RM for main lifts; set realistic percentage-based training loads.
Step 3: Intensification (weeks 7–9): Shift to heavier loads, reduce reps to 4–6, and increase rest. Target neurological adaptations with heavier single/double work and incorporate speed sets at submaximal loads.
Step 4: Realization/Peaking (weeks 10–12): Lower volume, maintain or increase intensity, and include 1RM attempts in the final week if competition or testing is planned. Schedule a deload week after this cycle for recovery.
Step 5: Evaluation and repeat: Analyze log data to identify lifts with the smallest relative progress and prioritize them in the next block with targeted assistance and frequency adjustments.
Tracking tools, case studies, and best practices
Tools: Use a training log app that records sets, reps, weight, and RPE. Barbell accelerometers or linear position transducers provide bar speed data that refine load selection and autoregulation. Spreadsheet templates for weekly volume help visualize progress and prevent abrupt increases that lead to injury.
Case study: A 35-year-old recreational athlete increased deadlift from 160kg to 195kg in 20 weeks. Key interventions included increasing deadlift frequency from once to twice weekly, incorporating RDLs and deficit pulls for weak points, and monitoring recovery via sleep logs and weekly subjective readiness scores. Volume was increased incrementally by 8% every two weeks with scheduled deload weeks.
Best practices summary:
- Prioritize consistent technique before heavy loading.
- Use measurable progression rules (fixed kg increases or RPE auto-regulation).
- Schedule regular deloads and monitor objective fatigue markers.
Frequently Asked Questions (专业)
This FAQ section provides concise, professional answers to common questions about strength training with barbell, equipment, programming, and safety. Each answer is practical and actionable for coaches and serious trainees.
-
Q1: How often should I perform barbell training per week?
A1: For general strength and health, 2–3 full-body barbell sessions per week is effective. For steady strength progression, 3 sessions with planned variation (heavy, volume, speed) optimizes adaptation. Advanced lifters may benefit from 4+ sessions with split focuses to manage fatigue.
-
Q2: What is the safest way to increase load on major lifts?
A2: Use small, consistent increments (1–2.5kg for upper body, 2.5–5kg for lower body) and only progress when all prescribed reps are completed with sound technique. Autoregulation using RPE (target RPE 7–8 for most work sets) helps avoid overreaching.
-
Q3: Do I need specialty barbells for effective training?
A3: No. A good-quality Olympic or power bar plus calibrated or standard plates suffice for most trainees. Specialty bars (trap bar, safety squat bar) are useful for addressing specific biomechanical needs or injury accommodations.
-
Q4: How do I prevent lower back pain when deadlifting?
A4: Prioritize neutral spine, hip hinge mechanics, and progressive loading. Strengthen the posterior chain with Romanian deadlifts and glute-focused work, and use mobility drills for hamstrings and hips. If pain persists, reduce load and consult a clinician.
-
Q5: Is a lifting belt necessary?
A5: A belt is a performance and safety tool for near-maximal lifts when used to support proper bracing. It should not replace core training. Use it selectively for heavy sets (above ~85% 1RM) rather than for all training.
-
Q6: How much protein do I need while doing barbell training?
A6: For hypertrophy and strength support, 1.6–2.2 g/kg bodyweight/day is a commonly recommended range. Distribute protein evenly across meals, aiming for 20–40 g per meal to maximize muscle protein synthesis.
-
Q7: How should I program accessories around main barbell lifts?
A7: Use 2–4 accessory movements per session targeting weak links and balance (horizontal pull for bench, hamstring/glute work for deadlift, core stability for squat). Keep accessory volume moderate to avoid compromising main lifts.
-
Q8: What are practical deload strategies?
A8: Reduce volume by 40–60% and intensity by 10–20% for one week, or cut frequency in half. Active recovery like light technical work and mobility sessions maintains movement quality without accumulating fatigue.
-
Q9: How to implement progressive overload without a coach?
A9: Keep a detailed log, use objective rules (add fixed weight when sets are hit), employ RPE for autoregulation, and video lifts periodically for self-review. Conservative progressions with frequent technique checks reduce injury risk.
-
Q10: Can beginners use barbell complexes for conditioning?
A10: Yes, but start with simple complexes using light loads and focus on movement quality. Examples: 5 rounds of 5 deadlifts, 5 bent-over rows, 5 front squats at 40–50% 1RM, with short rests to build conditioning safely.
-
Q11: How to choose between barbell and trap bar deadlifts?
A11: Use trap bar for reduced lumbar shear and easier setup (suitable for beginners or those with back issues). Use conventional barbell deadlifts to train posterior chain specificity and sport-transfer when technique allows.
-
Q12: When should I test 1RM?
A12: Test 1RM every 8–12 weeks or at the end of a training block when you’ve completed a peaking phase and a deload. Use submaximal rep-to-1RM estimates (e.g., 3RM or 5RM tests) for frequent assessment with less fatigue.