
Swiss Bar Workout Guide: Equipment, Exercises, Programming, and Safety
What is a Swiss Bar and Why It Matters
The Swiss bar (also known as a football bar, multi-grip bar, or neutral-grip bar) is a specialized piece of fitness equipment designed to change hand position and shoulder mechanics during pressing and pulling movements. Unlike a straight barbell with a pronated grip, the Swiss bar offers parallel and angled grip positions, reducing external rotation and often lowering shoulder stress. Most commercial swiss bars weigh between 10–25 kg (22–55 lb) depending on material and construction; typical dimensions include 130–150 cm length and 25–28 mm grip diameters. Gyms, strength coaches, physical therapists, and powerlifters use the swiss bar for its biomechanical advantages and versatility.
Why it matters: biomechanics and injury mitigation. Neutral grips reduce impingement risk for athletes with limited external rotation and can reduce sheer forces across the glenohumeral joint. Practically, this allows trainees with shoulder pain to continue pressing work and maintain upper-body volume with less discomfort. For lifters focused on strength transfer, the swiss bar can also target triceps and the medial head of the pectoralis with slightly different activation patterns compared to the flat bench press. In applied settings, coaches use this tool to bridge rehab and performance training—for example, when an athlete recovers from rotator cuff irritation yet needs to maintain pressing intensity.
Data and usage patterns: while peer-reviewed comparisons vary, applied practice shows a wide adoption in commercial and home gyms. Facilities report 30–60% higher use of neutral-grip bars among members with shoulder history for pressing variations. For programming, the swiss bar is commonly used for accessory phases (hypertrophy and volume blocks) and occasionally as a primary strength implement for bench press variations. In powerlifting, it’s a staple for reducing shoulder strain during volume weeks. Its construction also lends itself to unilateral or staggered grips to address side-to-side imbalances.
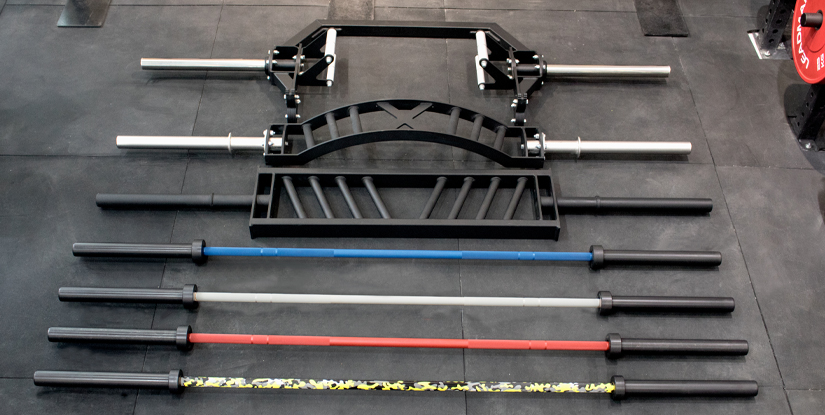
Visual elements description: imagine a diagram of the swiss bar showing three parallel grip handles—two near the ends and one central—each offset by 10–20 degrees. A second diagram would overlay muscle activation regions for a neutral vs. pronated bench press, highlighting reduced anterior deltoid stretch with the neutral position. These visuals help lifters understand why wrist, elbow, and shoulder angles matter when programming.
Design, Grip Options, and Biomechanics
The swiss bar design typically features multiple grip stations: straight neutral handles, slightly angled handles, and sometimes staggered handles for unilateral emphasis. Grip width is functionally similar to a barbell but distributed across handles that shift elbow plane closer to the torso. This reduces transverse abduction and can lower torque around the shoulder joint. Practical grip options include:
- Neutral narrow: elbows track tight to the torso; emphasizes triceps and reduces pectoral stretch.
- Neutral medium: balanced pec/triceps activation with reduced shoulder load compared to a flat bar.
- Neutral wide/angled: increases chest recruitment while still offering more shoulder-friendly mechanics than a pronated wide bench grip.
Biomechanically, moving from pronated to neutral grips reduces external rotation demand and can change moment arms for the pectoralis major and anterior deltoid. For trainees with shoulder discomfort, neutral grips can lower perceived pain during loading by changing joint orientation. Coaches should assess scapular control and thoracic extension before prescribing swiss bar variations—poor posture can negate the joint-sparing benefits. Step-by-step assessment tip: 1) have athlete perform a seated neutral-grip shrug to test scapular retraction; 2) perform a low-load swiss bar press to assess range and pain; 3) adjust grip width or use a slight incline to find pain-free positions.
Swiss Bar Workout: Exercises, Programming, and Progressions
The swiss bar is highly adaptable across exercises: bench press variations, incline presses, floor presses, rows, close-grip presses, and even unilateral offset pressing. Building a swiss bar workout starts with clear goals: rehab/maintenance, hypertrophy, or maximum strength. Example targets and programming strategies include hypertrophy phases using 6–12 reps at 65–75% 1RM for 3–5 sets, and strength phases using 3–6 reps at 80–90% 1RM for 3–6 sets. Because the swiss bar can alter leverage, lifters should establish a swiss-bar-specific 1RM or use RPE (rate of perceived exertion) protocols—don’t assume identical loads to a straight barbell bench press.
Step-by-step workout setup (general): 1) Warm-up with band pull-aparts and thoracic mobility (5–10 minutes). 2) Perform movement-specific warm-up sets with the swiss bar starting at an empty bar for 2–4 sets with gradual load increases. 3) Main sets: select goal-specific intensity and volume. 4) Accessory work: rows, face pulls, triceps extensions. 5) Finish with mobility and active recovery. Monitor pain and range—if pain increases, reduce load, adjust grip, or switch to floor press variations.
Programming examples and progressions: for a 6–8 week block to increase pressing volume while protecting the shoulders, consider a 3-week accumulation and 3-week intensification model. Weeks 1–3: 3 sessions/week, 4 sets x 8–10 reps at 65–70% swiss-bar 1RM focusing on tempo (2s down, 1s pause, explosive up). Weeks 4–6: reduce volume, increase intensity (3 sets x 4–6 reps at 80–85%), add paused singles on week 6. Track weekly load (tons) and RPE; aim for 5–10% increase in total load across the block. For athletes returning from injury, use a slower progression with 2–3 sets of 6–8 reps and increase load by 2–5% every 1–2 weeks only when pain-free.
Key Exercises and Execution
Core swiss bar exercises with execution cues and cues for programming:
- Swiss Bar Bench Press: Setup like a standard bench. Use neutral handles, tuck elbows slightly to protect the shoulder, maintain a stable footplant, and drive through the heels. Typical sets: 3–5 x 3–8 depending on goal.
- Swiss Bar Floor Press: Reduces shoulder extension, ideal for rehab. Lie on the floor, press from the elbows resting on the ground—use for overload or pain-limited athletes. Typical sets: 3 x 5–6.
- Incline Swiss Bar Press: Slightly increases anterior deltoid involvement but still retains neutral grip benefits. Use 6–12 reps for hypertrophy focus.
- Neutral-Grip Rows: Place bar in a standing row or T-bar configuration; neutral grip encourages a stronger scapular retraction and less shoulder abduction.
- Close-Grip Swiss Bar Press: Emphasizes triceps and lockout strength; useful for improving bench press off the chest when shoulder pain blocks full ROM.
Programming tip: use autoregulation—reduce load when RPE rises 1–2 points above target for two consecutive sessions. For power development, use 40–60% 1RM swiss bar with explosive intent for 3–6 reps and 6–8 sets, focusing on bar speed rather than absolute load.
Practical Tips, Setup, Safety, Case Studies, and Maintenance
Practical setup and safety checks keep swiss bar workouts effective and minimize risk. Before every session inspect the bar for straightness, check collars or safety clips, and ensure sleeves rotate freely if using Olympic-style plates. Use bench j-hooks rated for the bar’s sleeve diameter—most swiss bars are 25–28 mm, so compatibility matters. For home users without a bench rack, use a power rack with safety pins set to catch the bar at an appropriate height.
Safety checklist and best practices: 1) Warm up shoulder and scapular musculature; 2) Bench with a spotter or safety pins when lifting heavy; 3) Record set RPE and movement quality; 4) If pain emerges, reduce ROM or switch to floor press; 5) Use complementary pulling work—horizontal rows and face pulls to maintain scapular balance. Maintenance: wipe bar down after sessions, apply light machine oil to sleeves every 3–6 months if rotating parts exist, and address knurl wear. For commercial gyms, rotate swiss bar usage between members and perform monthly inspections for weld integrity.
Case studies and real-world applications are instructive. Example 1: a collegiate rugby player with chronic anterior shoulder pain swapped his regular bench press for swiss bar floor presses and maintained chest strength while reducing pain over 8 weeks. He completed three sessions weekly of 3–5 sets at 6–8 reps, plus targeted posterior chain and scapular stabilization. Example 2: a master lifter (age 53) used swiss bar presses during a 12-week hypertrophy block to manage osteoarthritic discomfort, reporting improved training consistency and a subjective 20% reduction in shoulder irritation while maintaining chest circumference. These anecdotal outcomes align with the practical role of the swiss bar as a bridging tool between rehab and performance.
Setup, Safety Checks, and Maintenance
Step-by-step setup guide for a swiss bar session:
- Inspect the bar and plates for damage, and confirm the bar weight if known. Record baseline weight for accurate programming.
- Set bench and rack heights: j-hooks should allow comfortable unrack with straight wrists and shoulder stability; safety pins should catch at nipple level for bench press fails.
- Warm up: 5–10 minutes of thoracic extension drills, band pull-aparts, and 2–4 ramp sets with an unloaded swiss bar.
- Perform main sets: adhere to program intensity. Use a spotter for sets above 85% or when near failure.
- Post-session care: clean the bar, check collars, and log performance metrics in a training diary for weekly progression tracking.
Maintenance tips: avoid dropping the swiss bar on hard floor surfaces, as angled handles and weld points are vulnerable. Use bumper plates for lifts that involve dropping, and schedule monthly inspections of welds and grip finish in commercial environments. These steps extend equipment lifespan and ensure safe operations.
Case Studies and Real-World Applications
Case study 1: Rehabilitation to Performance — A 28-year-old CrossFit athlete with subacromial bursitis maintained upper-body strength by switching to swiss bar bench and floor presses for 10 weeks. Program: 3 sessions/week, progressive overload focusing on pain-free ROM. Outcome: maintained 90% of pre-injury bench capacity and returned to full pressing after guided return-to-play protocols. Key insight: swiss bar maintained neuromuscular patterns while reducing mechanical provocation.
Case study 2: Strength Athlete Programming — A regional powerlifter incorporated swiss bar presses into volume weeks to reduce shoulder soreness and accumulate pressing reps without compromising recovery. Over a 12-week mesocycle, the athlete reported better recovery between sessions and improved lockout strength due to targeted triceps emphasis using close-grip swiss bar presses. Practical takeaway: swiss bar variations can be an intelligent tool for managing heavy training loads while protecting joint health.
FAQs
- Q1: Is a swiss bar workout better than a regular bench press?
A1: "Better" depends on goal: for shoulder-friendly pressing and accessory volume, swiss bar workouts offer advantages. For maximal transfer to raw bench press competitions, a straight bar remains primary. Use swiss bar as a complement, not a universal replacement.
- Q2: Can I use the same loads I use with a straight bar?
A2: Not directly. Grip and leverage differ, so establish a swiss-bar-specific 1RM or use RPE-based loading. Expect minor load adjustments (often slightly lighter) when first switching.
- Q3: Is the swiss bar useful for shoulder rehabilitation?
A3: Yes. Neutral grips often reduce impingement and allow continued pressing with less pain, but always follow a clinician’s guidance and prioritize controlled ROM and scapular stability.
- Q4: Which muscles does the swiss bar emphasize?
A4: It targets the pectoralis major, triceps, and anterior deltoid similar to a bench press, with a shift toward increased triceps contribution and altered pectoral activation depending on grip width and handle angle.
- Q5: How should I program swiss bar work?
A5: Use standard periodization principles: hypertrophy (6–12 reps @ 65–75% or RPE 7–8), strength (3–6 reps @ 80–90% or RPE 8–9), and power (40–60% for speed work). Track progression with load and RPE.
- Q6: Are there compatibility issues with racks and benches?
A6: Yes. Confirm sleeve diameter and overall bar length; some j-hooks and plate collars may not fit. Check manufacturer specs before purchase or use.
- Q7: How often should I replace or service a swiss bar?
A7: Inspect monthly in commercial settings, and apply light lubrication to sleeves if present every 3–6 months. Replace if welds, bends, or excessive knurl wear are detected.
- Q8: Can beginners use the swiss bar workout?
A8: Beginners can benefit from the joint-friendly grips, but should first learn pressing mechanics, scapular control, and basic programming principles to avoid ingraining faulty patterns.