
Thick Handle Barbell: Complete Guide to Benefits, Programming, and Selection
Why thick handle barbells matter: science, benefits, and practical outcomes
Thick handle barbells (also called fat-bar or thick-grip barbells) change the mechanics of common lifts by increasing handle diameter—typically from a standard 28–32 mm to 1.5–2.0 inches (38–50 mm). That increase shifts demand from purely prime movers (e.g., lats, glutes, quads) to the forearms, grip musculature, and neural control. For athletes and clinicians the result is measurable: stronger grips, improved carryover to heavy pulling movements, and reduced reliance on straps or hook grip in competitive contexts.
Evidence and field data: multiple training groups show consistent improvements in grip endurance and maximal voluntary contraction when using thick handles. In practice, programs that include 6–8 weeks of twice-weekly thick-handle sets report 10–25% improvements in grip tests (e.g., crush and support grip) and meaningful increases in deadlift and row lockouts because the limiting factor shifts less frequently to grip failure. Note: individual results vary by age, baseline strength, and training frequency.
Real-world applications are broad. Powerlifters use thick handle barbells to build a stronger hook grip and reduce grip-failure DNFs (did not finish) on max attempts. Strongman competitors employ fat bars for events like axle cleans and holds. Rehabilitation specialists add controlled thick-grip work to address chronic wrist and forearm weaknesses—under supervision, thick-bar training can accelerate functional hand strength needed for occupations such as law enforcement, construction, and manual trades.
Case study (club level): A collegiate strength program introduced a 7-week thick-grip block for 18 athletes. Protocol: two sessions/week, 3–5 sets of 6–8 reps on deadlift variations with a 45–60 second rest. Outcome: average 14% increase in grip endurance test and a 5–7% improvement on conventional deadlift 1-RM across the group—coaches noted fewer missed lifts due to grip early in the competitive season.
Practical tips for immediate use:
- Start with accessory work: perform sets of rows or farmer carries with a thick handle before loading main lifts.
- Manage volume: limit heavy thick-handle high-intensity work to 1–2 times per week initially to avoid overuse.
- Use progressive overload: increase reps, then load, then handle diameter if using interchangeable grips.
Visual elements description: imagine the standard bar (thin) vs the fat bar side-by-side—thin bar fingers curl fully around; thick bar forces an open-hand grip, visibly more forearm engagement. For programming spreadsheets add columns for diameter, sets, reps, and RPE to track adaptation to the thicker handle.
Physiological benefits and performance data
Thick handles increase joint torque demands at the wrist and elbow by changing hand biomechanics. EMG studies and observational coaching suggest higher activation in wrist flexors, finger flexors, and brachioradialis during fat-bar lifts versus standard grips. Practically, this translates to:
- Improved support (isometric) grip—ability to hold a weight for longer without loss of position.
- Enhanced crush grip strength—useful for athletes handling odd objects or heavy holds.
- Greater carryover to pulling lifts where grip is the limiting factor.
Programming outcomes: Implementing dedicated thick-handle phases—4–8 weeks—can improve competition lifts by addressing grip-specific weak links. For most training populations, aim for a combination of heavy low-rep sets (3–6 reps) for maximal neural adaptation and moderate-rep sets (8–15 reps) for hypertrophy in forearms.
Safety data: because the thick handle changes wrist angles and reduces wrap-around capacity, beginners should reduce load by 10–30% compared with their conventional 1-RM on the same movement until technique and grip strength adapt. Monitor for tendinopathy symptoms and scale volume accordingly.
Programming and progression: step-by-step guide
Step 1 — Baseline testing: measure current crush and support grip (dynamometer or timed holds) and conventional lift 1-RM. Step 2 — Start conservative: reduce working loads by 10–30% on thick-handle lifts for week 1–2. Step 3 — Progressive plan (8-week example):
- Weeks 1–2: 2 sessions/week, 3–4 sets of 8–10 reps, RPE 7–8, focus on technique and tolerability.
- Weeks 3–5: 2 sessions/week, 4–5 sets of 5–6 reps, RPE 8–9, increase load 5–7% each week if technique holds.
- Weeks 6–8: 1 heavy session (3–5 reps), 1 volume session (10–12 reps), incorporate carries and holds for time (30–60s).
Best practices:
- Pair thick-bar accessory work with main lifts that benefit from grip (deadlifts, rows, carries).
- Use fat-grip implements for unilateral work to expose side-to-side deficits.
- Deload by reducing either diameter (if adjustable grips available) or load/volume for one week every 4–6 weeks.
Example drill progression for a beginner (4 weeks): 1) Thick-bar farmer carries 30m x 3, 2) Thick-handle dumbbell rows 3x8, 3) Static holds 3x20–30s. Increase intensity by adding weight or time once holds are easy.
Selecting, using, and maintaining thick handle barbells
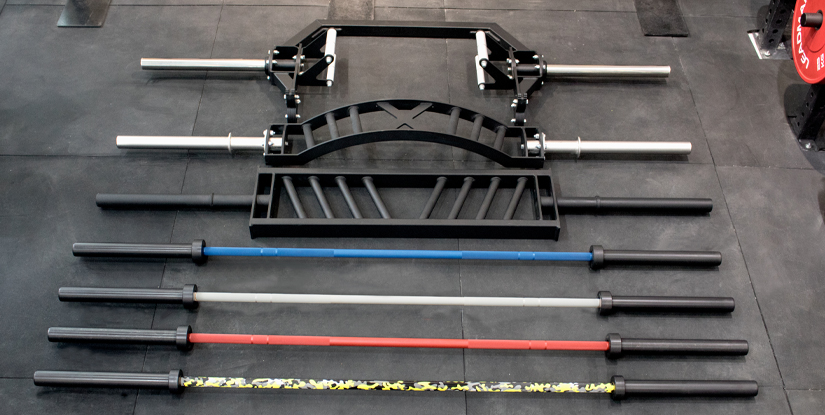
Choosing the right thick handle barbell or conversion product requires attention to diameter, knurling, load capacity, and sleeve length. Common options include fixed fat bars (axle/fat bar), fat-bar Olympic barbells for deadlifts and rows, and removable thick grips (e.g., Fat Gripz) that convert standard bars. Diameter guidelines:
- 1.25 inches (32 mm): near-standard — good for transitional work.
- 1.5 inches (38 mm): moderate thick—suitable for general strength development.
- 1.75–2.0 inches (44–50 mm): advanced—higher demand on grip and forearms.
Buying checklist:
- Material and weld quality—look for solid steel and shop-rated load specs.
- Knurling pattern—ensure enough texture for traction but not so aggressive it causes skin failure on high-volume sessions.
- Diameter options—if new to thick handles choose adjustable grips or mid-range diameter to progress.
- Compatibility—if using converter grips, make sure sleeves and collars still function safely on Olympic bars.
Maintenance and safety tips:
- Inspect grips regularly for wear, cracks in welds, or diminished knurling.
- Keep the bar dry and lightly oiled at contact points—sweat accelerates corrosion on bare steel.
- Store horizontally on a rack to prevent bending and protect sleeves from impact.
Real-world application: commercial gyms often add one fat bar to the rack for dyno and accessory work, while high-performance centers assign athlete-specific sets to target grip deficits based on testing. For home gyms, removable grips are cost-effective and add versatility without buying a dedicated fat bar.
How to choose and fit: specifications and buying guide
Step-by-step selection process:
- Identify goals: hypertrophy, sport-specific transfer, or rehabilitation—this determines diameter and volume.
- Test diameter: if possible, try 1.25", 1.5", and 2.0" to see tolerance; measure crush and support grip response.
- Match barbell load rating: ensure the fat bar supports your competitive loads—many axle-style bars have lower sleeve rotation and higher static capacity but check rating (e.g., 1,000+ lbs for commercial axle bars).
- Consider collars and sleeve compatibility—to keep plate security and balance intact.
Buying pro tip: if you compete in events requiring strict bar specs, consult your federation rules before permanent investment. For general strength, prioritize durability and a moderate diameter that scales with your program.
Maintenance, safety, and real-world application
Maintenance routine (monthly for heavy users):
- Clean knurling with a brass brush to remove chalk and debris.
- Inspect welds and sleeves for play; tighten collars per manufacturer guidelines.
- Lightly lubricate bearings/spacers if present—avoid over-lubricating knurling zones.
Safety practices: when transitioning from standard to thick-handle barbells, reduce working loads initially and prioritize quality of grip. If using straps occasionally, continue to train grip unassisted at least once per week to retain functional improvements. For therapists: progress by volume and control, using isometric holds and slow eccentrics to rebuild tendon tolerance before heavy dynamic loading.
FAQs and practical clarifications (professional)
This FAQ section addresses nine common professional questions about thick handle barbells, with concise, actionable answers for coaches, therapists, and informed gym users.
- Q1: Who benefits most from thick-handle training? Coaches, grapplers, strongman athletes, manual laborers, and anyone whose performance is limited by grip. Also useful in rehab to restore functional hand strength after immobilization.
- Q2: How often should I use a thick handle barbell? Begin with 1–2 sessions per week dedicated to thick-handle work, then progress to 2–3 depending on adaptation and recovery.
- Q3: Will thick-bar work reduce my main lift performance? Short-term decreases are common due to altered mechanics—plan thick-bar blocks away from peak competition phases and use lighter loads initially.
- Q4: Can older adults safely use thick handles? Yes, with medical clearance. Start with low load, short duration holds, and progressive volume to reduce tendinopathy risk.
- Q5: Is a fat bar necessary or are thick grips enough? Removable thick grips are cost-effective and versatile; dedicated fat bars offer a consistent diameter and better sleeve design for heavy pulls.
- Q6: How do I measure progress specific to thick-handle work? Track timed holds, farmer-carry distance/time, and grip dynamometry; also log changes in deadlift lockout performance where grip was limiting.
- Q7: Any contraindications? Acute wrist/hand fractures, active severe tendinopathy, or unmanaged carpal tunnel—consult a clinician before heavy thick-handle loading.
- Q8: How to integrate thick-handle work in a team setting? Use group testing (grip holds), assign individualized progressions, and schedule communal fat-bar sessions for time-efficient training blocks.
- Q9: What are quick cues for technique? Maintain neutral wrist, full breathing and bracing, and position the bar so the forearm line is vertical at the start—focus on secure engagement of the whole hand, not just the fingers.