
Top Rated Power Racks: Complete Guide to Choosing, Setting Up, and Using Strength Racks Safely
Choosing Top Rated Power Racks: What to Look For and Why It Matters
Selecting one of the top rated power racks for your home gym or commercial facility starts with a clear needs assessment. Consider training goals (strength, hypertrophy, Olympic lifting), available space (ceiling height, floor footprint), and member or athlete load expectations. Industry trends show strength equipment is a core investment for performance-focused facilities; even modest home gyms increasingly prioritize durable racks with modular attachments.
Key specifications to compare include weight capacity, frame gauge, rack height and depth, hole spacing (2" vs 1" increments), and included safety systems (safety straps, spotter arms, or safeties). Typical weight capacities for top rated power racks range from 700 lb for lightweight home models up to 1,500+ lb for commercial-grade rigs. Rack heights commonly offered are 80", 84", 90", and 96"; choose at least 6"–12" more than your tallest lift plus barbell overhead clearance for the jerk and pull-up movements.
Practical buying checklist (step-by-step):
- Step 1: Measure your space (ceiling height, walking clearance on all sides, and floor loading capacity).
- Step 2: Define use cases (solo training, partner lifting, heavy singles, Oly lifts, cable attachments).
- Step 3: Compare specifications—weight capacity, steel gauge, hole spacing, and warranty.
- Step 4: Prioritize safety features—pin-and-tube safeties, straps, or full-length safety arms.
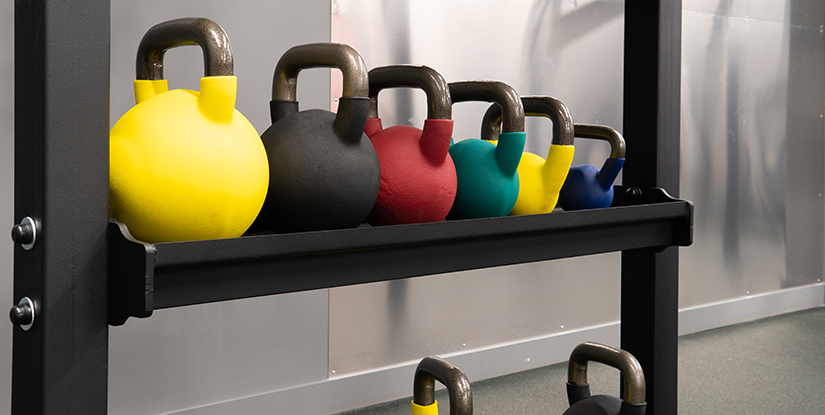
- Step 5: Factor attachments (lat pulldown, landmine, dip bars) and storage options for plates and bars.
Visual elements to reference when comparing models: exploded assembly diagrams, footprint overlays (showing required 360° clearance), and side-profile images that show barbell catch positions relative to user anthropometrics. When shopping, request a dimensional drawing from the manufacturer to verify clearances for overhead work and pull-up access.
Evaluating Build Quality and Specifications
Build quality separates top rated power racks from marginal models. Steel gauge is commonly quoted—11-gauge (approximately 3 mm) and 7-gauge (approximately 4–5 mm) are frequent descriptors. Heavier gauges and larger cross-section uprights reduce flex under load and increase longevity in high-usage settings. Look for weld quality (continuous, even beads), powder-coat finish for corrosion resistance, and fully braced designs (rear cross-members, base plates) for rigidity.
Important measurable specs to compare:
- Weight capacity: realistic working load vs. rated maximum. Prefer models with >2x your projected max if you plan heavy singles.
- Hole spacing: 1-inch increments allow finer J-cup adjustments; 2-inch may be adequate but less precise.
- Base footprint and bolting options: bolt-down vs free-standing—bolt-down offers added stability for heavy lifts.
Manufacturers’ warranties also indicate confidence: commercial-grade units often carry 10-year or lifetime structural warranties. For buyers on a budget, inspect user reviews and professional gym installations to confirm real-world durability.
Attachments, Versatility, and Budget Trade-offs
Top rated power racks are often modular. Common attachments: J-cups, safety spotter arms, lat pulldown towers, cable attachments, landmine anchors, dip bars, and plate storage pegs. Each attachment increases usability but also cost and space needs. Typical price ranges (2024 market snapshot): entry-level home racks $300–$700; mid-range well-equipped racks $700–$1,500; commercial rigs $1,500–$5,000+. Budget decisions should balance initial cost with upgrade paths—buying a rack with pre-drilled attachment ports reduces future compatibility headaches.
Practical trade-off advice:
- If you primarily squat, deadlift, and bench, prioritize strong uprights and reliable safety systems over fancy attachments.
- If you need a full-body functional rig, select a rack with integrated cable towers or add-on lat pulldowns and low rows.
- For limited space, choose a half-rack or fold-back option with vertical plate storage to conserve floor area.
Warranty terms, customer support responsiveness, and return policies are part of the true cost of ownership—factor them into budgeting alongside accessory compatibility and shipping/assembly complexity.
Setting Up and Using Power Racks Safely: Step-by-Step Assembly and Best Practices
Proper setup and informed usage are essential to realize the benefits of top rated power racks while minimizing injury risk. An organized assembly process saves time and ensures structural integrity. Most racks ship in multiple boxes—plan 2–4 hours for assembly with two people, longer for complex rigs. Follow the manufacturer manual exactly and use the recommended torque specs for anchor bolts and fasteners when provided.
Step-by-step assembly and anchoring guide:
- Unpack and inventory parts against the parts list. Photograph damage and contact support if anything is missing.
- Assemble the base and uprights on a flat, level surface. Use a rubber mallet and alignment pins when recommended.
- Temporarily assemble without final torquing to check holes and fit; then tighten sequentially to manufacturer torque specs.
- Decide whether to bolt down—if anchoring to concrete, use wedge anchors sized per instructions; if on wood subfloor, consult a structural professional.
- Install safety devices (safeties, straps, spotter arms) and test movement paths with an unloaded barbell before adding plates.
Floor protection and spacing: use 3/4"–1" thick heavy-duty rubber tiles under the rack to protect flooring and dampen impact noise. Allow at least 36" of clear space behind and on sides of the rack for safe loading/unloading; more for Olympic lifting. Ceiling clearance: ensure 12" plus arm reach above the top of the rack for jerks and kipping pull-ups.
Assembly and Anchoring Best Practices
Anchoring is a safety consideration, especially for heavy singles or commercial use. Bolting to concrete reduces tipping risk and improves lateral stability. When bolting, use calibrated torque drivers and follow anchor manufacturer load ratings. If your space prohibits anchoring, consider racks with wider base plates or wall-mounted bracing options to offset the lack of floor anchors.
Maintenance routines to keep the rack safe and functional include monthly inspections of fasteners, quarterly lubrication of moving cable parts, and annual checks of welds and powder-coat integrity. Keep a logbook of torque values and maintenance dates. Replace worn J-cup liners and safety straps at first signs of shoulder abrasion or fraying.
Programming and Safe Progression Inside a Power Rack
Power racks support a wide range of programs. Use them for heavy compound lifts, accessory work, and safety-spotting during high-intensity training. A practical progression model for strength gains:
- Phase 1 (4–8 weeks): Build technique with 3–4 sets of 6–8 reps at 60–75% 1RM, focusing on bar path and controlled tempo.
- Phase 2 (6–12 weeks): Increase intensity to 75–90% 1RM across 3–5 sets of 3–5 reps for strength adaptation.
- Phase 3 (4 weeks deload): Reduce volume by 40–60% to promote recovery, then retest 1RM or work capacity.
Use the rack’s safety pins at appropriate heights during heavy doubles/singles to enable confident maximal attempts without a spotter. For newcomers, practice unracking and racking technique with light weights to build motor patterns before loading heavy.
Programs, Accessories, and Case Studies: Maximizing ROI from Top Rated Power Racks
Power racks are central to effective strength programming. Here are three practical sample protocols you can run inside a rack, each including sets, reps, and accessory pairings. These examples assume familiarization with basic lifts and adequate warm-up.
Beginner 3x/week full-body (12 weeks):
- Squat: 3 sets x 8 reps (RPE 7)
- Bench Press (in rack): 3 x 8
- Barbell Row or inverted row: 3 x 8–10
- Accessory: Romanian deadlift 2 x 10
Intermediate 4x/week upper/lower split:
- Lower A: Squat 5 x 5; Accessory—lunges 3 x 8 each side
- Upper A: Bench 5 x 5; Pull-up 4 x 6–8
Advanced power program (peaking cycle): heavy singles and dynamic effort days using safeties and banded variations inside the rack to practice overloaded positions safely.
Accessory Integration and Space Optimization
Choose accessories that match your goals: lat towers and cable columns for vertical/horizontal pulling; adjustable benches with competition-style flat/incline settings; and dip bars for bodyweight pressing. Optimize space by using vertical plate storage pegs and multi-use attachments (e.g., landmine attachments that convert barbell movement to rotational work). For small spaces, fold-back uprights and wall-mounted pull-up bars can reduce footprint while preserving functionality.
When planning accessory purchases, calculate ROI by dividing expected training benefit (time saved, program versatility) against cost and space impact. Multi-function accessories with robust build quality typically deliver better long-term value than single-use add-ons.
Real-World Case Study and ROI for Home Gym Investment
Case study example: a 12-week structured program for a 29-year-old recreational lifter who invested in a mid-range top rated power rack with lat tower and bench. Baseline testing: squat 1RM 160 lb, bench 1RM 120 lb. After consistent 3x/week training focusing on progressive overload and accessory work, the lifter improved squat by 20 lb and bench by 15 lb—measurable gains attributed to consistent practice with safe heavy sets enabled by the rack's safeties.
Financial ROI: a quality rack costing $1,200 replaced a 6-month gym membership (approx. $50/month) and reduced commute time, in addition to intangible value—training convenience and program adherence. Clubs and PT studios often calculate payback periods of 6–18 months for robust rigs based on membership retention and increased session bookings when a facility adds a high-quality rack system.
FAQs
-
Q1: What defines "top rated power racks"? A: Top rated power racks are judged by build quality, weight capacity, safety features, modularity, warranty, and verified user reviews. Look for consistent positive feedback from both home users and commercial installers.
-
Q2: How much weight capacity do I need? A: Choose a rack with a rated capacity at least double your current max lift if you plan progressive overload or heavy singles; 1,000 lb capacity is common for robust home rigs.
-
Q3: Should I bolt my rack to the floor? A: If you plan heavy singles or commercial use, bolting to concrete is recommended. For apartments or wood floors, consult a structural professional and consider alternative stabilization like wider base plates.
-
Q4: What attachments are most useful? A: J-cups, safety arms, dip bars, and a lat tower/cable column provide the broadest utility. Landmine attachments are inexpensive and add rotational/core options.
-
Q5: How much space do I need? A: Minimum footprint is often 4' x 6', but allow at least 36" clearance on sides and rear. Ceiling height should be rack height plus 12" for overhead work.
-
Q6: How do I maintain a power rack? A: Monthly inspections of fasteners, quarterly lubrication of moving parts, and replacing worn liners and straps as needed keeps the rack safe and functional.
-
Q7: Are cheaper racks safe? A: Some budget racks are safe for light use but may lack longevity and precise hole spacing. Verify steel gauge, weld quality, and warranty before purchasing.
-
Q8: Can I perform Olympic lifts in a power rack? A: Yes for pulls and paused snatches/jerks, but full-height competition snatches may require higher ceilings and open floor space. Use a rack for blocks, pulls, and overhead work with care.
-
Q9: How do I choose between a full rack and half rack? A: Full racks offer more stability and accessory options; half racks save space and are sufficient for many lifters focused on barbell work with a bench.
-
Q10: What is the expected lifespan? A: With proper maintenance, a commercial-grade rack can last 10+ years; home-grade lifespans depend on usage intensity and maintenance practices.
-
Q11: Which brands are consistently top rated? A: Brand reputation evolves—prioritize models with verified commercial installations, clear warranties, and responsive support. Read professional reviews and inspect local installations where possible.