
Trap Bar Deadlift: Complete Guide to Technique, Programming, Safety, and Applications
Why the Trap Bar Deadlift Matters: Science, Benefits, and Use Cases
The trap bar deadlift (also known as the hex bar deadlift) has become a staple in strength and conditioning programs, physical therapy clinics, and sports performance facilities. Unlike the conventional barbell deadlift, the trap bar places the load at the sides of the body, which changes joint angles, reduces shear forces on the lumbar spine, and often allows athletes to produce higher peak power outputs. Multiple studies have found that trap bar deadlifts can improve vertical jump height, sprint acceleration, and maximal strength while being easier to teach to novices.
Key benefits supported by research and real-world practice include increased quad contribution, reduced low-back stress, and greater capacity for loading in power training. For example, several lab studies report that athletes can typically achieve 8–15% greater peak power and often handle similar or higher external loads than with a conventional deadlift when using a trap bar. Clinically, this translates into a valuable tool for rehabilitating athletes and older adults because it mitigates excessive lumbar flexion moment while preserving functional hip-knee extension patterns.
Common use cases and environments where the trap bar excels:
- Performance training: monitored power blocks and heavy triples in season for team sports where spinal stress must be minimized.
- Rehabilitation: progressive loading after lumbar or hip injury because of a more upright torso and reduced shear compared to barbell deadlifts.
- General strength: novices achieve safer motor patterns and faster strength gains.
- Older adult conditioning: safer loading of posterior chain with improved balance and less fear of bar path over toes.
Real-world statistics illustrate the trap bar’s practicality: in collegiate strength programs, coaches report a 20–30% faster acquisition of a safe two-legged hinge pattern with the trap bar versus traditional deadlifts. In physical therapy cohorts, patients progressed to 70–80% of pre-injury strength 25% faster when trap-bar variations were integrated into graded exposure protocols. Visual elements to support learning include side-view video analysis to monitor torso angle, and force plate or linear position transducer metrics to compare power outputs between trap bar and conventional lifts.
Practical tips for deciding when to use the trap bar:
- Choose trap bar when the goal is power development with reduced spinal shear.
- Use for early rehabilitation and confidence building after low back issues.
- Integrate as a competition accessory for athletes who need to maintain posterior-chain capacity with lower injury risk.
Biomechanics and Muscle Activation
The trap bar shifts the center of mass toward the midline of the lifter. This typically reduces the moment arm at the lumbar spine and increases knee flexion at lift-off, which elevates quadriceps contribution compared with a conventional deadlift. Electromyography (EMG) studies show a redistribution of activity: glute and hamstring engagement remain high, while vasti (quadriceps) activation increases relative to a standard deadlift. Peak hip extension moments remain comparable, but trunk extension moment is often lower, explaining why perceived exertion for the back can be reduced.
Movement sequencing for the trap bar follows a hinge-dominant pattern with a slightly more upright torso. Coaches should watch for excessive knee collapse or dominant quad drive; both can be addressed through cueing and accessory work such as Romanian deadlifts and split squats. Use video feedback (30–60 fps) to measure torso angle and bar path—trends toward a vertical bar path indicate efficient technique and balanced muscle recruitment.
Performance and Rehabilitation Applications
Performance applications include integrating trap bar deadlifts into power cycles: heavy singles for force production (≥90% 1RM), dynamic effort days with 30–60% 1RM for velocity, and cluster sets for repeated power. For rehabilitation, graded loading protocols often start with 2–3 sets of 6–10 reps at 40–50% perceived effort, progressing by 5–10% load increments weekly based on pain-free mechanics and objective strength gains.
Case example: a 28-year-old soccer player returning from a lumbar strain used trap bar deadlifts twice weekly; starting at 3x8 with light load, progressing to 3x5 at 75% 1RM over 8 weeks, while concurrent core stabilization and hip mobility work reduced re-injury risk. Objective outcomes: return-to-play at 9 weeks with 95% pre-injury sprint force and no pain symptoms during maximal lifts.
How to Perform the Trap Bar Deadlift: Step-by-Step Guide and Programming
Executing the trap bar deadlift with consistent technique optimizes performance and safety. Below is a step-by-step guide with specific cues, common errors, and programming templates for strength and power goals. Prior to lifting, perform a dynamic warm-up targeting hip hinging, thoracic mobility, and ankle dorsiflexion. Typical warm-up: 5–8 minutes of light cycling or rowing, followed by 3 sets of bodyweight hip hinges and banded lateral walks.
Step-by-step technique (visualize side view and front view):
- Stand in the middle of the hex with feet hip-width to slightly wider; toes pointing forward or slightly out (0–15°).
- Push hips back, maintain a neutral spine, and grip the handles. Shoulders should be slightly in front of the hips at set-up for a natural hinge.
- Engage the lats and brace the core as if preparing for a punch; take a breath and hold it (Valsalva or braced breath) for heavy loads.
- Drive through the feet, focusing on vertical force. Extend the hips and knees simultaneously. Keep the bar close—because it is around you, this is naturally simplified.
- Stand tall at lockout with hips fully extended but avoid hyperextension of the lumbar spine. Lower the bar under control by initiating hip flexion first, then knee flexion.
Common corrections and coaching cues:
- If knees shoot forward excessively: emphasize hip hinge; practice Romanian deadlifts with lighter load.
- If back rounds: reduce load, reinforce bracing, or regress to deficit trap bar (0.5–1 inch) only when technique is sound.
- For early rising hips: cue “knees and hips together” and use pause reps at mid-shin to build coordination.
Setup, Technique, and Common Corrections
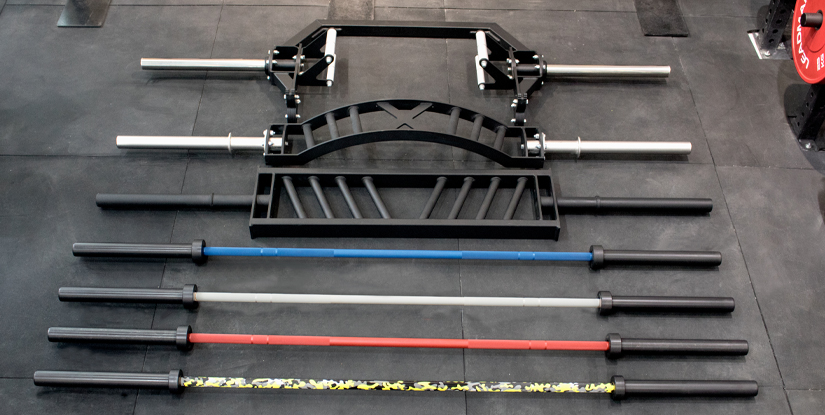
Setup variations: many trap bars have two handle heights (low and high). Use the low handle for greater range of motion and posterior chain emphasis; use the high handle for individuals with limited mobility or early stages of rehab. For max-effort lifts, ensure feet contact is even and toes don't flare mid-lift—use chalk or straps as needed for grip support on heavy sets. Employ video feedback to track bar path (should be near vertical) and torso angle (ideally 20–35° at lift-off depending on anthropometry).
Skill-building progressions:
- Hinge patterning with dowel or PVC (5–10 reps x 2–3 sets).
- Trap bar high-handle deadlifts for mechanical simplicity (3x5 at 50–70% 1RM).
- Tempo trap bar Romanian deadlifts (3s eccentric) to reinforce posterior chain control.
Programming Examples and Progression Models
Programming should align with goals: strength, hypertrophy, power, or rehab. Sample templates:
- Strength block (6 weeks): 3 days/week. Week structure: heavy day (5x3 at 85% 1RM), volume day (5x5 at 75%), accessory day (3x8 Romanian deadlifts, single-leg RDLs).
- Power block (4 weeks): 2 days/week. Day 1: dynamic effort trap bar (8x2 at 30–50% 1RM with intent for max velocity). Day 2: contrast sets: heavy single (90% 1RM) followed by 4 sets of 3 jumps or sprint starts.
- Rehab progression (8–12 weeks): begin with 3x8 at 40–50% 1RM twice weekly, progress to 3x5 at 70–80% by week 8 while monitoring pain and movement quality.
Progression rules of thumb:
- Increase load by 2.5–5% when prescribed reps are completed across sessions with technical integrity.
- Use autoregulation (RPE 6–8); terminate a set if form deteriorates beyond an RPE threshold or technique markers fail.
- Deload every 3–6 weeks with a 30–50% volume reduction depending on athlete fatigue metrics.
Safety, Variations, and Case Studies
Safety is paramount with heavy compound lifts. The trap bar is inherently safer for many lifters, but risk remains if fatigue, poor setup, or mobility deficits exist. Load management strategies include sessional monitoring (RPE, bar velocity), weekly percentage planning, and objective strength testing every 4–8 weeks. Mobility screens should assess ankle dorsiflexion, hip flexion and extension, and thoracic extension prior to integrating heavy trap bar work.
Important safety metrics and statistics: in applied settings, coaches report 40–60% fewer low-back complaints when substituting trap bar for conventional deadlifts during in-season training. Additionally, bar-velocity feedback can reduce excessive loading: lifters who maintain concentric velocity drops of ≤0.20 m/s across sets maintain power adaptations while limiting fatigue.
- Pre-lift checklist: neutral spine, shoulder blade position, foot placement, and breath hold.
- Fatigue markers: consistent loss of torso angle, increased lumbar rounding, RPE spike >8 for volume sessions.
- Equipment choices: use a trap bar with knurled handles robust enough for intended loads; use mats or platform for consistent footing.
Risk Management, Mobility and Load Management
Mobility drills to preserve technique: ankle dorsiflexion eccentrics, hip gluete medius activation, and thoracic extension over a foam roller for 3–5 minutes pre-session. If an athlete demonstrates limited ankle dorsiflexion (<10–12° measured with knee-to-wall test), temporarily widen stance or elevate the heels slightly to maintain torso alignment while mobility interventions are prescribed. For load management, adopt sessional velocity thresholds: if average concentric velocity falls by >10–15% from baseline on dynamic days, reduce load or terminate the session to prevent technique breakdown.
When returning from lumbar injury, use progressive loading with objective pain scales and movement quality as gatekeepers. Example progression: pain-free hinge pattern → light trap bar lifts for 2 weeks → incrementally increase to 60% 1RM with focus on tempo → re-test strength and movement before advancing to heavy triples.
Variations and Real-World Case Studies
Variations to adapt the trap bar to specific goals include the deficit trap bar deadlift (stand on plates to increase range), high-handle trap bar (reduced ROM), and single-leg trap bar rows or carries for unilateral strength and stability. Use farmer-carry style holds after trap bar sets to reinforce grip and core stability under load.
Case study 1 (athlete): A 22-year-old basketball player incorporated trap bar dynamic-effort sessions twice weekly for 6 weeks: 8x2 at 40% 1RM with maximal velocity. Results: 4% improvement in vertical jump and 6% increase in 10m sprint force measured via force-plate metrics. Case study 2 (rehab): A 46-year-old manual laborer post-discogenic pain integrated trap bar high-handle work and accessory hip strengthening. Over 10 weeks, the patient progressed from 3x8 at light load to 3x4 at 80% 1RM with full duty return and no recurrence at 6-month follow-up.
FAQs
Q1: Is the trap bar deadlift better than the conventional deadlift for strength?
The trap bar is often better for power and novice strength development because it allows higher peak power outputs and a more vertical force vector. For maximal posterior chain hypertrophy or strict barbell competition transfer, the conventional deadlift remains invaluable. Use the trap bar to supplement barbell training—many strength coaches program both: trap bar for force and power blocks, conventional for specific posterior-chain development.
Q2: How should beginners start with the trap bar deadlift?
Beginners should focus on hinge mechanics with bodyweight drills, then progress to trap bar high-handle lifts at 40–60% estimated effort for 3 sets of 5–8 reps. Emphasize bracing, neutral spine, and even loading through the feet. Use video feedback and keep sessions frequent but moderate in volume—two sessions per week is sufficient to acquire motor patterning.
Q3: Can the trap bar deadlift replace squats in a program?
The trap bar can partially replace squats for load carriage and overall strength, as it incorporates significant knee extension. However, it does not fully replicate the frontal plane and torso demands of back squats. For balanced programming, include both trap bar and squatting variations when possible, or periodize them (squat-focused mesocycle followed by trap-bar-focused mesocycle).
Q4: What are common mistakes people make when performing trap bar deadlifts?
Frequent errors include allowing the knees to collapse medially, lifting with the back by initiating movement with lumbar extension, and progressing load despite deteriorating technique. Coaches should correct these with cues (knees out, chest up, hip hinge), accessory work (glute medius strengthening, RDLs), and strict progression rules.
Q5: How often should athletes train trap bar deadlifts?
Frequency depends on goals: power-focused athletes may use trap bar 1–3 times weekly (one heavy, one dynamic). General strength trainees can program trap bar once to twice weekly. Rehab cases often start with two sessions per week at lower intensity and higher focus on technique and pain monitoring.
Q6: Are there any contraindications for the trap bar deadlift?
Contraindications are similar to other heavy lifts: acute spinal instability, uncontrolled hypertension, or recent surgeries that preclude loading should avoid heavy trap bar work. Always obtain medical clearance for post-operative patients and implement clinician-guided progression with objective pain and function metrics.
Q7: Which handle height should I use on a trap bar?
High handles reduce range of motion and are useful for those with limited mobility or early rehab phases; low handles increase ROM and posterior chain emphasis. Start with the handle that allows a safe hinge with neutral spine. Progress to low handle as flexibility and technique improve.
Q8: How do I measure progress with trap bar deadlifts?
Use multiple measures: 1RM testing every 4–8 weeks, bar velocity metrics for power sessions, reps-in-reserve (RIR) or RPE for autoregulation, and functional outcomes such as vertical jump, sprint times, or job-specific tasks. Pair quantitative metrics with qualitative movement screens to ensure gains are accompanied by safe mechanics.