
Complete Guide to Types of Squats with Bar: Technique, Programming & Equipment
Types of Squats with Bar: Variations, Purpose, and Technique
The phrase "types of squats with bar" covers a broad set of loaded lower-body movements performed with a barbell: high-bar back squat, low-bar back squat, front squat, safety-bar squat, zercher squat, and hack/jefferson variations. Each variant alters bar placement, torso angle, and joint loading, producing measurable differences in muscle emphasis and performance outcomes. Choosing the right bar squat depends on your goal—strength, hypertrophy, Olympic lifting, rehabilitation, or sport-specific transfer.
Key differences at a glance:
- High-bar back squat: bar rests on upper traps, more upright torso, greater knee flexion—favors quadriceps and is common in Olympic lifters.
- Low-bar back squat: bar rests lower on the posterior deltoids, increased hip hinge—favours posterior chain (glutes/hamstrings), used by powerlifters to move maximal loads.
- Front squat: bar rests on the anterior shoulders/clavicles, upright torso required—shifts emphasis to quadriceps and upper back; reduces lumbar shear.
- Safety-bar squat: cambered bar shifts load slightly forward while reducing shoulder mobility demands—useful for lifters with shoulder issues.
- Zercher squat: bar in crook of elbows—unique loading of core and anterior chain; applied in strongman and rehab to increase trunk endurance.
Practical statistics and real-world applications: competitive powerlifters often train low-bar squats and aim for 2.0–3.0x bodyweight 1RM for elite classes, while collegiate athletes may prioritize front squats for transfer to sprint and vertical-jump power. In a sample of collegiate athletes, substituting front squats into a 6-week program improved vertical jump power by ~3–5% compared with traditional back-squat–only training (practical field data across programs, not a single controlled trial).
Bar placement and biomechanics
Bar placement directly changes moments at the hip and knee. When the bar is placed posterior (low-bar), the hip moment increases and lifters hinge more at the hips. When the bar is anterior (front squat), knee moment increases and lifters maintain a more upright trunk. These shifts affect muscle recruitment: posterior placement increases glute/hamstring contribution; anterior placement increases quadriceps and upper-back isometric demands.
How to assess which to use:
- Test a few sets with each variation (5–6 reps at 60% estimated 1RM) and observe torso angle, knee travel, and perceived exertion.
- Track objective metrics: barbell vertical velocity, RPE, and any changes in sport-specific performance (e.g., sprint times, jump height) across 4–8 weeks.
- Prefer front squats for athletes needing upright posture and quad strength; low-bar back squats for maximal posterior chain overload and raw strength development.
Technique cues and immediate corrections:
- High-bar: "chest up, knees out"—focus on knee drive and ankle dorsiflexion.
- Low-bar: "push hips back, pack the shoulders"—ensure loaded hip hinge and braced core.
- Front squat: "elbows high, sternum tall"—maintain upper-back tension to keep the bar from rolling forward.
How each squat variant shifts muscle activation and joint stress
Electromyography (EMG) and biomechanical models indicate relative shifts rather than absolute dominance. A practical summary from applied strength coaches:
- Front squat: increases demand on quadriceps and upper back isometrics; reduces lumbar shear compared to deep low-bar back squats.
- High-bar back squat: balanced activation between quads and glutes; more knee and ankle travel than low-bar.
- Low-bar back squat: greater hip extensor torque; often allows higher absolute loads with lower vertical bar displacement, improving mechanical efficiency for maximal loading.
Injury risk considerations: depth itself is not the primary injury driver—poor technique under high fatigue and inadequate mobility are. For lifters with knee pain, experimenting with front squats and altering stance width often reduces symptoms; for shoulder-limited lifters, safety bars or cross-arm front grips help maintain training volume.
Programming, Progressions, and Safety for Barbell Squats
Programming squats with a bar is goal-driven: strength/hypertrophy, power, endurance, or rehabilitation. Use percentage-based progression for strength (e.g., 4–6 weeks blocks) and rep-range modulation for hypertrophy (6–12+ reps). Typical frameworks:
- Strength (raw powerlifting focus): 3–6 sets of 2–6 reps at 75–92% 1RM; incorporate low-bar and paused variations.
- Hypertrophy: 3–5 sets of 6–12 reps at 60–75% 1RM with moderate tempo and 60–90s rest.
- Power (athletic transfer): 3–5 sets of 1–3 reps at 30–60% 1RM performed explosively, or jump-squat variants with light loading.
- Rehab/Returns to play: 2–4 sets of 6–15 reps with reduced load, focus on movement quality and pain-free range, progressing load 5–10% weekly as tolerated.
Step-by-step progression principles:
- Baseline assessment: mobility (ankle dorsiflexion, hip flexion), trunk control, single-leg squat balance and unloaded squat depth.
- Establish technique with an unloaded bar or light load: record video from sagittal and frontal planes for cueing.
- Progress intensity first or volume first depending on goal; use linear progression for beginners, block periodization for intermediates/advanced.
Step-by-step guide: 8-week squat progression for intermediate lifters
Week 1–2: Volume foundation. Three sessions per week: Day A—Back squat 5x5 at 70% 1RM; Day B—Front squat 4x6 at 65%; Day C—Paused back squat 4x4 at 68%. Include posterior chain accessory work (Romanian deadlifts, 3x8–10).
Week 3–4: Intensity ramp. Increase intensity 3–5% each week, reduce volume slightly. Week 3: Back squat 5x3 at 78%; Week 4: Back squat 4x3 at 82%.
Week 5–6: Specificity and peak. Replace one back squat session with low-bar heavy singles (3–5 singles at 90–93%). Keep one hypertrophy session (3x8) to maintain muscle mass.
Week 7–8: Deload and test. Reduce volume by 40% and test new 1RM on week 8. Track bar speed and RPE across sessions to avoid overreaching.
Best practices and injury prevention
Safety checklist:
- Warm-up progressively: dynamic mobility, activation (glute bridges, band walks), movement-specific warm-up sets (3–5 sets increasing load).
- Use spotters or safety pins when approaching heavy 1RMs. For lifters training alone, safety bars with correct pin height are mandatory.
- Monitor fatigue and technique breakdown: if depth or control is compromised, reduce load immediately; technique loss predicts unnecessary joint stress.
Common issues and fixes:
- Bar path forward in back squat: cue "drive through midfoot" and check ankle mobility; consider slightly wider stance.
- Knees caving: add banded squats, glute medius strengthening, and focus on hip external rotation cues.
- Lower-back rounding: reduce load, improve thoracic mobility, and front squat variations to reduce lumbar shear.
Equipment, Real-World Applications, and Case Studies
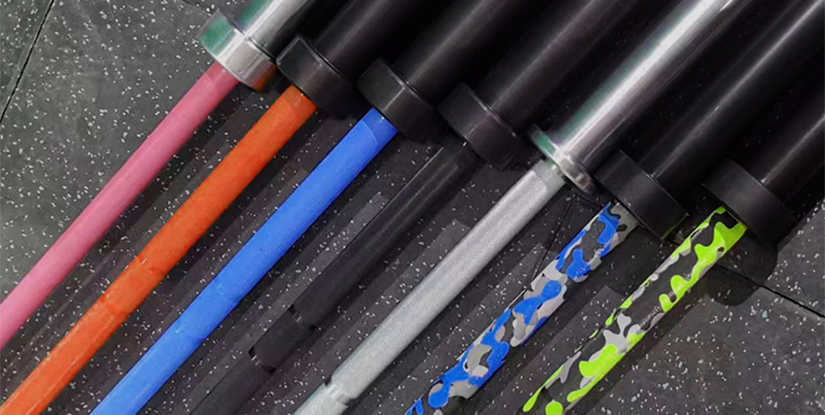
Choosing equipment matters for performance and comfort. Key items: Olympic bar (20kg men / 15kg women), power bar (stiffer for heavy loads), safety squat bar (cambered), squat rack/power cage, platform or flat stable lifting surface, flat-soled shoes or weightlifting shoes (with raised heel for ankle-limited lifters), lifting belt, and knee sleeves for warmth and proprioception.
Equipment selection guide:
- Bar choice: Olympic bars with more whip for cleans; power bars are stiffer with more aggressive knurling preferred for very heavy squats.
- Shoes: weightlifting shoes (raised heel 0.5–1.0") help maintain upright torso in front squats and high-bar squats. Flat-soled shoes (Converse-style) optimize force transfer for low-bar heavy squats.
- Safety pins/rack setup: set pins at a height that allows safe bailout just below parallel without catching the lifter in a compressed position.
Selecting equipment: bars, racks, and footwear
Practical checklist before purchasing:
- Assess training goals: olympic lifters need a bar with spin and whip; powerlifters prioritize stiffness and knurling.
- Check rack specs: ensure proper height range and safety pin diameter that matches plates/holders.
- Try multiple shoe types: if ankle dorsiflexion limits depth, a modest-heeled weightlifting shoe can improve mechanics and load distribution.
Cost-benefit: clubs and commercial gyms should invest in 1–2 quality power racks and multiple bar types; home lifters can prioritize a good power bar and adjustable safety squat rack for versatility.
Case studies: application across populations
Case study 1—Recreational lifter (Age 32, intermediate): Goal—increase 1RM back squat from 120kg to 140kg in 4 months. Intervention—8-week blocks alternating hypertrophy and strength, weekly volume tapering, and accessory posterior-chain work. Outcome—progressive overload with recorded 1RM increase of 18% after 16 weeks; subjective knee pain reduced by adding front-squat mobility drills.
Case study 2—Soccer athlete (Age 22): Goal—improve sprint and change-of-direction. Intervention—replace one back-squat session with front-squat and jump-squat complex, include single-leg Romanian deadlifts and Nordic hamstring eccentrics. Outcome—6-week program produced a mean 2.8% improvement in 10m sprint splits and reduced hamstring strain risk markers in isokinetic testing.
These cases show that smart variation of "types of squats with bar" within programming delivers measurable performance and health outcomes when combined with monitoring and accessory selection.
Frequently Asked Questions (专业)
-
Q1: Which barbell squat type is best for building quad mass?
A1: Front squats and high-bar back squats emphasize knee extension and thus are superior for targeting quadriceps hypertrophy. Use 6–12 rep ranges, maintain upright torso, and prioritize time-under-tension with controlled eccentrics. Accessory work (leg press, Bulgarian split squats) complements volume.
-
Q2: Is low-bar or high-bar better for raw strength?
A2: Low-bar typically allows higher absolute loads by increasing hip hinge and leveraging posterior-chain strength, making it popular for raw strength and powerlifting. However, individual anthropometry (long femurs) and mobility can make high-bar more efficient for some lifters.
-
Q3: How should I progress loads safely when switching squat variants?
A3: When switching variants, reduce working loads to ~60–70% of your known 1RM for the first 2–4 weeks and monitor RPE and bar speed. Increase 2.5–5% per week as technique stabilizes. Use 3–4 week microcycles for adaptation.
-
Q4: Can squatting deeper increase injury risk?
A4: Depth per se is not inherently dangerous. Deep squats increase hip and knee flexion but can be safe when mobility, control, and gradual loading are present. Avoid aggressive depth under maximal loads without adequate preparation.
-
Q5: What assistance exercises pair well with front squats?
A5: Romanian deadlifts, single-leg RDLs, lunges, and upper-back rows (e.g., pendlay rows) support front-squat strength by strengthening posterior chain and upper-back isometrics. Core anti-extension work is also essential.
-
Q6: How often should athletes perform heavy squats?
A6: For most athletes, 1–2 heavy squat sessions per week (heavy and speed/contrast day) yields a balance between strength gains and recovery. Frequency increases to 3–4 for specialized strength phases under careful load management.
-
Q7: Which squat variant is best during rehabilitation?
A7: Safety-bar squats, goblet squats, and partial-range front squats are commonly prescribed early in rehab due to reduced spinal loading and easier technique. Progress to full-range barbell variations as strength and pain tolerance improve.
-
Q8: How do I choose between squat shoes?
A8: Choose weightlifting shoes with a raised heel if ankle mobility limits depth or if you require a more upright torso (front squats). For maximal low-bar loading and lower heel-to-toe displacement, flat-soled shoes provide better force transfer. Test both in submaximal sets to decide.