
Wall Barbell Rack: Comprehensive Guide to Selection, Installation, Safety, and Best Practices
Comprehensive Guide to Wall Barbell Racks
Wall barbell racks are a space-efficient, durable solution for residential garages, boutique studios, and commercial fitness centers. Properly specified and installed, a wall-mounted rack converts vertical real estate into organized weight storage and secure barbell stabling, reducing floor clutter and improving traffic flow. Market trends since 2020 show a sustained increase in home-gym investment; industry analysts estimate the home fitness equipment segment expanded by roughly 30-50% during the pandemic peak years. Within that trend, wall-mounted storage and modular racks grew in popularity because they reduce required footprint by up to 40% compared to free-standing racks in some layouts.
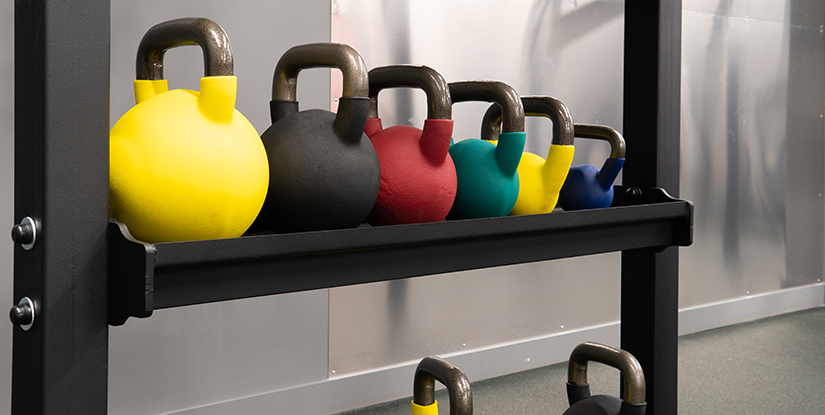
Choosing the right wall barbell rack requires balancing load capacity, mounting substrate, bar and plate geometry, and gym workflow. Typical load ratings range from 250 lb (113 kg) for lightweight, home-oriented units to 2000+ lb (900+ kg) for commercial-grade welded systems. Important measurable specs to compare include unit weight, distance from wall (depth), hook spacing, steel gauge (e.g., 11–14 gauge), and finish (powder coat, galvanized). Consider barbell length: standard Olympic bars are 7ft (2.2m) and require at least 4–6" (10–15cm) of clearance between adjacent hooks to avoid interference when racking multiple bars.
Real-world applications vary by environment. In a 1,200 sq ft boutique studio, installing four wall barbell racks along two walls allowed simultaneous warm-ups by 12 athletes and increased usable floor by ~25%. For home users, a single wall rack near a squat area reduces the need for a bulky rack, saving an estimated 10–20 sq ft.
Selection checklist (quick reference):
- Confirm wall substrate: solid wood studs, concrete, or block are ideal; drywall-only is insufficient.
- Determine maximum expected load: count plates and bars that will be stored and include dynamic forces if bars are slid in/out.
- Choose hook spacing and depth based on bar length and knurl placement.
- Prioritize corrosion resistance for humid or outdoor-adjacent installations.
Feature breakdown with practical tips:
- Material & gauge: heavier gauge (lower number) steel increases rigidity. For commercial use, prioritize 11–12 gauge welded frames.
- Mounting design: backplates spanning multiple studs distribute load. Where possible, use a mounting plate of 36" (90cm)+ width to cross at least two studs.
- Safety add-ons: rubberized hooks prevent bar damage; keyed hooks or locking pins deter unauthorized equipment use in shared spaces.
Cost considerations: basic home wall racks often range from $80–$250; commercial welded units typically cost $400–$1,200+ depending on features. Factor in professional installation (conservative estimate $150–$400) when mounting to concrete or integrating with seismic anchoring in commercial buildings.
Case example: a small athletic training facility replaced four freestanding racks with three vertical wall racks and gained a continuous 6 ft (1.8 m) corridor for coaching and safer traffic patterns. Staff reported a 15% faster equipment turnaround time during peak hours because bars were easier to access and store.
When specifying a wall barbell rack, document expected maximum total static load, preferred mounting substrate, bar type (Olympic vs. standard), and any local building-code or seismic requirements. This upfront data reduces rework, ensures safety compliance, and prolongs service life.
Installation, Safety, Maintenance, and FAQs
Installation must be methodical; improper anchoring is the primary cause of failures. Follow this step-by-step installation guide and safety protocol:
- Site survey: verify wall material. Use a stud finder for framed walls (identify 2x4/2x6 spacing). For concrete/block walls, inspect for cracks and moisture.
- Load calculation: add the weight of all bars and plates to be stored. Example: three Olympic bars (20 kg each) + 400 lb (181 kg) of plates totals approximately 541 lb (246 kg). Add a 25% safety margin for dynamic loading = ~676 lb (307 kg).
- Choose anchors: for wood studs, use lag bolts (5/16"–3/8") into center of studs; for concrete, use expansion anchors or epoxy-set threaded rods sized to the rack's backplate recommendations.
- Backplate alignment: mark anchor points, pre-drill pilot holes, lift rack using two people, and fit level before torquing bolts to manufacturer torque specs.
- Test and document: initially load to 50% of expected weight, observe for movement after 24 hours, then gradually increase. Keep an installation log with torque values, anchor types, and installer name.
Maintenance best practices (routine schedule):
- Monthly: inspect anchors for rust, retorque bolts, check welds for cracks.
- Quarterly: clean hooks, reapply protective coatings to bare metal, replace worn rubber sleeves.
- Annually: load test to certified percentage (if in a commercial facility) and record results for safety audits.
Visual element descriptions that assist planning:
- Elevation diagram: wall elevation showing studs at 16" (40cm) centers, rack backplate spanning two studs, hook centers labeled, and clearance arcs for barbell sleeves.
- Top-down plan: clearance zone radius for loading a 7ft bar—show 3ft (0.9m) min walkways in front.
Professional tips and common pitfalls:
- Never mount solely to drywall—use blocking or a plywood backing firmly attached across multiple studs.
- Avoid placing racks where bars will swing into mirrors or windows; use rubber end caps if near fragile finishes.
- Label capacity on the rack and train staff to return bars to their designated hooks to prevent overloading single points.
Eight professional FAQs (concise answers):
Q1: What wall types are safe for mounting? Mount to solid studs (wood) or concrete/CMU. Use engineered anchors compatible with substrate.
Q2: How do I calculate required load capacity? Sum the weight of stored bars and plates, add 25–50% safety margin for dynamic forces and inadvertent impacts.
Q3: Can I install on a finished drywall surface? Only if a blocking panel or heavy plywood backing is installed and anchored to studs; drywall alone is insufficient.
Q4: What spacing between hooks is recommended? For Olympic bars, allow 4–6" (10–15 cm) between hooks; increase spacing if bars have collars or bumpers protruding.
Q5: Are welded racks better than bolt-together? Welded racks typically offer higher rigidity and load capacity; bolt-together designs can be easier to ship and replace parts.
Q6: How often should I inspect anchors and welds? Monthly visual checks and an annual documented structural inspection are industry best practice for commercial settings.
Q7: What finishes resist corrosion best? Powder-coated finishes with an epoxy primer or hot-dip galvanizing perform best in humid or coastal environments.
Q8: Is professional installation necessary? For residential DIY-savvy owners, proper mounting to studs may suffice; for commercial sites or heavy loads, professional installation ensures compliance with codes and warranty terms.