
Complete Guide to Wall Mounted Lat Pulldown: Buying, Installing, and Programming
Overview: What Is a Wall Mounted Lat Pulldown and Why It Matters
A wall mounted lat pulldown is a compact strength training apparatus designed to replicate the traditional lat pulldown found in commercial gyms while taking up minimal floor space. Instead of a freestanding frame or tower, the machine mounts directly to a structural wall and uses pulleys, cables, and a handle or bar to deliver vertical pulling resistance. This design is particularly appealing for home gyms, small training studios, physiotherapy clinics, and specialty spaces where footprint, versatility, and clean aesthetics are priorities.
Understanding the mechanical and practical differences of a wall mounted system is essential before investing. Mechanically, the unit contains a high-quality pulley assembly, a cable routed to the top-mounted pulley, and a resistance source—either a weight stack, plate-loaded carriage, or external resistance such as bands or a selectorized cable stack located elsewhere. The attachment to a solid wall changes the installation demands: wall integrity, mounting hardware, and load paths become critical. Functionally, these units offer nearly identical biomechanical movement to floor-mounted machines, allowing athletes and casual lifters to target lats, upper back, biceps, and core through compound pulling variations.
There are several reasons a wall mounted lat pulldown is a valuable addition to a fitness setup. First, space-efficiency: by eliminating the bulky base and frame, you reclaim floor area for other uses. Second, customization: many wall units allow you to choose between a simple lat bar, multi-grip bars, or interchangeable handles for a broader exercise selection. Third, integration: these machines can be combined with other wall-mounted components such as cable columns, adjustable benches, and anchor points to build a multi-functional training station. Finally, for commercial and rehab applications, a properly specified wall-mounted lat can provide the same durability and performance of larger units while improving room layout and client flow.
However, wall-mounted systems also bring trade-offs. They rely on structural mounting—concrete or reinforced studs—and if installation is incorrect, safety and longevity are compromised. Weight-stack capacity may be more limited than full-size towers unless the design routes to an external stack. Additionally, some models may sacrifice adjustability (seat height, kneepads) to reduce bulk, so assessing user population and movement requirements upfront is important. The following sections detail how to choose the right model, how to install and maintain it safely, and how to integrate it into effective training programs.
What a Wall Mounted Lat Pulldown Does and Who Should Use It
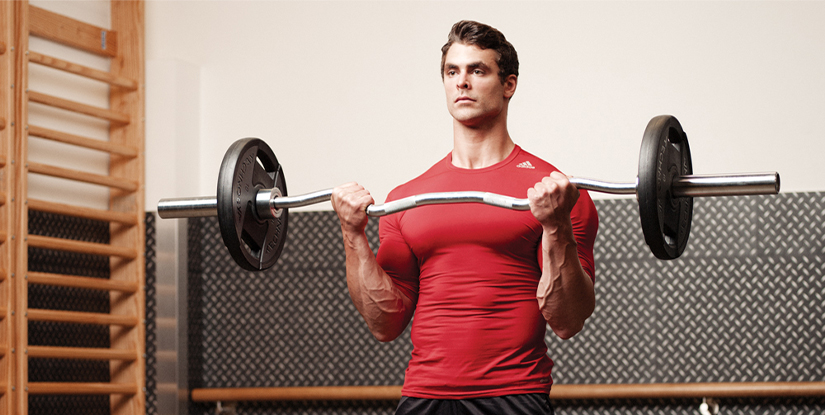
At its core, the wall mounted lat pulldown provides a vertical pulling motion that predominantly targets the latissimus dorsi, but also recruits the rhomboids, traps, posterior deltoids, biceps, and forearms. Movements commonly performed include traditional wide-grip lat pulldowns, close-grip pulldowns, single-arm lat pulls, triceps pushdowns (with different attachments), face pulls, and seated rows with the right pulley configuration. This versatility makes the unit appropriate for a wide range of users, from beginners working on basic upper-body strength and posture to advanced lifters seeking accessory work.
Ideal users include:
- Home gym owners constrained by space who still want quality strength equipment.
- Personal trainers or small studios needing modular systems that adapt to multiple clients and programs.
- Physiotherapists and rehab professionals who require controlled, adjustable resistance for shoulder and scapular rehabilitation.
- Commercial facilities that need a clean aesthetic and efficient floor plans without compromising on muscle-targeting options.
Key Benefits and Limitations Compared to Other Lat Pulldown Options
Benefits of a wall mounted lat pulldown include space savings, streamlined aesthetics, potential cost savings versus full commercial towers, and flexibility in customizing pulley height and attachment points. Many models also allow for wall-to-ceiling integration to create cable columns that handle multiple movement planes—vertical, horizontal, and diagonal—boosting exercise variety beyond conventional pulldowns.
Limitations to be aware of include dependency on wall strength—requiring concrete or reinforced stud installations for heavy usage—and occasionally reduced resistance capacity relative to large standalone stacks. Some models have limited seat or thigh support adjustability, which can affect biomechanics for different body sizes. Finally, portability is often reduced: once installed, moving the unit is non-trivial. Balancing these pros and cons with your space, user needs, and budget will guide the best choice.
Choosing the Right Wall Mounted Lat Pulldown
Selecting the right wall mounted lat pulldown starts with assessing your use case and constraints. Consider who will use the machine, how often, the maximum load required, and the types of exercises you need to perform. Commercial settings often demand heavy-duty steel construction, high-capacity weight stacks (200+ lbs), dual bearings in pulleys, and warranty-backed parts. Home users may prioritize compactness, price, and compatibility with existing equipment like adjustable benches or squat racks.
Detailed features to evaluate include the resistance type, pulley quality, range of motion adjustability, attachment compatibility, mounting system, and included accessories. Resistance systems fall into several categories: integrated weight stack, plate-loaded carriage, or cable-only systems designed to pair with free-weight plates or band anchors. An integrated stack offers convenience and consistent weight increments, while plate-loaded or band-compatible models can be more cost-effective and scalable over time.
Measure your intended space accurately. Important dimensions include vertical clearance (top of pulley to floor), mounting height relative to bench or seat, and lateral clearance for bar path. If you use a bench or adjustable seat, verify that the pulldown can align correctly so that the bar travels directly over the chest or slightly behind the head depending on exercise choice. Also verify that optional seat pads, kneepads, or leg rollers exist or can be added to stabilize users during heavier pulls.
Technical Specifications: What to Compare Before Buying
When comparing models, prioritize the following specifications and how they affect performance:
- Load capacity: maximum safe working load and typical weight stack or plate capacity.
- Pulleys: number, diameter, bearing type (sealed bearings reduce friction and maintenance), and material (nylon-coated, stainless, or steel).
- Cable: type (aircraft-grade steel with PVC coating), minimum breaking strength, and replacement ease.
- Mounting hardware: anchor types, recommended wall materials (concrete, masonry, timber stud spacing), and included fasteners.
- Adjustability: pulley height range, included seat or optional mounting brackets for benches, and attachment interface types (carabiner, snap, or proprietary hooks).
Practical Considerations: Budget, Space, and Accessories
Create a purchase checklist that includes budget considerations, actual footprint, and desired accessories. Budgets vary widely—home models can start under $500, while commercial wall-mounted lat pulldowns with integrated stacks often exceed several thousand dollars. Determine whether you need a fully integrated station or a modular design that can expand later with additional pulleys, handles, or resistance sources.
Accessories matter: multi-grip lat bars, triceps ropes, single-hand D-handles, ankle straps, and chin assist attachments broaden exercise options. Ask if the manufacturer offers a kit of attachments or sells them separately. Also consider service and installation costs—professional wall mounting adds to the total but ensures safety and long-term reliability. Finally, read customer reviews focused on durability and real-world usage to avoid pitfalls that specs alone may not reveal.
Installation, Safety, and Maintenance
Proper installation is the most critical step for wall mounted fitness equipment. Because the unit transfers dynamic loads directly to the wall, mounting on drywall alone is unsafe. Installation must anchor into structural materials—concrete or reinforced timber studs. For drywall over studs, ensure the studs are rated and bucked with blocking if necessary. Many manufacturers provide specific mounting templates and hardware lists; follow these precisely and consult an engineer for heavy-duty or commercial installations.
Start by verifying the wall type: poured concrete, concrete block, brick, steel stud, or wood stud. Each material requires different anchors: through-bolts for concrete, epoxy-set anchor bolts for hollow block, heavy-duty timber screws with backing for wood studs, and specialized toggles for steel studs. If the wall is shared with utilities (plumbing, electrical conduits), map and avoid those areas. Always use a level and plumb line during installation to ensure the pulley path remains true—an off-angle install increases wear on cables and pulleys and can cause unpredictable force paths.
Safety checks after installation are non-negotiable. Conduct a static load test gradually increasing to the intended maximum weight while inspecting for flex, noisy hardware, or visible deformation. Perform dynamic testing with slow repetitions to assess cable tracking and pulley smoothness. Tighten all fasteners after initial load cycles per manufacturer torque specs and re-check periodically. For commercial settings, create a maintenance log and inspection protocol tailored to usage frequency.
Routine Maintenance and Troubleshooting
Maintain smooth, safe operation through a set maintenance routine:
- Daily/Weekly: Quick visual inspection for frayed cables, loose fasteners, or abnormal movement. Wipe down exposed hardware and cables after heavy use.
- Monthly: Lubricate pulleys per manufacturer guidelines (some recommend dry lubricants for sealed bearings), check cable tension and alignment, and test all safety stops and catches.
- Quarterly/Annually: Replace cables on a scheduled basis depending on usage; inspect anchors and wall condition; verify wear on handles, grips, and attachment carabiners.
Safety Best Practices for Users
Training safety around a wall mounted lat pulldown includes setup and movement cues. Always adjust seating or bench height so the pulley path aligns with the center of the chest for standard pulldowns, or slightly behind the head for specialized variations—never adopt extreme angles that stress the shoulder joint. Use appropriate attachments for the exercise: wide grip bars for lat emphasis, V-rows or single handles for unilaterally correcting asymmetries, and ropes for face pulls and triceps work.
Ensure participants perform a proper warm-up focusing on scapular mobility and rotator cuff activation before heavy pulldown work. Use controlled eccentric tempos and avoid jerking or leaning back excessively which transfers loads to the lower back and raises injury risk. Finally, enforce load limits for younger or rehabilitating clients and provide clear instruction on hand placement, breathing patterns, and progressive loading to support long-term training safety.
Exercises, Programming, and Technique for Maximum Benefit
The wall mounted lat pulldown supports a broad exercise library when configured correctly. Core movements include wide-grip pulldowns for overall lat development, close-grip pulldowns for emphasis on the lower lats and biceps, single-arm pulldowns for addressing imbalances, and upright rows or triceps pushdowns when using different attachments. Balanced programming includes compound vertical pulls, horizontal pulls (if your unit adapts to seated row positions), and accessory isolation work for stabilizers like the rotator cuff and scapular retractors.
Technique matters: maintain a tall torso, draw the shoulder blades down and together before initiating the pull, and lead with the elbows rather than the hands to emphasize lat engagement. Avoid shrugging the shoulders and using excessive momentum. For hypertrophy, target 8–15 repetitions per set with controlled tempo and progressive overload. For strength, work lower rep bands or heavier stack loads (3–6 reps) with longer rests and focus on technique under load. For rehabilitation or endurance, higher repetitions at lower loads with slow tempo and scapular control are beneficial.
Incorporate variety by changing grips, attachments, tempo, and range of motion. Examples include:
- Neutral-grip single-arm pulldowns to correct lat asymmetry.
- Slow-tempo (4s eccentric) pulldowns to increase time under tension for hypertrophy.
- Drop sets combining wide-grip and close-grip attachments to target different lat portions.
- Face pulls on a mid-height pulley to strengthen posterior deltoids and external rotators—valuable for shoulder health.
Sample Program: 8-Week Progression Using a Wall Mounted Lat Pulldown
Weeks 1–2 (Foundational): Focus on technique and scapular control. Perform 3 sets of 10–12 controlled reps of wide-grip pulldowns and 3 sets of 12–15 single-arm neutral pulldowns twice weekly. Use light to moderate resistance and prioritize full scapular retraction at the top of each rep.
Weeks 3–5 (Hypertrophy Phase): Increase intensity with 3–4 sets of 8–12 reps. Add slow eccentrics and vary grips—alternate wide-grip one day and close-grip the next. Incorporate drop sets on the final set to push metabolic stress. Ensure adequate recovery between sessions.
Weeks 6–8 (Strength Emphasis and Specialization): Move to heavier loads for 3–5 sets of 4–6 reps one session per week, paired with an accessory day of higher-rep unilateral work. Use paused pulldowns at the bottom of the motion to reinforce lat activation and reduce momentum. Track progress with small incremental load increases and maintain form checks.
Accessory Movements and Mobility Work
Complement pulldown training with exercises that fortify the posterior chain and shoulder health. Key accessories include seated rows (horizontal pull), bent-over rows, face pulls, band pull-aparts, and rotator cuff external rotations. Mobility work should prioritize thoracic extension and scapular upward rotation: incorporate foam roll thoracic extensions, active banded scapular depressions, and wall slides to enhance the pulldown movement quality.
Programming tips: pair heavy vertical pulls with lower-body work on the same day for full-body strength sessions, or alternate with pushing movements to maintain balanced development. For rehabilitation clients, reduce range of motion and emphasize high-repetition low-load sets that promote neuromuscular control while protecting healing tissues.
FAQs
The following frequently asked questions address common concerns about wall mounted lat pulldowns, including installation, compatibility, and programming. Each response provides professional, actionable guidance to help you make safe and effective decisions when selecting and using a wall mounted lat pulldown.
1. Is a wall mounted lat pulldown safe to install on drywall?
Installing a wall mounted lat pulldown directly into drywall alone is not safe. Drywall lacks the structural strength to handle dynamic loads from pulldown exercises—loads that can be several times the selected weight due to acceleration and user force. Safe installation requires anchoring into structural elements such as concrete, masonry, or reinforced timber studs. For stud walls, manufacturers frequently require mounting into at least two studs with additional blocking between studs to distribute load. If direct masonry is not available, consult a structural engineer or professional installer to add a reinforced mounting plate or header that transfers loads into the building structure. Never assume that toggle bolts or light anchors will suffice for heavy or frequent use; these are typically only appropriate for light accessories, not dynamic exercise equipment.
2. How much weight capacity do I need for effective training?
Weight capacity depends on user population and training goals. For most home users, a maximum resistance of 150–220 lbs (68–100 kg) is adequate for progressive strength and hypertrophy training. Competitive lifters or commercial facilities often require 200–300+ lbs (90–136+ kg) of stack capacity. Consider not only the maximum stack but also the smallest increments and ergonomics; smaller increments (5 lb/2.5 kg) allow finer progressive overload. If you plan to attach bands or plate-loaded resistance, ensure the cable and pulleys are rated for combined loads exceeding the highest expected tension. Always factor in dynamic multipliers: explosive pulls and momentum can briefly increase loads on anchors beyond the static weight selected.
3. Can I add a bench or seat to a wall-mounted system for seated rows?
Yes—many wall-mounted lat pulldown units are designed to integrate with bench seating to allow for seated rows and other horizontal pulls. To do this safely, the system must have a mid- or low-height pulley option or an accessory cable routing kit that directs the cable near floor level. Verify the range of pulley height adjustment and ensure the bench seat aligns so the attachment path is horizontal to the chest when performing rows. Some manufacturers sell compatible benches with mounting brackets that align precisely. If retrofitting your own bench, confirm that the bench is stable and that user foot placement and chest support allow for correct mechanics to avoid lower-back strain.
4. How often should I replace the cable and pulleys?
Cable and pulley replacement frequency depends on use intensity and environment. In commercial settings with heavy daily use, inspect cables weekly and consider proactive replacement every 1–3 years. For home use with moderate frequency, annual inspections and replacement every 3–5 years are common. Replace cables immediately if you see any fraying, kinking, or broken strands. Pulleys with sealed bearings typically last longer but should be inspected for groove wear, cracking, or rough rotation. Keep spare cables and a manufacturer-approved pulley on hand if you run a studio or clinic to minimize downtime during repairs.
5. Are wall mounted lat pulldowns suitable for shoulder rehab?
Wall mounted lat pulldowns can be excellent tools for shoulder rehabilitation when used under professional guidance. They allow controlled, adjustable resistance and can emphasize scapular control and rotator cuff activation. For rehab, clinicians typically use lighter loads, higher repetitions, and specific ranges of motion that avoid impingement—often favoring neutral or close grips and limiting overhead or extreme behind-the-neck pulldowns. Ensure the clinician assesses scapular mechanics and prescribes exercises that progress load only when pain-free function and movement quality are achieved. Proper pulley height adjustment and slow tempos are key to safe rehabilitation work.
6. What wall type is best for mounting—concrete or stud wall?
Both concrete and reinforced stud walls can work if installed correctly, but concrete (poured or solid block) provides the most straightforward and reliable mounting surface for heavy-duty, high-frequency use. Concrete allows through-bolts or epoxy anchors with clear load ratings. Stud walls can be suitable if the installation includes multiple studs with blocking or a reinforced mounting plate that distributes loads across studs; however, this approach requires careful planning and often professional carpentry to ensure safety. For light home use, stud-based installations with adequate blocking and hardware can be acceptable, but always follow manufacturer mounting guidelines and, when in doubt, consult a structural professional.
7. Can bands or external resistance be used with a wall mounted lat pulldown?
Yes. Bands or external resistance can expand the loading curve and exercise variety of a wall mounted system. Some units include band pegs or anchor points to add band resistance to the cable or directly to the bar. Bands provide accommodating resistance—more load at the top of the movement—which changes the stimulus and can be useful for overload at lockout ranges. When using bands, ensure anchor points are secure and rated for dynamic loading. Also adjust movement tempo and technique to account for changing resistance through the range of motion and avoid abrupt loading that could stress anchors or attachments.
8. How do I troubleshoot noisy or jerky pulley movement?
Noisy or jerky pulleys are usually caused by misalignment, debris, worn bearings, or cable damage. Start troubleshooting by visually inspecting the pulley grooves and cable for dirt, fraying, or deformation. Clean the pulley grooves with a soft cloth and check that the cable tracks centrally. Lubricate per manufacturer recommendations—note that some sealed-bearing pulleys require no lubrication and will be damaged by inappropriate lubricants. Verify that mounting bolts are torqued per spec and that the frame is secure to the wall. If noise persists, replace the pulley or bearings and, if present, replace the cable if any wire strands are compromised.
9. What attachments should I prioritize buying with a wall mounted lat pulldown?
Prioritize attachments that increase exercise variety and match your training goals. A multi-grip lat bar (wide and neutral grips) is essential for lat emphasis. A V-row or close-grip handle provides lower-lat and biceps targeting. Single D-handles or swivel handles are excellent for unilateral work and functional strength. A triceps rope and a short straight bar broaden accessory movement choices. For rehab or mobility-focused setups, a light single-handle and ankle strap can be valuable. Choose attachments made of durable materials with comfortable grips and reliable carabiners—cheap hardware increases risk and maintenance needs.