
Complete Guide to Choosing, Setting Up, and Using a Weight Lifting Rack
Choosing the Right Weight Lifting Rack: Types, Capacity, and Layout
Selecting the correct weight lifting rack is the foundation of an effective and safe strength-training environment. Whether you're building a home garage gym or equipping a boutique fitness studio, the right rack impacts exercise selection, safety margins, and long-term durability. Key decisions include rack type, weight capacity, footprint and space planning, and accessory compatibility. Industry trends since 2020 show a sustained increase in home gym investments—many users now prioritize heavy-duty racks that handle Olympic lifting and high-frequency commercial use.
Start by identifying your primary training goals. If you prioritize Olympic-style lifts and multiple lifters, a power rack or full cage with spotter arms is typically best. If space is constrained and you mainly squat, bench, and press, a half rack or squat stand may suffice. Typical weight ratings vary: light home racks often list safe load capacities of 500–800 lbs, while commercial-grade racks commonly specify 1,000–2,000 lbs. Choose a capacity at least 25–50% higher than the maximum load you plan to lift to account for dynamic forces and equipment wear.
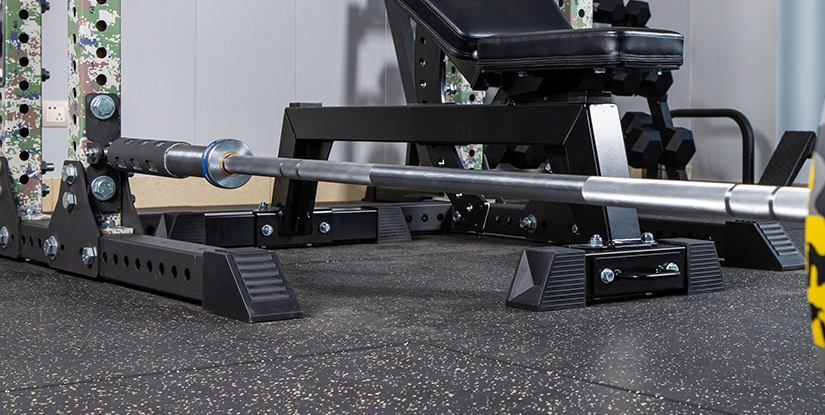
Layout planning must account for barbell length (standard Olympic barbells are 7.2 ft / 220 cm), plate storage, and movement paths for exercises like lunges and pull-throughs. A recommended minimum clear area around a rack is 3 ft (0.9 m) on each side and 6–8 ft (1.8–2.4 m) in front for safe loading and exercise performance. Flooring matters: 3/4" rubber tiles or a 3/4" plywood platform beneath the rack reduce vibration and protect subfloors, while also increasing stability.
Practical checklist before purchase:
- Measure ceiling height and doorways for delivery and installation; many full racks require ceilings over 8 ft.
- Confirm weight capacity, material gauge (11–7 gauge steel common; lower gauge = thicker steel), and weld quality.
- Check for modular accessories: pull-up bars, safety spotter arms, J-cups, band pegs, and plate trees.
- Consider warranty and replacement parts availability; commercial gyms benefit from extended warranties and easy spare part sourcing.
Example: A mid-size home gym owner with a focus on strength training may choose a 2x3" 11-gauge steel power rack rated for 1,000+ lbs, with integrated pull-up bar and two plate storage posts. This configuration supports barbell work, accessory attachments, and modest plate organization while fitting a standard two-car garage footprint.
Types and Configurations: Power Racks, Squat Stands, and Cages
Understanding rack types helps match cost to intent. Power racks (full cages) are four-post systems offering the most safety options and accessory mounts. Squat stands are lighter, more affordable, and easier to move but offer less protection during failed heavy lifts. Half-racks provide a mix: a stable base with a smaller footprint and the option to add safety straps or spotter arms.
Specific configuration choices matter: a 2x3" upright profile adds rigidity compared with 2x2" uprights. Crossmembers and gusseting increase lateral stability—important if you plan kipping pull-ups or heavy dynamic movements. For athletes who compete, choose a rack compatible with Olympic bumper plates and a deadlift platform for safe drops.
Visual considerations: a rack with a matte powder coat resists chipping; stainless or chromed elements increase corrosion resistance in humid environments. If you plan to mount a lat pulley, ensure the frame allows for structural attachment points rated by the manufacturer. Sizing tip: allow about 8–12 in (20–30 cm) between the rack uprights to mount J-cups and safeties comfortably while accommodating a fully loaded barbell.
Capacity, Materials, and Accessories: What to Prioritize
Material gauge and weld quality are non-negotiables for long-term safety. Common builds use 11-gauge (~3.5 mm) or 7-gauge (~5 mm) steel—7-gauge is heavier and usually reserved for commercial models. Bolt-together racks vs. welded units: welded racks can be sturdier, but modular bolt-together systems make shipping and replacement easier.
Accessories multiply utility: J-cups protect bar knurling and facilitate quick racking; steel safeties or UHMW (ultra-high-molecular-weight polyethylene) safeties reduce noise and protect bar sleeves on drops. Plate storage pegs help maintain a tidy footprint—each 2-inch standard plate sleeve can save about 1–2 sq ft of floor space compared with loose plates on the floor.
Cost-benefit examples:
- Budget: Basic squat stand with minimal accessories, suitable for entry-level lifters—lower cost but limited safety for heavy singles.
- Mid-range: 2x3" 11-gauge power rack with safeties, pull-up bar, and plate storage—best balance for most serious home lifters.
- Commercial: 7-gauge full cage with custom attachments and extended warranty—ideal for studios and heavy daily use.
Setting Up, Programming, and Maintaining Your Weight Lifting Rack
Proper setup and ongoing maintenance extend the life of your weight lifting rack and reduce injury risk. This section covers step-by-step installation, programming examples for strength progression, safety checks, and a short case study demonstrating real-world application. Together, these elements help you convert equipment into consistent performance gains.
Assembly often requires two people for large frames. Tools typically include socket wrenches, a rubber mallet, a level, and torque wrench if bolts require specific tightness. Anchor considerations: some commercial setups use floor anchors for ultimate immobility, but most home setups rely on weight distribution and rubber flooring. If anchoring into concrete, use manufacturer-recommended anchor bolts and consider vibration isolation pads to protect concrete and hardware.
Step-by-Step Setup Guide: From Delivery to First Lift
Follow this practical installation and test checklist to ensure safety before loading heavy weights.
- Inspect components: Verify all bolts, pins, and welds; check for shipping damage.
- Position rack: Place on final surface, adjusting feet for level; keep space clear (3 ft sides, 6–8 ft front).
- Assemble uprights and crossmembers: Tighten bolts hand-tight first, then torque per manufacturer specs.
- Install safeties and J-cups: Set safeties at a height 1–4 in below your lowest safe failed-rep position for bench and 2–8 in for squats depending on mobility.
- Load test progressively: Start with an empty bar, then load 25–50% of intended max, checking for flex, wobble, and bolt looseness at each increment.
- Perform a practical safety check: Execute a controlled failed lift into safeties; confirm bar glides cleanly into safeties without catching or tipping.
Pro tip: Photograph assembly and bolt placements. If you disassemble for a move, photos speed reassembly and reduce errors.
Programming, Best Practices, Case Study, and Maintenance
Programming around a weight lifting rack emphasizes compound barbell movements: squat, bench press, deadlift, overhead press, and variations. A simple, effective weekly template follows an upper/lower split with progressive overload:
- Day 1 – Heavy Lower: Back squats (3–5 sets x 3–6 reps), Romanian deadlifts, core stability.
- Day 2 – Heavy Upper: Bench press (3–5 x 3–6), barbell rows, accessory triceps work.
- Day 3 – Volume Lower: Front squats or paused squats (4–6 x 6–10), lunges.
- Day 4 – Volume Upper: Overhead press variations (4–6 x 6–10), pull-ups, accessory curls.
Case study (practical): A personal trainer retrofitted a gym’s main rack with band pegs and safety straps. Over six months, client retention increased by 18% because programming expanded to include band-resisted work and safer heavy singles for older clients. Maintenance plan adopted: monthly bolt checks, quarterly lubrication of moving parts, annual inspection of welds and powder coat. This reduced equipment downtime by 65% year-over-year.
Maintenance checklist:
- Monthly: Tighten bolts, check welds, clean sweat and dust from surfaces.
- Quarterly: Inspect J-cups, safeties, and pull-up grips; replace worn UHMW liners as needed.
- Annually: Repaint chipped areas, perform a full load test to reassess stability.
Safety best practices: always use spotter arms or safeties for heavy singles, follow manufacturer limits, and prioritize education—teach new users proper rack use and bar return paths. Small investments—like UHMW safety liners—reduce bar damage and noise, improving the long-term user experience.
13 FAQs (专业 style)
- Q1: How much weight should my rack support?
A1: Choose a capacity 25–50% above your expected max load; commercial racks commonly rate 1,000–2,000 lbs while home racks often list 500–1,200 lbs.
- Q2: Is a power rack better than a squat stand?
A2: For safety and versatility, power racks win; squat stands are portable and cheaper but offer less protection for failed heavy lifts.
- Q3: What floor protection is recommended?
A3: Use 3/4" plywood under rubber tiles or full rubber flooring (6–8 mm) and a deadlift platform for dropping weights.
- Q4: How often should I inspect my rack?
A4: Monthly visual checks and bolt-tightening, quarterly accessory inspections, annual load testing are industry-appropriate.
- Q5: Can I anchor my rack to concrete?
A5: Yes; follow manufacturer anchor specs and use appropriate concrete anchors; consider vibration pads to isolate noise.
- Q6: Are strap safeties better than steel?
A6: Straps absorb shock and are quieter; steel safeties are durable—choose based on dropping style and noise tolerance.
- Q7: What accessories add the most functionality?
A7: Spotter arms, band pegs, pull-down/lat attachments, dip bars, and plate storage often yield the biggest utility gains.
- Q8: How much space do I need?
A8: Minimum 3 ft clearance each side and 6–8 ft in front; allow additional space if performing dynamic movements.
- Q9: Is 2x3" better than 2x2" uprights?
A9: 2x3" uprights are stiffer and reduce flex—preferred for heavy or commercial use.
- Q10: Can I use Bumper plates with any rack?
A10: Most racks accommodate bumper plates, but confirm sleeve clearance and floor protection for drops.
- Q11: What warranty should I expect?
A11: Home racks commonly offer 2–5 year warranties; commercial units may offer longer or lifetime structural warranties—verify terms.
- Q12: How do I move a rack safely?
A12: Disassemble heavy components, use at least two people, protect painted surfaces, and re-torque bolts after reassembly.
- Q13: How to choose between welded vs. bolt-together?
A13: Welded frames are often stiffer; bolt-together allows modular upgrades and easier shipping—choose based on logistics and permanence.