
Ultimate Guide to Weight Lifting Wall Rack: Selection, Installation, and Best Practices
Choosing the Right Weight Lifting Wall Rack: Types, Specifications, and Use Cases
Selecting the correct weight lifting wall rack is crucial for safety, space optimization, and training effectiveness. Wall racks (also called wall-mounted squat racks or wall rigs) convert vertical wall space into a stable lifting platform. They are widely used in home gyms, commercial studios, CrossFit boxes, and physiotherapy clinics where floor space is limited but structural walls are available. When choosing a rack, evaluate five core criteria: load capacity, mounting surface, footprint and swing-clearance, adjustability, and accessory compatibility.
Load capacity is the single most important spec. Commercial-grade wall racks often list working loads between 500–1,200 kg (1,100–2,650 lb) depending on design and mounting hardware. For home use, models rated for 450–700 kg (1,000–1,540 lb) are typically sufficient, but always confirm manufacturer test data, safety factor (commonly 1.5–2.0), and proof load testing. Real-world case: a boutique gym replaced a freestanding rack with a wall rack rated for 1,000 kg, which increased usable floor area by 22% and allowed placement of an extra cardio unit without compromising rig stability.
Mounting surface matters. Concrete or masonry walls provide predictable anchorage and are ideal for heavy-duty installations. Stud-framed drywall installations are possible only when double-stud walls or engineered load-bearing headers are present; otherwise, supplemental blocking or a structural steel plate is required. A practical tip: before purchasing, drill a 6–8 mm test hole to inspect wall thickness and material and consult a structural engineer for commercial installs.
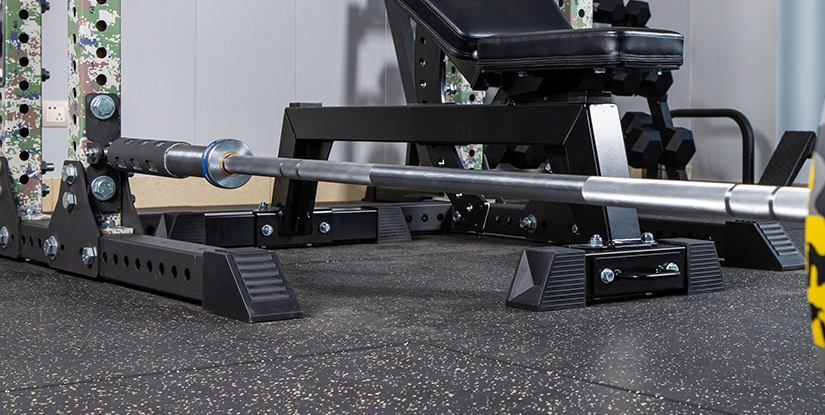
Footprint and swing-clearance determine how the rack will be used day-to-day. Measure overhead (for pull-ups and rack pulls), forward clearance for barbell sleeves, and lateral space for spotting. Many wall racks fold or have detachable arms to reduce sweep space when not in use—ideal for multi-use rooms. Include a 1.2–1.5 m (4–5 ft) forward clearance from the wall for Olympic lifts and safe unracking.
Adjustability and accessory options—J-cups, safety arms, spotter pins, pull-up bars, and plate storage—affect versatility. For powerlifting-focused users, deep, sturdy J-cups and fixed safety pins are essential. For gyms wanting group classes, add multi-grip pull-up bars and band pegs. Check accessory compatibility: some manufacturers use proprietary pin spacing; others use standard 1" or 25 mm hole spacing.
Cost vs. longevity: Initial prices range from budget $150–$400 home units to $800–$2,500 commercial systems. Consider lifecycle costs: frequent re-anchoring, paint touch-ups, or part replacements add expense. Example: a pilates studio invested $1,600 in a high-quality wall rack that reduced equipment downtime and saved $600 annually in maintenance compared to cheaper units.
- Checklist before purchase: verify wall material, confirm load rating, measure clearance, list required accessories, and request proof load tests.
- Quick specs to request: ultimate load, working load limit, safety factor, anchor type and size, hole spacings, corrosion protection (powder coat, galvanization).
Technical Specifications and Load Capacity Considerations
Understanding technical specs prevents dangerous mismatches between rack rating and actual use. Manufacturers often provide two numbers: working load limit (WLL) and breaking strength. The WLL is the maximum recommended operational load; breaking strength is the point of failure in lab tests. A conservative industry practice is to apply a safety factor of 1.5–2.0 to account for dynamic loads experienced during Olympic lifts. For example, if the heaviest lifter plus bar and plates could generate 350 kg peak dynamic load, choose a rack with a WLL ≥ 525–700 kg.
Anchors and fasteners are equally critical. For concrete installations, common anchors include wedge anchors (e.g., M10/M12), sleeve anchors, or chemical anchors (epoxy-set bolts). Typical torque specs for M10 wedge anchors range 30–50 Nm depending on anchor type and manufacturer—always use the anchor maker’s torque chart. For timber studs, use load-spreading backing plates (steel plate at least 6 mm thick) bolted through the wall into multiple studs with structural lag bolts rather than single-point screw mounting.
Vibration and dynamic forces: high-velocity lifts (cleans, snatches) induce momentary peak forces beyond static weight. If your programming includes Olympic lifts, opt for a rack with reinforced gussets, welded joints, and tube wall thickness of at least 3–4 mm (12–14 gauge) on load-bearing members. For heavy powerlifting, tubular steel with 2.5–3 mm wall thickness may suffice provided anchor system and weld quality meet standards.
Data-driven tip: conduct an initial load test after installation using incremental static loading up to 125% of anticipated maximum, monitoring for wall movement, anchor slippage, or structural deformation. Document results and keep a maintenance log. This proactive approach reduces risk and meets many facility insurance requirements.
Installation, Training Strategies, and Maintenance for Wall Racks
Proper installation governs both safety and longevity of your weight lifting wall rack. Start with a pre-installation survey: identify wall type (concrete, CMU, wood-framed), locate utilities (electrical, plumbing), and confirm load paths to the building structure. For commercial or any high-load installations, a structural engineer sign-off is recommended. Prepare tools: rotary hammer (for concrete), impact driver, torque wrench, spirit level, plumb line, stud finder, and a sacrificial helper to hold heavy components during mounting.
Installation steps (overview): 1) mark mounting points using manufacturer template, 2) pre-drill pilot holes and verify alignment, 3) install anchors without final torque, 4) mount the rack and then torque anchors to specified values, 5) add accessories and complete function test. An actionable example: for a commercial Remember Rack model installed on 200 mm concrete, the team used M12 wedge anchors torqued to 70 Nm, and performed a 1-hour safety check including 50 loading cycles with 70% maximum load to ensure stability.
Training strategies that leverage wall racks go beyond space savings. For strength programs, use the rack for rack pulls, box squats, safety-pin squats, and static lockouts. For athletic conditioning, integrate band-resisted pulls and plyometric box drills anchored to band pegs. Practical programming tip: pair wall-rack-based compound lifts (3–5 sets of 3–8 reps) with accessory work using plate-loaded movements for balanced hypertrophy and strength gains.
Maintenance routines extend equipment life and ensure safety. Recommended schedule:
- Daily: visual inspection for loose bolts, paint chips, and obvious damage.
- Monthly: torque check on critical fasteners, lubricate moving parts, clean knurled surfaces.
- Annually: perform a structural inspection, non-destructive testing for welds if used heavily, and reapply rust-inhibiting finish where needed.
Step-by-Step Installation Guide and Safety Checklist
Step-by-step installation (detailed):
- Site assessment: confirm wall composition, measure clearances (1.2–1.5 m forward), and map utilities with a detector.
- Template alignment: use the manufacturer template; verify level and plumb with a spirit level and laser if available.
- Pilot drilling: for concrete, use rotary hammer and correct-diameter masonry bit; for studs, pilot into center of stud and avoid edge distances less than 50 mm.
- Anchor installation: choose wedge/chemical anchors for concrete. For chemical anchors, follow cure times (commonly 10–60 minutes for initial set, full cure per epoxy data sheet).
- Racking: mount the rack with two people; hold in position while fastening upper bolts but do not fully torque until all bolts are engaged to allow micro-adjustments.
- Final torque: use torque wrench per anchor specifications and manufacturer installation manual.
- Testing: perform incremental static load test to 125% of planned max, monitor deflection, and run 20–50 cycles of load/unload with representative movements.
- Confirm all fasteners torqued and locked.
- Check for interference with lights or HVAC.
- Verify accessory fitment and locking mechanisms.
- Document installation date, installer name, and test results.
FAQs (专业风格)
1) Q: What minimum wall type is required for a heavy-duty weight lifting wall rack? A: Concrete (cast-in-place) or concrete masonry unit (CMU) walls are preferred. If mounting to stud walls, use engineered backing plates attached to structural members; consult a structural engineer for live-load calculations.
2) Q: How do I calculate required load rating for a wall rack? A: Sum the lifter’s body mass, barbell mass, plates, and an estimated dynamic multiplier (1.25–1.5). Select a rack with working load limit exceeding that product plus a safety margin (typically 1.5–2.0).
3) Q: Are wall racks suitable for Olympic lifts like snatches and cleans? A: Yes, provided the rack and anchors are rated for dynamic forces. Reinforced cross members, gussets, and secure anchoring to concrete are recommended. Allow full forward clearance and use bumper plates on the platform.
4) Q: How often should anchors be retorqued? A: Inspect visually daily; perform torque checks monthly for the first six months and quarterly thereafter. Torque intervals may depend on use intensity; record all checks in a maintenance log.
5) Q: Can a wall rack be moved to a new location? A: Yes, but removal may damage wall finish and require patching. Use reusable mounting plates where temporary installation is anticipated. Re-certify loads after remounting and perform new anchor torque tests.
6) Q: What are the common causes of wall rack failures? A: Improper anchoring, insufficient wall backing, using rack beyond its rated load, corrosion, and poor weld quality. Regular inspections and adherence to manufacturer specs mitigate these risks.
7) Q: Do insurers require professional installation? A: Many commercial insurers require professional installation and documented proof load testing. Residential policies vary; check your policy and keep installation documentation.
8) Q: What accessories improve safety and utility? A: Recommended additions include safety arms or pins, J-cups with UHMW liners, band pegs for resistance training, integrated pull-up bars, and plate storage to minimize trips and improve workflow.
For more technical queries or installation planning, consult product manuals, manufacturer engineering data, or a licensed structural engineer. Proper selection, installation, and maintenance make a weight lifting wall rack a reliable, space-saving cornerstone of any training facility.