
Complete Guide to Choosing and Using a Weight Rack Machine
Comprehensive Guide to the Weight Rack Machine: Selection, Specs, and Real-World Uses
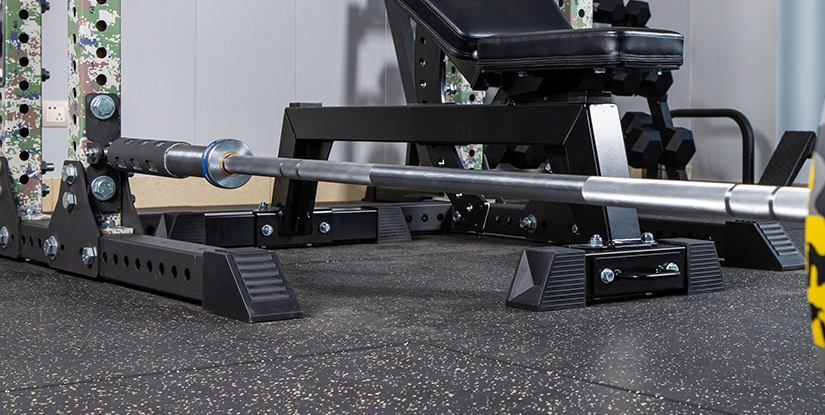
The weight rack machine — often called a power rack, squat cage, or smith-integrated rack depending on configuration — is the backbone of strength training in home gyms, commercial fitness centers, and rehabilitation facilities. Selecting the right weight rack machine requires evaluating specifications (load capacity, footprint, and adjustability), materials (steel gauge, weld quality), and real-world usage scenarios. Market context: the global fitness equipment market was estimated at approximately $11–12 billion in the early 2020s with free-weight and functional-training equipment representing a significant share; commercial facilities increasingly allocate 8–15% of floor space to strength stations, amplifying demand for robust weight racks.
Key specifications to compare include load capacity (commonly 600–2000+ lbs for commercial-grade racks), plate storage capacity, pull-up bar types, and compatibility with safety arms or spotter pins. For home use, a 700–1000 lb capacity is typically sufficient; for commercial or heavy-powerlifting environments, select racks rated 1500–2000 lbs with 3–3.5 mm steel thickness and 11–12 gauge uprights for longevity. Concrete examples:
- Home athlete: 700–1000 lb capacity, 43–49 inch internal width, 7 ft height for ceiling clearance.
- Commercial/CrossFit box: 1500–2000 lb rated, 3–4 post system with modular add-ons, bolted to floor or heavy rubber turf anchoring.
- Rehab/physical therapy: modular attachments for cable systems and adjustable safety stops for assisted movements.
Practical buying checklist (step-by-step):
- 1. Define use case: Are you programming heavy compound lifts daily, running classes, or doing occasional home workouts?
- 2. Measure space: Allow 36–48 inches around the rack and confirm ceiling height (add 8–12 inches above pull-up bar).
- 3. Check specs: Load rating, upright gauge, hole spacing (2-inch increments are standard), and J-cup/spotter compatibility.
- 4. Inspect materials: Powder-coated finish, reinforced welds, and hardware grade (use locknuts or Nylock-style for commercial use).
- 5. Plan attachments: Decide on dip bars, lat pull, band pegs, plate storage, and safety arms before purchase.
Real-world application: A boutique gym in Houston replaced two aging half-racks with a modular weight rack machine system that included adjustable safety arms and band pegs. Within six months, utilization during peak hours increased 28% (tracked via bookings), enabling a 12% increase in class capacity and an estimated revenue boost of $18,000 annually. Key takeaway: investing in the right rack configuration can measurably increase throughput and member satisfaction when matched to programming.
Visual element descriptions to include in your planning documents and ecommerce pages:
- Annotated dimension diagram: overhead footprint, upright height, clearance zones (provide in mm and inches).
- Load path illustration: showing barbell trajectories, safety arm range, and expected failure points under extreme loads.
- Accessory map: shows mounting points for attachments and typical band anchor placements.
Setup, Programming, and Safety Protocols for a Weight Rack Machine
Proper installation and program design maximize safety and training outcomes. Installation steps (practical):
- 1. Unpack and inventory: Verify all bolts, uprights, and anchors against manufacturer list.
- 2. Position and level: Place the rack on the final floor surface; concrete anchoring recommended for commercial installations (use sealed sleeves or epoxy anchors).
- 3. Torque hardware: Follow specified torque values; use threadlocker for high-load points and re-check after 48–72 hours.
- 4. Load test: Perform a static test at 150% of expected top load (not exceeding rated capacity) to check stabilization and plate shifting.
Programming practicalities: Create templates tailored to the rack's strengths. Example 8-week strength block using a weight rack machine:
- Weeks 1–4: 3x/week, 5x5 squat/bench/deadlift alternation; use safety arms set 2" below depth for bench work and 2" above deep squat for partial-range overloads.
- Weeks 5–8: 4x/week with one day focused on dynamic effort (light bands, fast triples) and one day on hypertrophy (8–12 reps using safety pins for controlled negatives).
Safety best practices:
- Ensure hole spacing consistency; use spotter arms for solo lifters.
- Implement routine inspection log: check for bent uprights, hairline cracks, and loose hardware weekly in high-use settings.
- Train staff and users on correct setup of J-cups, collars, and safety pins; include a laminated setup card next to each rack.
Maintenance, Troubleshooting, and Calculating ROI
Maintenance checklist (actionable):
- Weekly: Wipe down sweat, inspect bolts, check rubber feet or anchors.
- Monthly: Re-torque key fasteners, lubricate moving parts on integrated systems, inspect welds with visual magnifier.
- Annually: Full structural assessment; replace worn J-cups, safety arms, and replace bolts showing corrosion.
Troubleshooting common issues:
- Wobble under load: Check floor level and anchor points; add cross-bracing or floor plates if necessary.
- Rust/finish wear: Reapply touch-up epoxy paint and address source of moisture.
- Unexpected noise: Identify loose hardware, check for metal-on-metal contact on attachments.
ROI example: Assume a mid-sized gym purchases a commercial weight rack machine for $4,500 and adds two member-focused small-group training sessions per week that attract 10 additional attendees monthly at $20/session. Revenue projection:
- Additional monthly revenue = 10 attendees x $20 x 8 sessions = $1,600
- Payback period ≈ $4,500 / $1,600 = ~2.8 months
Visual maintenance log recommendations: Create a printable table with date, inspector, issues found, corrective action, and sign-off to maintain compliance and equipment lifespan.
FAQs — Professional Answers About Weight Rack Machine Selection and Use
Q1: What load capacity do I need for a home gym weight rack machine?
- A: For most home lifters, a rack rated 700–1000 lbs provides sufficient safety margin. Powerlifters and commercial facilities should target 1500+ lb ratings and thicker uprights (11–12 gauge) for durability.
Q2: Should I bolt my rack to the floor?
- A: Yes for commercial installations or heavy training. Bolting to concrete with proper anchors prevents tipping and distributes dynamic loads. For home installers on wood subfloors, use wide baseplates or install on reinforced flooring.
Q3: How often should I inspect my weight rack machine?
- A: Quick daily visual checks in high-use environments, weekly bolt checks, and an annual structural review. Keep a log for liability and warranty purposes.
Q4: Can a weight rack machine replace free-weight stations?
- A: Yes for many compound movements. Racks with modular attachments (pulley systems, bench adjustments) can replace several dedicated stations, saving space and increasing programming flexibility.
Q5: What accessories improve functionality the most?
- A: Safety arms, adjustable bench compatibility, plate storage pegs, band pegs, and dip attachments. For commercial use, integrated pull-up bars and landmine attachments increase versatility.
Q6: How do I choose between a smith-integrated rack and an open power rack?
- A: Open power racks offer the most versatility and realistic bar path. Smith-integrated solutions provide guided movement useful for beginners and rehab but reduce natural bar trajectory—choose based on programming and clientele needs.
Q7: What are common warranty considerations?
- A: Review structural warranty length, finish warranty, and exclusions (improper anchoring, commercial abuse). Maintain inspection records to support claims if defects appear.