
Complete Guide to Choosing and Using a Weight Rack with Pull Up Bar
Why choose a weight rack with pull up bar: benefits, industry data, and practical use cases
A weight rack with pull up bar combines strength training, functional movement, and efficient space usage for home gyms and commercial facilities. For most users the primary appeal is versatility: one frame provides a squat/power rack for barbell work, plate storage to keep the area tidy, and a pull up bar for vertical pulling, core stability, and bodyweight progressions. Typical high-quality racks support 700–1500 lbs (317–680 kg) of static load and have heights of 84–96 inches (213–244 cm), which accommodates tall users and Olympic lifting with ample safety. Including a pull up bar expands exercise variety without buying separate equipment—important for budgets and compact spaces.
Industry context: home-fitness equipment sales surged in 2020–2021, with many reports indicating a 40–60% increase in consumer spend on strength gear. That trend stabilized by 2023 but demand for multi-function equipment remains high. For gyms, adding a rack with a pull up bar increases throughput: a single station can serve squats, bench press (when paired with a bench), pull-ups, hanging leg raises, and banded assistance work, reducing the need for multiple dedicated stations.
Real-world applications: personal trainers use racks with pull up bars for small-group circuits combining loaded barbell sets and bodyweight sets to maximize time efficiency. Physical therapists leverage the pull up bar to assess shoulder girdle function and prescribe isometric holds and eccentric-focused pull-ups in rehabilitation progressions. CrossFit-style programming often integrates weighted pull-ups as part of strength cycles—adding a dip belt to a rack pull up bar turns bodyweight movements into progressive overload exercises.
Practical considerations:
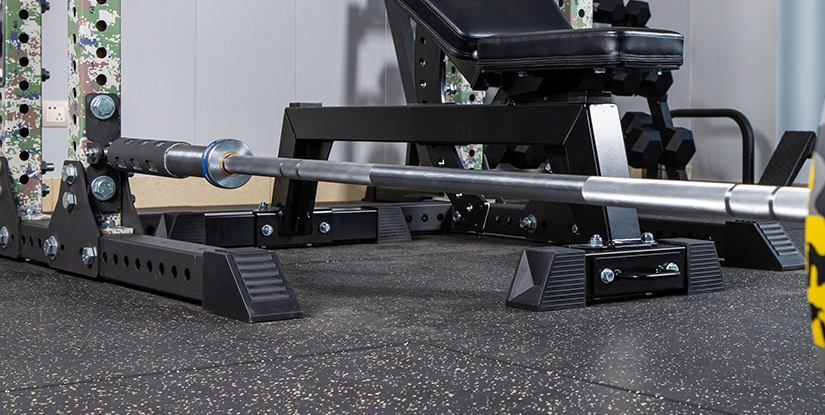
- Footprint: Most power racks require 4–6 ft by 4–6 ft (1.2–1.8 m) of floor area; leave additional clearance for bar path and spotting.
- Ceiling height: Confirm pull up bar clearance—allow 8–12 inches (20–30 cm) above the bar for kipping or full extension.
- Weight storage: Integrated plate horns and designated storage pegs reduce clutter and increase safety.
Visual element description: imagine a 3D rendering showing a 90-inch tall rack with marked clearance zones (1. barbell swing radius, 2. pull up vertical clearance, 3. plate storage footprint). Such diagrams help installers visualize placement before purchase.
Key performance benefits and statistics for programming and ROI
From a performance standpoint, integrating a weight rack with pull up bar accelerates strength gains by enabling compound lifting and higher-quality accessory work. Compound lifts (squat, deadlift, bench press, overhead press) offer the greatest stimulus for muscle and strength increases—racks provide secure, repeatable setups for these movements. Pull-ups are among the most effective bodyweight upper-body exercises: EMG studies show high activation in latissimus dorsi and biceps, and including vertical pulling twice weekly correlates with appreciable improvements in upper-body strength over 8–12 weeks in novice and intermediate trainees.
Return on investment (ROI): for facility owners, a single versatile rack can reduce equipment spend by up to 30% compared to buying separate dedicated machines for squats, pulls, and bodyweight stations. For homeowners, saving floor space and the ability to progress exercise intensity (adding weight to pull-ups, performing paused squats) improves the long-term utility of the purchase. Case study: a small boutique gym replaced two dedicated lat machines with four racks, increasing member throughput by 18% during peak hours while cutting maintenance costs.
Actionable tip: when calculating ROI, factor in the lifespan (steel racks commonly last 10+ years), warranty coverage, and potential resale value. Prioritize modularity—bolt-on accessories such as dip attachments, landmine posts, and band pegs extend functionality at low marginal cost.
Selecting the right weight rack with pull up bar: specifications, comparison checklist, and buying guide
Choosing the correct rack involves matching user needs to rack specs and accessory ecosystem. Start with these core criteria: load capacity, material/finish, footprint, rack height, hole spacing (to match J-cups and safeties), type of pull up bar, and available attachments. Commercial-grade racks typically use 11–14 gauge steel with a powder-coat finish; home racks often use slightly thinner steel but still offer safe loads when rated appropriately. Hole spacing at 1-inch intervals allows fine adjustment; 2-inch spacing is common but reduces precision when setting consistent safety heights.
Pull up bar types matter: a straight fixed bar provides a stable platform for strict pull ups and weighted variations; multi-grip bars (neutral, angled, wide) increase joint-friendly options and reduce shoulder stress. Consider knurling and diameter—28–32 mm diameter bars balance grip and comfort. Some racks include a removable or height-adjustable pull up bar to fit different ceiling heights and training styles.
Comparison checklist (use before purchase):
- Load rating and test certification (ANSI, ASTM where applicable)
- Outer dimensions vs. available room space and flooring strength
- Compatibility with 2-inch or 1-inch hole spacing accessories
- Presence and type of plate storage and landmine attachment point
- Warranty length and part availability
Step-by-step buying guide:
- Measure space: include ceiling height and clearance for pull-ups and barbell loading.
- List priorities: heavy barbell work, Olympic lifting, or general fitness with pull-ups.
- Match specs: choose material, capacity, and hole spacing based on usage intensity.
- Check accessory ecosystem: ensure J-cups, safeties, dip bars, and plate horns are sold or compatible.
- Read verified user reviews and verify seller return policy and warranty.
Case example: a household of two adults (one beginner lifter, one intermediate) chose a 92-inch, 1000-lb capacity rack with multi-grip pull up bar and four plate horns. The result: both users could safely progress from bodyweight to weighted pull-ups while performing heavy back squats and bench presses without equipment conflicts; plate horns reduced clutter and improved session flow.
Step-by-step setup, installation, and safety best practices
Proper installation and safety measures reduce injury risk and preserve equipment life. Follow this step-by-step installation and safety checklist:
- Step 1 — Site preparation: clear a 6 ft by 6 ft area, ensure floor is even; if installing on a wooden floor, confirm joist structure or consider rubber matting and anchoring to concrete.
- Step 2 — Assembly: follow manufacturer torque specs for bolts; use thread locker where recommended. Assemble on a soft surface to prevent finish damage.
- Step 3 — Pull up bar placement: place at a height that allows full extension plus 8–12 inches for kipping; for strict pull-ups, 6–8 inches may suffice.
- Step 4 — Safety checks: inspect welds, straightness of uprights, and test safeties with incremental loads before heavy lifts.
- Step 5 — User education: teach correct barbell racking, un-racking, and spotter protocols; train members on proper pull-up progressions (scapular activation, assisted pull-ups, negative reps).
Best practices and actionable insights:
- Always use safeties for heavy singles and near-maximal attempts—do not rely on spotters in unattended sessions.
- Mark standard heights for common users (e.g., bench press, power jerk) with colored tape to speed setup changes.
- Cycle maintenance: monthly bolt torque check and quarterly lubrication of moving attachments (slotted pulleys, swivel joints).
Maintenance, programming, and case studies: how to maximize lifespan and training outcomes
Routine maintenance preserves structural integrity and ensures safety. A simple monthly checklist will extend rack life significantly: inspect bolts and welds, clean sweat and chalk accumulation, touch up paint chips to prevent corrosion, and cycle test uprights and accessories. For racks used in commercial environments, a quarterly professional inspection is advisable. Typical failure points are loose fasteners, worn J-cups, and chipped powder coat where rust can begin—address these early.
Programming with a rack and pull up bar can cover strength, hypertrophy, and conditioning. Combining barbell sets with pull-up variations creates balanced upper-lower and push-pull cycles. For example, a basic twice-weekly upper-body session could be structured as: heavy bench press (5x5), weighted pull-ups (4x6), accessory rows (3x10), and core hangs (3x20s). This balance ensures posterior chain development and shoulder health.
Maintenance checklist (concise):
- Weekly: wipe down, remove chalk residue, inspect for loose plates or accessories.
- Monthly: torque bolts, inspect welds, verify safeties function smoothly.
- Quarterly: touch-up paint, replace worn J-cup inserts, service moving attachments.
Case study 1 — Home gym optimization: A family of four replaced a dated multi-gym with a power rack featuring a pull up bar, three adjustable benches, and plate storage. Gym usage increased 67% as users could train concurrently. Ergonomics improved because each athlete had faster transitions between barbell sets and bodyweight movements.
Case study 2 — Small gym throughput: A boutique gym installed six racks and introduced a circuit using rack stations. Average class capacity rose 22% while member satisfaction scores, measured in a quarterly survey, improved due to shorter wait times and greater exercise variety.
30-day training plan and progressive overload with a weight rack with pull up bar
This 30-day sample focuses on strength and pull-up progressions for intermediate trainees. Week 1 emphasizes technique and volume; weeks 2–4 progress intensity while rotating accessory work to address weaknesses.
Sample schedule (3 sessions per week):
- Session A: Barbell back squat 5x5; Weighted pull-ups 4x6 (or assisted negatives); Romanian deadlifts 3x8; Hanging knee raises 3x12.
- Session B: Bench press 5x5; Bent-over row 4x8; Neutral-grip pull-up holds 3x20s; Farmer carry 3x30s.
- Session C: Front squat 5x3; Overhead press 5x5; Wide-grip pull-ups 3x max reps; Face pulls 3x15.
Progression strategy: increase load by 2.5–5 lbs (1.25–2.5 kg) per session on main lifts when all sets complete with good form; add 1–2 reps per set on bodyweight pull-ups or introduce a 5–10 lb weight increment when reps stall. Document sessions with a simple log (date, lift, sets, reps, RPE) to track overload and prevent plateaus.
FAQs (专业)
Q1. What is the ideal weight capacity for a home weight rack with pull up bar? A1. For most home users, a 700–1000 lb (317–454 kg) rated rack is sufficient. If multiple heavy lifters or high-volume commercial use is expected, choose 1000–1500 lb capacity.
Q2. How much ceiling clearance do I need for a pull up bar on a rack? A2. Allow at least 8–12 inches (20–30 cm) above the bar for strict pull-ups and up to 18 inches for kipping or muscle-ups; confirm bar height relative to floor.
Q3. Can I anchor a weight rack to wooden floors? A3. Anchoring to structural joists or using a heavy-duty floor plate is recommended; when in doubt, use rubber mats and avoid overloading without proper anchoring.
Q4. Are multi-grip pull up bars better than straight bars? A4. Multi-grip bars provide joint-friendly options and reduce shoulder stress for some users; a straight bar is optimal for maximal-range strict pull-ups and weighted variations.
Q5. How often should I inspect my rack for safety? A5. Perform basic visual checks weekly, torque and detailed inspections monthly, and a thorough assessment quarterly or after any impact incident.
Q6. What attachments are essential for a versatile setup? A6. J-cups, safeties, dip attachments, plate storage horns, landmine post, and band pegs provide broad functionality for most training goals.
Q7. How do I progress pull-ups using a rack? A7. Use bands for assistance, perform negatives, add weighted belts, change grip width, and use paused repetitions; the rack enables safe loading and band anchoring.
Q8. Is there a standard for hole spacing on uprights? A8. 1-inch spacing provides fine adjustments and is preferred for precision; 2-inch spacing is common but less precise.
Q9. What are common maintenance mistakes to avoid? A9. Neglecting bolt torque, failing to clean chalk and sweat, and ignoring minor finish damage that can lead to corrosion are common errors.
Q10. How can small facilities maximize ROI with racks? A10. Use modular racks to replace single-use machines, standardize attachments across stations, and design circuits that rotate members through rack-based movements to increase throughput and reduce equipment redundancy.