
Complete Guide to Choosing and Using a Weight Rack with Weights
Choosing the Right Weight Rack with Weights: Key Criteria and Practical Guidance
Selecting a weight rack with weights is a foundational decision for any home gym, commercial facility, or training studio. The right rack balances safety, capacity, footprint, and futureproofing. Start by defining your primary use cases: powerlifting, Olympic lifting, general strength training, or a multi-user commercial environment. Each use case drives different design and material choices. For example, a powerlifting-focused rack often requires deeper safety spotter arms and a higher static capacity, while an Olympic-style rig emphasizes plate storage, pull-up stations, and bumper plate compatibility.
Material and build quality directly affect longevity and safety. Look for uprights made from 11- or 3/16-inch (approx. 7.3–8 mm) steel wall thickness or a comparable gauge rated for 1,000–1,500+ lbs (450–680+ kg) static load. Bolt-together racks with welded joints and thick base plates reduce flex. Powder-coat finishes resist corrosion and high-touch wear. Pay attention to weld quality and hardware grade: use Grade 8 bolts where provided for critical connections. These specifications are industry benchmarks and are commonly found on mid- to high-end models.
Capacity and storage: for most home users a 1,000 lb rated rack is ample; small commercial gyms should target 1,500–2,000 lb ratings. Consider integrated plate storage: vertical storage pegs conserve floor space and speed plate changes, while horizontal plate trees are easier to load. Also evaluate bar storage and accessory modularity—does the rack accept monolift attachments, dip bars, landmine mounts, or band pegs? Modular designs extend useful life and accommodate evolving training needs.
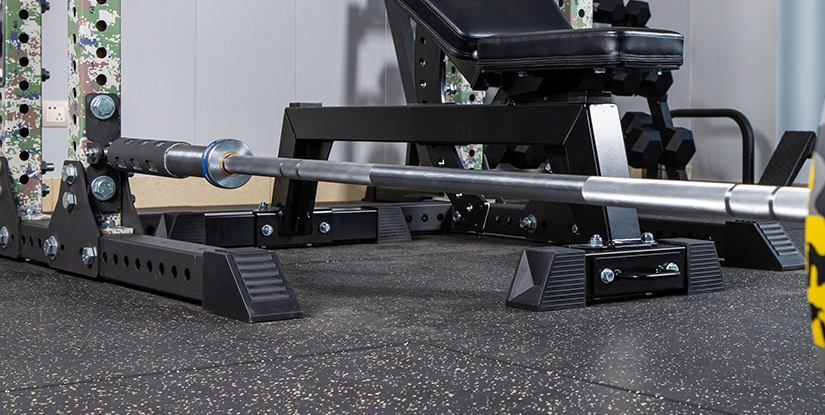
Space planning: measure ceiling height, doorways, and clearances. A typical full-power rack height ranges from 82" to 98" (208–249 cm). Leave at least 36" (90 cm) of clearance behind and on both sides if users will move around the rack or perform dynamic lifts. Account for barbell length: a standard Olympic barbell is 86.6" (220 cm) end-to-end; allow at least 3–4 ft (90–120 cm) on each side for loading plates and movement.
Budget and cost-effectiveness: while budget racks under $300 exist, investing in the mid-range $700–$1,500 bracket often yields superior materials and warranty support. Commercial racks frequently exceed $2,000 but include heavy-duty steel, thicker gauge uprights, and professional warranty packages. When budgeting, allocate funds for essential accessories: at minimum, a quality Olympic barbell (20 kg men’s or 15 kg women’s), a set of bumper plates (e.g., 260–400 lbs total for home use), safety spotter arms, and floor protection such as 3/4" rubber tiles.
Practical tips:
- Prioritize safety features like adjustable J-cups and spotter arms that are easy to reposition; quick adjustments reduce risk during heavy sets.
- Choose racks with standard hole spacing (1" or 2" increments) to ensure accessories fit across brands.
- Verify warranty and spare parts availability; racks should offer at least a 1–5 year structural warranty.
- Check real-world user reviews for issues like weld cracking, paint chipping, or bolt loosening under repeated high-load cycles.
Case example: a home lifter planning to progress to 500+ lb squats should choose a 1,500 lb rated rack with floor-mounted anchor points and integrated safety spotter arms. Combine with a 20 kg stainless-steel bar rated for 1,500–2,000 lb and a set of bumper plates (e.g., 320 lbs of bumper plates) to ensure safe progression and minimal floor impact. This configuration balances cost, safety, and growth potential.
Types of Racks, Configurations, and Capacities
There are several common rack types: power racks (full cages), half racks, squat stands, and wall-mounted rigs. Power racks offer maximum versatility—four uprights, cross-members, and safety options—making them ideal for solo heavy lifting. Half racks save space and are often sufficient for controlled strength sessions. Squat stands are the most compact but provide minimal safety unless paired with spotters. Wall rigs and modular crossbeam systems suit commercial gyms wanting multiple stations linked together.
Capacity varies by design: compact squat stands often rate 500–1,000 lbs, general-purpose half racks 700–1,500 lbs, and commercial power racks 1,500–3,000+ lbs. When purchasing, note static vs. dynamic load ratings—dynamic loads (e.g., dropping loaded bars) require bumper plates and rigs specifically rated for impact. Bumper plate compatibility is crucial if you plan to drop bars; racks for Olympic lifting often include deeper pull-through areas and reinforced base plates.
Accessory compatibility is a major differentiator: look for standard 5/8" steel pinhole sizes, integrated band pegs, and add-on compatibility for monolifts and safety arms. Manufacturers often provide accessory catalogs—cross-compatibility with industry-standard hole spacing ensures longevity and resale value.
Sizing, Space Planning, and Safety Standards
Effective space planning starts with accurate measurement. Create a floor plan including rack footprint, barbell length, and a 360-degree movement zone. For a standard power rack footprint (approx. 48" x 48" / 122 x 122 cm), add 36" clearance on each side for plate loading and movement. Ceiling clearance should accommodate overhead lifts; allow extra for pull-up attachments and kipping movements if used.
Safety standards and maintenance protocols reduce liability and extend equipment life. Anchor heavy racks to the floor and use commercial-grade rubber flooring in high-impact zones. Inspect bolts and welds every 3–6 months for commercial use and quarterly for home use—tighten fasteners to manufacturer torque specs. Replace worn J-cups and spotter arms immediately; cracked plastic or deformed metal parts compromise safety.
Visual element description: imagine an annotated layout showing a power rack centered in a 10' x 12' room with 36" clearance on three sides and a 7' ceiling—this visual helps non-technical buyers translate specs into real-world fit. Use masking tape on the floor to simulate rack footprint before purchase to verify fit.
Setting Up, Programming, and Maintaining a Weight Rack with Weights
Proper setup and programming maximize the utility of a weight rack with weights. Begin with installation: assemble on a flat, solid surface using a level. Follow step-by-step manufacturer instructions and use a second person to hold components during bolt tightening. Where applicable, anchor the rack to concrete floors using appropriate expansion bolts or chemical anchors—this prevents tipping under lateral loads. Use torque wrenches to achieve specified bolt tensions and apply threadlocker on high-vibration joints.
Programming around the rack means designing workouts that fully exploit its features. For strength-focused users, follow a progressive overload scheme—example: a 12-week linear progression for compound lifts. Week-by-week, increase the total training volume or intensity by 2.5–5% for upper-body and 5–10% for lower-body lifts every 1–2 weeks, with deloading every 4th week. For hypertrophy, program 3–5 sets of 6–12 reps at 65–85% of 1RM for compound exercises. Create circuits using the rack: pull-ups, barbell squats, rack pulls, and barbell rows can be combined for time-efficient sessions.
Practical setup checklist:
- Confirm floor and ceiling clearances and delivery path for rack components.
- Assemble uprights and cross-members on a mattress or soft surface to avoid paint damage.
- Tighten bolts progressively in an alternating pattern to spec.
- Install J-cups and safety arms; test with unloaded bar across multiple heights.
- Load initial weights and perform incremental test lifts up to 50% planned working weight, checking for movement or flex.
Progression and load management: pair the rack with a weight block system—e.g., start with a training block where 1RM is estimated after 4 weeks of base training. Use velocity-based or percentage-based programming depending on access to tracking tools. For example, a beginner might use 3 sets of 5 at 75% 1RM for squats, increasing 5 lbs/week. Track set-by-set bar speed if possible; slowed concentric velocity signals fatigue and may indicate a need for auto-regulation.
Maintenance best practices extend equipment life and minimize downtime. Wipe down steel and upholstery after sessions, lubricate moving parts with a light machine oil every 6 months, and inspect plates and bars for cracks or bends. Replace rubber bumper plates that show delamination. Maintain an equipment log: record inspections, repairs, and parts replaced. For commercial facilities, implement a monthly maintenance SOP and train staff on safe load limits and spotting procedures.
Step-by-Step Installation and Load-Progression Guide
Installation: unpack components and verify parts against the manual. Layout components in assembly order. Use two people for upright installation: lift uprights into position, insert cross-members, then loosely install all bolts. Once aligned, torque bolts to specified values. Anchor rack where recommended—concrete anchors are standard. Install J-cups and safety arms; confirm all accessories are seated correctly.
Load progression example for intermediate lifter (squat focus):
- Weeks 1–4: Base phase — 3x5 at 70% 1RM, three sessions/week.
- Weeks 5–8: Intensity increase — 3x3 at 80–85% 1RM, two sessions/week.
- Weeks 9–12: Peaking — 5x2 at 87–92% 1RM, then test new 1RM in week 12.
Maintenance, Troubleshooting, and a Short Case Study
Maintenance steps: weekly visual check, monthly bolt torque check, semi-annual lubrication of moving parts, and annual professional inspection for commercial setups. Troubleshooting common issues: if the rack develops lateral play, check base plate bolts and replace missing washers; if J-cups wear quickly, use protective sleeves and inspect for deformation. Keep a spare set of essential parts—J-cups, bolts, and a secondary safety arm—on hand to minimize downtime.
Case study: A mid-sized CrossFit box upgraded to a 12-station welded rig to accommodate 60 weekly athletes. After installation, they implemented a monthly maintenance log and reduced equipment-related downtime by 82% over 12 months. They standardized on one plate type and barbell model to simplify maintenance and spare inventory. The investment increased throughput and reduced injury claims by improved spotting and safety arm usage.
FAQs
Q: What does “weight rack with weights” typically include? A: It generally refers to a rack or cage plus a set of plates and sometimes bars—verify if the seller includes bars, bumper plates, or only iron plates.
Q: How much floor space do I need? A: A compact power rack requires roughly 4' x 6' (1.2 x 1.8 m) with 3' clearance on sides; larger rigs need more—measure barbell length and user movement zones.
Q: Is a plate tree necessary? A: Plate trees keep plates organized and reduce floor loads; they are essential in multi-user or commercial settings and helpful for home gyms to protect flooring.
Q: Can I drop bumper plates in a rack? A: Only if the rack and floor are rated for dynamic drops—use bumper plates and reinforced flooring; many racks are not designed for repeated drops unless specified.
Q: What weight capacity should a power rack have for heavy lifting? A: Aim for at least 1,500 lbs (680 kg) static capacity for serious lifters; commercial environments should exceed this depending on use.
Q: How often should I inspect my rack? A: Home users should inspect quarterly; commercial facilities should inspect monthly and maintain an equipment log.
Q: Are there compatibility issues between racks and accessories? A: Yes—check hole spacing (1" vs. 2" increments), pin diameter, and accessory mounting standards before purchase.
Q: Should I bolt my rack to the floor? A: Anchor to concrete for heavy commercial use; for home use, anchor if recommended by the manufacturer or if there's significant lateral load risk.
Q: What are the best flooring options under a weight rack with weights? A: Use 3/4" commercial rubber tiles or interlocking 1/2–3/4" mats; for heavy drops, consider 1" or thicker reinforced platforms.
Q: How do I scale a home rack as my training advances? A: Invest in modular racks with accessory compatibility and buy higher-capacity bars and bumper plates to avoid early upgrades—prioritize safety arms and quality barbell selection.