
Complete Guide to Weighted Bar Training: Selection, Programming, and Safety
Overview and Benefits of Weighted Bar Training
The weighted bar is a foundational piece of strength equipment for gyms, home setups, and sports performance programs. It refers to any barbell or specialty bar that is intentionally loaded to provide resistance for compound and isolation movements. Common examples include the standard Olympic barbell (20 kg for men, 15 kg for women), trap bars, safety squat bars, and technique bars ranging from 5–15 kg. Worldwide data show that resistance equipment remains the fastest-growing segment of the fitness market; by 2023, home strength equipment purchases increased over 20% year-over-year in many regions as consumers prioritized functional strength at home.
Scientific and practical benefits of consistent weighted bar training include:
- Increased muscle hypertrophy and strength—progressive overload applied via a weighted bar effectively stimulates type II muscle fibers, improving 1RM performance across lifts.
- Bone density improvements—weight-bearing barbell exercises produce mechanical loading that correlates with improved bone mineral density over time, particularly valuable for aging populations.
- Hormonal and metabolic adaptations—compound lifts like deadlifts and squats elicit favorable acute hormonal responses and help increase resting metabolic rate when combined with progressive loading.
Real-world applications: strength coaches use the weighted bar for sport-specific power transfer (e.g., Olympic lifts for sprint/power athletes), physical therapists apply light-weighted bars for controlled rehabilitation and motor patterning, and general populations utilize bars for time-efficient, compound-movement workouts. Evidence-based practice recommends using relative intensity (percentage of one-rep max) to prescribe training volumes: for strength gains, work mostly at 80–95% 1RM with lower reps; for hypertrophy, 65–85% 1RM with moderate reps; for endurance, 50–70% 1RM with higher reps.
Practical statistics and benchmarks to guide expectations:
- Beginner timeline: 8–12 weeks of organized weighted bar training can yield measurable strength increases (10–25% improvement in major lifts for novices).
- Load increments: Smallest practical barbell increment is 1.25 kg per side for precise progressions; microloading is recommended when plate selection limits standard jumps.
- Equipment longevity: a well-maintained Olympic barbell with regular cleaning and lubrication can last 10+ years in commercial settings; purchase decisions should balance tensile strength (e.g., 190k PSI in higher-end bars) and knurling preference.
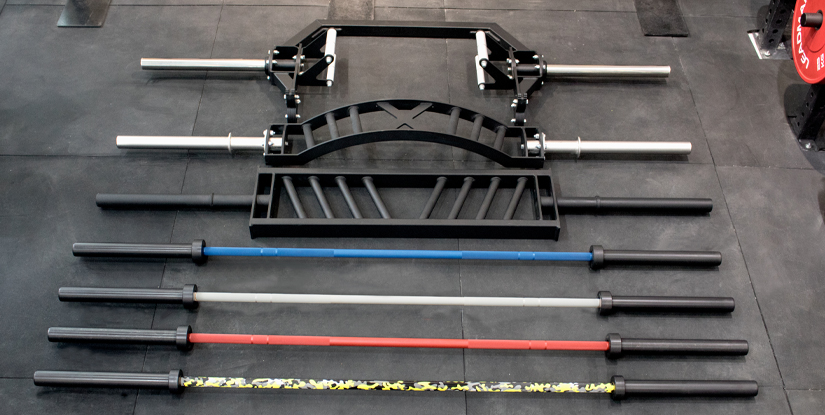
Visual elements description: include a labeled diagram showing bar zones (shaft, sleeves, collars), an image of a loaded trap bar highlighting foot platform width, and a comparison chart (bar weight vs. tensile rating vs. intended use). These visuals help users quickly match the correct weighted bar to their goals.
How to Choose, Set Up, and Use a Weighted Bar: Practical Guide
Selecting the right weighted bar begins with clarifying goals and space. If the priority is Olympic lifting, choose a 20 kg men’s Olympic bar with rotating sleeves and high tensile strength. For general strength with reduced shoulder strain, a trap or hex bar often allows safer back loading for deadlifts. For home gyms with limited ceiling height, shorter technique bars (5–15 kg) allow practicing patterns without maximal loads.
Key selection criteria checklist:
- Goal: power/OLY vs. strength vs. rehabilitation.
- Bar specifications: length, shaft diameter (28–29 mm for men’s, 25 mm for women’s/technique), sleeve rotation, knurling depth, and weight.
- Gym capacity: rack width, floor protection, and plate availability for proper loading increments.
- Budget vs. durability: higher tensile strength and bearings cost more but justify investment in heavy-use settings.
Step-by-step setup and safety considerations (practical actions before first lift):
- 1) Inspect the bar: check straightness, sleeve rotation, and knurling for defects.
- 2) Confirm load: calculate total bar + plates; ensure collars are secure and plates are rated.
- 3) Set rack height: match to lift (squat vs. bench vs. clean) and practice unracking with light sets.
- 4) Warm-up: 5–10 min cardio + dynamic mobility, then progressive empty-bar to working sets.
- 5) Use spotters or safety pins on heavy singles; when training alone, use safety bars and conservative loads.
Step-by-Step Setup and Safety Checklist
Detailed safety checklist for everyday training with a weighted bar:
- Pre-session: visually inspect bar sleeves, collars, and plates for cracks or deformation; replace damaged plates immediately.
- Footwear and surface: wear flat, stable shoes; ensure platform or floor can handle dropped loads (use rubber mats or bumper plates when needed).
- Technique warm-up progression: 3–5 reps with an empty bar, 3 sets gradually increasing to 50–60% of planned working weight, then begin work sets—this reduces injury risk and primes neuromuscular coordination.
- Load management: avoid adding more than 2.5–5% total load per week for intermediate lifters; for beginners, structured linear progression is effective (e.g., +2.5 kg/session on major lifts until stalls appear).
- Emergency plan: if a lift fails, practice controlled bail techniques (e.g., releasing the bar for cleans/snatches, stepping back to release squats) and have clear gym protocols for assistance.
Programming Examples, Case Studies, and Progression Models
Below are three practical program templates using a weighted bar. Adjust percentages/volume to individual level and recovery capacity.
- 1) Beginner linear strength (12 weeks): 3x/week full-body. Core lifts: squat, bench, deadlift using 3 sets x 5 reps at 70–85% 1RM. Add 2.5–5 kg to main lifts each session for lower body, 1.25–2.5 kg for upper body until progress stalls.
- 2) Hypertrophy block (8 weeks): 4x/week upper/lower split using bar-based compound lifts at 6–12 reps (65–80% 1RM) with 3–4 accessory sets. Rest intervals 60–90s to maintain metabolic stress.
- 3) Power and speed (6 weeks): 3x/week focusing on bar speed. Use lighter weighted bar complexes (e.g., jump shrugs + hang cleans) at 30–60% 1RM with 3–6 reps and longer rest to optimize rate of force development.
Case study: a recreational athlete followed the beginner linear program and reported a 12% increase in back squat 1RM across 10 weeks while body composition improved modestly—this demonstrates practical transfer when nutrition and sleep are controlled. Use performance logs to track microloads, RPE, and subjective recovery for smarter progression decisions.
FAQs — Professional Answers on Weighted Bar Use
1) What is the best weighted bar for beginners? — Choose a 15–20 kg bar with moderate knurling and good sleeve rotation; technique bars (10–15 kg) help teach patterns safely.
2) How often should I train with a weighted bar? — 2–4 sessions per week depending on goals; novices can train 3x/week full-body while intermediates use 3–5 sessions with split routines.
3) How do I measure progress? — Track objective metrics (1RM, sets x reps at prescribed loads), velocity if available, and consistent body composition or performance markers.
4) Is a trap bar safer than a straight bar for deadlifts? — Trap bars reduce shear on the lumbar spine and are often preferred for athletes with mobility limits; straight-bar deadlifts more closely train posterior chain specificity.
5) How important is bar maintenance? — Very: wipe sweat, inspect for rust, re-lubricate bearings/bushings periodically to preserve rotation and longevity.
6) Can I use a weighted bar for rehab? — Yes. Light loads (20–50% 1RM) with controlled tempo can restore motor patterns; coordinate with clinicians for phased progressions.
7) What are safe load increments? — Use 1.25 kg plates per side microloads when plate availability allows; otherwise 2.5–5 kg total jumps are common.
8) How do I prevent plate slippage? — Use quality collars, ensure plate size matches sleeve diameter, and inspect sleeves for damage.
9) When should I deload? — Every 4–8 weeks for structured blocks, or when performance metrics decline and RPE rises despite reduced volume.
10) Are specialty bars worth the investment? — For targeted needs (e.g., safety squat bar for shoulder issues, trap bar for power), specialty bars reduce injury risk and enhance training specificity.
11) What are common mistakes to avoid? — Neglecting mobility, rushing progression, poor warm-up, and skipping safety checks—address these with consistent habits and coach feedback.