
Complete Guide to Choosing, Using, and Maintaining a Weightlifting Barbell Set
How to Choose the Right Weightlifting Barbell Set
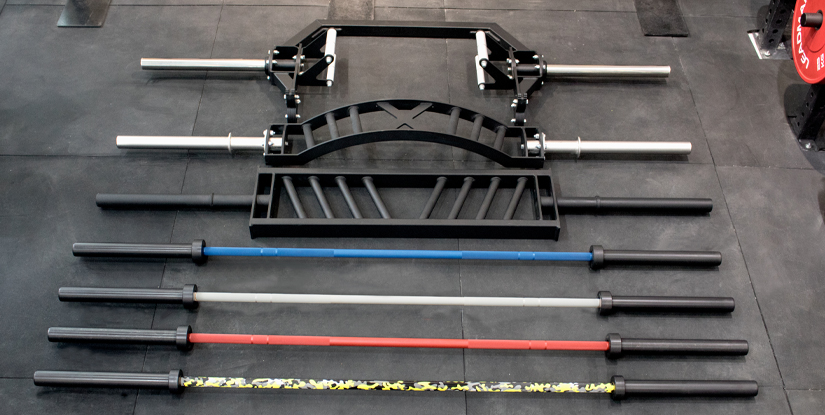
Choosing a weightlifting barbell set is foundational to a safe, progressive strength program. The decision affects biomechanics, long-term durability, and performance outcomes. Start by clarifying your primary use—Olympic Olympic-style lifting (snatch/clean & jerk), powerlifting (squat/bench/deadlift), general strength training, or home fitness. Each use-case points to different bar attributes: diameter, length, sleeve design, tensile strength and bushings/bearings. For example, Olympic men’s bars are typically 20 kg, 7 ft long, and 28–29 mm in shaft diameter; women’s Olympic bars are ~15 kg, 6.5 ft long, and 25 mm diameter. Standard 1-inch barbells common in budget home sets are shorter (~5–6 ft) and rated for lower loads.
Key specifications and practical implications:
- Diameter and knurling: Thinner shafts (25–28 mm) are easier to grip during fast Olympic lifts; thicker shafts are common on power bars for improved lever control. Aggressive knurling offers grip at the cost of comfort—ideal for heavy powerlifting, less ideal for frequent high-rep sets.
- Sleeve design and rotation: Bearings or bushings in the sleeves control rotation. Olympic lifts require smooth rotation (bearings preferred), while powerlifting can work with slower rotation.
- Tensile strength and load capacity: High-quality bars often list tensile strength (e.g., 190,000–220,000 PSI) and max safe load (ranges 700–2,000+ lbs depending on bar type). For home users lifting under 500 lbs, a good mid-range Olympic bar (1,000–1,500 lb rating) is sufficient.
- Finish and corrosion resistance: Zinc, black oxide, chrome, or stainless finishes affect rust resistance and aesthetics. Stainless steel offers best longevity but costs more.
Budget vs. long-term investment: entry-level barbells under $150 are suitable for light use but often have lower tensile ratings and weaker sleeves. Mid-tier Olympic sets ($200–$400) provide a balance—better knurling, sleeve rotation, and durability. High-end specialty bars ($400+) are designed for competitive lifting and heavy daily use.
Practical buying checklist (step-by-step):
- Define primary use (Olympic, powerlifting, general).
- Set a realistic load target (current 1RM + projected 12–24 month growth).
- Choose bar type and check diameter/length specs.
- Verify sleeve rotation mechanism and tensile/load ratings.
- Inspect finish, warranty, and user reviews for durability.
Real-world example: a recreational lifter planning to progress from a 200 lb squat to a 400 lb squat within 18 months should opt for an Olympic or power bar rated ≥1,000–1,500 lbs with moderate knurling and chrome or zinc finish. In contrast, a CrossFit-style athlete prioritizing fast bar turns should choose a bar with bearings and a 28 mm shaft for optimal grip-speed balance.
Materials, Types, and Technical Specs
Understanding materials and mechanical specs demystifies prices. Key materials include carbon steel (common), chrome-plated steel, stainless steel (premium), and even brass or bronze bushings. Important technical specs to compare: shaft diameter (mm), bar length (ft), weight (kg), tensile strength (PSI), load rating (lbs or kg), and sleeve rotation type (bushing vs. bearing). For context, a standard men’s Olympic bar is 20 kg (44 lb), 7 ft, and 28 mm diameter. Tensile strength commonly ranges from 120,000 PSI for budget bars up to 220,000+ PSI for high-end competition bars; higher tensile strength generally correlates with reduced permanent deformation under extreme loads.
When examining product pages, prioritize clear specs: if a seller lists only weight and price without tensile/load numbers, consider other options. Look for manufacturer datasheets and third-party reviews. For home-gym durability, aim for bars that list both tensile strength and a realistic max load. A bushing bar (bushings) is fine for standard strength training; bearings are superior for Olympic lifts where shaft rotation affects performance and injury risk.
Sizing, Load Capacity, and Plate Compatibility
Size and compatibility are practical considerations that often get overlooked. Most modern plates use 50 mm (2") sleeves (Olympic) while standard plates use 25 mm (1") sleeves. Confirm your chosen barbell set matches your plates or budget for plates that fit. Load capacity should be judged not only by the maximum static load but also the bar’s resilience to dynamic loads (drops during cleans/snatches). Power bars designed for deadlifts and squats often have higher yield strengths and are built to withstand heavy static loads, whereas Olympic technique bars optimize whip (elasticity) and rotation.
Examples: a versatile home gym pair would include one Olympic bar (20 kg) rated 1,500 lbs and a set of bumper plates for dropping, or if space/budget limited, a heavy-duty standard bar with iron plates if no dropping is planned. Always verify collar types—spring clips, lock-jaw collars, or screw collars—and ensure secure load locking during sessions.
How to Use, Program, and Progress with a Weightlifting Barbell Set
Owning a weightlifting barbell set delivers the best returns when combined with structured programming and sound technique. Evidence-based guidelines from the American College of Sports Medicine recommend resistance training major muscle groups two to three times weekly, with progressive overload strategies to drive strength gains. For practical application, this section covers exercise selection, programming templates, and technique checkpoints to reduce injury risk.
Beginner to intermediate programming (practical plans):
- Novice linear progression (0–6 months): 3 full-body sessions/week: Squat, Bench or Overhead Press, Deadlift or Romanian Deadlift, Accessory core and posterior chain work. Start at 60–70% 1RM, add 5–10 lbs to major lifts (upper/lower) per session when form is good.
- Intermediate periodized plan (6–18 months): 4 sessions/week split (Upper/Lower or Push/Pull). Use weekly microcycles combining volume and intensity (e.g., Week A heavier 3–5 sets of 3–5 reps, Week B lighter 4–6 sets of 6–10 reps).
- Olympic lifting focus: Include technique days with lighter loads (50–70% 1RM) emphasizing bar speed and positions; use pulls and complexes to build required power and mobility.
Step-by-step technique and safety checklist (apply every session):
- Warm-up: 5–10 minutes cardio, dynamic mobility for hips/shoulders, and movement-specific warm-ups with an empty bar.
- Load selection: estimate a working weight at ~60–80% of 1RM for strength sets; use RPE (Rate of Perceived Exertion) or percentage-based programming for precision.
- Breathing and bracing: learn diaphragmatic breath-hold and abdominal brace; exhale under control during concentric phase.
- Spotting and safety: use safety pins in racks for squats/bench, and always ensure collars are secure.
- Progress checks: log loads, reps, and perceived difficulty. Retest 1RM or use rep-to-RM charts every 8–12 weeks.
Practical programming examples with load percentages (12-week beginner block):
- Weeks 1–4: 3x/week, 3 sets x 8–10 reps at 60–70% 1RM (focus on volume and technique).
- Weeks 5–8: 3x/week, 4 sets x 5–6 reps at 70–80% 1RM (build strength).
- Weeks 9–12: 3x/week, 5 sets x 3–5 reps at 80–90% 1RM (intensification).
Case example: a 30-year-old lifter with a 1RM squat of 180 lb could follow this progression to safely add 10–30 lb to their 1RM over 12 weeks, assuming adequate recovery and nutrition (protein intake ~1.6–2.2 g/kg body weight and caloric surplus for hypertrophy).
Technique, Safety Cues, and Common Errors
Technique matters more than load. Key universal cues for barbell lifts: maintain a neutral spine, keep the bar path vertical and close to the body, use hips as primary power drivers on lower-body lifts, and avoid excessive forward knee travel in squats. Common errors include rising heels in squats (fix with ankle mobility work and posterior chain strengthening), hips shooting upward early in deadlifts (fix with tempo pulls and hip hinge drills), and poor bar path in the bench press (fix with scapular retraction and targeted triceps work).
Use video analysis: record sets from multiple angles and compare with coaching cues. If training alone, always use a power rack with safety pins set to a level that prevents heavy drop injuries. For explosive lifts, ensure you have appropriate flooring (rubber matting 6–12 mm and bumper plates) and space for safe bar drops.
Progressive Overload Methods and Monitoring
Progressive overload can be achieved via increases in load, volume (sets x reps), frequency, or intensity distribution. Practical methods include:
- Linear progression: add small increments each session (5 lbs for major lifts).
- Double progression: increase reps up to a target, then increase load and drop reps back.
- Auto-regulation using RPE: adjust load based on daily readiness and performance metrics.
Setup, Maintenance, Accessories, and Case Studies for Barbell Sets
Proper setup and maintenance extend equipment life and ensure consistent performance. A weightlifting barbell set’s longevity depends on storage, cleaning, lubrication, and inspection routines. Additionally, strategic accessory purchases (bumpers, collars, rack, platform) optimize training variety and safety. This section provides a maintenance checklist, storage recommendations, and real-world case studies demonstrating ROI (return on investment) for different buyer profiles.
Maintenance checklist (weekly/monthly):
- Weekly: wipe down shaft and sleeves with a dry cloth after use to remove sweat and chalk; inspect knurling for wear.
- Monthly: apply light coating of 3-in-1 oil or dedicated bar oil to sleeves and lightly to the shaft if non-stainless; rotate sleeves to ensure smooth rotation.
- Quarterly: remove sleeves where possible and inspect bearings/bushings; replace worn bushings or relube bearings per manufacturer instructions.
- Annually: perform a full inspection for straightness and structural cracks; return to manufacturer if deformities appear.
Storage and setup best practices:
- Use vertical storage solutions for multiple bars (vertical holders) to save space—but ensure plates are removed before vertical storage on some bars; check manufacturer guidance.
- Install a rack or power cage for safety—look for one with 1" hole spacing for precise J-cup & pin placement.
- Use rubber or foam flooring and a lifting platform for impact protection when dropping bumper plates.
- Keep collars, spare bushings, and an oil kit accessible in your gym area.
Accessory recommendations by use-case:
- Olympic lifting: bumper plates, bearing bar, lifting platform, and weightlifting shoes.
- Powerlifting: power bar with aggressive knurling, calibrated iron plates, and slingshot or band attachments for overloaded training.
- Home general strength: versatile Olympic bar, changeable plates (bumper + iron mix), power rack, and adjustable bench.
Practical Maintenance Guide (Step-by-Step)
Step 1: After each session, wipe the bar with a dry microfiber cloth to remove sweat and chalk—this prevents corrosion buildup. Step 2: Every 10–20 hours of use, use a soft brass brush to clean knurling debris; avoid steel brushes which can damage finishes. Step 3: Apply 1–2 drops of light machine oil to the sleeve contact points and spin the sleeve to distribute. Step 4: If you notice gritty sleeve rotation, disassemble sleeves (if user-serviceable), clean old grease, inspect bearings/bushings, and relube with bearing-grade grease. Step 5: For rust on a non-stainless bar, use a rust eraser or fine steel wool lightly, then reapply protection (oil or wax). Document maintenance dates and any part replacements; good logs extend warranties and resale value.
Cost-saving tips: buy spare collars and bushings in advance; maintain a small tool kit with hex keys and lubricant; consider a barbell maintenance kit (often $20–50) that includes brushes and lubricant.
Case Studies and Real-World Applications
Case Study A — The Home Gym Starter: Sam, a 28-year-old working professional, purchased a mid-tier Olympic weightlifting barbell set ($300) and bumper plates ($350) for home. Using the 12-week beginner program outlined earlier and logging progress, Sam increased his deadlift from 275 lb to 330 lb (20% improvement) while training three times per week. Key factors: consistent programming, weekly progress tracking, and investing in a quality bar with 1,500 lb rating to avoid replacement.
Case Study B — The Club Upgrade: A small commercial gym replaced three cheap standard bars with two competition-grade Olympic bars and one power bar. Over 12 months, reported member retention increased by ~8% and fewer equipment complaints were logged. Financially, the higher upfront cost was offset by reduced replacements and improved member satisfaction—highlighting ROI for higher-use environments.
FAQs
Below are 11 professional-style FAQs addressing common, technical, and purchasing questions about weightlifting barbell sets.
- Q1: What is the difference between an Olympic and a standard barbell?
A: Olympic bars have 50 mm (2") sleeves that accept Olympic plates and feature rotating sleeves; standard bars use 25 mm (1") diameter sleeves and smaller plates. Olympic bars are built for heavier loads and dynamic lifts.
- Q2: How do I choose the right bar diameter?
A: Choose 25–28 mm for Olympic lifts for better grip and whip; choose thicker bars (29–32 mm) for powerlifting to reduce bend. Consider hand size and lifting style.
- Q3: What tensile strength or load rating is necessary for a home lifter?
A: For most home lifters, a bar rated 1,000–1,500 lbs and tensile strength around 150,000–200,000 PSI provides adequate safety and longevity.
- Q4: Are bearings worth the extra cost?
A: Bearings improve sleeve rotation and are beneficial for Olympic-style lifts. For heavy but slower powerlifting movements, bushings are often sufficient.
- Q5: How often should I oil my barbell?
A: Light oiling of sleeves monthly and shaft wiping after each use is a practical schedule. High-use commercial bars may require more frequent maintenance.
- Q6: Can I drop a barbell with iron plates?
A: Dropping iron plates from height can damage plates, floors, and the bar’s sleeves. Use bumper plates and a platform for safe dropping. If dropping is occasional and controlled, static drops with iron plates are less ideal.
- Q7: What accessories are essential with a barbell set?
A: Essential accessories: collars, a power rack, adjustable bench, rubber flooring or platform, and a set of quality plates (bumper and/or iron).
- Q8: How do I test if my barbell is straight?
A: Roll the unloaded bar on a flat surface to observe wobble; visually inspect from distance for bends; measure with a straight edge if concerned. Manufacturers can certify straightness for competition bars.
- Q9: Is a women’s bar different than a men’s bar?
A: Yes. Women’s Olympic bars are typically 15 kg, 6.5 ft long, and 25 mm in diameter. They are designed for female lifters’ average hand sizes but can be used by anyone preferring that diameter.
- Q10: How should I store multiple barbell bars in a small space?
A: Use vertical bar storage posts or wall-mounted holders. Ensure bars have plates removed as recommended by the manufacturer before vertical storage to avoid bending.
- Q11: What signs indicate it’s time to replace a barbell?
A: Replace a barbell if you detect permanent bending, cracked welds, compromised sleeves, or significant corrosion that affects knurling and structural integrity.