
What Equipment for Insanity Fitness
Core Equipment Essentials for Insanity Fitness
Insanity-style workouts are built on short bursts of extremely high effort, followed by brief recovery periods. To achieve this at home, you don’t need a full gym, but you do need a core set of tools that support plyometrics, quick transitions, and stability. Start with space, then add gear that expands your options without clutter. A typical home setup for insanity fitness sits in a clear 8x6 foot area, but even smaller spaces can work with smart placement and foldable options. The goal is consistency: equipment that’s easy to access, safe, and versatile enough to cover cardio, strength, and mobility aspects of the program.
Must-have items include a sturdy jump rope for timing and rhythm; a shock-absorbent mat for floor work; resistance bands with multiple tension levels for progressive loading; adjustable dumbbells or kettlebells to vary resistance; and a medicine ball for dynamic core and rotational work. If space allows, a plyometric box or a solid step provides height for jump progressions, while a stability ball and a yoga mat support balance, core, and mobility drills. A pull-up bar or a sturdy door-mounted bar opens up pulling movements that amplify upper-body work. Finally, consider a weight vest only if you’re at an intermediate level and want to intensify cardio bursts without extending workout time.
Practical setup tips: arrange items in a circular flow so you can move from warm-up to plyometrics to strength work without retreating to other rooms. Protect your flooring with a thick mat or foam floor tiles to reduce impact and noise. Label zones for cardio (rope, box), strength (dumbbells, kettlebells), and mobility (mat, foam roller). Use modular storage to keep bands, clips, and small accessories organized.
Case studies illustrate returns from well-chosen equipment. Case Study A: A 34-year-old runner swapped a treadmill for a 16 kg kettlebell, a jump rope, and resistance bands. Within 8 weeks, she maintained weekly training time while increasing average workout intensity by 15–20 percent, with perceived exertion dropping for the same power output. Case Study B: A parent with a small apartment used a compact foldable plyo box, a resistance-band set, and a medicine ball to hit a 5-day Insanity-style cycle; after 6 weeks, she reported improved jump height and core strength, and no more missed sessions due to gym access.
The Must-Have List
- Jump rope (adjustable length, medium to heavy handles for grip stability)
- Non-slip exercise mat with cushioning
- Resistance bands set (light, medium, heavy with door anchor)
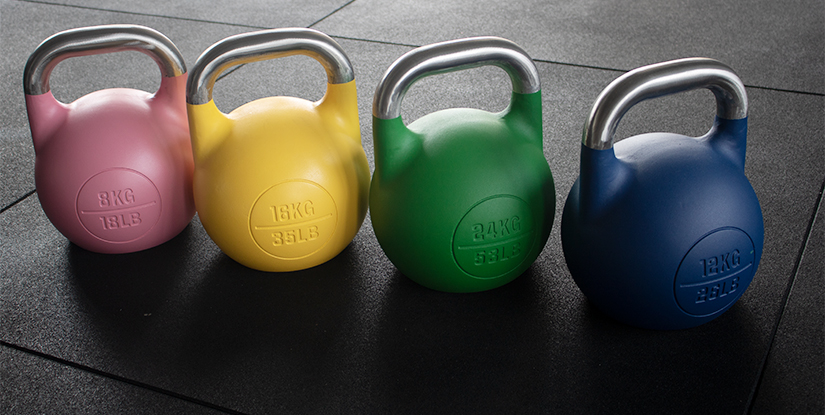
- Adjustable dumbbells or kettlebells (2–20 lb to start; scale up as needed)
- Medicine ball (6–14 lb depending on ability)
- Plyometric box or sturdy step (16–20 inches)
- Stability ball and/or BOSU (for core and balance work)
- Pull-up bar or alternative grip apparatus
- Towels, water bottle, fan or ventilation for cooling
Optional upgrades based on goals: weighted vest for advanced cardio sessions, ankle weights for targeted leg work, and a foam roller for recovery. When choosing gear, prioritize stability, grip comfort, and durability. Avoid gear with sharp edges or slippery surfaces that increase injury risk.
Budget-Friendly Options and Space-Saving Tips
Budget-conscious buyers can pick multipurpose items that stretch across several workouts. A single adjustable dumbbell set can replace an entire rack of fixed weights; a jump rope requires minimal space and costs less than $30 in many markets. For space-saving, prefer foldable plyo boxes, compact resistance-band sets, and a small stability ball that can double as a chair for off-workout recovery. Consider second-hand gear in good condition from reputable sources; inspect items for cracks, rust, and wear before use.
How to Select Equipment by Goals
If your priority is fat loss and endurance, focus on cardio tools (rope, box, bands) and a moderate load for strength moves. For athletic performance or sport-specific conditioning, include heavier loads (dumbbells or kettlebells), a medicine ball for power, and a stability tool to challenge balance. For beginners, start with lighter loads and shorter intervals, then progressively increase volume, intensity, and complexity as technique becomes solid.
Cardio and Plyo Tools for Maximum Burn
Cardio and plyometrics lie at the core of insanity-style workouts. The aim is to maximize caloric burn in short bursts while maintaining form and safety. The equipment you choose should enable rapid transitions, precise footwork, and strong propulsion. In practice, this means combining jump rope work with box jumps, agility drills, and body-weight complexes that spike heart rate and demand fast recovery.
Jump Rope, Plyo Box, and Agility Ladder Utility
Jump rope builds rhythm, coordination, and ankle stability—critical for injuries in high-impact sessions. Start with 30 seconds on, 30 seconds off, repeated for 6–8 rounds, then progress to 45/15 or 60/15 as you improve. A pliant plyo box adds vertical height for box jumps and step-ups; use a height you can land softly on the balls of your feet. An agility ladder challenges foot speed and motor control; perform quick in-and-out patterns or lateral shuffles to target fast-twitch fibers. For each tool, emphasize form over speed; land softly, maintain a neutral spine, and keep knees tracking over toes.
Practical progression example: Week 1 uses rope, box step-ups, and basic ladder drills for 20–25 minutes; Week 2 introduces two-box combination moves and short explosive sets; Week 4 pushes to 4–5 rounds with increased reps and slightly longer intervals. Typical weekly plan includes 3–4 cardio-focused sessions with 1–2 strength days.
Weighted Vests, Ankle Weights, and Resistance Bands
Weighted vests significantly increase caloric expenditure per minute, but should be introduced after a solid base of technique and conditioning. Start with a light vest (4–8% of bodyweight) for 10–15 minutes and monitor joint response. Ankle weights can accompany leg-focused circuits but use them cautiously to minimize knee strain. Resistance bands provide scalable resistance without heavy equipment and are ideal for progressive overload in glute bridges, hip hinges, and lateral movements. When using bands, anchor them securely and choose levels that allow you to complete each rep with control.
Measuring intensity: track heart rate zones (target 70–85% of max HR for peak intervals) or use rate of perceived exertion (RPE) of 7–9 during high-intensity windows. Use a simple rule: if you can’t perform the next rep with good form, reduce the load or rest and resume.
Measuring Intensity and Progression
To gauge progress, log interval times, jump height, and number of rounds completed within a workout. A common Insanity-style metric is the ratio of work to rest: start with 1:1 for 20–25 minutes, then progress to 1:0.75 or 1:0.5 as stamina increases. For cardiovascular data, use a wearable or a rough estimate from RPE and heart rate. The principle is steady progression: small, consistent increases in volume or intensity over 4–6 weeks yield meaningful gains.
Strength, Mobility, and Core Add-ons
While Insanity workouts emphasize cardio, including strength, mobility, and core work creates a balanced fitness profile and reduces injury risk. The equipment in this section supports compound movements, stability training, and post-workout recovery. A compact set of weights, a stability tool, and mobility aids can transform a short HIIT session into a comprehensive conditioning cycle.
Dumbbells, Kettlebells, and Medicine Balls
Dumbbells and kettlebells offer versatile resistance for pushing, pulling, hinges, and corerotation exercises. Start with a light-to-moderate range (5–15 lb dumbbells or 8–24 kg kettlebell depending on strength) and progress gradually. Medicine balls enable dynamic throws, rotational chops, and explosive slams that complement high-intensity cardio sequences. Use controlled tempo: 2 seconds down, 1 second up, with deliberate exhale on exertion.
Sample movements: goblet squats with kettlebell, dumbbell push presses, medicine ball slams, renegade rows, rotational throws. Track sets and reps, aiming for 8–12 reps per movement, 2–4 sets, with short rests to maintain intensity.
Stability, Mat, and Mobility Tools
A stability ball or BOSU ball challenges balance and core stiffness, which improves performance in high-impact sequences. A good mat with adequate cushioning protects joints during floor work. Foam rollers and massage balls aid recovery between sessions and reduce muscle soreness. Plan 5–10 minutes of mobility work before and after sessions, focusing on hips, ankles, thoracic spine, and shoulders.
Mobility drills example: ankle dorsiflexion pass-throughs, hip circles, thoracic spine rotations, shoulder dislocates with a resistance band. Recovery routine: 5–10 minutes of foam rolling targeting quadriceps, calves, upper back, and glutes.
Setup, Safety, and Program Design
Designing an insanity-style program around equipment means balancing intensity with safety. Clear planning, proper warm-up, and progressive loading are key. A dedicated space with ventilation and hydrating options helps sustain effort and reduce fatigue-related injuries. The layout should minimize unnecessary transitions and keep all equipment within arm’s reach to avoid breaks in flow.
Creating a Workout Space, Layout, and Equipment Care
Tips for an optimal space: choose a flat, non-slip surface; protect floors with a cushioned mat; ensure a ceiling height adequate for box jumps; and provide a fan or good ventilation. Label zones for cardio, strength, and mobility. Regular maintenance includes wiping sweat, inspecting bands for cracks, tightening bolts on a box or rack, and storing equipment after use to prevent tripping hazards.
Equipment care actions: check resistance bands for fraying each week, rotate kettlebell grips to avoid wear, and replace mats that show deep compression lines.
Sample 4-Week Equipment-Based Progression
Week 1 focuses on technique and moderate volume: 3 days cardio (rope, ladder, box), 1–2 days strength (dumbbells and bands), 1 mobility day. Week 2 increases intervals by 10–15 seconds and adds one extra round per circuit. Week 3 introduces heavier loads and slightly longer cardio blocks, while Week 4 tests peak effort with a reduced rest window. A typical session lasts 25–40 minutes, including warm-up and cooldown.
Safety notes: begin at 60–70% effort if you’re new to high-intensity training; avoid pushing through pain; and consult a professional if you have chronic conditions.
Common Mistakes and How to Avoid Injuries
Key mistakes include neglecting warm-up, using too much resistance before form, and ignoring rest days. To avoid injuries, master technique first, progress load gradually (no more than 5–10% increase in weight per week), and listen to your body. Hydration, sleep, and nutrition also play critical roles in recovery and performance.
Frequently Asked Questions
-
1. Can I do insanity fitness at home with minimal equipment?
Yes. With a jump rope, mat, bands, a pair of dumbbells or a kettlebell, and a sturdy box or step, you can perform most Insanity-style workouts. Focus on quality of movement and progressive overload over time.
-
2. What is a good starter equipment set?
Begin with a jump rope, a yoga mat, a resistance-band set (light to heavy), one adjustable dumbbell pair, a kettlebell (or a second dumbbell set), a medicine ball, and a compact plyo box or sturdy step. This enables a wide range of HIIT and strength moves.
-
3. How often should I train insanity-style workouts?
3–5 days per week is common, with 1–2 full rest or active recovery days. Alternate cardio-focused days with strength and mobility sessions to balance effort and recovery.
-
4. How do I modify for beginners?
Reduce tempo, lower resistance, and shorten intervals. Use 10–15 seconds of work with equal rest, and gradually increase duration and weight as technique improves.
-
5. What should I do if I have knee or back issues?
Prioritize low-impact variations, ensure proper knee tracking, and avoid deep jumps if they irritate joints. Consult a clinician or physical therapist for personalized modifications.
-
6. How can I measure progress?
Track interval times, repetitions, jump height (if possible), and subjective effort. Use a simple 1–10 Scale for RPE and aim for consistent improvements over 4–6 weeks.
-
7. Is a weighted vest worth it?
Only for experienced practitioners; it increases load and joint stress. Start with light loads and shorter sessions, ensuring form remains solid.
-
8. What is the ideal warm-up?
A 5–10 minute routine including dynamic leg swings, arm circles, hip openers, light cardio, and a few mobility drills to prep joints and muscles for explosive work.
-
9. Can women benefit from this equipment?
Absolutely. The same equipment applies. Adjust resistance and volume to individual strength and goals, not gender.
-
10. How do I avoid monotony?
Rotate exercises weekly, vary interval lengths, and mix in different equipment combinations. Keeping a workout journal helps maintain progressive variety.
-
11. Are there alternatives to expensive gear?
Yes. Body-weight progressions, household items (a backpack filled with books as resistance), and minimal bands can substitute many traditional pieces while still delivering results.