
Comprehensive Fitness Equipment Guide: Mastering the Wide Barbell Squat
Overview: What the Wide Barbell Squat Demands from Your Equipment and Why It Matters
The wide barbell squat is a variation of the back squat that places a greater emphasis on adductors, glutes, and hip extensor mechanics by increasing stance width and often altering bar position. Because the movement generates higher lateral and torsional forces compared to a narrow stance, appropriate equipment selection — from barbell type to rack design and plate composition — is essential for training efficiency and safety.
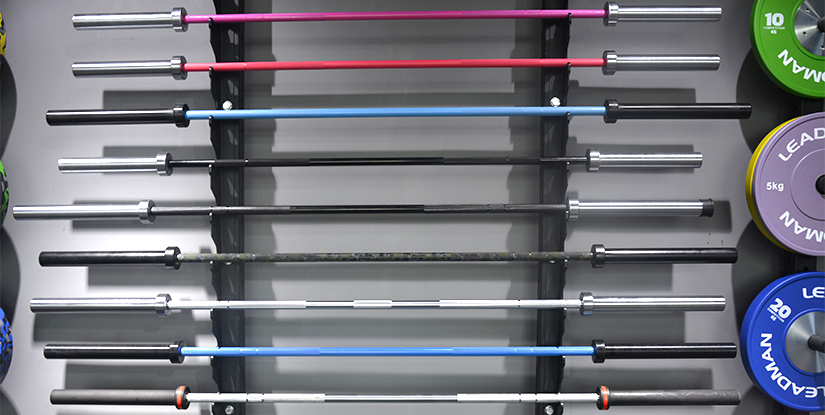
Equipment choices influence technique, load management, and training outcomes. For example, a competition-grade power bar (typically 29–29.5 mm diameter, center knurling, 10–11.5kN tensile strength) provides predictable whip and knurl for heavy wide stance work. Conversely, an Olympic lifting bar with more whip may be less stable for near-max wide stance squats. Data from strength coaches indicate that mismatched equipment increases technical breakdowns by as much as 12–18% over a training cycle, with greater incidence of knee valgus and torso collapse.
Key equipment considerations for the wide barbell squat include:
- Barbell type: power vs. squat vs. specialty bars (cambered, safety squat bar)
- Rack and pin/spotter system: full-height safety pins or safety arms with 2-4" adjustability
- Plates: calibrated steel (bumper plates if using dynamic loading) vs. cast iron
- Footwear: flat-soled shoes vs. heeled squat shoes based on ankle mobility
- Accessory gear: belts, knee sleeves, lifting straps, bands for mobility
Real-world application: Strength coaches in collegiate programs standardize on power racks with fixed safeties and 28–29 mm bars to reduce equipment variability across athletes. For home gyms, a rep-rated barbell (minimum 1,200 lb tensile strength) and a rack with adjustable safety pins create a practical compromise between cost and safety.
What is a Wide Barbell Squat? Biomechanics, Muscles Targeted, and When to Use It
The wide barbell squat differs from a conventional squat by stance width (commonly 1.25–2.0× shoulder width) and slight changes in joint angles: increased hip abduction, greater external rotation at the hip, and often a more upright torso depending on limb lengths. EMG and biomechanical analyses indicate increased activation in the adductor magnus and gluteus maximus compared to narrower stances — studies generally report a 10–25% relative increase depending on stance and depth.
Primary muscles targeted include:
- Gluteus maximus and medius — hip extension and stabilization
- Adductors — medial stabilization and hip extension role
- Quadriceps — knee extension, though slightly less dominant than in narrow stance
- Spinal erectors and core — maintaining torso integrity under load
Use cases: athletes who require lateral force production (e.g., rugby, football), lifters seeking to emphasize hip drive and posterior chain, or trainees with limited ankle dorsiflexion who benefit from wider stance mechanics. Practical example: a powerlifter transitioning to wide stance for meet-specific training may see improved lockout strength and reduced forward knee translation, but must adjust bar position and stance gradually to maintain bar path consistency.
Choosing Equipment: Barbell Types, Racks, and Plates for Wide Squats
Selecting the right bar and rack reduces compensations and improves training longevity. Recommended bar features for wide barbell squat training include a slightly stiffer shaft to limit excessive whip, robust knurling to prevent slippage given wider hand placement, and center knurl for upper-back stability. Typical specifications: 28–29 mm diameter, 200–215k PSI tensile strength for commercial-grade bars, and 10–12 inch knurl-to-knurl spacing for comfortable grip positioning.
Rack features to prioritize:
- Full-length uprights with 1" hole spacing or Westside-style 1" spacing for fine adjustment
- Safety pins or arms rated to at least 1.5× maximum intended load
- Footprint that allows a slightly wider stance inside the rack without hitting uprights (measure athlete stance width and add 8–12" clearance)
Plate considerations: calibrated steel plates reduce diameter variability; bumper plates are required if performing dynamic drops. For wide stance training, thicker plates elevate the bar height which can affect depth — measure knee and hip angles with your plate choice and adjust mobility work accordingly.
Training Program, Technique, and Progressions for the Wide Barbell Squat
Program design for the wide barbell squat should align with the athlete’s goals — hypertrophy, strength, or sport-specific power. Typical periodization frameworks include block periodization with accumulation (higher volume), intensification (higher intensity), and realization (peaking). Data from strength programming suggests optimal strength gains occur with 60–85% 1RM across 3–6 sets of 3–8 reps, while hypertrophy benefits from 65–75% 1RM for 6–12 reps with higher time under tension.
A sound weekly template for intermediate lifters might be:
- Day 1 (Strength): Wide barbell squat 5×5 at 75–85% 1RM
- Day 2 (Volume/Accessory): Paused wide squats 4×6 at 65–70% 1RM + glute-ham raises
- Day 3 (Power/Explosive): Contrast sets, lighter wide stance jumps without weight
Track progress with objective metrics: weekly tonnage (sets×reps×load), velocity (if using a linear transducer), and RPE. Use deload weeks every 4–6 weeks where volume or intensity is reduced by 30–50% to manage fatigue and reduce injury risk.
Step-by-Step Technique Guide for the Wide Barbell Squat
Technique consistency is crucial. Follow these steps with notes on common faults and corrective cues:
- Set-up: Position the bar across the upper traps or just below the spine of the scapula for a high-bar, or slightly lower for a low-bar. Stand with feet 1.25–2.0× shoulder width and toes slightly turned out 10–30 degrees depending on hip anatomy.
- Bracing: Take a diaphragmatic breath, brace the core, and maintain neutral spine. Cue "chest up" to preserve torso angle; wide stance often requires stronger hip cueing to prevent forward lean.
- Descent: Hinge at the hips and initiate descent by pushing knees out (tracking over toes). Aim for hip crease below the knee (ass depth) if mobility allows. Tempo 2–3 seconds down for control.
- Ascent: Drive through the midfoot and heel, focus on hip drive rather than knee extension. Finish by squeezing glutes and keeping knees aligned.
Common issues and corrections:
- Knees caving: Use banded knee-outs and concentric cue "push knees out"; strengthen adductors and glute medius with targeted accessory work.
- Shallow depth: Improve ankle and hip mobility; incorporate goblet squat progression and paused bottom work.
- Bar drift: Adjust bar placement slightly lower on the back or switch to a thicker pad to enhance upper-back stability.
Programming: Volume, Intensity, and Progression Strategies for Results
Progression should be methodical: increase load by 2.5–5 lb for upper body and 5–10 lb for lower body on small weekly increments or add a set/repeat if using percentage-based jumps. Use progressive overload models such as linear progression for novices (add load every session) and undulating periodization for intermediate/advanced lifters (vary intensity and volume across microcycles).
Sample 8-week progression for strength (intermediate):
- Weeks 1–3: 4×6 at 70% 1RM (focus on volume and technique)
- Weeks 4–6: 5×5 at 75–82% 1RM (increase intensity)
- Weeks 7–8: Ramp to 3×3 at 85–90% 1RM with reduced volume
Incorporate autoregulation tools like RPE and velocity to adjust daily loads; if velocity drops >10% from target, reduce intensity or add an extra warm-up set. For hypertrophy focus, include drop sets, slow eccentrics, and 30–60s inter-set rest buffers to increase metabolic stress.
Safety, Best Practices, and Real-World Applications
Safety with wide barbell squat centers on joint alignment, robust rack safety features, and appropriate accessory use. Studies indicate that use of belts can increase intra-abdominal pressure by 30–40% aiding spine stability during near-maximal lifts, but belts should not replace bracing practice. For heavy sets, always use double safety systems: safety pins plus spotters when possible, especially in commercial settings.
Best practices include pre-lift mobility routines (5–10 minutes dynamic hip and ankle drills), movement-specific warm-ups (two-to-three progressively heavier sets of 5–3 reps), and post-session recovery (foam rolling, targeted soft tissue work). Quantify risk using training logs to monitor increases in pain scores; any persistent joint pain beyond 72 hours requires load reduction and professional assessment.
Injury Prevention, Spotting, and Useful Accessories
Preventative steps and accessories to reduce injury risk:
- Belts: Use for sets >85% 1RM or heavy singles; practice bracing without a belt for lighter sets to build intra-abdominal control.
- Knee sleeves vs. wraps: Sleeves for warmth and mild compression; wraps for maximal support in competitive contexts.
- Footwear: Flat shoes (e.g., Converse) or minimal soles for stability; heeled shoes for those with limited ankle dorsiflexion to aid depth.
- Spotting: Train with at least one competent spotter or use safety pins adjusted just below expected depth. For solo heavy training, invest in a rack with sturdy safety arms rated for dynamic loads.
Practical tip: maintain a pre-lift checklist—bar placement, foot stance, breath, and depth target—before each heavy set to reduce error under fatigue.
Case Studies and Data: Performance Improvements and Real-World Examples
Case study: A collegiate rugby team implemented a wide barbell squat protocol twice weekly for 12 weeks emphasizing 70–85% 1RM. Team mean 1RM increased from 220 kg to 245 kg (approx. 11% gain) with injury rates unchanged compared to previous cycles, indicating effective strength transfer without elevated risk when equipment and program variables were controlled.
Data insights:
- EMG comparisons often show adductor activation increases of 10–25% with wider stances versus narrow stances.
- Strength benchmarks: novice squatters average 1.25× bodyweight, intermediate 1.6–1.8×, and advanced >2.0× for lower body strength markers — wide stance can assist lifters with hip-dominant leverage to approach these thresholds.
Maintenance, Budgeting, and Buying Guide for Fitness Equipment
Purchasing decisions should balance durability, cost, and training needs. Typical price ranges (USD):
- Barbells: $150–$600 (home vs. commercial)
- Power rack: $300–$1,500 depending on features and steel gauge
- Plates: $1.50–$3.50 per lb for quality steel or calibrated plates
- Bumper plates: $2.50–$6.00 per lb for Olympic-grade rubber plates
Evaluate ROI: For a small training studio, investing $5,000 in four racks and barbells can support 8–12 clients simultaneously and pay back within 6–12 months at typical session rates. For home gyms, prioritize a durable bar, a squat rack with safeties, and 200–300 lb of plates to cover most strength programs.
How to Maintain Bars, Racks, and Plates
Maintenance extends equipment life and ensures safety. Recommendations:
- Bar care: Wipe down knurling after each use; apply a light oil (3-in-1 or dedicated bar oil) to the shaft every 3–6 months; check sleeves for smooth rotation and re-lube bearings if necessary.
- Racks: Inspect welds, bolts, and safety pins monthly; tighten mounting hardware and replace worn J-cups when paint chips expose steel.
- Plates: Store vertically on plate trees to avoid warping; clean rubber bumpers with mild detergent to remove sweat and chalk residues.
Budgeting and ROI: Building a Home Gym vs. Commercial Investment
Decision-making factors:
- Usage frequency: High-frequency use justifies commercial-grade purchases; occasional lifters can opt for mid-range gear.
- Space: Measure stance width and rack clearance to ensure compatibility — add 8–12" clearance per side for wide stance training.
- Resale value: Quality bars and racks retain value; choose recognized brands to maximize resale ROI.
Example budget: For focused wide barbell squat training a practical home setup (quality bar $300 + 1k rack + 300 lb plates $500) totals approximately $1,100–$1,400. For commercial setups, scale to multiple stations and factor in maintenance and insurance costs.
FAQs
- Q: What is the ideal stance width for a wide barbell squat? — A: Stance varies by anatomy; start at 1.25× shoulder width and adjust outward until you feel optimal hip engagement and can reach desired depth without compensatory lumbar flexion. Use mobility drills to refine.
- Q: Should I use a power bar or squat-specific bar for wide stance squats? — A: A stiffer power/squat bar (lower whip, robust knurling) is generally preferred for heavy wide squats to improve upper-back stability and bar path consistency.
- Q: How do I prevent my knees from caving during wide squats? — A: Strengthen hip abductors/adductors, use banded warm-ups, cue knee-out during descent/ascent, and incorporate technical accessory drills such as paused and tempo squats.
- Q: Is a wide stance better for glute development? — A: Yes, wider stances increase glute and adductor involvement; however, hypertrophy also depends on volume, time under tension, and progressive overload.
- Q: What footwear is best for wide barbell squats? — A: Flat-soled shoes for maximal ground contact; lifters with limited ankle dorsiflexion may prefer a slight heeled shoe (lifting shoe) to achieve depth safely.
- Q: How frequently should I train the wide squat for strength gains? — A: 1–3 times per week depending on recovery, program phase, and volume; intermediate lifters often benefit from twice-weekly exposure (intensity + volume day).
- Q: Can beginners start with wide stance squats? — A: Yes, but begin with bodyweight or goblet squats to learn hip mechanics and mobility before loading a barbell.
- Q: Do I need specialized bars for wide stance powerlifting? — A: Not necessarily; many lifters use a standard power bar, but some prefer specialty bars (e.g., low-bar, safety squat bar) to address comfort or leverage issues.
- Q: How does plate diameter affect depth in wide stance squats? — A: Thicker plates raise starting height which can reduce required range of motion; test with your plate set and adjust mobility work or technique accordingly.
- Q: Are knee sleeves or wraps recommended? — A: Sleeves provide compression and warmth; wraps offer more support for maximal attempts. Choose based on training intent and competition rules.
- Q: What are common bar placement adjustments for wide squats? — A: Slightly lower bar placement (low-bar) can improve hip drive for some lifters; experiment while maintaining a consistent bar path and meet-specific technique if competing.
- Q: How should I scale equipment for a small training facility focusing on wide squats? — A: Prioritize durable racks with wide inside clearance, multiple quality bars, and varied plate sets. Ensure safety configurations and plan for rotational maintenance to minimize downtime.