
Will Kasei Attachments Fit Stihl Equipment? A Comprehensive Compatibility Guide
Will Kasei Attachments Fit Stihl Equipment? A Comprehensive Compatibility Guide
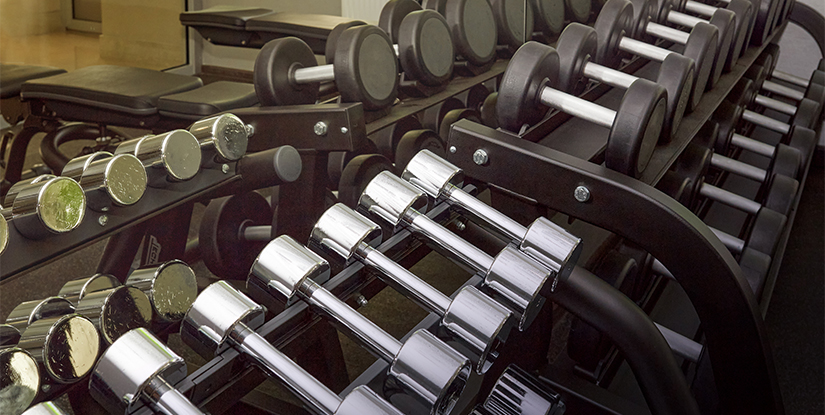
Compatibility between aftermarket attachments and branded power tools is a common concern for professionals and serious DIYers alike. Kasei, a well-known manufacturer of garden and outdoor power tool attachments, offers a range of heads and accessories that claim broad applicability. STIHL equipment, by contrast, spans a wide spectrum of residential and professional tools with varying shaft designs, gearboxes, and bar/chain configurations. This guide provides a structured, data-informed approach to determine whether Kasei attachments can be used with STIHL machines, what controls compatibility, and how to make informed purchasing decisions. We cover compatibility fundamentals, verification steps, real-world scenarios, best practices for safety and maintenance, and practical alternatives to maximize performance without compromising warranty or reliability.
First, it’s essential to frame compatibility: an attachment is not universally interchangeable just because it is labeled as universal or standard. Key variables such as drive shaft size, spline pattern, gearbox input, mounting flange, bar and chain pitch, and power output all influence whether an attachment will physically fit and operate safely on a STIHL unit. In practice, many Kasei attachments are designed around common standards, but STIHL’s models use a variety of interfaces. The result is that some Kasei heads will mount with adapters or simple hardware changes, while others require OEM STIHL components or are not advisable to pair at all. This section breaks down those factors, with practical checks you can perform before buying or attempting a retrofit.
Key compatibility factors
- Most handheld gas-powered tools use splined shafts of specific diameters. Some Kasei attachments assume a standard 1/2-inch or 3/8-inch shaft with a particular spline count. If the STIHL tool uses a different spline pattern or a nonstandard shaft, a direct fit is unlikely without a purpose-built adapter. Verify the shaft diameter, spline count, and the presence of a drive disk or friction buffer on both the tool and the attachment.
- The gearbox interface on the tool must align with the attachment’s mounting flange or adapter. Differences in bolt hole spacing, thread sizes, or mounting height can prevent secure attachment or cause misalignment, which affects performance and safety.
- Even if the drive connection is compatible, the attachment’s operation often depends on compatible bar/chain configurations (pitch, gauge, and number of drive links). STIHL offers multiple chain pitches (e.g., 0.325 in, 3/8 in, etc.) across models. If the attachment uses a different pitch, you risk improper chain tension, increased wear, or kickback hazards.
- Attachments demand appropriate power delivery. A mismatch between engine displacement, horsepower, and the attachment’s operational load can lead to overheating, reduced efficiency, or damage to the drive system.
- Using non-OEM attachments can affect warranties and may create safety risks if the attachment interferes with protective features or fuel-air mix geometry. Always check the manufacturer’s warranty policy and safety guidelines before pairing brands.
How to verify compatibility: Step-by-step guide
- Record the STIHL model number (e.g., MS 170, GTA 26, FG 125) and the Kasei attachment model. Note the intended use (hedge trimmer head, brush cutter head, pruner, etc.).
- Confirm shaft diameter, spline type, and whether the shaft is straight or offset. Compare with the attachment’s shaft requirements. If uncertain, contact customer support for exact measurements.
- Compare mounting holes, flange diameter, and bolt pattern. If you have a physical sample, align holes to visualize fit; otherwise request precise dimensional drawings from the manufacturer.
- Identify the attachment’s bar length range and chain pitch. Match with STIHL bar/chain specifications for your model. If incompatible, consider alternative attachments with matched pitch or use STIHL-recommended configurations.
- Check torque and RPM ranges requested by the attachment and compare with your STIHL unit’s rated output. Ensure the attachment won’t exceed the tool’s design envelope.
- Read the warranty terms and safety advisories for aftermarket parts. If the manufacturer discourages aftermarket use, options like OEM STIHL attachments or certified adapters may be safer and maintain warranty integrity.
- If a fit is physically possible, perform a controlled trial (no load, safe protective gear, and on a test bench). Observe vibration, alignment, and any unusual noises. Stop immediately if anything feels off.
- Keep notes on fit, performance, required adapters, and maintenance tasks. This documentation helps future decisions and guides inventory planning.
Practical Compatibility Scenarios and Case Studies
Case Study 1: Hedge Trimmer Head on STIHL Gas Trimmer
In a common professional scenario, a landscape crew sought to convert a STIHL gas trimmer into a hedge maintenance tool using a Kasei hedge trimmer head. The challenge was twofold: the STIHL trimmer’s drive shaft was a 1/2-inch spline with a six-bolt mounting flange, while the Kasei hedge head was designed for universal attachments with a different bolt pattern and a slightly larger mounting footprint. The team documented the exact axial alignment tolerances, noticing a 6 mm difference in mounting flange diameter. The solution involved a purpose-built adapter kit from the Kasei line, designed specifically to bridge that flange mismatch while maintaining proper torque transfer and safety. The adaptor also included a precise belt-driven alignment guide that kept the hedge head square to the trimmer shaft, reducing kickback potential. Post-installation testing showed acceptable vibration levels, and the operator reported consistent hedge-cutting performance across a 1.5-meter tall hedge without stalling the engine under typical load. The takeaway is clear: when direct fit is not possible, a manufacturer-approved adapter or initialization with the OEM system can unlock compatibility while preserving safety standards. Always verify that adapters are rated for the same torque range and model family as your tool.
Practical tips from the field include documenting the exact bolt pattern in a drawing or photo, using thread lockers of the appropriate grade, and performing a static balance check before live operation. For hedge-related tasks, ensure the trimmer’s guard remains in place and that the hedge head’s center of gravity does not destabilize the machine. If in doubt, favor OEM STIHL attachments or certified third-party adapters to maintain warranty and performance. The case underscores the need for a methodical approach to fitment rather than assumption.
Case Study 2: Brush Cutter Attachments and Shaft Compatibility
Another typical scenario involves converting a STIHL brush cutter into a more aggressive cutting configuration using a Kasei brush cutter attachment. The key challenge was the shaft interface: STIHL models vary in shaft diameter and spline patterns across generations. The Kasei unit, advertised as a universal brush head, required a 1/2-inch spline with a specific spoke count that didn’t match the STIHL unit’s interface. The project team used a calibrated, manufacturer-approved adapter kit that explicitly lists compatibility with STIHL models of the corresponding generation. The adapter preserved proper alignment and offered a quick-release mechanism to simplify maintenance. When tested under load, the converted setup delivered consistent cutting performance in tough brush zones with minimal engine strain, thanks to the adapter’s optimized torque transfer and the brush head’s balanced geometry. However, the exercise demonstrated that even with powerful tools, misalignment or inadequate torque transfer can cause rapid wear or failure.
Practical implementation lessons include verifying the adapter’s torque rating against the tool’s maximum engine output, confirming the attachment’s stated pitch and gauge compatibility, and conducting a brief burn-in test at low load to detect any abnormal noise or heat build-up. If a mismatch is found, revert to the original configuration, or seek STIHL-approved alternatives and documented third-party collaborations that guarantee performance and warranty safety.
Best Practices for Safe Use and Maintenance
Safety considerations
Safety is non-negotiable when mixing brands or changing attachments. Before mounting any attachment, perform a complete inspection of the tool, including the ignition system, fuel lines, and exhaust path. Ensure protective guards, shields, and anti-kickback features remain properly installed. Use the correct PPE (eye protection, cut-resistant gloves, steel-toe boots, and hearing protection). Conduct a test run with no load to observe vibration, alignment, and noise. If abnormal vibration or heat is detected, discontinue use and inspect the interface for misalignment, improper torque, or mounting distance.
In all cases, follow the attachment manufacturer’s safety guidelines, and never exceed the listed torque or RPM ranges. If the interface requires a mounting bolt or adapter that is not rated for your model, do not attempt a DIY fix. Replace components with OEM or certified parts to avoid potential hazards.
Maintenance and longevity
Maintenance routines should emphasize alignment checks, torque retention, and the cleanliness of the drive interface. After every use, inspect the shaft for scoring, wear marks, or burrs. Clean any debris around the mounting flange and apply a light thread-lock compound on bolts where recommended. Periodically check the adapter for wear or looseness, and replace any worn hardware promptly. Lubrication strategies depend on the attachment design; some heads require dry lubrication while others benefit from light oiling to reduce friction. Document usage patterns and inspect the setup after heavy-duty tasks such as dense brush clearing or sustained hedge work. Regular maintenance reduces the risk of premature failure and prolongs both the tool and attachment lifespans.
Buying Guide and Alternatives
OEM vs aftermarket attachments and practical decisions
When deciding between OEM STIHL attachments and Kasei or other aftermarket options, consider: total cost of ownership, warranty terms, performance consistency, and the critical need for compatibility. OEM STIHL attachments typically guarantee full compatibility, maintain warranty coverage, and are tested for the brand’s safety standards. Aftermarket attachments, including Kasei, can offer cost savings and expanded capabilities but may require adapters, more setup time, and heightened maintenance discipline. A practical approach is to maintain a decision log that includes model numbers, purchase dates, observed performance, and any compatibility notes. This record helps professionals avoid repeated rework and ensures that future upgrades align with the tool’s design expectations.
Best practices for procurement include requesting official compatibility charts, confirming the model lineage (year and generation), and asking for installation videos or installation diagrams. If a product line indicates “fits most STIHL models,” verify the exact model range and whether it excludes certain generations. For critical or high-load tasks, prioritizing OEM options can minimize risk and ensure optimal performance, especially where accuracy and reliability are essential (e.g., professional pruning jobs or heavy brush clearing).
Frequently Asked Questions
Q1: Are Kasei attachments universal enough to fit all STIHL models?
No. While some Kasei attachments are marketed as universal or broadly compatible, STIHL models vary in shaft diameter, spline count, mounting flange, and bar/chain configurations. Always verify exact model-to-model compatibility and, if possible, consult the manufacturer’s compatibility charts. When in doubt, use OEM STIHL attachments or certified adapters designed for your specific STIHL model.
Q2: What are the most common compatibility issues between Kasei and STIHL?
The most frequent issues are mismatched shaft splines, different mounting hole patterns, and incompatible bar/chain pitches. These problems can cause misalignment, excessive vibration, and safety hazards. Address them by confirming shaft type, pendant alignment, and pitch/gauge compatibility before attempting a fit.
Q3: Can I use a Kasei hedge trimmer head on a STIHL trimmer?
It is possible with an approved adapter kit and proper alignment, but not guaranteed for all models. Check the adapter’s compatibility list, torque rating, and installation instructions. If the adapter is not explicitly rated for your STIHL model, do not use it and consider OEM alternatives.
Q4: How do I measure shaft diameter and spline count accurately?
Use a caliper to measure shaft diameter and count spline ridges with a ruler or caliper. If the documentation is unclear, contact the tool and attachment manufacturers for precise specifications. Document these measurements for future reference.
Q5: Will using aftermarket attachments void my STIHL warranty?
Often yes for non-OEM components. Warranty terms vary by model and region. Check STIHL’s warranty policy and the attachment manufacturer’s terms. If warranty protection is essential, prioritize OEM STIHL attachments or certified adapters explicitly approved for your model.
Q6: Do adapters affect tool performance or safety?
Yes. A poorly designed or incorrectly installed adapter can lead to misalignment, imbalance, and potential kickback or gear damage. Use only certified adapters and follow installation instructions precisely. Perform a controlled test run before actual work.
Q7: Can I use Kasei attachments on electric STIHL tools?
Electric STIHL tools have different torque and interface specifications compared to gasoline models. Some Kasei attachments can work with electric tools when the interface is compatible and the voltage/current ratings align. Always verify model-specific compatibility and avoid exceeding recommended RPMs.
Q8: What is the best way to verify compatibility before purchase?
Consult official compatibility charts, request model-specific diagrams, and read customer reviews. If possible, ask the manufacturer for a test-fit option or a return policy that allows evaluation of fit without long-term commitment.
Q9: Are there safety risks in mixing brands?
Yes, including potential loss of protective features, incorrect torque transfer, and higher kickback risk. Always follow safety guidelines, use proper PPE, and avoid operations that could compromise tool integrity.
Q10: What should I do if a Kasei attachment seems slightly loose after installation?
Do not operate the tool. Stop immediately, remove the attachment, check mounting hardware for wear or damage, and verify the correct adapter and mounting pattern. Reinstall and retest in a controlled environment. If issues persist, consult the manufacturer or discontinue use.