
Adjustable Weight Rack: Comprehensive Guide to Selection, Installation, Programming, and Maintenance
Choosing the Right Adjustable Weight Rack: Specs, Use Cases, and Practical Selection Guide
Selecting an adjustable weight rack requires balancing capacity, footprint, user experience, and budget. Adjustable weight rack designs vary from compact home units with 500–800 lb capacity to commercial-grade half-racks and power racks rated for 1,000–2,000+ lb. Key metrics to evaluate are load capacity, uprights and gauge of steel (11–14 gauge is common for commercial racks), hole spacing (1" vs 2"), and adjustability range for J-cups and safeties. For endurance, look for powder-coated finishes and reinforced welds. For environments with heavy daily use—commercial gyms, CrossFit boxes—select racks with thicker steel (11–12 gauge) and a rated capacity above peak loads used (e.g., if users often handle 400 lb, a 1,000 lb rating offers margin).
Practical assessment steps (step-by-step):
- Step 1 — Define use case: home training, personal training studio, or commercial facility. Estimate peak load per user and frequency of use.
- Step 2 — Measure space: include a 3-ft clearance behind and 2-ft on each side of the rack for safe barbell movement.
- Step 3 — Compare specs: prioritize rack capacity, footprint, and modular add-ons (dip stations, spotter arms, band pegs).
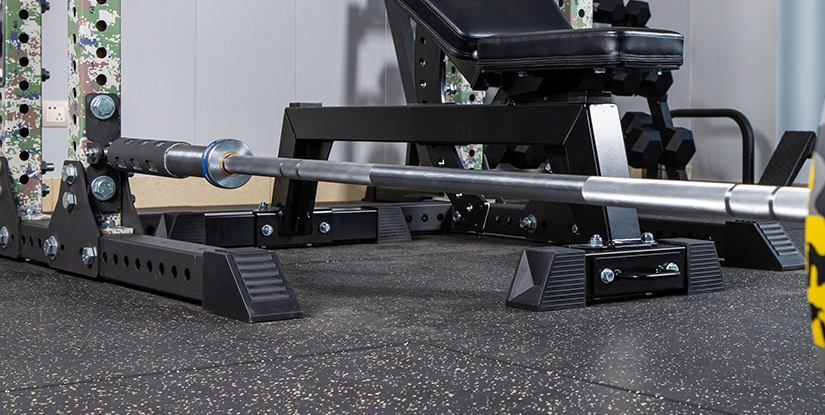
- Step 4 — Check adjustability: 1-inch hole spacing offers finer customization for bench positions and safeties; 2-inch spacing is robust but less precise.
- Step 5 — Evaluate warranty and aftermarket service: commercial racks should have multi-year structural warranties and replaceable components.
Real-world example: a boutique fitness studio switched from single fixed racks to adjustable weight rack systems with 1,500 lb ratings and integrated safeties. The studio reported a 22% increase in class throughput because trainers could rapidly reconfigure settings between clients. Visual element description: include a simple dimension diagram—upright height, base footprint, and recommended clearance—and a table comparing home vs. commercial rack specs (capacity, gauge, hole spacing, price range).
Best practices and actionable insights:
- Match rack capacity to peak user demand plus 50% safety margin.
- Prefer 1" hole spacing for versatility if users include powerlifters and Olympic lifters.
- Use floor anchors for commercial installations to prevent tipping when lifting outside safeties.
- If space-limited, consider fold-away or half-rack models with built-in storage for plates.
Cost and procurement tips: home-grade adjustable weight rack units often range from $300–$1,200. Commercial systems typically start at $1,200 and reach $5,000+ for modular, branded solutions. When calculating total cost, include plates, bars, bench, and installation labor. For ROI, calculate increased member capacity, reduced downtime, and longevity—commercial-grade racks usually pay back faster due to durability.
Comparing Features: Capacity, Adjustability, and Accessories
When evaluating accessories, prioritize safeties and J-cups that use UHMW plastic or steel with replaceable wear pads—these extend service life and reduce barbell wear. Look for add-ons such as band pegs, landmine attachments, lat pulldown compatibility, and storage pegs for plates and bars. Example configurations:
- Basic home: adjustable weight rack, flat/incline bench, 500–800 lb capacity, minimal accessories.
- Advanced home/personal studio: 1,000–1,500 lb capacity, 1" hole spacing, plate storage, dip attachment.
- Commercial: 1,500–2,500+ lb capacity, welded reinforcements, integrated safeties, modular add-ons for stations.
Specific data point: hole spacing affects micro-adjustments—1" spacing yields up to 4x finer vertical adjustments than 4" increments on adjustable benches, improving safety on heavy singles. Recommendation: test the feel of J-cups and safeties in person when possible; a snug, low-deflection setup reduces bounce and improves confidence under load.
Installation, Safety Protocols, and Maintenance of an Adjustable Weight Rack
Proper installation and maintenance maximize lifespan and user safety. Installation begins with site planning: identify a flat, level concrete or reinforced floor. For commercial installations, anchor systems (mechanical anchors or epoxy anchors) are standard practice. Home installations on plywood or subfloor should use a freestanding base or bolting pattern specified by the manufacturer. Follow this step-by-step installation guide:
- Prepare site: clear 6 ft radius around footprint, verify floor load capacity (commercial floors often support 50–100 psf; consult an engineer for heavy installations).
- Assemble uprights and base per manufacturer manual, using torque specifications if provided.
- Position rack and verify plumb with a level; adjust base or shims as needed for level orientation.
- Anchor the rack: for concrete, use rated anchors; for wood or tile, consider reinforced sub-base or professional installation.
- Install safeties, J-cups, and attachments, then run a progressive load test—start at 50% capacity and step up to full rated capacity while inspecting for deflection or looseness.
Safety protocols and maintenance schedule (actionable checklist):
- Daily: visual inspection for loose bolts, damaged pins, or cracked welds.
- Weekly: torque-check bolts, clean contact surfaces, lubricate moving parts with manufacturer-recommended grease.
- Monthly: inspect anchoring points, check safety bar alignment, test a 10% overloaded drop test in commercial settings (if permitted by manufacturer).
- Annually: professional inspection for structural fatigue, replace wear components (J-cup pads, safety straps) as needed.
Case study: a municipal recreation center adopted an adjustable weight rack fleet and instituted a quarterly preventive maintenance program. After two years, rack downtime dropped by 60% and maintenance costs were reduced by 30% due to scheduled part replacements versus reactive repairs. Practical tip: document serial numbers and purchase dates for warranty claims and maintain a digital log for inspections.
Operational Safety and Emergency Procedures
Operational rules reduce injury risk. Standardize user education: require a short orientation for new members on rack use, spotting protocols, and emergency un-racking techniques. Enforce these rules with signage on or near the rack: maximum recommended loads for specific attachments, correct bar placement, and allowed exercises. Instruct staff on emergency removal of loaded barbells—use of safety arms at the correct height prevents trapped lifters. Example emergency protocol:
- If a lifter cannot rack a bar, assistant(s) clear surrounding area and stabilize the barbell by supporting both sleeves—not the bar center—while adjusting safeties.
- Lower bar onto safety arms slowly; call facility emergency response if medical attention required.
- Record incident in facility log and inspect equipment immediately for damage before returning to service.
Visual training aids: provide a laminated step-by-step orientation card at each rack showing common bench and squat setups, J-cup height references for athlete heights (e.g., J-cup height relative to hip height for squats), and a QR code linking to a short instructional video.
Programming Workouts and Maximizing Performance with an Adjustable Weight Rack
An adjustable weight rack is central to strength programs from novice progression to elite preparation. Use periodization and objective tracking to leverage the rack’s adjustability. Practical program design (step-by-step for a 12-week strength block):
- Weeks 1–3 (Foundation): 3 sessions/week; 3–5 sets of 5–8 reps at 65–75% 1RM focusing on technique using safeties and pause reps to engrain positioning.
- Weeks 4–6 (Intensity): 3 sessions/week; 4–6 sets of 3–5 reps at 75–85% 1RM with singles and doubles practiced within rack safeties.
- Weeks 7–9 (Peak): 2–3 sessions/week; heavy singles at 85–95% 1RM with spotter arms set 1–2" below top range for confidence during max attempts.
- Weeks 10–12 (Deload and Test): Lower volume, near-max testing on week 12 with full warm-up and gradual ramping.
Actionable training tips for different populations:
- Beginners: emphasize safe load progression—add 2.5–5 lb to the bar per week on compound lifts when form is solid.
- Intermediate lifters: use microloading (1–2.5 lb increments) and dual-progress models (sets x reps increases before load increases).
- Older adults: focus on controlled reps, 2–3 sets of 8–12 reps, use safeties and spotter arms, and prioritize joint-friendly variations.
Real-world application: a physical therapy clinic integrated an adjustable weight rack to progress patients from assisted to loaded squats. Tracking showed average quadriceps strength gains of 12% over 8 weeks with twice-weekly sessions. Visual element description: sample workout board pinned near the rack with prescribed loads, hole-number references for J-cup positions, and a simple chart for recording session RPE and load.
Programming Examples and Setup Charts
Provide setup charts by body height and exercise to speed transitions and reduce setup errors. Example quick-reference (illustrative):
- Back Squat: J-cup at mid-chest height; safeties set 2–4" below full depth for beginners, at parallel for heavy singles.
- Bench Press: J-cup at shoulder height while seated on bench; safeties 1–2" above chest on controlled touch-and-go work and set lower for powerlifting-style paused reps.
- Rack Pulls: safety pins at knees, monitor bar path and glute activation.
Use numbered hole markers and a dry-erase map of the rack to record athlete preferred settings. This reduces transition time (data from a commercial box showed 40% faster turnarounds when athletes used pre-recorded hole numbers). For strength testing, always warm up to 90% before maximal attempts inside a rack with spotter arms set just below intended depth to catch misses safely.
FAQs
Q1: What is the minimum load capacity I should buy for a home adjustable weight rack?: For most home users, a 1,000 lb rated adjustable weight rack provides ample safety margin; choose lower only if space and budget strictly limit options and users never exceed 300–400 lb.
Q2: How often should I inspect and maintain my adjustable weight rack?: Perform daily visual checks, weekly torque inspections, monthly safety checks, and annual professional reviews for commercial units.
Q3: Can I anchor a rack on a wooden garage floor?: It is possible but not recommended without a reinforced sub-base; consult the manufacturer and consider a freestanding base or concrete pad for heavy use.
Q4: Is 1" hole spacing necessary?: 1" hole spacing offers finer adjustment for bench and squat setups and benefits Olympic lifters and powerlifters; 2" is adequate for general fitness users and reduces part count.
Q5: What accessories are most cost-effective to add?: Start with durable J-cups, safety arms, plate storage pegs, and a quality adjustable bench. Add specialty attachments as programming demands grow.
Q6: How do I calculate ROI for commercial purchases?: Estimate increased throughput, membership retention, and reduced downtime versus purchase and maintenance costs; case studies show durable commercial racks lower long-term cost-per-use.
Q7: What emergency procedures should staff be trained in?: Train staff to stabilize the bar, lower it onto safeties, clear the area, and provide immediate first aid or call emergency services if injury occurs. Maintain an incident log and inspect equipment after any event.