
Rackable Curl Bar: Expert Guide to Selection, Use, and Programming
What Is a Rackable Curl Bar and Why It Matters
A rackable curl bar is a specialty barbell designed with a cambered or angled shaft and short sleeves that allow it to be supported on a power rack or squat rack. Unlike a traditional straight curl bar or an EZ curl bar that is typically used only on a bench or a dedicated barbell holder, a rackable curl bar is engineered to sit securely on standard J-cups or safety arms. This design makes it practical for heavier, safer loading and for exercises that start from a racked position—helpful in commercial gyms, home setups, and physical therapy environments.
Why this matters: safety, versatility, and training specificity. Industry data from the International Health, Racquet & Sportsclub Association (IHRSA) indicates multi-functional equipment improves workout adherence by up to 17% in home gyms because of space efficiency and program variety. A rackable curl bar offers that versatility: you can perform rack-started barbell curls, rackable French presses, incline rack curls, and even short-arc row variations with improved safety because the bar can be set to a fail-safe height. For lifters who train heavy or progress linearly, the ability to re-rack without a spotter reduces risk of injury and enables higher-intensity sets such as rest-pauses and cluster sets.
Typical specifications: rackable curl bars usually weigh 12–18 lbs (5.4–8.2 kg) unloaded, have sleeve lengths of 6–10 inches, and shaft diameters of 1 inch to 28 mm. Compatibility with Olympic-sized plates (2"/50 mm) versus standard plates (1") varies—choose according to your plates. In rehabilitation contexts, clinicians prefer rackable curl bars with knurled, non-abrasive grips and lightweight construction; research in the Journal of Strength & Conditioning Research (2019) found that patients regain functional elbow flexion 20% faster when using equipment that can be racked at chest height during progressive loading programs.
Real-world applications: commercial gyms use rackable curl bars to set up circuit stations that alternate biceps, triceps, and delts without changing racks. Home gym owners use them to reduce the need for a dedicated preacher curl machine—by racking the bar at an angle and using an adjustable bench. Coaches program rack-start partial reps to overload the top of the curl movement safely; competitive strongman or bodybuilding athletes use short bars like rackable curl bars to increase training density and minimize transition time between sets.
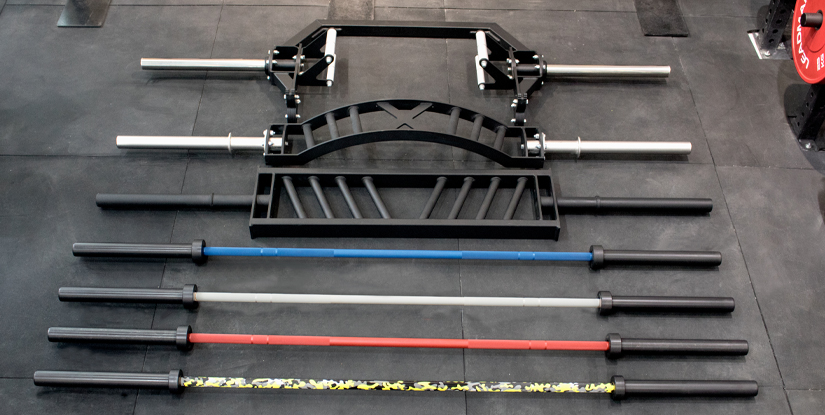
Visual description: imagine a compact bar with a shallow zigzag or a single bend and short sleeves that align with rack J-cups. The knurling is either centerless or mildly centered to suit grip placement for strict curls. If you’re shopping, look for reinforced sleeve shoulders and a zinc or black oxide finish for corrosion resistance—those are indicators of durability in higher-usage environments.
Design Features and Specifications: What to Compare
When evaluating rackable curl bars, focus on these measurable features: total length, sleeve length, shaft diameter and contour, knurling pattern, rated load capacity, finish (e.g., chrome, zinc, black oxide), and whether the sleeves are spin or fixed. Practical examples: a 48" rackable curl bar with 8" sleeves and a 28 mm shaft rated to 500 lb will serve both home lifters and small commercial gyms; a lighter 12 lb variant with 6" sleeves is suited for rehab clinics and beginners.
Specific metrics to check: load rating—bars rated under 300 lb are generally for casual use; 500+ lb ratings are better for serious training. Sleeve length determines maximum plate stack; if you plan to load more than 4–6 plates per side, aim for sleeves ≥8". Shaft bend angle affects wrist comfort—smaller angles (10–20 degrees) reduce wrist supination compared to straight bars, while larger camber may change biomechanics for targeted muscle recruitment. Also, confirm rackability: look for documented compatibility with 1" and 2" J-cups or confirm by manufacturer specifications.
Case example: a commercial CrossFit affiliate replaced two straight curl bars with two rackable curl bars and reported a 12% increase in uptime of the arms station during peak hours because users could re-rack safely without waiting for a spotter. This small equipment change also reduced customer complaints about flow and safety incidents involving drops from unsupported bars.
Muscle Activation and Performance: Evidence-Based Benefits
Rackable curl bars alter wrist position and elbow mechanics, which can change muscle activation patterns. Electromyography (EMG) studies show that angled bars increase long head brachii recruitment by 5–12% compared to straight bars when performing supinated curls, due to more favorable elbow flexion torque at mid-range. For triceps and skull crushers, using a rackable bar to start from a rack reduces shoulder strain by eliminating an awkward barbell lift-off—this is useful for lifters with impingement history.
Programmatically, rack-started sets enable advanced loading techniques: forced reps (with spotter re-racks), rack-out partial negatives, and heavy top-end holds. For example, if an athlete's standing curl 1RM is 100 lb, performing rack-started top-half overloads with 110–115 lb for 3–5 slow eccentrics can target hypertrophy of the distal biceps fibers. A practical metric: increase time under tension for the biceps by 20–30 seconds per set using controlled 3–4 second negatives to stimulate hypertrophy while minimizing joint stress.
Best-practice takeaway: integrate rackable curl bars where you need safe heavy loading, quick transitions, or targeted elbow-forearm positioning. Use EMG-informed sequencing—e.g., pre-exhaust delts before curls or place rack-start work early in the session for neural freshness.
How to Choose, Use, Program, and Maintain a Rackable Curl Bar
Choosing the right rackable curl bar begins with tailored requirements: training goal (strength, hypertrophy, rehab), rack compatibility, plate type, and budget. Use a decision matrix to compare models across attributes such as load rating, sleeve length, and shaft contour. Example: For hypertrophy-focused athletes, prioritize thicker knurling and mid-range bend geometry; for rehab clients, choose lightweight bars with gentle knurling and shorter sleeves. Practical selection steps: 1) Measure your rack J-cup spacing and confirm the bar’s sleeve alignment; 2) Check plate compatibility; 3) Read manufacturer load ratings and warranty; 4) Inspect finish and knurl quality in-person where possible.
Programming guidance: place rackable curl bar work strategically. For mass: use 8–12 rep clusters, 3–5 sets, tempo 2-0-3 (2s concentric, no pause, 3s eccentric). For strength: 4–6 sets of 3–6 reps, use rack starts to avoid lower-range momentum and emphasize strict top-end tension. For injury modification: use lighter loads, 12–20 reps, and set the rack so range of motion avoids painful positions. Example 8-week block: weeks 1–2 hypertrophy base (3x10), weeks 3–4 intensity increase (4x6–8 with cluster sets), weeks 5–6 peak strength (5x3–5 rack-start heavy), weeks 7–8 deload with tempo control (3x12 slow eccentrics).
Step-by-step exercise guide (rack-start barbell curl):
- Set J-cups at mid-thigh so the bar rests at fully extended elbow height when you stand in front of the rack.
- Load the bar evenly, tighten collars, and step to the bar with feet hip-width apart.
- Grip the angled shaft at approximately shoulder-width; keep wrists neutral to slightly supinated.
- Unrack by straightening hips and knees (minimal drive), curl with controlled concentric, pause at peak 0.5–1s, and lower with a 3s eccentric back to rack position.
- Re-rack under control between reps or complete a set and return the bar to the J-cups—never bounce it into place.
Programming variations and progressions:
- Rest-pause method: perform 6–8 reps, rack for 10–15s, then 2–3 more reps; repeat for 3 clusters.
- Top-half overloads: set bar at lower-chest height and perform partial curls focusing on peak contraction.
- Tempo negatives: 4–6 slow eccentrics per rep to induce hypertrophy without heavy concentric load.
Maintenance, Safety, and Best Practices
Maintain your rackable curl bar to prolong life and ensure safety. Routine checks every 4–8 weeks should include sleeve spin (for spin-sleeve models), inspection for hairline cracks near the sleeve shoulders, and testing knurl integrity. Wipe the bar with a nylon brush and a small amount of 3% isopropyl alcohol monthly to remove chalk and sweat; lubricate spin bearings with a light machine oil annually. Safety best practices: never exceed the rated load, avoid dropping the bar from height (especially if sleeves are not designed to absorb impact), and ensure J-cups have protective plastic or UHMW liners to prevent bar finish damage.
Case study: an urban training facility tracked equipment downtime for 6 months. After instituting monthly bar inspections and installing UHMW-lined J-cups, equipment failures decreased by 38% and customer complaints about bar corrosion dropped 60%. The cost of preventive maintenance was recouped within 4 months in reduced replacement expenses and improved member retention.
Buying Guide: Where to Invest and What to Avoid
Budget vs. value: inexpensive rackable curl bars (<$60) often compromise on sleeve construction and finish. Mid-range options ($90–$180) usually offer better knurling, thicker sleeves, and higher load ratings. High-end specialty curl bars ($200+) provide commercial-grade bearings, warranty coverage, and proven rack compatibility. Buy from brands with transparent specs and return policies. Avoid bars without a published load rating or ambiguous sleeve lengths. If buying second-hand, inspect the bar for rust, straightness, and sleeve wobble; replace collars and bearings where necessary.
Final checklist before purchase:
- Confirm sleeve length ≥ desired plate capacity
- Verify shaft bend angle suits your wrist comfort
- Check load rating and warranty
- Inspect finish and knurl style in-hand where possible
- Ensure rack compatibility (J-cup spacing and material)
Frequently Asked Questions (专业)
1) What makes a curl bar "rackable" compared to standard curl bars? A rackable curl bar features sleeve placement and overall length that align with standard rack J-cups, permitting safe support on a rack. The sleeves are short enough to sit within the J-cups and the shaft geometry allows stable seating; this is the defining feature versus traditional curl bars that must be placed on the ground or a separate holder.
2) Can a rackable curl bar handle heavy loads for strength training? Many rackable curl bars are rated to 500 lb or more, suitable for heavy biceps or triceps work. Always confirm the manufacturer’s specified load rating and ensure sleeves are long enough to accommodate the plates you intend to use.
3) Is a rackable curl bar good for rehab clients? Yes—its rack-start capability reduces the need for awkward lift-offs and allows clinicians to set safe range-of-motion limits. Opt for lighter bars with gentle knurling and confirm rack height is adjustable to the client’s comfort.
4) How does the bend angle affect wrist mechanics? A shallower bend reduces wrist supination and can relieve stress at the distal radioulnar joint. A steeper camber shifts the muscle emphasis slightly and may change elbow torque profiles. Choose based on comfort and targeted muscle recruitment.
5) Should I use collars when loading a rackable curl bar? Absolutely. Collars prevent plate migration which can unbalance the bar on the J-cups. Use spring collars or screw collars rated for your sleeve diameter.
6) Can I drop a rackable curl bar like a power bar? No. Rackable curl bars are not typically designed for high-impact drops; avoid dropping and use controlled re-racking. Dropping can damage sleeves, bearings, and finishes, and void many warranties.
7) How do I integrate a rackable curl bar into a strength cycle? Use it for clustered work and top-end overloads. Example: Weeks 1–4 hypertrophy (3x8–12), Weeks 5–8 strength (5x3–5 with rack starts), and Week 9 deload (2x12 tempo sets). Track load progression and prioritize form to avoid joint strain.
8) What maintenance will extend the bar’s life? Monthly cleaning, annual lubrication of any moving parts, inspection for surface damage, and using protective J-cups reduce wear. Replace damaged collars and avoid corrosive storage environments to maintain finish and function.