
Comprehensive Guide to Arms Pull Down Equipment: Selection, Use, and Programming
Overview of Arms Pull Down Equipment
The term arms pull down typically refers to exercises and machines designed to load the latissimus dorsi and related upper-body pulling muscles through a downward pulling motion. Commonly found in commercial gyms and increasingly in home setups, arms pull down equipment ranges from dedicated lat pulldown stations with long bars to multifunctional cable machines and resistance band rigs. Understanding the variations and how each design influences force curves and muscle activation is essential for effective training and injury prevention.
In practice, the arms pull down movement is versatile: it can emphasize the lats, teres major, posterior deltoids, biceps, and forearms depending on grip, bar type, and torso position. Machines aim to stabilize body position so users can focus on concentric and eccentric control without managing a free-weight bar path. This stability allows higher repetition ranges and deliberate tempo work, which is valuable for hypertrophy and rehabilitation. Conversely, free-weight variants and cable setups promote more natural movement paths and core recruitment, which can be advantageous for athletic transfer.
When evaluating the role of arms pull down equipment within a training program, it helps to consider goals: maximal strength, hypertrophy, muscular endurance, or functional transfer. Different attachments, angle adjustments, and loading methods produce distinct stimulus patterns. For example, a long straight bar typically enables wider grips to stress the outer lats, while V-bars and close grips shift loading to the central lats and biceps. A well-designed training plan leverages multiple arms pull down variations to create balanced development while addressing weaknesses.
Types and Mechanisms
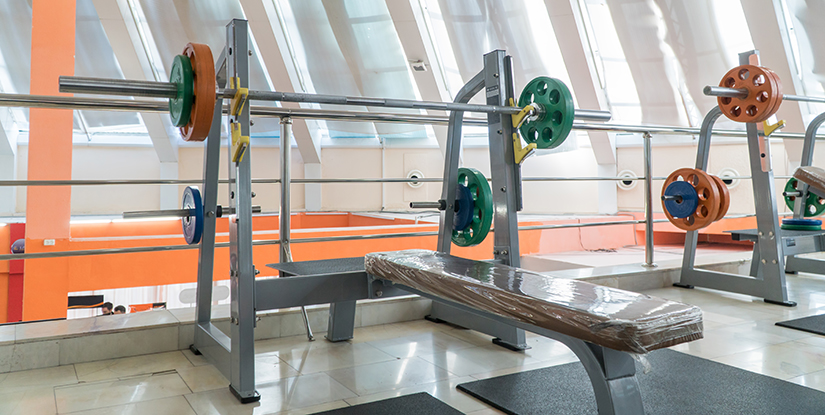
Arms pull down machines commonly fall into several categories: traditional seated cable lat pulldown stations, plate-loaded high-pulley rigs, selectorized machines with guided weight stacks, and compact home gym units using resistance bands or small pulley systems. Each type has mechanical differences that affect user experience and training outcomes. Selectorized machines provide quick, repeatable loading via a pin-in-stack; they minimize setup time and are popular in high-traffic commercial settings. Plate-loaded or free-weight pulleys require manual plate changes but can deliver a smoother, less constrained feel when paired with appropriate bearings and cable routing.
Mechanically, the key components are the pulley placement, cable routing, handle or bar attachment, and seat/leg stabilization. High pulley placement above the user creates a vertical line of pull that maximizes downward force on the lats. Some machines incorporate adjustable cam profiles to change resistance throughout the range of motion; cams can increase resistance where the muscle is strongest and reduce it at weaker points, producing a tailored load curve for hypertrophy or strength goals. Resistance bands can be grafted onto pulleys to alter the eccentric-concentric balance and provide accommodating resistance that increases tension at the top of the movement.
When choosing mechanisms, prioritize smooth cable action, minimal friction, and robust handle attachments. Bearings or nylon bushings in pulleys reduce vibration and jerk, enhancing control during slow eccentrics. For athletes focused on power, a pulley system with minimal slack and rapid return is beneficial. For rehabilitation or beginners, an adjustable guided machine with defined seat and thigh restraint may offer safer, more reproducible positioning.
Key Muscles Targeted and Biomechanics
The primary target of most arms pull down movements is the latissimus dorsi, a large, flat muscle responsible for shoulder extension, adduction, and internal rotation. Secondary muscles include the teres major, rhomboids, middle and lower trapezius, posterior deltoid, biceps brachii, brachialis, and brachioradialis. The degree of biceps involvement increases with narrower grips and elbow flexion emphasis; conversely, wider grips place the lats under greater mechanical advantage with reduced elbow flexor demand.
Biomechanically, the power curve of a pull down depends on arm length, torso angle, grip width, and the machine's pulley height. For example, a high pulley directly overhead creates a near-vertical line of pull, maximizing lat engagement through a deep stretch at the top and strong mechanical leverage mid-range. Leaning slightly back shifts more load to scapular retraction and the lower traps, enhancing mid-back activation. Conversely, maintaining an upright torso places more emphasis on pure vertical humeral depression and adduction.
Practical cues to optimize muscle recruitment include initiating the movement with a scapular depression and retraction before elbow flexion, keeping the chest slightly up to maintain a long lat stretch, and avoiding excessive neck flexion or swinging. Adjustments like supinated vs. pronated grip, using neutral handles, or employing single-arm attachments can correct muscle imbalances and provide focused loading on weaker areas. Understanding these biomechanical subtleties allows coaches and lifters to select the most appropriate arms pull down variation for specific objectives.
How to Choose the Right Arms Pull Down Machine
Selecting the right arms pull down equipment starts with a clear assessment of user needs, space, budget, and training objectives. For home gym buyers, footprint and multifunctionality weigh heavily; a compact cable tower that supports lat pulldowns, triceps pushdowns, and seated rows may deliver superior value compared to a single-purpose seated lat machine. Commercial buyers prioritize throughput, durability, and serviceability: selectorized stacks with easy adjustments, steel frames, and protective covers are standard in gym environments to facilitate frequent use and reduce maintenance downtime.
Performance-oriented users should evaluate mechanical smoothness, maximum load capacity, and handle versatility. A machine with high-quality sealed bearings, 10–12mm galvanized steel cable, and a minimum load capacity beyond the user’s top projected needs (often at least 200–300 lb for advanced lifters) provides room to progress. For rehabilitation settings, machines offering very low incremental resistance and precise positional adjustments are preferable to enable safe, progressive overload from light loads.
Warranty, parts availability, and brand reputation are practical considerations that correlate with long-term ownership satisfaction. Commercial-grade machines typically come with extended warranties and better component durability, but at significantly greater cost. For many home users, mid-range units from reputable brands deliver an optimal balance of price and performance, especially when accompanied by user reviews and third-party laboratory or consumer test results.
Features to Look For
When comparing machines, inspect specific features that affect usability and training outcomes. A padded, adjustable knee restraint ensures stability for heavier loads and for users with different femur lengths. A range of handle attachments—wide bar, V-bar, rope, single handles—permits exercise variety and targeted muscle emphasis. Seat height adjustability and a contoured backrest let users achieve optimal torso angle relative to the pulley, crucial for maximizing lat stretch and minimizing shoulder impingement risk.
Other important specifications include cable quality (coating, diameter, core material), pulley type (bearing vs. bushing), and the presence of a cam to modify resistance curves. Smooth, low-friction pulleys reduce jerky motion and make slow eccentrics manageable, enhancing hypertrophy outcomes. A functional weight stack with small incremental pin increments (e.g., 5 lb increments) facilitates precise progression, which is particularly useful when targeting weak points or during rehabilitation phases where small increases in load matter.
Extra amenities that add value: integrated plate storage, built-in attachment hooks, clear weight labeling, and modular compatibility with other equipment. For home settings, consider if the machine can be anchored or moved easily, and whether it fits through doorways and in intended spaces when assembled.
Buying Considerations: Home vs Gym Use
Home buyers should prioritize footprint, assembly complexity, and multifunctionality. A foldable or compact tower that supports pulldowns, low rows, cable flyes, and core rotations provides a more complete solution than a dedicated lat pulldown station. Electrical tools needed for assembly, delivered weight, and whether the product arrives pre-assembled affect installation decisions—some warranty policies require professional assembly to remain valid. For budget-conscious users, modular add-ons like resistance band converters or stack add-ons can expand functionality without buying a second machine.
Gym owners require durable frames (usually 11–14 gauge steel), replaceable wear parts, and minimal maintenance designs. Machines used in commercial settings should allow rapid adjustment between users, have protective shrouds over weight stacks to prevent contamination and injuries, and use heavy-duty cables rated significantly above expected loads. Also consider service agreements and spare-parts kits to reduce downtime. Ergonomics for a wide user population—adjustable seats, multiple handle sizes, and accommodating maximum user heights—are crucial in a public environment.
Finally, factor in long-term costs: shipping, installation, maintenance, and potential upgrades. While a low-cost unit may suffice short-term, high-quality models often save money over time due to longevity and lower repair frequency. Matching your choice to projected usage frequency and training intensity ensures a better return on investment and a consistent training experience with arms pull down equipment.
Proper Use, Programming and Safety
Proper use of arms pull down equipment balances mechanical setup, exercise technique, program structure, and adherence to safety practices. Beginners must learn body positioning, grip selection, and tempo control before adding heavy loads. Coaches should emphasize scapular movement patterns: initiating with a controlled scapular depression and retraction to anchor the shoulder blades, then following with elbow-driven descent. Faulty patterns, such as relying on momentum, excessive torso swing, or shrugging the shoulders, diminish lat activation and increase injury risk.
Programming considerations include frequency, volume, intensity, and exercise variation. For hypertrophy, aim for moderate loads (65–80% of 1RM equivalent) for 6–12 reps across 3–5 sets, incorporating variations like wide-grip, close-grip, and neutral-handle pulldowns to target different fibers. For strength emphasis, heavier sets of 3–6 reps with longer rest intervals and slower eccentrics can be implemented, though pure strength gains are often better served by compound pull-ups and weighted variations. For endurance or rehabilitation, higher-rep, lower-load strategies with slow tempo control help develop muscular control and tolerate longer time under tension.
Safety protocols include gradual progression, maintaining neutral cervical alignment, and avoiding excessive shoulder internal rotation under high loads. Regularly inspect cables, carabiners, and attachment points for fraying or wear. Users with pre-existing shoulder pain should consult a medical professional and begin with light loads and partial ranges guided by a therapist or qualified trainer.
Setup, Form and Common Mistakes
Correct setup begins with seat height and thigh restraint adjustments. Set the seat so your arms can reach the bar comfortably while maintaining a slight scapular elevation at the start point. Thigh pads should snugly secure the upper thighs to prevent the body from lifting during heavy reps. Choosing the right handle influences joint angles: a wider bar increases shoulder external rotation and abduction, while a close or neutral grip reduces shoulder stress and increases elbow flexor involvement.
Key form cues: (1) Start with a deep inhalation and establish scapular depression and retraction; (2) Pull the bar down using the elbows, driving them toward the torso rather than pulling with the hands; (3) Keep the chest elevated and avoid excessive backward lean; (4) Pause briefly at the bottom to ensure muscle contraction, then control the eccentric phase slowly. Common mistakes include using momentum (swinging the torso), letting the neck flex forward to reach the bar, pulling the bar behind the neck (which risks impingement), and allowing the shoulders to shrug up rather than retracting them.
To correct mistakes, employ tempo training (e.g., 2-second concentric, 3–4-second eccentric), use lighter loads until form is solid, and incorporate cueing such as “lead with your elbows” or “keep chest tall.” Video-recording sets or having a coach observe can identify subtle technical faults that compromise training quality and increase risk.
Sample Programs and Progressions
Below are actionable sample progressions tailored to common goals. For hypertrophy: perform lat pulldowns 2–3 times weekly, 3–4 sets of 8–12 reps. Vary grip each session (wide, neutral, narrow supinated) and progressively increase load by 2.5–5 lb increments every 1–2 weeks when all sets can be completed with good form. Implement drop sets and slow eccentrics periodically (e.g., once every 6–8 weeks) to stimulate additional fiber recruitment.
For strength, include heavier pulldown sets (3–6 reps) twice weekly with longer rests (2–3 minutes), and complement with pull-ups or weighted chin-ups for transfer. Use a linear progression model: increase weight when the target reps can be achieved across all sets. For rehabilitation or endurance, use 3–4 sets of 15–25 reps with light resistance emphasizing tempo and full control; integrate isometric holds at 90° elbow flexion to improve tendon tolerance.
Single-arm pulldowns and eccentric-only sessions are useful loading variations to address unilateral imbalances and tendon remodeling. Track progress with a simple log: load, reps, tempo, and perceived exertion. Adjust volume and intensity based on recovery markers such as soreness, sleep, and performance trends. These structured approaches allow consistent, safe improvements while utilizing arms pull down equipment effectively.
FAQs
1. What muscles do arms pull down exercises primarily target and how can I adjust my grip to emphasize specific muscles?
Arms pull down exercises primarily target the latissimus dorsi, with secondary emphasis on the teres major, middle and lower trapezius, rhomboids, posterior deltoid, and elbow flexors (biceps). Adjusting grip width and orientation changes muscle emphasis: a wide pronated grip increases lateral lat recruitment and reduces elbow flexor contribution; a close supinated grip shifts more load to the biceps and central lats; a neutral-grip handle tends to balance lat and arm involvement and is often easier on the shoulders. For more targeted mid-back work, use a slightly leaned-back torso with a narrower neutral grip to promote scapular retraction and rhomboid activation. Precise grip choice should align with your specific training goals and comfort, and rotating grips over time prevents overuse while promoting balanced development.
2. Is the arms pull down machine better than pull-ups for lat development?
Neither exercise is universally superior; each has unique benefits and transfer potentials. Pull-ups are a closed-chain, bodyweight compound movement that demands greater core stability and global strength, often yielding stronger functional carryover for climbing or gymnastics. Arms pull down machines provide controlled variable resistance, enabling precise load manipulation, increased volume tolerance, and safer work for those unable to perform bodyweight pull-ups. For hypertrophy, combining both—use pull-ups for strength and neural adaptations, and arms pull down variations for targeted volume and isolation—typically yields the best long-term lat development. Use progression strategies: assisted pull-ups or negatives for beginners, then incorporate weighted pull-ups and heavy pulldowns for advanced trainees.
3. How should I progress load and volume on arms pull down exercises without risking injury?
Progress slowly using small increments—2.5–5 lb for most home setups and 5–10 lb in commercial settings. Track performance across sessions and increase load only when you can complete all prescribed reps with strict form. Alternatively, manipulate volume by adding sets or reducing rest if increasing weight is not feasible. Implement deload weeks every 4–8 weeks with reduced volume or intensity to promote recovery. Focus on tempo control (e.g., 3-second eccentric) and avoid pushing loads that cause form breakdown, excessive neck strain, or shoulder pain. For those rehabbing or returning from injury, work with a physical therapist and use very small progressions and symptom-based adjustments to ensure tendon and joint tolerance improves safely.
4. Can resistance bands effectively substitute for cable-based arms pull down equipment?
Yes, resistance bands can substitute effectively, particularly for home users or rehabilitation contexts. Bands provide accommodating resistance—tension increases as the band stretches—making the top portion of the movement harder. This can be beneficial for developing lockout strength and time under tension but alters the force curve compared to a cable system. To replicate a lat pulldown, anchor a band overhead and kneel or sit on a bench, performing the same scapular-first mechanics. Use multiple bands in parallel to increase resistance or adjust hand positions to mimic wide and close grips. While bands lack the precise incremental loading of weight stacks, their portability and low cost make them a practical alternative when cable machines are unavailable.
5. What are common mistakes that limit effectiveness of arms pull down training?
Common mistakes include using momentum (swinging the torso), pulling the bar behind the neck (increasing impingement risk), allowing the shoulders to shrug upward instead of retracting, and relying excessively on the forearms and grip instead of initiating with scapular movement. Another frequent error is inappropriate seat height or poor thigh restraint fit, which can allow the body to lift and shift force distribution away from the lats. Correct these issues by using lighter loads, focusing on slow controlled eccentrics, cueing “lead with the elbows,” and ensuring proper machine setup. Addressing these technical faults significantly improves stimulus specificity and reduces injury risk.
6. How do I choose between a wide bar, V-bar, rope, or single-handle attachments?
Attachment choice depends on training objectives. Wide bars emphasize the outer lats and create greater shoulder abduction; V-bars and close-grip handles increase central lat and biceps involvement and often allow heavier loads due to mechanical advantage. Rope attachments enable a fuller range of motion at the bottom of the pull, allowing scapular retraction and a stronger contraction, which benefits hypertrophy. Single-handle attachments are ideal for unilateral work to correct imbalances and improve intermuscular coordination. Rotate attachments periodically to develop balanced musculature and address weak points identified through testing or imbalance observations.
7. Are there specific indicators that my arms pull down machine needs maintenance or replacement?
Signs of wear include fraying or exposed core on cables, sticky or jerky pulley action, unusual noises (squeaks, clicks), loose bolts, or wobble in the frame under load. If a cable shows visible damage, stop using the machine immediately and replace the cable or attachment hardware. Persistent play in pivot points indicates worn bushings or bearings and warrants replacement to restore smooth motion. For older selectorized stacks, check for worn pin holes or cracked weight plates. Regular inspection and quick replacement of worn components prevent sudden failures and maintain safe, predictable training sessions.
8. What warm-up and mobility work should precede arms pull down sessions?
Begin with general cardiovascular warm-up (5–10 minutes of light rowing or cycling) to raise core temperature, followed by dynamic upper-body mobility drills: shoulder circles, scapular retraction/protraction reps, and band pull-aparts to prime posterior chain activation. Perform specific movement prep sets on the arms pull down machine with very light resistance for 2–3 sets of 8–12 reps focusing on full range and controlled tempo to engrain proper motor patterns. Incorporate thoracic mobility exercises like seated thoracic rotations and foam rolling to improve chest elevation and allow a fuller lat stretch during working sets. These preparatory steps reduce injury risk and improve immediate training performance.