
Complete Guide to Back Rope Pull Down: Equipment, Technique, and Programming
Understanding the Back Rope Pull Down: Purpose, Muscles, and Variations
Muscles Targeted and Movement Biomechanics
The back rope pull down is a cable-based exercise that primarily targets the latissimus dorsi but also recruits the biceps, posterior deltoids, rhomboids, and erector spinae. Unlike a straight-bar lat pulldown, the rope attachment allows a neutral or semi-pronated grip and a greater degree of scapular retraction at the bottom of the movement. This alters the line of pull and the joint angles, shifting emphasis slightly toward the lower and outer fibers of the lats while improving mind-muscle connection for many lifters.
Biomechanically, the exercise involves shoulder adduction, extension, and some degree of horizontal abduction when the rope ends are spread at the finish. The cable system maintains continuous tension throughout the range of motion, which enhances time under tension and allows for controlled eccentric loading. Good technique requires initiating the movement with the scapulae—first retract and depress the shoulder blades—followed by elbow drive toward the hips. This sequencing reduces upper-trap dominance and directs force more effectively into the lats and mid-back musculature.
Training nuances matter: wrist position, torso angle, and rope spread all influence muscle recruitment. A slight lean back (10–20 degrees) increases the stroke length and emphasizes lat stretch on the eccentric. Keeping the chest tall and shoulders externally rotated at the start helps maintain a stronger lat engagement. For athletes or rehabilitation contexts, the rope pulldown can be a safer alternative to heavy bar variations because the neutral grip is often more shoulder-friendly.
Equipment Variations, Attachments, and Setup
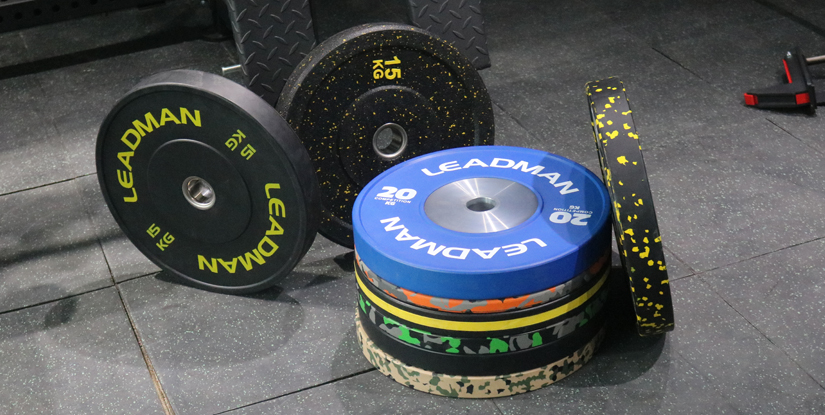
Back rope pull downs can be performed on standard high-pulley cable stations, functional trainers, and even with resistance bands anchored high. The most common attachment is a short tricep rope with rubber ends; alternatives include dual-handled ropes, V-attachments for a narrower grip, and two single handles for unilateral work. Each attachment changes hand spacing, which influences biceps involvement and scapular movement. For example, a wider rope spread maximizes lat stretch and outer lat activation, while narrower setups emphasize biceps and mid-back.
Proper setup begins with selecting the right pulley height and rope length. The high pulley should be set above head height, enabling the rope to travel in an arc that finishes at the upper chest or clavicle region if you prefer a more vertical line, or toward the upper abdomen for a hip-level finish. Attach the rope securely and inspect the carabiner and pulley for wear. Foot positioning is equally important: a staggered stance or seated position provides stability, whereas standing with a slight hinge allows the torso to assist slightly in pulling heavier loads.
Practical examples of variations include: single-arm rope pulldowns for addressing asymmetries, close-grip rope pulldowns to increase biceps involvement, and high-rep rope pulldowns for hypertrophy of the lower lats. For advanced lifters, pauses at the peak contraction, slow eccentrics, or incorporating drop sets can increase stimulus without changing equipment.
Selecting and Maintaining Fitness Equipment for Back Rope Pull Down
Choosing the Right Machine, Cables, and Ropes
Selecting the appropriate equipment for back rope pull downs starts with the cable machine. A commercial-grade high-pulley station with a smooth, sealed-bearing pulley system provides the best feel and longevity. Look for stations that allow weight stacks with small increments (5 lb or 2.5 kg plates) to facilitate progressive overload while maintaining good form. For dedicated home setups, a compact high-pulley frame with a stable base and reinforced cable routing will minimize wobble and ensure consistent resistance.
Rope quality matters: choose a braided nylon or heavy-duty polymer rope designed for gym use. Cheaper ropes can fray, leading to skin abrasion or premature failure. Examine attachment points such as carabiners and swivels; stainless steel or zinc-coated metal with locking mechanisms increases safety. Cable diameter and coating influence grip comfort—textured or rubber-coated grips can improve handling during sweaty sessions. If you plan to use varied attachments, ensure the machine uses standard carabiner clips that accept multiple handles and ropes for versatility.
Consider cable length and pulley height relative to your user population. Taller users may need higher pulley placement or longer ropes to maintain ideal motion geometry. For commercial gyms, stock several rope types: short ropes for seated pulldowns, long ropes for standing variations, and thicker ropes for grip-strength-focused work. Test the equipment under load before committing to heavy sets to confirm smooth travel and no snapping or jerking throughout the motion.
Maintenance, Safety Checks, and Longevity
Regular maintenance extends machine life and ensures user safety. Implement a weekly checklist: inspect cables for fraying, check carabiners and attachment points for deformation, and verify pulley alignment. Lubricate bearings per manufacturer guidelines to reduce wear and maintain smooth cable travel. Replace ropes showing visible abrasion, and discard any compromised hardware immediately to prevent accidents. For cable machines, periodic professional inspection is recommended annually for heavy-use facilities.
Tip: Keep spare ropes and carabiners on hand to minimize downtime. Label replacement parts with purchase dates to manage warranty claims and lifecycle tracking. Clean equipment surfaces regularly—sweat and chalk accelerate material degradation and increase corrosion risk on metal components. Use manufacturer-approved cleaning agents to avoid damaging coatings and upholstery.
In addition to physical maintenance, educate users on proper equipment use. Display brief setup instructions and recommended weight limits near the machine. Encourage warm-up sets and discourage jerky, momentum-driven reps that can overload the cable system. These safety-focused practices reduce wear and protect users from common cable-related injuries.
Technique, Programming, and Progressions for Back Rope Pull Down
Step-by-Step Technique and Common Mistakes
Performing a back rope pull down with correct technique maximizes muscle engagement and reduces injury risk. Start by setting the weight and attaching a rope at a high pulley. Sit or stand with a slight hinge, maintain a neutral spine, and grasp the rope ends with a neutral grip. Begin each rep by retracting and depressing the scapulae—this lat-first initiation helps place emphasis on the intended muscles rather than the biceps or upper traps.
Pull the rope down toward the upper- to mid-abdomen, leading with the elbows and thinking about pulling the elbows down and back rather than pulling with the hands. At the bottom of the movement, flare the rope ends apart slightly to increase lat contraction, hold for a controlled 0.5–1 second squeeze, then return under control to full overhead extension. Keep the torso stable; minor lean-back is acceptable, but avoid swinging or using excessive momentum.
Common mistakes include collapsing the chest, allowing the shoulders to protract at the top, and using too much weight that forces a kipping motion. Excessive biceps dominance indicates either an overly narrow grip or insufficient scapular recruitment. To correct form, reduce weight, slow the eccentric phase, and add a pause at the top to fully reset scapular position. Video feedback or a coach’s cueing—such as “elbows to the floor” or “lead with the elbows”—can accelerate technique improvements.
Sample Workouts, Sets, Reps, and Progressions
Programming the back rope pull down depends on training goals. For hypertrophy, aim for 3–4 sets of 8–12 reps with 60–90 seconds rest, focusing on controlled eccentrics and full peak contractions. Use tempo variations like a 3-1-1 pattern (three-second eccentric, one-second pause, one-second concentric) to increase time under tension. For strength or power development tied to pulling mechanics, use heavier weights for 4–6 sets of 4–6 reps with longer rests (2–3 minutes) and emphasize explosive concentric drives while maintaining form.
Progressions can be linear or undulating. Beginners follow 2–3 sessions per week with progressive load increases of 2.5–5% once target rep ranges are achieved. Intermediate and advanced lifters can incorporate advanced techniques: drop sets to extend a finisher, unilateral rope pulldowns for symmetry work, and tempo manipulations to overload eccentric control. Periodization might include a 4–6 week hypertrophy block followed by a strength-focused block where back rope pulldowns serve as an accessory to heavier compound pulls like deadlifts and rows.
Sample session: "Lat Focus" – Warm-up 5–8 minutes, 2 activation sets of band-assisted pulldowns (15 reps), 4 working sets of rope pulldowns (10, 10, 8, 8, increase weight as form permits), followed by 3 sets of single-arm seated cable rows for balance. Track volume and perceived exertion to guide weekly increases and deload appropriately to prevent overuse.
FAQs
- What exactly is a back rope pull down and how does it differ from a traditional lat pulldown?
The back rope pull down uses a rope attachment on a high pulley, allowing a neutral or semi-pronated grip and the ability to separate the rope ends at peak contraction. This contrasts with straight-bar lat pulldowns which offer a fixed bar grip. The rope variation typically increases scapular retraction and emphasizes lower and outer lat fibers while reducing shoulder impingement risk for some users.
- Which muscles does the back rope pull down work most effectively?
Primary muscles include the latissimus dorsi, with secondary involvement from the biceps, posterior deltoids, rhomboids, and middle traps. The rope’s neutral grip and flared finish promote lower-lat engagement and better scapular control compared to some other pulldown variations.
- Is the rope attachment safe for people with shoulder issues?
For many individuals with shoulder discomfort, the neutral grip of a rope reduces internal rotation and can feel more comfortable. However, safety depends on specific pathologies; consult a physical therapist for impingement, rotator cuff tears, or post-surgical conditions. Start with light weight and controlled motion to assess tolerance.
- How should I set up the machine for optimal rope pulldown technique?
Attach the rope to a high pulley, select a moderate weight, and set the seat or stance so you can pull the rope to the upper abdomen while maintaining an upright chest and neutral spine. Feet should be stable, and a slight torso lean is acceptable if control is preserved. Ensure the pulley height allows a clean arc without rubbing or binding.
- What are common mistakes to avoid when performing this exercise?
Avoid using momentum, letting the shoulders shrug, and allowing the elbows to flare excessively at the top. Don’t overload the weight to the point where scapular retraction is lost. Focus on initiating with the lats and driving the elbows down and back rather than pulling with the hands.
- How often should I include the back rope pull down in my program?
For general strength and hypertrophy, include the movement 1–3 times per week depending on overall volume and recovery. Beginners can perform it twice weekly; more advanced trainees might rotate it as an accessory in different phases of periodized training.
- Can I substitute resistance bands if I don't have a cable machine?
Yes. Anchor a band overhead and perform similar pulling mechanics with a neutral grip using a doubled band or handles. Bands provide variable resistance but lack the same linear constant tension; adjust tempo and reps accordingly to match training stimulus.
- How do I progress the back rope pull down for continued gains?
Progress via increasing load in small increments, adding sets or reps, manipulating tempo (slower eccentrics), using unilateral variations to correct imbalances, or incorporating intensity techniques like drop sets and paused contractions. Track performance and prioritize clean technique as loads increase.