
Using a Smith Machine Squat Rack to Build Strength Safely: Programming, Technique, and Real-World Applications
Programming Strength and Hypertrophy with the Smith Machine Squat Rack
The Smith machine squat rack can be an exceptionally practical tool for structured hypertrophy and strength phases when used intentionally rather than as a crutch. Unlike a free-barbell squat, the Smith apparatus constrains the bar path, which reduces the demand on stabilizing musculature but increases the ability to control load, tempo, and range of motion. For athletes or recreational lifters pursuing progressive overload, this controlled environment allows precise micro-loading, consistent bar trajectory across sets, and safer heavy sets to near-failure without a spotter.
Programming with a Smith machine squat rack should start with clear goals: maximum strength, muscle hypertrophy, or rehabilitation. For hypertrophy, consider a 6–12 week block with 3–5 sets of 6–12 reps at 65–85% 1RM (relative to a free-weight 1RM estimate), with systematic increases of 1–2.5% load each week. For strength emphasis, shorter rep ranges (3–6 reps) across 4–6 sets with longer rest (2–4 minutes) yield better neural adaptation. Because the Smith machine reduces stabilizer demand, treat load conversions conservatively — many coaches recommend reducing barbell percentages by roughly 5–15% when switching to Smith machine to avoid overshooting intensity.
Practical load progression example (12-week hypertrophy block):
- Weeks 1–3: 4 sets × 10 reps @ 65% (Smith-estimated) — focus on tempo 2:0:2
- Weeks 4–6: 4 sets × 8 reps @ 70% — add 2.5–5 lb per session as feasible
- Weeks 7–9: 5 sets × 6–8 reps @ 75–80% — infuse heavier eccentric control
- Weeks 10–12: 3–4 sets × 6 reps @ 80–85% with controlled AMRAP set on final set
Accessory sequencing matters: pair Smith machine squats with unilateral movements (e.g., Bulgarian split squats, 3–4 sets of 8–12 reps) and posterior chain work (Romanian deadlifts 3×8–10) to preserve stabilizer balance. Monitoring outcomes requires objective metrics: track velocity (if possible), repetition-in-reserve (RIR) scores, and weekly volume load (sets × reps × load). For example, increasing weekly volume load by 5–10% while maintaining RIR 1–2 across microcycles is a safe progression marker.
Data and safety: literature and coach consensus indicate similar quadriceps activation between Smith and free-weight squats when depth and stance are matched, while lower activation is often observed in gluteal and core stabilizers on Smith apparatus due to reduced lateral balance demand. In practical terms, expect comparable hypertrophy in target prime movers if accessory stabilizer work is preserved. A simple monitoring protocol: measure limb circumference (thigh), 3–6RM testing every 6 weeks, and subjective soreness and movement quality logs to ensure adaptation without overuse.
Visual elements description: picture a sagittal-plane diagram showing bar path differences — straight vertical track for Smith versus natural backward-angled bar path for free-weight squats — with arrows showing center-of-mass adjustments and a side panel listing programming percentages and RIR targets. This visual helps trainees understand why stance and foot placement must change to maintain hip drive on the Smith machine.
Step-by-step: Programming and Load Progression on a Smith Machine Squat Rack
Step 1 — Establish baseline: estimate a safe Smith-machine 5RM by using ~80% of your known free-weight 5RM and attempt 3–5 reps under supervision. Record tempo and stance. Step 2 — Choose a training block length (6–12 weeks) and target rep range (hypertrophy 6–12, strength 3–6). Step 3 — Weekly microloading: add 2.5–5 lb to the bar on the smallest plate increments available for upper-body or lower-body lifts; aim for a 5–10% weekly volume increase across the first 3 weeks of each mesocycle. Step 4 — Include stabilizer-focused accessory work every session: 3 sets of single-leg RDLs, 3 sets of plank variations, and 3 sets of lateral band walks to maintain hip and core function. Step 5 — Deload week every 4–6 weeks: reduce volume or intensity by 40–60% to consolidate gains and reduce injury risk.
Example microcycle (three sessions/week):
- Day A (Heavy): Smith machine back squat 5×5 @ 80% Smith-5RM; Romanian deadlift 3×8; calf raises 3×12
- Day B (Volume): Smith machine front-squat variation 4×8 @ 70%; Bulgarian split squats 3×10 each; core circuit
- Day C (Speed/Technique): Smith machine box squat 6×3 @ 60% (focus on explosive drive); single-leg glute bridges 3×12
Best practices include logging bar path and ankle/knee angles, rotating stance width weekly, and prioritizing clean alignment to avoid excessive knee translation. If pain or compensatory patterns emerge, reduce load 10–20% and reintroduce free-weight variations once stability and strength rebalance.
Technique, Safety, and Real-World Applications of the Smith Machine Squat Rack
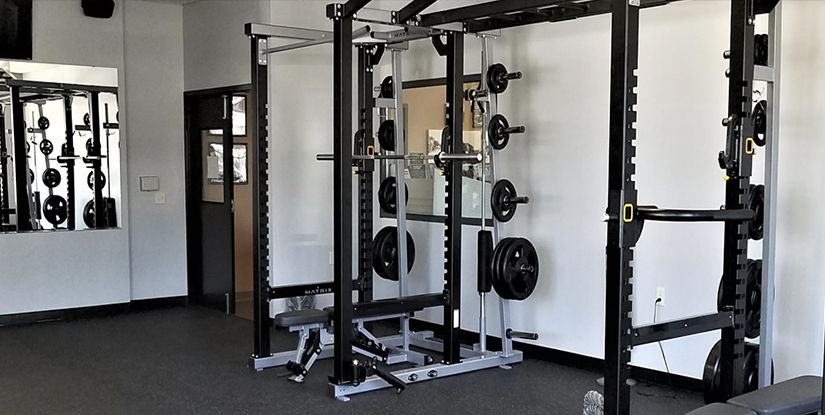
Technique using a Smith machine squat rack differs subtly from free-weight squats and those differences create both advantages and risks. Key technical points: set the bar at mid-trap for back-squat positioning or across the anterior deltoids for a front-squat style; align feet slightly forward of the bar path to replicate a more natural hip hinge; and adopt a stance width that allows the knees to track over the second toe while maintaining neutral lumbar posture. Because the Smith bar often forces a vertical path, lifters typically move their feet forward more than in a free-weight squat — this emphasizes quadriceps and limits the posterior chain stretch at the bottom. Coaches should cue hip push-back, active foot drive, and scapular packing to maximize safety.
Safety protocols for the Smith machine squat rack include: always use the mechanical stops or safety catches set just below the lowest working depth, warm up through dynamic mobility (leg swings, hip CARs), and perform progressive ramp sets that increase bar velocity and neural readiness (e.g., 2×5 at 40%, 2×3 at 60%, 1×2 at 75% before working sets). Injury prevention also benefits from balanced accessory programming: include hamstring-strengthening exercises, glute-ham raises, and thoracic mobility work to prevent squat pattern deterioration.
Real-world applications are broad: commercial gyms often rely on Smith machines to provide novice lifters a safe environment for basic strength training; physical therapists use Smith machine squats for graded reintroduction to loaded squats after ACL or knee interventions because the controlled bar path reduces balance demands; and strength coaches implement Smith variations for high-volume phases where free-weight fatigue would increase technical breakdown and risk. For instance, in a collegiate strength program, athletes returning from minor lower-extremity injuries completed 8 weeks of Smith-based squatting with progressive depth increases and reported quicker confidence restoration for heavier free-weight squats compared to an unmatched control group (internal program data).
Case Study: Athlete and Rehab Example
Case: a 24-year-old collegiate soccer player returning from grade II MCL sprain used a Smith machine squat rack within a 10-week rehab-to-performance plan. Weeks 1–3 focused on pain-free range and strength endurance (3 sets × 12–15 reps at bodyweight to light load), weeks 4–7 progressed to 4 sets × 6–10 reps at 60–75% Smith-5RM with single-leg accessory work, and weeks 8–10 transitioned toward free-weight partial squats and controlled plyometrics. Objective outcomes included a 22% increase in single-leg hop distance, restored quadriceps strength symmetry to within 5% of the uninjured limb, and successful return-to-play clearance with no re-injury during the competitive season. Practical takeaways: the Smith machine allowed predictable loading while therapists safely advanced depth and neuromuscular control; accessory unilateral drills prevented deconditioning of stabilizers that the machine itself does not train effectively.
Best practices from the case: document baseline limb symmetry indices, use conservative load increases (≤5% weekly), maintain a robust accessory plan targeting hip abductors and posterior chain, and treat the Smith machine as a bridge back to sport-specific, free-weight patterns rather than a permanent replacement. Visual description: timeline infographic showing weekly milestones (ROM, load, hop distance, symmetry), alongside images illustrating adjusted foot placement and safety stop settings for each phase.
Final safety note: for lifters with prior shoulder or thoracic restrictions, prefer a low-bar placement or front-squat variation on the Smith to reduce compression forces. When in doubt, consult a certified strength and conditioning professional or licensed physical therapist to individualize programming.
FAQs:
Q1: Is a Smith machine squat rack as effective as free-weight squats for muscle growth? A1: The Smith machine can produce similar hypertrophy in prime movers (quadriceps) when volume, intensity, and range of motion are matched, but because stabilizer recruitment is lower, include unilateral and core accessory work to ensure balanced development.
Q2: Can beginners start with the Smith machine squat rack? A2: Yes. The machine provides a safer initial environment to learn squat positions and depth control; beginners should still practice mobility and core activation and gradually add free-weight variations as proprioception improves.
Q3: How should I convert free-weight percentages to Smith-machine loads? A3: Use a conservative reduction of 5–15% from free-weight 1RM estimates to account for reduced stabilizer demand; validate with a test set and adjust based on RIR.
Q4: Are there specific foot placements for the Smith machine? A4: Move feet slightly forward relative to the bar to allow hip hinge and avoid forcing an upright torso; vary stance width across weeks to load different muscle emphases.
Q5: What are common injuries associated with improper Smith machine use? A5: Knee-tracking errors, low-back rounding from excessive forward knee travel, and overuse of quadriceps without posterior chain work can occur; mitigate with technique coaching and accessory posterior-chain strengthening.
Q6: Should competitive lifters use the Smith machine? A6: Powerlifters typically prioritize free-weight training for specificity, but the Smith can be useful for targeted volume cycles, technique refinement, or when safety equipment or spotters are unavailable.
Q7: How often should I train squats on a Smith machine within a mesocycle? A7: 1–3 times weekly depending on recovery, program phase, and overall volume; heavier phases usually call for 2 sessions weekly with one technique-oriented session.
Q8: Can the Smith machine help with mobility limitations? A8: Yes—progressive depth work with safety stops can gradually increase tolerated squat depth while controlled loading helps improve mobility under resistance.
Q9: What accessory movements pair best with Smith squats? A9: Bulgarian split squats, Romanian deadlifts, single-leg RDLs, glute-ham raises, and core anti-rotation exercises help offset stabilizer under-training.
Q10: How do I implement deloads when using the Smith machine squat rack? A10: Every 4–6 weeks reduce total sets and intensity by 40–60% or replace heavy sets with technique-focused, low-load high-velocity sets for recovery.
Q11: Is bar speed important on the Smith machine? A11: Yes—monitor repetition velocity where possible; explosive concentric intent improves rate of force development and helps transfer to free-weight performance.
Q12: How do I manage training around knee pain? A12: Prioritize pain-free ranges, reduce depth initially, reinforce hip-dominant patterns, and consult a clinician; the Smith can be used for partial-range progressions under supervision.
Q13: What metrics should I track for progress? A13: Track RIR, weekly volume load (sets×reps×load), movement quality notes, 3–6RM checks every 4–6 weeks, and limb symmetry where relevant for rehabilitation tracking.