
Choosing the Right Tool for Safe Heavy Squats at Home: When a Smith Machine Beats a Squat Rack
Technical comparison and movement outcomes: Smith machine v squat rack
The Smith machine and the squat rack produce different load paths, stability demands, and transfer to free-weight performance. For lifters prioritizing consistent vertical bar path and reduced stabilization, the Smith machine constrains the bar to a fixed plane; this simplifies technique learning and can reduce injury risk for users with balance deficits or mobility limits. Conversely, a squat rack (power rack) forces the trainee to stabilize the bar in three planes, which increases recruitment of stabilizers—especially the core, spinal erectors and hip abductors—and improves real-world strength transfer.
Key objective metrics and typical training applications:
- 1. Muscle activation and specificity: Free-bar back squats tend to produce higher overall neuromuscular demand across posterior chain and core; Smith-machine squats can bias quadriceps through a more vertical shaft and controlled path.
- 2. Load handling and progression: For progressive overload, use a rack for heavy compound strength work (85%+ 1RM, 1–5 reps). Smith machines are effective for moderate loads (60–80% 1RM) and higher rep hypertrophy sets with safer single-person training.
- 3. Safety and fallbacks: Squat racks with safety pins provide unrestricted technique and true barbell mechanics; Smith machines have built-in stops and easy lockouts that reduce need for spotters.
Real-world application example: an intermediate homeowner who trains alone may add 10–15% more working volume on a Smith machine during accessory squat variations because setup time and safety stops are faster, while a competitive powerlifter should spend the majority of heavy cycles in a squat rack to maintain balance, joint integrity under load, and competitive specificity.
Biomechanics, injury risk, and measurable outcomes
From a biomechanical standpoint, the constrained bar of a Smith machine reduces shear forces from lateral drift but can increase compressive load if the user’s torso angle is forced into suboptimal positions. Practically, that means lifters with limited ankle dorsiflexion or hip mobility often find a Smith machine allows deeper, more upright squats without compensatory forward trunk lean, decreasing low-back stress for a given load.
Actionable metrics to track:
- 1. Range-of-motion (ROM): measure femur-to-torso angle using video; Smith machine can improve perceived ROM by 5–10° in those limited by stability.
- 2. Load-to-RPE conversion: use RPE to compare tools—if a 5x5 at 80kg on a rack is RPE 8, the same RPE on a Smith might feel 7 due to stability support.
- 3. Injury mitigation: use Smith for controlled eccentric tempos (e.g., 4–5s eccentric) to reduce muscle strain risk when returning from lower-limb injury.
Programming, setup, and progressive protocols for home and commercial gyms
Choosing between a Smith machine and squat rack should map to goals, space, and staffing. For strength-focused programming (linear or undulating), the squat rack is essential for specificity and nervous system adaptations. For hypertrophy, rehab, or single-person heavy training, Smith machines offer practical benefits. Below is a step-by-step program template for each tool, plus setup and best practices.
Squat-rack strength block (8 weeks):
- 1. Weeks 1–4: Base volume — 4 sets x 6 reps at 70–80% 1RM, emphasize bracing cues and 2–3 accessory movements (RDLs, front squats).
- 2. Weeks 5–7: Intensity shift — 5 sets x 3–5 reps at 82–90% 1RM, include paused squat sets and tempo variations to build tension.
- 3. Week 8: Deload — reduce volume 50% and keep intensity moderate to consolidate adaptation.
Smith-machine hypertrophy/recovery block (6 weeks):
- 1. Week template: 4 sets x 8–12 reps at 60–75% estimated 1RM; use narrow and wide stances to alter muscle emphasis.
- 2. Technique leverage: pair Smith squats with unilateral work (split squats) to preserve stabilizer strength.
- 3. Safety protocols: set stops 1–2 inches below depth target for consistent rackout and use collars to prevent plates from sliding.
Step-by-step setup, safety, and best practices
Setting up either tool correctly reduces injury risk and improves outcomes. Follow this checklist before heavy sets:
- 1. Rack placement: ensure the rack is anchored or stable on level flooring; measure 2–3 feet of clear space behind the rack for safe bar path and spotting in a rack.
- 2. Pin and stop height: set safety pins at or slightly below target depth for squats; on Smith machines, adjust stops to allow a fail-safe at parallel without jamming the knees.
- 3. Warm-up sequence: 8–12 minutes including dynamic hip and ankle mobility, activation (glute bridges, banded lateral walks), and 2–3 ramp sets increasing to working weight.
- 4. Progress tracking: record sets, reps, tempo, and RPE. Increase load when you complete prescribed reps across sessions for two consecutive workouts.
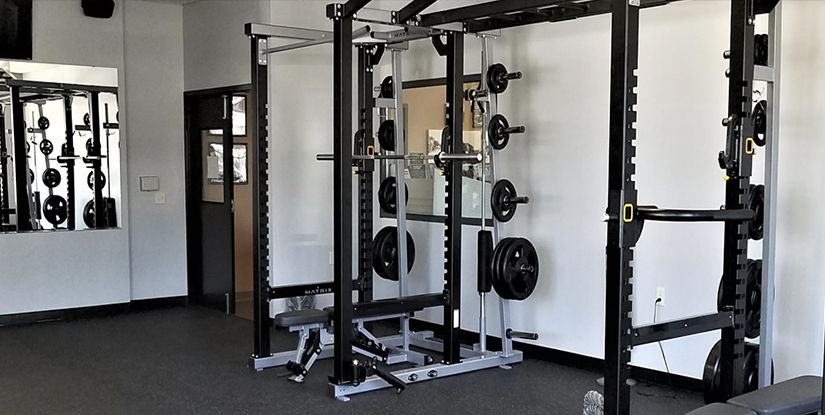
Visual element descriptions for readers building a home setup: imagine a 4-foot footprint for a squat rack with 7–8 feet ceiling clearance for Olympic bars; a Smith machine requires a similar footprint but with fixed rails and often integrated counterweights—verify rail alignment visually and via a 10–20kg test run to detect sticking points.
FAQs
Q1: Which is better for building raw strength—Smith machine or squat rack?
A1: For raw strength, a squat rack is superior because it requires full stabilization and specificity to barbell mechanics; use progressive heavy triples and singles at 85%+ 1RM in the rack to maximize neural adaptations.
Q2: Can a Smith machine replace a squat rack for beginners?
A2: A Smith machine can be a useful learning tool for beginners to learn depth and tempo safely, but transition to a rack as soon as balance and bracing improve to develop full movement competency.
Q3: How do I program accessory work differently between the two?
A3: After rack squats, prioritize posterior-chain accessories (Romanian deadlifts, glute-ham raises). After Smith squats, prioritize unilateral and stabilizer work (Bulgarian split squats, single-leg RDLs) to offset the fixed bar path.
Q4: Is a Smith machine safer when training alone?
A4: Yes—built-in stops and simple lock hooks reduce dependence on a spotter, making it safer for solo high-volume or near-failure sets than an unloaded rack without safeties.
Q5: How should I set safety pins for beginners?
A5: Set pins just below the lowest point of a safe squat (parallel). Teach beginners to use pins as a confidence aid—not a crutch—and practice controlled unracking and re-racking.
Q6: What tempo and rep ranges work best on each tool?
A6: Rack squats: strength phases use 1–5 reps at high intensity; Smith machine: hypertrophy phases with 6–15 reps and controlled eccentrics (3–4s) often produce good results.
Q7: Does the Smith machine increase knee stress?
A7: It can if the constrained path forces a forward knee track beyond individual biomechanics—use stance modification and monitor joint comfort; reduce depth or change to a high-bar position if pain occurs.
Q8: How do I progress safely after an ACL or meniscus repair?
A8: Use the Smith machine for controlled eccentric loading early (8–12 weeks post-op with clinician approval), gradually reintroducing rack squats and unilateral work as neuromuscular control returns.
Q9: Which tool is more space-efficient for a home gym?
A9: Both have similar footprints; often a compact half-rack provides more versatility than a full Smith machine for the same floor space if you also plan presses and pulls.
Q10: Can powerlifters use Smith machines effectively?
A10: Powerlifters may use Smith machines for accessory work (squat variations, paused eccentrics) but must prioritize open-chain rack squats for competition specificity.
Q11: How do I decide based on cost and maintenance?
A11: Squat racks are typically less mechanically complex and require less maintenance; Smith machines are costlier and need occasional rail lubrication and alignment checks—factor long-term durability into purchase decisions.